Table of Contents
Advertisement
Quick Links
Advertisement
Table of Contents

Related Manuals for Gigabyte AORUS AD27Qd


Summary of Contents for Gigabyte AORUS AD27Qd
- Page 1 All manuals and user guides at all-guides.com...
- Page 2 GIGABYTE. Changes to the specifications and features in this manual may be made by GIGABYTE without prior notice. No part of this manual may be reproduced, copied, translated, transmitted, or published in any form or by any means without GIGABYTE’s prior written permission.
-
Page 3: Safety Information
All manuals and user guides at all-guides.com LCD Monitor User’s Manual SAFETY INFORMATION Regulatory Notices Federal Communications Commission Statement This device complies with Part 15 of the FCC Rules. Operation is subject to the following two conditions: • This device may not cause harmful interference, and • This device must accept any interference received including interference that may cause undesired operation. - Page 4 (Cd, Pb, Hg, Cr+6, PBDE and PBB). The parts and components have been carefully selected to meet RoHS requirement. Moreover, we at GIGABYTE are continuing our efforts to develop products that do not use internationally banned toxic chemicals. European Community Waste Electrical & Electronic...
-
Page 5: Safety Precautions
All manuals and user guides at all-guides.com LCD Monitor User’s Manual Safety Precautions Read through the following Safety Precautions before using the monitor. • Only use the accessories that are provided with the monitor or that which are recommended by the manufacturer. • Keep the plastic packaging bag for the product in a place that cannot be reached by children. -
Page 6: Table Of Contents
Quick Menu ........................22 Configure the Device Settings .................. 27 Appendices ..........................37 Specifications ........................37 Supported Timing List ....................38 Troubleshooting ......................39 Basic Care .......................... 40 Notes on USB Charging ....................40 GIGABYTE Service Information ................. 40 - 6 -... -
Page 7: Introduction
All manuals and user guides at all-guides.com LCD Monitor User’s Manual INTRODUCTION Unpacking Open the upper cover of the packaging box. Then observe the unpacking label attached on the inner cover. Making sure the box is in the correct orientation, carefully lay the box on the stable surface. - Page 8 All manuals and user guides at all-guides.com LCD Monitor User’s Manual Remove the items from the upper EPS foam. Remove the upper EPS foam. Then you can remove the monitor from the lower EPS foam. - 8 -...
-
Page 9: Package Contents
Monitor Base Power Cable HDMI Cable USB Cable DP Cable Multilingual Installation Guide AORUS AD27QD Cable Holder Quick Start Guide Warranty Card Note: Please keep the packaging box and packing materials for future transportation of the monitor. - 9 -... -
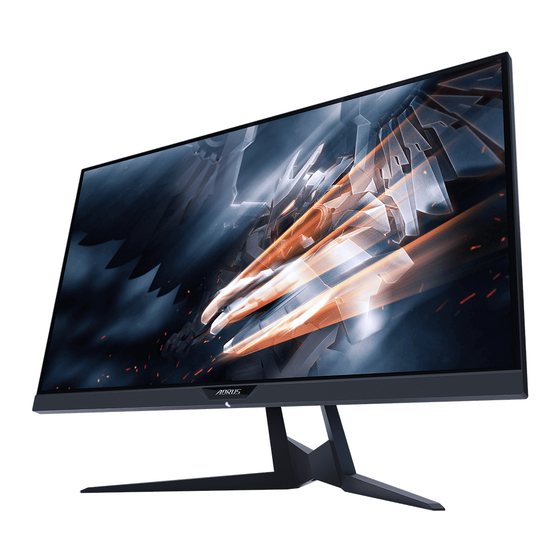
Page 10: Product Overview
All manuals and user guides at all-guides.com LCD Monitor User’s Manual Product Overview Front View Power LED Control button - 10 -... - Page 11 All manuals and user guides at all-guides.com LCD Monitor User’s Manual Rear View HDMI-1 HDMI-2 USB 3.0 HDMI-1 HDMI-2 USB 3.0 AC IN jack HDMI ports (x2) Kensington lock DisplayPort Headphone jack USB upstream port Microphone jack USB 3.0 ports (x2) - 11 -...
-
Page 12: Getting Started
All manuals and user guides at all-guides.com LCD Monitor User’s Manual GETTING STARTED Installing the Monitor Base Place the monitor on a flat surface, with the screen facing down. Note: We recommend that you cover the table surface with soft cloth to prevent damage to the monitor. - Page 13 All manuals and user guides at all-guides.com LCD Monitor User’s Manual Lift the monitor to an upright position and place it on a table. Then lower the screen to allow the safety plate to automatically release from its slot. - 13 -...
-
Page 14: Adjusting The Viewing Angle
All manuals and user guides at all-guides.com LCD Monitor User’s Manual Adjusting the Viewing Angle Note: Hold the monitor base so that the screen does not topple when you make the adjustment. Adjusting the Tilt Angle Tilt the screen forward or backward to the desired viewing angle (-5˚... - Page 15 All manuals and user guides at all-guides.com LCD Monitor User’s Manual Changing the Screen Orientation Raise the screen to the highest position (130mm). 130 mm Note: Before making the height adjustment, make sure you have removed the safety plate from the stand. Rotate the monitor (90˚...
-
Page 16: Installing A Wall-Mount Bracket (Optional)
All manuals and user guides at all-guides.com LCD Monitor User’s Manual Installing a Wall-Mount Bracket (Optional) Use only the 100 x 100 mm wall mount kit recommended by the manufacturer. Place the monitor on a flat surface, with the screen facing down. Note: We recommend that you cover the table surface with soft cloth to prevent damage to the monitor. - Page 17 All manuals and user guides at all-guides.com LCD Monitor User’s Manual Attach the mounting bracket to the mounting holes at the rear of the monitor. Then use the screws to secure the bracket in place. 100 mm 100 mm HDMI-1 HDMI-2 USB 3.0 Note: To mount the monitor on the wall, refer to the installation guide that is...
-
Page 18: Making Connections
All manuals and user guides at all-guides.com LCD Monitor User’s Manual Making Connections HDMI-1 HDMI-2 USB 3.0 Keyboard Mouse & USB disk drive Computer Power outlet Computer Headphone Microphone Power cable DisplayPort cable Headphone cable USB (A-Male to B-Male) cable Microphone cable USB cable HDMI cable... -
Page 19: Using The Device
All manuals and user guides at all-guides.com LCD Monitor User’s Manual USING THE DEVICE Turning the Power On/Off Power On Connect one end of the power cable to the AC IN jack at the rear of the monitor. Connect other end of the the power cable to a power outlet. Control Press the button to turn on the monitor. -
Page 20: Managing The Cables
All manuals and user guides at all-guides.com LCD Monitor User’s Manual Managing the Cables Align the cable clip with the clip holes at the rear of the monitor. Press the cable clip firmly until it is fully seated. Then route the connected cables through the clip. -
Page 21: Selecting The Input Source
All manuals and user guides at all-guides.com LCD Monitor User’s Manual Selecting the Input Source Move the Control button right ) to enter the Input menu. Input Control Move the button up/ down ( ) to select the desired DisplayPort input source. -
Page 22: Operations
All manuals and user guides at all-guides.com LCD Monitor User’s Manual OPERATIONS Quick Menu Hot Key By default, the Control button has been assigned with the specific function. Note: To change the preset hot key function, refer to the “Quick Switch” section on page 34. - Page 23 All manuals and user guides at all-guides.com LCD Monitor User’s Manual Control ) to enter the Picture Mode • Move the button down ( menu. Move the Control button up/down ( ) to select the Picture Mode desired option and press the Control button to confirm.
- Page 24 All manuals and user guides at all-guides.com LCD Monitor User’s Manual Function Key Guide Control button to display the Main menu. Press the Settings SETTING Dashboard Game Assist DASHBOARD EXIT GAME ASSIST Exit Power Off POWER OFF Control Then use the button to select the desired function and configure the related settings.
- Page 25 All manuals and user guides at all-guides.com LCD Monitor User’s Manual Once the Dashboard configuration is complete, it will transfer the system data to the SOC through the USB port and display the value of the selected function(s) on the screen. Mouse DPI: 1600 CPU temperature: 48°C CPU frequency: 3200MHz...
- Page 26 All manuals and user guides at all-guides.com LCD Monitor User’s Manual • AORUS INFO: Configure the FPS (First Person Shooting) game related settings. √ Select Gaming Timer to select countdown timer mode. To disable this function, set the setting to OFF. √...
-
Page 27: Configure The Device Settings
Balance 60 HZ All manuals and user guides at all-guides.com Picture Mode Standard LCD Monitor User’s Manual Stabilizer Configure the Device Settings k Equalizer When the Main menu appears on the screen, move the Control button er Resolution ) to enter the Settings menu. up ( Blue Light lay Mode... - Page 28 All manuals and user guides at all-guides.com LCD Monitor User’s Manual Item Description Black Adjust the brightness of the black areas. Equalizer Super Sharpen the low resolution images. Resolution Low Blue Reduce the amount of blue light exposure from the Light screen.
- Page 29 All manuals and user guides at all-guides.com LCD Monitor User’s Manual Picture Configure the image related settings. Brightness Contrast Sharpness Gamma Color Temperature Gamma 3 Normal Picture Mode Standard Gaming Picture Mode Standard Picture Brightness AORUS Display Contrast PIP/PBP Color Vibrance RTS/RPG System Sharpness...
- Page 30 All manuals and user guides at all-guides.com LCD Monitor User’s Manual Item Description Color Select the color temperature. Temperature Note: Select User Define to customize the color temperature by adjusting the red (R), green (G), or blue (B) level according to your preference. Dynamic Adjust the black level of the image to achieve the Contrast...
- Page 31 All manuals and user guides at all-guides.com LCD Monitor User’s Manual Display Configure the display screen related settings. Brightness Contrast Sharpness Gamma Color Temperature Gamma 3 Normal Picture Mode Standard Gaming Input DisplayPort Picture HDMI RGB PC Range HDMI 1 Display Overscan HDMI 2...
- Page 32 All manuals and user guides at all-guides.com LCD Monitor User’s Manual PIP/PBP Configure the multi-picture related settings. Brightness Contrast Sharpness Gamma Color Temperature Gamma 3 Normal Picture Mode Standard Gaming Picture Display PIP/PBP System Reset All Exit Move/Adjust Enter/Confirm Item Description Disable the PIP/PBP function.
- Page 33 All manuals and user guides at all-guides.com LCD Monitor User’s Manual System Configure the system related settings. Brightness Contrast Sharpness Gamma Color Temperature Gamma 3 Normal Picture Mode Standard Gaming RGB LED Picture Headphone Mode 1 Display Audio Source Mode 2 PIP/PBP OSD Setting Mode 3...
- Page 34 All manuals and user guides at all-guides.com LCD Monitor User’s Manual Item Description OSD Settings • OSD Lock: When this function is enabled, no OSD adjustment is allowed. (continue) Note: To disable the OSD lock function, press the Control key. When the message appears on the screen, select Yes to confirm.
- Page 35 All manuals and user guides at all-guides.com LCD Monitor User’s Manual Item Description Other Settings • LED Indicator: By default, the LED indicator is set to ON. (continue) D LED Indicator OFF: Turn off the Power LED. D LED Indicator ON: The Power LED lights white during operation and lights orange in standby mode.
- Page 36 All manuals and user guides at all-guides.com LCD Monitor User’s Manual Reset All Restore the monitor to its factory default settings. Brightness Contrast Sharpness Gamma Color Temperature Gamma 3 Normal Picture Mode Standard Gaming Picture Display PIP/PBP System Reset All Exit Move/Adjust Enter/Confirm...
-
Page 37: Appendices
All manuals and user guides at all-guides.com LCD Monitor User’s Manual APPENDICES Specifications Item Specifications Panel Size 27-inch Aspect Ratio 16:9 Resolution 2560 x 1440 Refresh Rate 144Hz LED Life 30000 hours (min.) Pixel Pitch 0.233 x 0.233 Response Time 1ms(MPRT) Brightness 350nits (typ.) / 280nits (min.) -
Page 38: Supported Timing List
All manuals and user guides at all-guides.com LCD Monitor User’s Manual Supported Timing List Timing List HDMI 2.0 DisplayPort 1.2 640 x 480 @ 60Hz √ √ 640 x 480 @ 67Hz √ √ 640 x 480 @ 72Hz √ √... -
Page 39: Troubleshooting
All manuals and user guides at all-guides.com LCD Monitor User’s Manual Troubleshooting Problem Possible Solution(s) No power • Make sure the power cable is properly connected to the power source and the monitor. • Check the cable and plug to make sure they are not broken. -
Page 40: Basic Care
When the Hub is connected to a PC, these devices cannot be charged using the USB cable. Vendor Device PID/VID Apple IPad PID_129A/VID_05AC Samsung Galaxy Tab2 10.1 PID_6860/VID_04E8 Samsung GALAXY TabPro PID_6860/VID_04E8 GIGABYTE Service Information More service information, please visit GIGABYTE official website: https://www.gigabyte.com/ - 40 -...