Table of Contents
Advertisement
Quick Links
Advertisement
Table of Contents

Related Manuals for Symbol AP-51 Series


Summary of Contents for Symbol AP-51 Series
- Page 1 AP-51xx Access Point Product Reference Guide...
- Page 3 AP-51xx Access Point Product Reference Guide 72E-XXXXX-01 Revision X Juanuary 2007 Pre-Release...
- Page 5 Symbol reserves the right to make changes to any software or product to improve reliability, function, or design. Symbol does not assume any product liability arising out of, or in connection with, the application or use of any product, circuit, or application described herein.
-
Page 7: Table Of Contents
Contents About This Guide Introduction............vii Document Conventions. - Page 8 AP-51xx Access Point Product Reference Guide Single or Dual Mode Radio Options....... . . 1-7 Separate LAN and WAN Ports .
- Page 9 Symbol Power Injector System ........
- Page 10 AP-51xx Access Point Product Reference Guide Chapter 3. Getting Started Installing the Access Point ..........3-1 Configuration Options.
- Page 11 Enabling Wireless LANs (WLANs)........5-22 Creating/Editing Individual WLANs.
- Page 12 viii AP-51xx Access Point Product Reference Guide Using MUs to Detect Rogue Devices ....... 6-59 Configuring User Authentication .
- Page 13 Network WAN Commands ........8-39 Network WAN NAT Commands .
- Page 14 AP-51xx Access Point Product Reference Guide Configuring a WLAN for Mesh Networking Support ....9-8 Configuring the Access Point Radio for Mesh Support ....9-12 Usage Scenario - Trion Enterprises .
- Page 15 Frequently Asked VPN Questions ........B-13 Replacing an AP-4131 with an AP-5131 or AP-5181......B-18 Appendix C.
- Page 16 AP-51xx Access Point Product Reference Guide...
-
Page 17: About This Guide
About This Guide Introduction This guide provides configuration and setup information for the AP-5131 and AP-5181 model access points. For the purposes of this guide, the devices will be called AP-51xx or the generic term “access point” when an identical conifiguration activities applied to both models. Document Conventions The following document conventions are used in this document: NOTE Indicate tips or special requirements. -
Page 18: Notational Conventions
Symbol Technologies is not responsible for any damages incurred during shipment if the approved shipping container is not used. Shipping the units improperly can possibly void the warranty. If the original shipping container was not kept, contact Symbol to have another sent to you. -
Page 19: Chapter 1. Introduction
This AP-51xx Product Reference Guide contains setup and advanced configuration instructions for both the AP-5131 and AP-5181 model Symbol access points. Both the AP-5131 and AP-5181 model access points share the same Web UI interface, thus there is no difference in how the devices are configured using the instructions within this guide. -
Page 20: New Features
AP-51xx Access Point Product Reference Guide 1.1 New Features With this most recent 1.1 release of the access point firmware, the following new features have been introduced to the existing feature set: • Mesh Networking • Additional LAN Subnet • On-board Radius Server Authentication •... -
Page 21: Additional Lan Subnet
Introduction Once the access point (in client bridge mode) establishes at least one wireless connection, it establishes other wireless connections in the background as they become available. In this way, the access point is able to establish simultaneous redundant links. An access point (in client bridge mode) can establish up to 3 simultaneous wireless connections with other AP-5131s or AP-5181s. -
Page 22: On-Board Radius Server Authentication
AP-51xx Access Point Product Reference Guide 1.1.3 On-board Radius Server Authentication The access point now has the ability to work as a Radius Server to provide user database information and user authentication. Several new screens have been added to the access point’s menu tree to configure Radius server authentication and configure the local user database and access policies. -
Page 23: Routing Information Protocol (Rip)
Introduction 1.1.5 Routing Information Protocol (RIP) With the release of the 1.1 version access point, Routing Information Protocol (RIP) functionality has been added to the existing Router screen. RIP is an interior gateway protocol that specifies how routers exchange routing-table information. The parent Router screen also allows the administrator to select the type of RIP and the type of RIP authentication used. -
Page 24: Feature Overview
AP-51xx Access Point Product Reference Guide 1.2 Feature Overview The Symbol access point has the following existing features carried forward from its initial 1.0 release: • Single or Dual Mode Radio Options • Separate LAN and WAN Ports • Multiple Mounting Options •... -
Page 25: Single Or Dual Mode Radio Options
Introduction 1.2.1 Single or Dual Mode Radio Options One or two possible configurations are available on the access point depending on which model is purchased. If the access point is manufactured as a single radio access point, the access point enables you to configure the single radio for either 802.11a or 802.11b/g. -
Page 26: Antenna Support For 2.4 Ghz And 5.2 Ghz Radios
AP-51xx Access Point Product Reference Guide For detailed information on the mounting options available for the access point, see Mounting the AP-5131 on page 2-12. 1.2.4 Antenna Support for 2.4 GHz and 5.2 GHz Radios The access point supports several 802.11a and 802.11b/g radio antennas. Select the antenna best suited to the radio transmission requirements of your coverage area. - Page 27 Introduction For detailed information on strategically mapping BSSIDs to WLANs, see Configuring the 802.11a or 802.11b/g Radio on page 5-47.
-
Page 28: Quality Of Service (Qos) Support
1-10 AP-51xx Access Point Product Reference Guide 1.2.7 Quality of Service (QoS) Support The access point QoS implementation provides applications running on different wireless devices a variety of priority levels to transmit data to and from the access point. Equal data transmission priority is fine for data traffic from applications such as Web browsers, file transfers or email, but is inadequate for multimedia applications. -
Page 29: Kerberos Authentication
The use of strong authentication methods that do not disclose passwords is necessary. Symbol uses the Kerberos authentication service protocol (specified in RFC 1510), to authenticate users/clients in a wireless network environment and to securely distribute the encryption keys used for both encrypting and decrypting. -
Page 30: Wep Encryption
1-12 AP-51xx Access Point Product Reference Guide An MU is not able to access the network if not authenticated. When configured for EAP support, the access point displays the MU as an EAP station. EAP is only supported on mobile devices running Windows XP, Windows 2000 (using Service Pack #4) and Windows Mobile 2003. -
Page 31: Keyguard Encryption
Use KeyGuard to shield the master encryption keys from being discovered through hacking. KeyGuard negotiation takes place between the access point and MU upon association. The access point can use KeyGuard with Symbol MUs. KeyGuard is only supported on Symbol MUs making it a Symbol proprietary security mechanism. -
Page 32: Firewall Security
1-14 AP-51xx Access Point Product Reference Guide For detailed information on WPA2-CCMP configurations, see Configuring WPA2-CCMP (802.11i) on page 6-22. 1.2.8.7 Firewall Security A firewall keeps personal data in and hackers out. The access point firewall prevents suspicious Internet traffic from proliferating the access point managed network. The access point performs network address translation (NAT) on packets passing to and from the WAN port. -
Page 33: Multiple Management Accessibility Options
• Command Line Interface (CLI) accessed via RS-232 or Telnet. Use the access point DB-9 serial port for direct access to the command-line interface from a PC. Use Symbol's Null- Modem cable (Part No. 25-632878-0) for the best fitting connection. -
Page 34: Power-Over-Ethernet Support
4-17. 1.2.13 Power-over-Ethernet Support When users purchase a Symbol WLAN solution, they often need to place access points in obscure locations. In the past, a dedicated power source was required for each access point in addition to the Ethernet infrastructure. This often required an electrical contractor to install power drops at each access point location. -
Page 35: Voice Prioritization
DTIM (Delivery Traffic Indication Message) and the TIM (Traffic Indication Map). PSP (Power Save Polling) MUs power off their radios for short periods. When a Symbol MU in PSP mode associates with an access point, it notifies the access point of its activity status. The access point responds by buffering packets received for the MU. -
Page 36: Transmit Power Control
1-18 AP-51xx Access Point Product Reference Guide Associated MU stats can be displayed collectively and individually for specific MUs. An echo (ping) test is also available to ping specific MUs to assess association strength. Finally, the access point can detect and display the properties of other APs detected within the access point’s radio coverage area. -
Page 37: Dhcp Support
1-19 Introduction For detailed information on restoring a default or partial default configuration, see Configuring System Settings on page 4-2. 1.2.22 DHCP Support The access point can use Dynamic Host Configuration Protocol (DHCP) to obtain a leased IP address and configuration information from a remote server. DHCP is based on the BOOTP protocol and can coexist or interoperate with BOOTP. -
Page 38: Cellular Coverage
2.4 to 2.5-GHz frequency range (802.11b/g radio) or the 5.2 GHz frequency range (802.11a radio), the actual range is country-dependent. Symbol devices, like other Ethernet devices, have unique, hardware encoded Media Access Control (MAC) or IEEE addresses. -
Page 39: Mac Layer Bridging
1-21 Introduction access points with the same ESSID defines a coverage area. A valid ESSID is an alphanumeric, case- sensitive identifier up to 32 characters. An MU searches for an access point with a matching ESSID and synchronizes (associates) to establish communications. This device association allows MUs within the coverage area to move about or roam. -
Page 40: Media Types
Spread spectrum (broadband) uses a narrowband signal to spread the transmission over a segment of the radio frequency band or spectrum. Direct-sequence is a spread spectrum technique where the transmitted signal is spread over a particular frequency range. The Symbol access point uses Direct- Sequence Spread Spectrum (DSSS) for radio communication. -
Page 41: Mu Association Process
1-23 Introduction The ratio of chips per bit is called the spreading ratio. A high spreading ratio increases the resistance of the signal to interference. A low spreading ratio increases the bandwidth available to the user. The access point uses different modulation schemes to encode more bits per chip at higher data rates. The access point is capable of a maximum 54Mbps data transmission rate (802.11a radio), but the coverage area is less than that of access point operating at lower data rates since coverage area decreases as bandwidth increases. -
Page 42: Operating Modes
• Access Point - As an Access Point, the access point functions as a layer 2 bridge (similar to Symbol’s existing AP-4131 access point). The wired uplink can operate as a trunk and support multiple VLANs. Up to 16 WLANs can be defined and mapped to access point WLANs. -
Page 43: Management Access Options
MIB Browser. The AP-5131 or AP-5181 downloads site contains the following 2 MIB files: • Symbol-CC-WS2000-MIB-2.0 (standard Symbol MIB file) • Symbol-AP-5131-MIB (AP-5131 and AP-5181 specific MIB file) Make configuration changes to access point’s individually. Optionally, use the access point import/ export configuration function to download access point’s settings to other access points. - Page 44 1-26 AP-51xx Access Point Product Reference Guide...
-
Page 45: Chapter 2. Hardware Installation
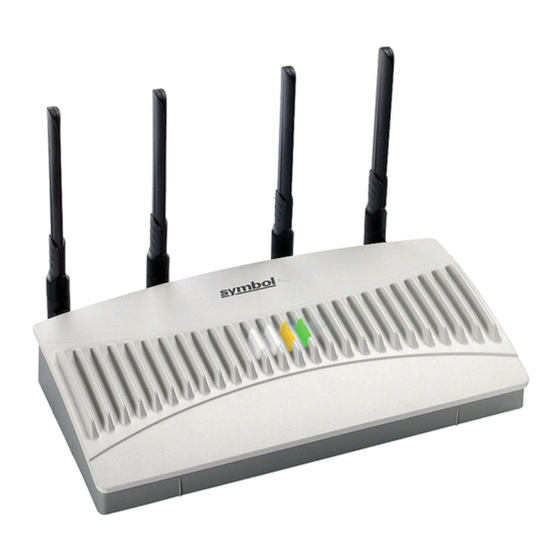
See the following sections for more details: • Precautions • Requirements • Access Point Placement • Power Options • Symbol Power Injector System • Mounting the AP-5131 • AP-5131 LED Indicators • Mounting the AP-5181 • AP-5181 LED Indicators •... -
Page 46: Precautions
2.1 Precautions Before installing an AP-5131 or AP-5181 model access point verify the following: • Do not install in wet or dusty areas without additional protection. Contact a Symbol representative for more information. • Verify the environment has a continuous temperature range between -20° C to 50° C. - Page 47 (2) Dual-Band Antennae (Part No. ML-2452-APA2-01) Accessories Bag Verify the model indicated on the bottom of the AP-5131 is correct. Contact the Symbol Support Center to report missing or improperly functioning items. The Symbol power injector (Part No. AP-PSBIAS-1P2-AFR) is included in certain orderable configurations, but can be added to any configuration.
-
Page 48: Ap-5181 Configurations
5.2 GHz Antenna Matrix on page A-5. CAUTION Using an antenna other than the Dual-Band Antenna (Part No. ML-2452-APA2-01) could render the AP-5131’s Rogue AP Detector Mode feature inoperable. Contact your Symbol sales associate for specific information. 2.2.2 AP-5181 Configurations... -
Page 49: Requirements
• Orient the access point antennae vertically for best reception. • Point the access point antenna(s) downward if attaching to the ceiling. Symbol recommends conducting a site survey to define and document radio interference obstacles before installing the access point to maximize its radio coverage area. -
Page 50: Site Surveys
Symbol recommends conducting a new site survey and developing a new coverage area floor plan when switching from 2 or 11Mbps access points (AP-3021 or AP-4131 models) to 54Mbps access points (AP-5131 and AP-5181 models), as the device placement requirements are significantly different. - Page 51 Yagi Antenna 13.9 ML-2452-APA2-01 Dual-Band NOTE An additional adapter is required to use ML-2499-11PNA2-01 and ML-2499-BYGA2-01 model antennae. Please contact Symbol for more information. The AP-5131 5.2 GHz antenna suite includes the following models: Symbol Part Number Antenna Type Nominal Net Gain (dBi)
-
Page 52: Ap-5181 Antenna Options -Tbd
Symbol 48-Volt Power Supply (Part No. 50-24000-050). However, Symbol does recommend the AP-PSBIAS-5181-01R model power supply for use the AP-5181. • Symbol Power Injector (Part No. AP-PSBIAS-1P2-AFR) • Symbol (AP-5181 specific) 48-Volt Power Supply (Part No. AP-PSBIAS-5181-01R) • Any standard 802.3af compliant device. -
Page 53: Symbol Power Injector System
Ethernet cable connected to the LAN port (using the 802.3af standard). When users purchase a Symbol WLAN solution, they often need to place access points in obscure locations. In the past, a dedicated power source was required for each access point in addition to the Ethernet infrastructure. -
Page 54: Preparing For Site Installation
Data In connector. 3. Connect an RJ-45 Ethernet cable between the power injector Data & Power Out connector and the Symbol access point LAN port. CAUTION Cabling the power injector to the access point’s WAN port renders the AP-5131 non-operational. Only use a AP-PSBIAS-1P2-AFR model power injector with the access point’s LAN port. -
Page 55: Power Injector Led Indicators
Green (Blinking) Output voltage source is out of range. The power injector is overloaded or has a short circuit. For more information and device specifications for the Symbol power injector, refer to the Power Injector Quick Install Guide (Part No. 72-70762-01) available from the Symbol Web site. -
Page 56: Mounting The Ap-5131
2-12 AP-51xx Access Point Product Reference Guide 2.7 Mounting the AP-5131 The AP-5131 can rest on a flat surface, attach to a wall, mount under a suspended T-Bar or above a ceiling (plenum or attic). Choose one of the following mounting options based on the physical environment of the coverage area. - Page 57 2-13 Hardware Installation 4. Cable the AP-5131 using either the Symbol power injector solution or an approved line cord and power supply. CAUTION Do not supply power to the AP-5131 until the cabling of the unit is complete. For Symbol power injector installations: a.
-
Page 58: Wall Mounted Installations
2-14 AP-51xx Access Point Product Reference Guide 5. Verify the behavior of the AP-5131 LEDs. For more information, see AP-5131 LED Indicators on page 2-21. 6. Return the AP-5131 to an upright position and place it in the location you wish it to operate. Ensure the AP-5131 is sitting evenly on all four rubber feet. - Page 59 Radio 1, and two dots designate the secondary antenna for Radio 1. 8. Cable the AP-5131 using either the Symbol power injector solution or an approved line cord and power supply.
-
Page 60: Suspended Ceiling T-Bar Installations
NOTE If the AP-5131 is utilizing remote management antennae, a wire cover can be used to provide a clean finished look to the installation. Contact Symbol for more information. 9. Verify the behavior of the AP-5131 LEDs. For more information, see... - Page 61 2-17 Hardware Installation 4. Cable the AP-5131 using either the Symbol power injector solution or an approved line cord and power supply. CAUTION Do not supply power to the AP-5131 until the cabling of the unit is complete. For Symbol power injector installations: a.
-
Page 62: Above The Ceiling (Plenum) Installations
NOTE If the AP-5131 is utilizing remote management antennae, a wire cover can be used to provide a clean finished look to the installation. Contact Symbol for more information. 2.7.4 Above the Ceiling (Plenum) Installations An AP-5131 above the ceiling installation requires placing the AP-5131 above a suspended ceiling and installing the provided light pipe under the ceiling tile for viewing the rear panel status LEDs of the unit. - Page 63 6. Use a drill to make a hole in the tile the approximate size of the AP-5131 LED light pipe. CAUTION Symbol recommends care be taken not to damage the finished surface of the ceiling tile when creating the light pipe hole and installing the light pipe.
- Page 64 AP-5131’s lock port. 14. Align the ceiling tile into its former ceiling space. 15. Cable the AP-5131 using either the Symbol power injector solution or an approved line cord and power supply. CAUTION Do not supply power to the AP-5131 until the cabling of the unit is...
-
Page 65: Ap-5131 Led Indicators
Symbol Power Injector System on page 2-9. For standard Symbol 48-Volt Power Adapter (Part No. 50-24000-050) and line cord installations: a. Connect RJ-45 Ethernet cable between the network data supply (host) and the AP-5131 LAN port. - Page 66 2-22 AP-51xx Access Point Product Reference Guide Power and Error Conditions (Split LED) Data Over Ethernet 802.11a Radio Activity 802.11b/g Radio Activity The five LEDs on the top housing of the AP-5131 are clearly visible in table-top, wall and below ceiling installations.
-
Page 67: Mounting The Ap-5181
2-23 Hardware Installation AP-5131 Solid white indicates the is adequately powered. Boot and Power Status AP-5131 Solid red indicates the is experiencing a problem condition requiring immediate attention. Error Conditions Blinking red indicates the AP-5131 Rogue AP Detection feature has located a Power and Error rogue device Conditions... -
Page 68: Ap-5181 Wall Monuted Installations
2-24 AP-51xx Access Point Product Reference Guide NOTE The AP-5181 tilt angle may need to be adjusted during the antenna alignment process. Verify the antenna polarization angle when installing, enusre the antennas are oriented corretly in respect to the AP-5181's coverage area. -
Page 69: Ap-5181 Led Indicators
2-25 Hardware Installation 2.10 AP-5181 LED Indicators The AP-5181 utilizes four LED indicators. Five LEDs display within four LED slots on the back of the access point. The five LEDs have the following display and functionality: Illustration forthcoming AP-5131 Solid white indicates the is adequately powered. -
Page 70: Setting Up Mus
3-11. Refer to the LA-5030 & LA-5033 Wireless Networker PC Card and PCI Adapter Users Guide, available from the Symbol Web site, for installing drivers and client software if operating in an 802.11a/g network environment. Refer to the Spectrum24 LA-4121 PC Card, LA-4123 PCI Adapter & LA-4137 Wireless Networker User Guide, available from the Symbol Web site, for installing drivers and client software if operating in an 802.11b network environment. -
Page 71: Chapter 3. Getting Started
The access point should be installed in an area tested for radio coverage using one of the site survey tools available to the Symbol field service technician. Once an installation site has been identified, the installer should carefully follow the hardware precautions, requirements, mounting guidelines... -
Page 72: Configuration Options
For information on the 802.11a and 802.11b/g radio antenna suite available to the access point, see Antenna Options on page 2-6. For more information on using a Symbol Power Injector to combine Ethernet and power in one cable to the access point, see Symbol Power Injector System on page 2- 9. -
Page 73: Basic Device Configuration
• MIB (Management Information Base) accessing the access point SNMP functions using a MIB Browser. The access point download package contains the following 2 MIB files: • Symbol-CC-WS2000-MIB-2.0 (standard Symbol MIB file) • Symbol-AP-5131-MIB (AP-5131 specific MIB file) 3.3 Basic Device Configuration For the basic setup described in this section, the Java-based Web UI will be used to configure the access point. - Page 74 AP-51xx Access Point Product Reference Guide 2. Log in using admin as the default User ID and symbol as the default Password. Though the example above is for an AP-5131, there is no difference for an AP-5181. 3. If the default login is successful, the Change Admin Password window displays.
-
Page 75: Configuring Device Settings
2. Enter a System Name for the access point. The System Name is useful if multiple Symbol devices are being administered. 3. Select the Country for the access point’s country of operation from the drop-down menu The access point prompts the user for the correct country code on the first login. - Page 76 DHCP server to a host. Some of these parameters are IP address, network mask, and gateway. NOTE Symbol recommends that the WAN and LAN ports should not both be configured as DHCP clients.
- Page 77 DHCP server over the LAN connection. Select the Bootp client option to enable a diskless system to discover its own IP address. NOTE Symbol recommends that the WAN and LAN ports should not both be configured as DHCP clients.
- Page 78 AP-51xx Access Point Product Reference Guide c. If using the static or DHCP Server option, enter the network-assigned IP Address of the access point. NOTE DNS names are not supported as a valid IP address for the access point. The user is required to enter a numerical IP address. d.
-
Page 79: Configuring Wlan Security Settings
Quick Setup screen. Policies can be defined over time and saved to be used as needed as security requirements change. Symbol recommends you familiarize yourself with the security options available on the access point before defining a security policy. Refer to Configuring WLAN Security Settings on page 3-9. - Page 80 Multiple WLANs can share the same security policy, so be careful not to name security policies after specific WLANs or risk defining a WLAN to single policy. Symbol recommends naming the policy after the attributes of the authentication or encryption type selected.
-
Page 81: Testing Connectivity
(WNMP) ping packets to the associated MU. Use the Echo Test screen to specify a target MU and configure the parameters of the test. The WNMP ping test only works with Symbol MUs. Only use a Symbol MU to test access point connectivity using WNMP. -
Page 82: Where To Go From Here
3-12 AP-51xx Access Point Product Reference Guide Packet Length Specifies the length of each packet transmitted to the MU during the test. The default length is 100 bytes. 4. Click the Ping button to begin transmitting packets to the specified MU address. Refer to the Number of Responses value to assess the number of responses from the MU versus the number of ping packets transmitted by the access point. -
Page 83: Chapter 4. System Configuration
System Configuration The Symbol access point contains a built-in browser interface for system configuration and remote management using a standard Web browser such as Microsoft Internet Explorer, Netscape Navigator or Mozilla Firefox. The browser interface also allows for system monitoring of the access point. -
Page 84: Configuring System Settings
AP-51xx Access Point Product Reference Guide System configuration topics include: • Configuring System Settings • Configuring Data Access • Managing Certificate Authority (CA) Certificates • Configuring SNMP Settings • Configuring Network Time Protocol (NTP) • Logging Configuration • Importing/Exporting Configurations •... - Page 85 Version The displayed number is the current version of the device firmware. Use this information to determine if the AP is running the most recent firmware available from Symbol. Use the Firmware Update screen to keep the AP’s firmware up to date.
- Page 86 CAUTION Restoring the access point’s configuration back to default settings changes the administrative password back to “symbol.” If restoring the configuration back to default settings, be sure you change the administrative password accordingly.
-
Page 87: Configuring Data Access
To avoid jeopardizing the network data managed by the access point, Symbol recommends enabling only those interfaces used in the routine (daily) management of the network, and disabling all other interfaces until they are required. - Page 88 AP-51xx Access Point Product Reference Guide 2. Use the access point Access field checkboxes to enable/disable the following on the access point’s LAN1, LAN2 or WAN interfaces: Applet HTTP (port 80) Select the LAN1, LAN2 and/or WAN checkboxes to enable access access point to the configuration applet using a Web browser.
- Page 89 System Configuration 4. Configure the Secure Shell field to set timeout values to reduce network inactivity. Defines the maximum time (between 30 - 120 seconds) allowed for Authentication SSH authentication to occur before executing a timeout. The Timeout minimum permissible value is 30 seconds. SSH Keepalive The SSH Keepalive Interval defines a period (in seconds) after Interval...
-
Page 90: Managing Certificate Authority (Ca) Certificates
Access screen to the last saved configuration. 10. Click Logout to securely exit the access point Symbol Access Point applet. A prompt displays confirming the logout before the applet is closed. 4.3 Managing Certificate Authority (CA) Certificates Certificate management includes the following sections: •... - Page 91 System Configuration Depending on the public key infrastructure, the digital certificate includes the owner's public key, the certificate expiration date, the owner's name and other public key owner information. The access point can import and maintain a set of CA certificates to use as an authentication option for Virtual Private Network (VPN) access.
-
Page 92: Creating Self Certificates For Accessing The Vpn
4-10 AP-51xx Access Point Product Reference Guide 2. Copy the content of the CA Certificate message (using a text editor such as notepad) and then click on Paste from Clipboard. The content of the certificate displays in the Import a root CA Certificate field. - Page 93 4-11 System Configuration 2. Click on the button to create the certificate request. Certificate Request screen displays. 3. Complete the request form with the pertinent information. Only 4 values are required, the others optional: Key ID Enter a logical name for the certificate to help distinguish between certificates.
- Page 94 4-12 AP-51xx Access Point Product Reference Guide Signature Algorithm Use the drop-down menu to select the signature algorithm used for the certificate. Options include: • MD5-RSA - Message Digest 5 algorithm in combination with RSA encryption. • SHA1-RSA - Secure Hash Algorithm 1 in combination with RSA encryption.
-
Page 95: Creating A Certificate For Onboard Radius Authentication
4-13 System Configuration The CA signs the certificate and will send it back. Once received, copy the content from the email into the clipboard. 7. Click the Paste from clipboard button. The content of the email displays in the window. Click the Load Certificate button to import the certificate and make it available for use as... - Page 96 4-14 AP-51xx Access Point Product Reference Guide 3. Complete the request form with the pertinent information. Key ID (required) Enter a logical name for the certificate to help distinguish between certificates. The name can be up to 7 characters in length. Subject Subject (required) The required...
- Page 97 System Configuration Key Length Defines the length of the key. Possible values are 512, 1024, and 2048. Symbol recommends setting this value to 1024 to ensure optimum functionality. 4. Complete as many of the optional values within the Certificate Request screen as possible.
- Page 98 4-16 AP-51xx Access Point Product Reference Guide 10. Select the Advanced request checkbox from within the Choose Request Type screen and click Next to continue. 11. From within the Advanced Certificate Requests screen, select the Submit a certificate request using a base 64 encoded PKCS #10 file or a renewal request using a base64 encoded PKCS file option.
-
Page 99: Configuring Snmp Settings
The remaining portion of the Symbol-AP-5131-MIB contains supplemental information unique to the access point feature set. If using the Symbol-CC-WS2000-MIB-2.0 and/or Symbol-AP-5131-MIB to configure the AP-5131, use the table below to locate the MIB where the feature can be configured. - Page 100 AP-51xx Access Point Product Reference Guide Radio Configuration Symbol-AP-5131-MIB Content Filtering Symbol-CC-WS2000-MIB-2.0 Bandwidth Symbol-AP-5131-MIB Rogue AP Detection Symbol-CC-WS2000-MIB-2.0 Management SNMP Trap Selection Symbol-AP-5131-MIB Firewall Configuration Symbol-CC-WS2000-MIB-2.0 SNMP RF Trap Symbol-AP-5131-MIB LAN to WAN Access Symbol-CC-WS2000-MIB-2.0 Thresholds Config Import/Export Symbol-AP-5131-MIB Advanced LAN Access Symbol-CC-WS2000-MIB-2.0...