Table of Contents
Advertisement
Quick Links
Advertisement
Table of Contents

Related Manuals for Electrolux WASL6IE300

Summary of Contents for Electrolux WASL6IE300
- Page 1 WASL6IE300 Washing Machine User Manual...
-
Page 2: Table Of Contents
CONTENTS 1. SAFETY INFORMATION..................3 2. SAFETY INSTRUCTIONS..................5 3. INSTALLATION....................6 4. PRODUCT DESCRIPTION................11 5. THE WATER SOFTENER (SOFTWATER TECHNOLOGY)......12 6. CONTROL PANEL................... 16 7. FIRST TIME START-UP...................16 8. TOUCH SCREEN..................... 18 WI-FI CONNECTIVITY SETUP..............20 10. BEFORE FIRST USE..................21 11. -
Page 3: Safety Information
ENGLISH WE’RE THINKING OF YOU Thank you for purchasing an Electrolux appliance. You’ve chosen a product that brings with it decades of professional experience and innovation. Ingenious and stylish, it has been designed with you in mind. So whenever you use it, you can be safe in the knowledge that you’ll get great results every time. - Page 4 Do not let children play with the appliance. • Children aged 3 years and under must be kept away • from this appliance when it is in operation at all times. Keep all packaging away from children and dispose of •...
-
Page 5: Safety Instructions
ENGLISH 2. SAFETY INSTRUCTIONS 2.1 Installation • Connect the mains plug to the mains socket only at the end of the • Remove all the packaging and the installation. Make sure that there is transit bolts. access to the mains plug after the •... -
Page 6: Installation
• Disconnect the appliance from the Prewash such fabrics by hand before mains electrical and water supplies. loading them into the washing • Cut off the mains electrical cable machine. close to the appliance and dispose of •... - Page 7 ENGLISH 5. Carefully put down the appliance with the rear side on it. 6. Put the front polystyrene packaging CAUTION! element on the floor under the Do not use alcohol, solvents appliance. or chemical products. 9. Make sure to identify the different sizes and the positions of the sound barriers.
- Page 8 Attach the sound barriers at a room temperature. 13. Pull up the appliance in vertical position. We recommend that you keep the packaging and the transit bolts for any movement of the appliance. 3.2 Positioning and levelling 14. Remove the power supply cable and the drain hose from the hose holders.
- Page 9 ENGLISH A correct adjustment of the appliance level prevents the vibration, noise and the movement of the appliance when in operation. CAUTION! Make sure that there are no leaks from the couplings. Do not use an extension hose if the inlet hose is too 3.3 The inlet hose short.
- Page 10 It is possible to connect the drain hose in The end of the drain hose different ways: must always be ventilated , i.e. the inner diameter of the 1. Make a U shape with the drain hose drain pipe (min. 38 mm - and put it around the plastic hose min.
-
Page 11: Product Description
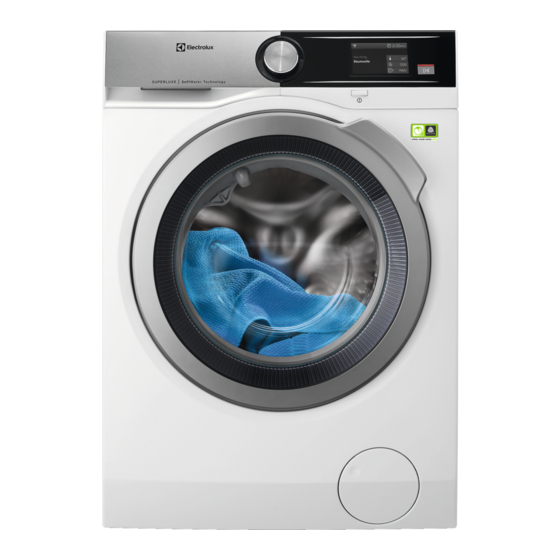
ENGLISH 4. PRODUCT DESCRIPTION 4.1 Special features • Thanks to the Weight Sensors the appliance can detect the weight of Your new washing machine meets all your load and advise on how much modern requirements for an effective detergent you need to achieve the treatment of laundry with low water, best results without waste. -
Page 12: The Water Softener (Softwater Technology)
Worktop Compartment for washing phase: Detergent dispenser and salt powder detergent, stain remover. compartment When using liquid Control panel detergent, make sure Door handle that the special Rating plate container for liquid detergent is inserted. Drain pump filter Refer to 'Filling the... - Page 13 ENGLISH The water softener should be adjusted according to the water hardness of your inlet water. A correct setting allows to achieve the best washing results and the maximum garments protection. To set the water softener correctly, please refer to 'How to set the water hardness level'.
- Page 14 This setting increases the salt consumption. • OFF: to deactivate the water softener. Water hardness levels Levels as indi‐ cated on the Levels Water hardness range tester °f °d °e (French (German (English mmol/l degrees) degrees) degrees) ≤5 ≤3 ≤...
- Page 15 ENGLISH WARNING! Do not put anything but salt Salt in the compartment . If any other detergent/additive is poured inadvertently in this compartment, please refer to 'Eliminating detergent or other additives from salt compartment' in 'Troubleshooting' chapter. 4. Close the salt compartment and the Only use special salt for detergent dispenser.
-
Page 16: Control Panel
6. CONTROL PANEL 6.1 Control panel description On/Off button (On/Off) Start/Pause button (Start/Pause) Programme dial Touch screen 7. FIRST TIME START-UP Each time you turn the appliance on, the Start-up Screen appears on the touch screen. 2. The following screen pops up: •... - Page 17 ENGLISH 7.2 Time setup desired programme. 1. Scroll the hour and minute bars to the right or to the left to set the current time. If you tap on Set, proceed with next settings. 7.4 Water Hardness 2. Tap on the Set Clock bar to set the time.
-
Page 18: Touch Screen
4. Tap on OK to confirm or on Change matches with the average dosage to change the level. suggested on the detergent packaging. 7.5 Detergent Dosing You can set the average quantity of detergent suggested on the detergent packaging. - Page 19 ENGLISH After a few seconds, the programme list • The currently selected options. The screen appears proposing Cottons as shortcut allows to enter the default programme. additional option menu. If you don't scroll the programme list up When a shortcut is visible on and down, in a few seconds the the summary screen, it is programme summary screen appears.
-
Page 20: Wi-Fi Connectivity Setup
WI-FI CONNECTIVITY SETUP This chapter describes how to connect 2. Download and install the App "My the smart appliance to the Wi-Fi network AEG". and to link it to mobile devices. 3. Make sure you started a Wi-fi connection in the washing machine. -
Page 21: Before First Use
ENGLISH for about 3 minutes. 2. When the programme summary screen appears, tap on More to enter the option list. 3. Tap on the Remote Start Mode bar to activate it (ON status). The following message pops up: 3. Configure the "My AEG" app on your smart device. -
Page 22: Programmes
6. Set and start a programme for cotton This removes all possible dirt from the at the highest temperature without drum and the tub. any laundry in the drum. 11. PROGRAMMES 11.1 Programme Chart All washing programmes benefit from the softened water, if the water softener is active. - Page 23 ENGLISH Programme Programme description Wool/Silk Machine washable wool, hand washable wool and oth‐ er fabrics with «hand washing» care symbol Woolmark Apparel Care - Green The wool wash cycle of this machine has been approved by The Woolmark Company for the washing of wool gar‐ ments labelled as «hand wash»...
- Page 24 Programme Programme description Outdoor Do not use fabric softener and make sure that there is no softener residue in the detergent dispenser. Outdoor clothing, technical, sport fabrics, waterproof and breathable jackets, shell jackets with a removable fleece or inner insulation. The recommended laundry load is 2.5 kg.
- Page 25 ENGLISH Programme Programme description Spin All fabrics, except woollens and very delicate fabrics. Programme for spinning the laundry and draining the water left in the drum. The default spin speed is the one used for cotton programmes. Reduce the spin speed accordingly to the type of laundry.
- Page 26 Programme Default tempera‐ Maximum spin Maximum load ture speed Temperature range Spin speed range Outdoor 30 °C 1200 rpm 2.5 kg 40 °C - Cold 1200 rpm - 400 rpm 1 kg Jeans 40 °C 1200 rpm 9 kg 60 °C - Cold...
-
Page 27: Options
ENGLISH Delicates ■ ■ ■ ■ ■ ■ ■ ■ ■ ■ Wool/Silk ■ ■ Steam ■ 20min 3kg ■ ■ Outdoor ■ ■ ■ ■ Jeans ■ ■ ■ ■ ■ ■ ■ ■ ■ ■ Anti-Allergy ■ ■ ■... - Page 28 If the shortcut is on, you can activate this option by tapping on the shortcut without entering the More menu. Refer to "Shortcuts" in chapter "Settings". 12.3 Delay Start With this option you can delay the start of To return to the programme summary a programme to a more convenient time.
- Page 29 ENGLISH 1. Tap on the Temperature bar to enter The drum turns regularly to reduce the submenu. creasing. You must drain the water to 2. Scroll the submenu bar to set the unlock the door. desired temperature. Cold= Cold Touch the Start/Pause button: the wash.
- Page 30 , mud and other Tap on the Plus Steam bar to activate solid particles. the option (ON status). Put the detergent for This option can increase the prewash in a dosing ball programme duration. inside the drum.
-
Page 31: Daily Use
ENGLISH 2. Tap on the Memory bar to enter the This is available with the submenu. Steam programme only. 3. Tap on the Memory 1 or Memory 2 bar with In Use status. A message 12.14 Memory pops up asking if you want to delete or replace the saved programme. - Page 32 13.1 Using weight sensors If you set a programme or an option that ends with water For a correct use of the in the drum, the Stand-by weight sensor, the drum function doesn't deactivate must be empty when the appliance to remind you activating the appliance.
- Page 33 ENGLISH 13.6 Loading the laundry 1. Open the appliance door. The weight sensor window pops up. 2. Shake the garments before you put 5. If you have already set Detergent them in the drum. Type 1 or Detergent Type 2 with 3.
- Page 34 2. Put the powder detergent in the Filling the liquid detergent compartment . If using liquid detergent, refer to 'Filling the liquid 1. Insert the proper container for liquid detergent'. detergent. 3. If desired, pour the fabric softener in 2.
- Page 35 ENGLISH • The programme name. • The remaining time to programme end. • The progress bar. • The ProSense phase first and then the running programme phase. • The indicator . When it is on, it is still possible to stop the cycle 2.
- Page 36 13.13 End of the programme 2. Tap on to change the options. In the option list only the available When the programme has finished, the options will be active. appliance stops automatically. The 3. Touch the Start/Pause button again.
-
Page 37: Settings
ENGLISH 4. Press the On/Off button for a few • If you have set , the appliance seconds to deactivate the appliance. only drains the water. 2. If necessary, change the spin speed In any case, the appliance proposed by the appliance: touch the empties the water out Start/Pause button to pause the automatically after... - Page 38 3. Tap on the Display Brightness bar 14.7 Extra Rinse Default to return to the machine setting list or With this option you can permanently tap on the Programmes bar to return have two additional rinses each time you to the programme summary screen.
- Page 39 ENGLISH necessary detergent dosage for your cycles. It is possible to set two types of detergent: e.g., the value entered in Detergent Type 1 could refer to powder detergent and the value entered in Detergent Type 2 could refer to liquid detergent.
-
Page 40: Hints And Tips
To find the desired description, e.g.: 1. Tap on the Machine Information bar. 2. Tap on 1. Programmes bar. 3. Tap on Cottons bar and the relevant description will appear. 14.14 Factory Reset DEFAULT 2. Tap on the bar of the desired... -
Page 41: Care And Cleaning
ENGLISH a. interrupt the programme and programmes (60 °C max) for all open the door (refer to "Opening types of fabric, or special ones for the door when a programme or woollens only. the delay start operates"); • Do not mix different types of b. - Page 42 The regular detergents already contain 2. Run a short cotton programme at water softening agents, but we high temperature with empty drum recommend to run a cycle with empty and with a small quantity of powder drum and a descaling product detergent, in order to rinse out any occasionally.
- Page 43 ENGLISH 3. Wash the drawer and all inserts 6. Insert the detergent drawer into the under running water. guide rails and close it. Run the rinsing programme without any clothes in the drum. 4. Make sure that all detergent residue is removed from the detergent conveyor.
- Page 44 5. When the bowl is full of water, close WARNING! the drainage duct back and empty • Do not remove the filter the container. while the appliance 6. Repeat the steps 4 and 5 until the operates. water stops flowing out.
- Page 45 ENGLISH 16.8 Cleaning the inlet hose and the valve filter It is recommended to clean both the filters of the inlet hose and valve occasionally to remove any deposit, collected over the time: 1. Remove the inlet hose from the tap and clean the filter.
-
Page 46: Troubleshooting
16.10 Frost precautions depending on the position of your water tap. If the appliance is installed in an area where the temperature can reach the values around 0° C or drop below, remove the remaining water from the inlet hose and the drain pump. - Page 47 ENGLISH mains supply is unstable. Wait until the mains supply is stable. • A water leak has been detected - The anti-flood device is on. Disconnect the appliance and close the water tap. Contact the Authorised Service Centre. WARNING! Deactivate the appliance before carrying out any check.
- Page 48 Problem Possible solution • Make sure that the sink spigot is not clogged. • Make sure that the drain hose has no kinks or bends. • Make sure that the drain filter is not clogged. Clean the filter, if necessary. Refer to "Care and cleaning".
- Page 49 ENGLISH Problem Possible solution • Check the wireless signal. • Check if your smart device is connected to the wireless network. • Check your home network and router. The App cannot con‐ • Restart the router. nect to the appliance. •...
- Page 50 Problem Possible solution • Check if the water softener has been set to act also dur‐ Excessive consumption ing rinse phase. Refer to "How to set the water hard‐ of salt. ness level" in "The Water Softener (SoftWater Technol‐...
-
Page 51: Consumption Values
ENGLISH 5. Take out the laundry and then close 2. Eliminate any trace of detergent or the appliance door. additive and clean the compartment 6. Close the filter flap. thoroughly. 3. Insert the drawer back and pour salt 17.4 Eliminating detergent or Salt in the compartment other additives from salt... -
Page 52: Technical Data
Programmes Load Energy Water Approxi‐ Remain‐ (kg) con‐ con‐ mate pro‐ ing mois‐ sumption sumption gramme ture (%) (kWh) (litre) duration (minutes) Cottons 60°C 1.65 Cottons 40°C 1.20 Synthetics 40°C 0.72 Delicates 40°C 0.60 Wool/Silk 30°C 0.35 Standard cotton programmes 0.32... -
Page 53: Accessories
ENGLISH Level of protection against ingress of solid parti‐ IPX4 cles and moisture ensured by the protective cov‐ er, except where the low voltage equipment has no protection against moisture Water supply pressure Minimum 0,5 bar (0,05 MPa) Maximum 8 bar (0,8 MPa) Cold water Water supply Maximum Load... -
Page 54: Guarantee
To raise your appliance and make WARNING! loading and unloading laundry easier. Do not put the tumble dryer The drawer can be used for laundry under the washing machine. storage e.g.: towels, cleaning products and more. 20.4 Pedestal with the drawer Read carefully the instructions supplied with the accessory. - Page 55 ENGLISH 22. ENVIRONMENTAL CONCERNS Recycle materials with the symbol For Switzerland: Put the packaging in relevant containers Where should you take your to recycle it. Help protect the old equipment? environment and human health by Anywhere that sells new recycling waste of electrical and equipment or hand it in to electronic appliances.
- Page 56 electrolux.com/app...