Table of Contents
Advertisement
Quick Links
Advertisement
Table of Contents

Related Manuals for AEG L6FBG142R


Summary of Contents for AEG L6FBG142R
- Page 1 L6FBG142R User Manual Washing Machine USER MANUAL...
-
Page 2: Table Of Contents
17. QUICK GUIDE....................38 FOR PERFECT RESULTS Thank you for choosing this AEG product. We have created it to give you impeccable performance for many years, with innovative technologies that help make life simpler – features you might not find on ordinary appliances. Please spend a few minutes reading to get the very best from it. -
Page 3: Safety Information
ENGLISH SAFETY INFORMATION Before the installation and use of the appliance, carefully read the supplied instructions. The manufacturer is not responsible for any injuries or damage that are the result of incorrect installation or usage. Always keep the instructions in a safe and accessible location for future reference. -
Page 4: Safety Instructions
– working environments; by clients in hotels, motels, bed & breakfast and – other residential type environments; areas for communal use in blocks of flats or in – launderettes. Do not exceed the maximum load of 10 kg (refer to the •... - Page 5 ENGLISH • Do not install or use a damaged • Do not touch the mains cable or the appliance. mains plug with wet hands. • Do not install or use the appliance • Do not pull the mains cable to where the temperature can be less disconnect the appliance.
-
Page 6: Product Description
If you install the appliance on a plinth automatically the programme duration that is not an accessory supplied by to the laundry in the drum to achieve AEG, secure the appliance in the fixing perfect washing results in the plates. minimum possible time. -
Page 7: Technical Data
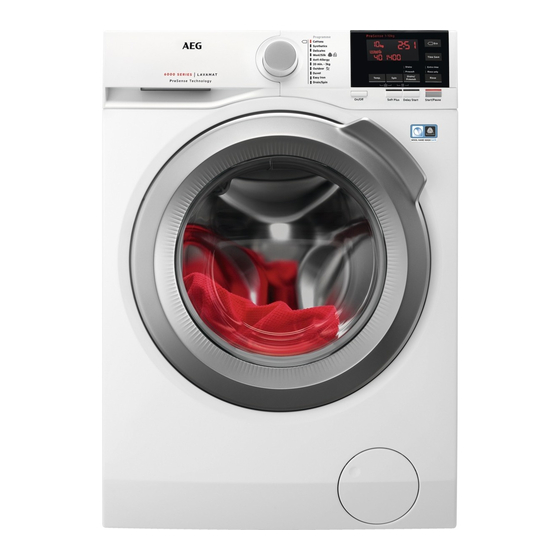
ENGLISH Read carefully the instructions supplied with the accessory. 3.3 Appliance overview 11 12 Worktop Drain hose Detergent dispenser Inlet hose connection Control panel Mains cable Door handle Transit bolts Rating plate Hose support Drain pump filter Feet for levelling the appliance The rating plate reports the model name (A), product number (B), electrical ratings (C) and serial number (D). -
Page 8: Installation
Level of protection against ingress of solid particles and IPX4 moisture ensured by the protective cover, except where the low voltage equipment has no protection against mois‐ ture Water supply pressure Minimum 0.5 bar (0.05 MPa) Maximum 8 bar (0.8 MPa) - Page 9 ENGLISH 4. Make sure to identify the different It is possible to see water sizes and the positions of the sound flowing from the drain hose. barriers. Refer to the illustration: This is due to the testing the appliance with water in factory.
- Page 10 5.4 The inlet hose Make sure that the appliance does not touch the wall or 1. Connect the water inlet hose to the other units. back of the appliance. 2. Loosen or tighten the feet to adjust 2. Position it toward left or right the level.
- Page 11 ENGLISH 5.5 Water drainage The drain hose should be positioned at a height of not less than 60 cm and not more than 100 cm from the floor. You can extend the drain hose to maximum 400 cm. Contact the authorized service centre for the other drain hose and the extension.
-
Page 12: Accessories
Read carefully the instructions supplied with the accessory. Only appropriate accessories approved by AEG ensure the safety standards of the appliance. If unapproved parts are used, any claims will be invalidated. 6.2 Stacking kit The tumble dryer can be stacked on the... -
Page 13: Control Panel
ENGLISH 7. CONTROL PANEL 7.1 Control panel description 11 10 1. Programme dial • Stains option 2. Display • Prewash option 3. Delay Start touch button 8. Anti-Allergy touch button 4. Time Save touch button 9. Soft Plus touch button 5. -
Page 14: Dial And Buttons
Delay start indicator. The digital indicator can show: • Programme duration (e. g. • Delay time (e. g. • Cycle end ( ). • Warning code ( Washing phase indicator. It flashes during prewash and wash phase. Rinsing phase indicator. It flashes during rinse phase. - Page 15 ENGLISH 8.2 Introduction If you touch the Start/Pause button, the appliance performs the spinning The options/functions are phase and drains the water. not selectable with all The appliance empties washing programmes. the water out Check the compatibility automatically after 18 between options/functions hours approximately.
- Page 16 Use this option to add a pre-wash several minutes. This helps in removing phase at 30 °C before the washing germs, bacteria, micro-organism and phase. particles. The addition of vapour together This option is recommended for with an additional rinsing phase ensures...
-
Page 17: Programmes
ENGLISH 9. PROGRAMMES 9.1 Programme Chart Washing programmes Programme Programme description Washing programmes Eco 40-60 White cotton and fast-coloured cotton. Normally soiled items. The energy consumption decreases and the time of the washing programme is extended, ensuring good washing re‐ sults. - Page 18 Programme Programme description Synthetic items requiring a gentle wash. Normally and light‐ Easy Iron ly soiled items. All fabrics, except woollens and delicate fabrics. To spin Drain/Spin the laundry and to drain the water in the drum. 1) During this cycle the drum rotates slowly to ensure a gentle wash. It can seem that the drum doesn't rotate or doesn't rotate properly, but this is normal for this programme.
- Page 19 ENGLISH Programme Default tempera‐ Reference spin Maximum load ture speed Temperature Spin speed range range 1400 rpm Drain/Spin 10 kg 1400 rpm 1) According to Commission Regulation EU 2019/2023, this programme at 40 °C is able to clean normal‐ ly soiled cotton laundry declared to be washable at 40 °C or 60 °C, together in the same cycle. For the reached temperature in the laundry, the programme duration and other data, please refer to 'Consumption Values' chapter.
- Page 20 OPTIONS Only Rinse ■ ■ ■ ■ ■ ■ ■ ■ ■ ■ Anti-Allergy ■ ■ ■ ■ ■ Time Save ■ ■ ■ ■ ■ ■ ■ ■ ■ ■ Delay Start Soft Plus ■ ■ ■ ■...
-
Page 21: Settings
ENGLISH 9.2 Woolmark Apparel Care - Blue The wool wash cycle of this machine has been approved by The Woolmark Company for the washing of wool garments labelled as «hand wash» provided that the garments are washed according to the instructions issued by the manufacturer of this washing machine. - Page 22 12.1 Activating the appliance 12.3 Filling the detergent and additives 1. Connect the mains plug to the mains socket. 2. Open the water tap. 3. Press the On/Off button for a few seconds to activate the appliance. A short tune sounds (if activated). The appliance automatically proposes a default programme.
- Page 23 ENGLISH 2. Press the lever down to remove the With the flap in the dispenser. position DOWN: • Do not use gelatinous or thick liquid detergents. • Do not put more liquid detergent than the limit shown on the flap. •...
- Page 24 The programme starts, the door is In case a selection is not locked. The display shows the indicator possible, no indicator comes on and an acoustic signal sounds. The drain pump can operate shortly before the appliance 12.6 Starting a programme fills water.
- Page 25 ENGLISH 12.10 Interrupting a programme and changing the options When the programme is running, you can change only some options: 1. Touch the button Start/Pause. The related indicator flashes. 2. Change the options. The given information in the display changes accordingly.
-
Page 26: Hints And Tips
4. Keep the door and the detergent 3. When the programme is completed dispenser slightly ajar to prevent and the door locked indicator mildew and odours. goes off, you can open the door. 5. Close the water tap. 4. Press the On/Off button a few seconds to deactivate the appliance. - Page 27 ENGLISH a. interrupt the programme and • Use only detergents and other open the door (refer to "Daily treatments specially made for Use" chapter); washing machines. First, follow these b. manually redistribute the load so generic rules: that the items are spaced evenly –...
-
Page 28: Care And Cleaning
• Loading the appliance to the laundry in a tumble dryer. This will maximum capacity indicated for save energy during drying! each programmes helps to reduce 13.5 Water hardness energy and water consumption. • With adequate pre-treatment, stains If the water hardness in your area is high and limited soiling can be removed;... - Page 29 ENGLISH CAUTION! Do not clean the metal surfaces with chlorine-based detergent. 14.4 Descaling If the water hardness in your area is high or moderate, we recommend that you use a water descaling product for Clean it when needed, using ammonia washing machines.
- Page 30 2. Remove the top part of the additive 14.9 Cleaning the drain pump compartment to aid cleaning and flush it out under running warm WARNING! water, to remove any traces of Disconnect the mains plug accumulated detergent. After from the mains socket.
- Page 31 ENGLISH 7. Turn the filter anti-clockwise to remove it. 2. Place a suitable bowl below the drain pump access to collect the water that flows out. 8. If it is necessary, remove fluff and 3. Open the chute downwards. Always objects from the filter recess.
- Page 32 2. Remove the inlet hose from the appliance by loosening the ring nut. 12. Close the pump cover. 3. Clean the valve filter on the back of the appliance with a toothbrush. When you drain the water with the...
-
Page 33: Troubleshooting
ENGLISH 1. Put 2 litres of water in the main wash 3. Put the two ends of the inlet hose in compartment of the detergent a container and let the water flow out dispenser. of the hose. 2. Start the programme to drain the 4. - Page 34 • Make sure that the sink spigot is not clogged. • Make sure that the drain hose has no kinks or bends. The appliance does • Make sure that the drain filter is not clogged. Clean the filter, if not drain the water.
- Page 35 ENGLISH Problem Possible solution • Make sure that the couplings of the water hoses are tight and there is not water leakages. There is water on the • Make sure that the water inlet hose and the drain hose have floor.
-
Page 36: Consumption Values
16. CONSUMPTION VALUES 16.1 Introduction This user manual reports two different tables in order to favour a gradual passage from a regulation to the other: • Regulation EU 1061/2010, valid up to 28th of February 2021, is related to the Energy Efficiency classes from A+++ to D, •... - Page 37 ENGLISH 16.3 According to Commission Regulation Eu 2019/2023 Eco 40-60 pro‐ Litres h:mm °C gramme Full load 1.200 3:50 1351 Half load 0.810 2:50 1351 Quarter load 0.500 2:50 1351 1) Maximum spin speed. Power consumption in different modes Off (W) Stand-by (W) Delay start (W) 0.30...
-
Page 38: Quick Guide
16.5 Common programmes These values are indicative only. Programme Litres h:mm °C Cottons 3.35 4:00 1400 95°C Cottons 2.05 3:40 1400 60°C Cottons 20° 0.45 3:00 1400 20°C Synthetics 0.85 2:10 1200 40°C Delicates 0.30 0:50 1200 30°C Wool/Silk 0.30... - Page 39 ENGLISH 2. Set the desired options (1) by means Push the On/Off button to turn the of the corresponding touch buttons. appliance off. To start the programme, touch the Start/Pause (2) button. 3. The appliance starts. At the end of the programme, remove the laundry.
- Page 40 Programmes Load Product description All fabrics, except woollens and very delicate 10 kg fabrics. Programme for spinning and draining Drain/Spin the water. 1) Washing programme. 2) Washing programme and waterproofing phase. 3) To reduce creasing, this cycle regulates the water temperature and performs a soft wash and spin phase.
- Page 44 www.aeg.com/shop...