Table of Contents
Advertisement
CAUTION:
READ THIS MANUAL CAREFULLY
BEFORE OPERATING YOUR NEW
®
CANNON
DOWNRIGGER. ®
RETAIN FOR FUTURE REFERENCE.
LAKE-TROLL
Terminator & Line Release
EASI-TROLL hS
EASI-TROLL /E
OWNER'S MANUAL
pg. 2
pg. 2-7
pg. 8
pg. 9
pg. 9
pg. 10
pg. 11
NOTE: Do not return your CANNON® Downrigger to
your retailer. Your retailer is not authorized to repair or
replace this unit. You may obtain service by:
•
calling CANNON® at 1-800-227-6433;
•
returning your downrigger to the Factory Service
Center;
•
sending or taking your downrigger to any
CANNON® Authorized Service Center on
enclosed list.
Please include proof of purchase, serial number
and purchase date for warranty service with any of
the above options.
Trolling Tips
Authorized Service Centers
pg. 12
pg. 13
pg. 13
pg. 14
pg. 15
pg. 15
See List
Advertisement
Table of Contents

Related Manuals for Cannon EASI-TROLL /E


Summary of Contents for Cannon EASI-TROLL /E
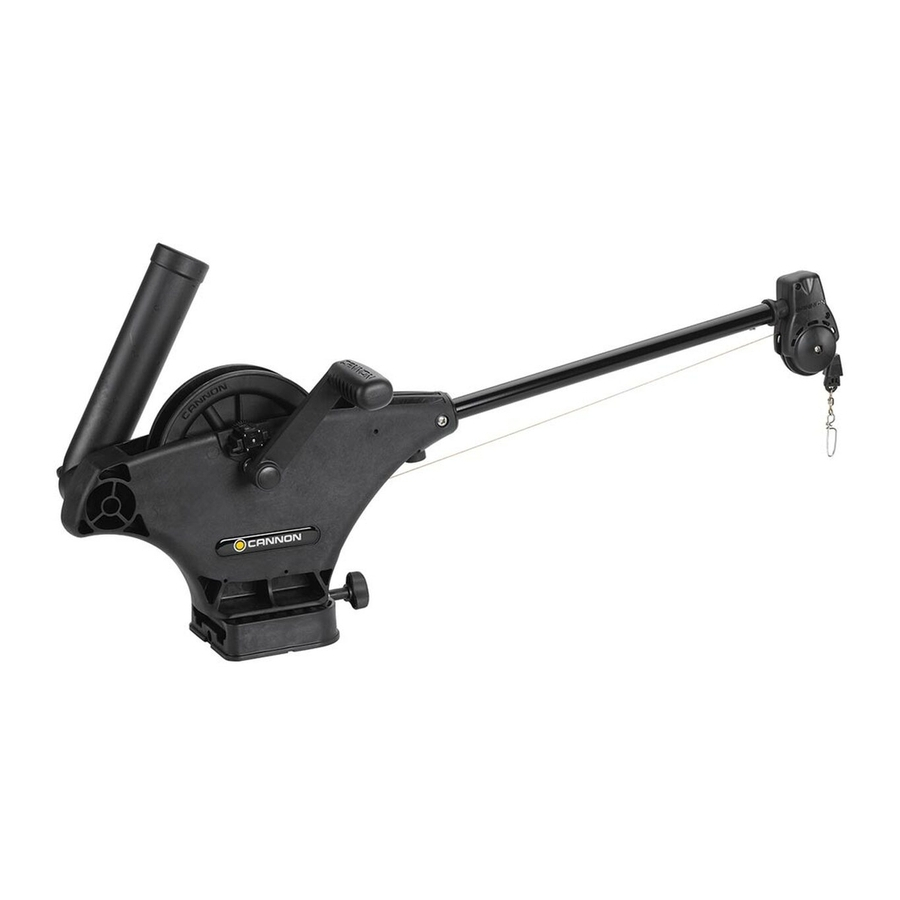
- Page 1 Terminator & Line Release Cannon Uni-Release Attaching the Rod Holder Operating Your Downrigger NOTE: Do not return your CANNON® Downrigger to your retailer. Your retailer is not authorized to repair or replace this unit. You may obtain service by: •...
- Page 2 Introduction to Controlled Depth Fishing Undoubtedly there are many fishermen familiar with the methods and use of controlled depth fishing. During the mid 1960's the state of Michigan introduced Pacific salmon into the Great lakes in an attempt to revitalize its sport fishing industry.
- Page 3 99% of the job. Due to the great variety of boats available, mounting your downrigger can be a dilemma. Having proper mounting accessories is essential. Cannon has a complete line of mounting accessories to conveniently mount your downriggers on any boat. Mounting Accessories...
- Page 4 Side Rail Mounting Side/Rail mounts can be mounted to a welded T-section. It can also be used at the two rail section butt joint. In both installations it is recommended to use a non-slip material, such as rubber or a thin wood sheet, between metal surfaces.
- Page 5 Installing the Base on Your Boat Decks up to 7/16" thick Where access to the underside of the deck is not available, the mounting base can be mounted using wellnuts. Use the base as a template to mark locations and drill four 1/2" holes. Mount the base using four 1/4"-20 x 1 1/2"...
- Page 6 Decks thinner than 1/4" Use a Cannon Deck Plate to prevent deflection and add stability to decks thinner than 1/4". Use the deck plate as a template to mark the hole locations. If access to the underside of the deck is not available, the deck plate can be mounted using screws and wellnuts.
- Page 7 Setting Up Your Downrigger Attaching the Boom The boom inserts into the downrigger frame. Be sure that the boom is held securely by seating it firmly against the shoulder inside the fame and fastening the boom locking screw (#8 X 1” self tapping) so that it engages the hole in the boom.
- Page 8 Attaching the Crank Handle Assembly Make sure the thrust bearing is sandwiched between its two races. The thrust bearing spring should be oriented where the narrow end is toward the bearing. Slide the bearing with races and spring over the ratchet shaft. Then, carefully thread the crank handle onto the shaft and continue turning the handle clockwise until the clutch is fully tightened...
- Page 9 CABLE IN CABLE IN CABLE Slide the cushion over the top of the terminator and give it a test pull. The cable is set to attach a Cannon Trolling Weight. Close Tension Open Adjust...
- Page 10 Attaching the Rod Holder The positive lock rod holder incorporates a locking disk that allows the rod holder to be aligned in 15 degree increments. Slide the rod holder tube into the clamp to the desired position within the recommended area (see below). Be sure the angled shoulders are facing up.
- Page 11 Operating Your Downrigger After mounting the Cannon downrigger to your boat, release some line from your rod and reel so that the lure is anywhere from 5 to 100 feet behind the boat, this is called drop back. Attach the fishing line firmly into the line release.
- Page 12 The farther the weight is behind you, the shallower the weight is. The following charts provide you with blowback information for three sizes of Cannon downrigger weights pulled at three different speeds with no lures attached and with no current. Current drag, water salinity and the use of non-Cannon products will affect your actual trolling depth.
-
Page 13: Adjusting The Depth Meter
Adjusting the Depth Meter The Cannon Depth Meter provides non-slip accuracy, plus easy resetting. To reset, just slide the meter away from the reel until the gears are disengaged. Spin meter gear to change setting. NOTE: Actual fishing depth may vary from depth shown on meter due to trolling speed and weight of cannon ball. - Page 14 Ten Good Trolling Tips 1) Test your lures over the boat side before sending them down and back. Do this to make sure the lure wiggles and wobbles properly without going belly up or wandering off. Some lures can be adjusted, fine tuned actually, to impart maximum action.
- Page 15 AFTER THE APPLICABLE WARRANTY PERIOD After the applicable warranty period, or, if one of the above exclusions applies, Cannon® products will be repaired for a charge of parts plus labor. All factory repairs, after the applicable warranty period, carry a 90-Day Limited Warranty, subject to the exclusions and limitations stated above.
- Page 16 To download product manuals or purchase Cannon products from an authorized dealer, please visit our web page at www.cannondownriggers.com Johnson Outdoors, Inc. / Cannon Division 121 Power Drive, Mankato, MN 56001 1-800-227-6433 © 2008 Johnson Outdoors, Inc. All rights reserved.