Table of Contents
Advertisement
Quick Links
INSTALLATION INSTRUCTIONS
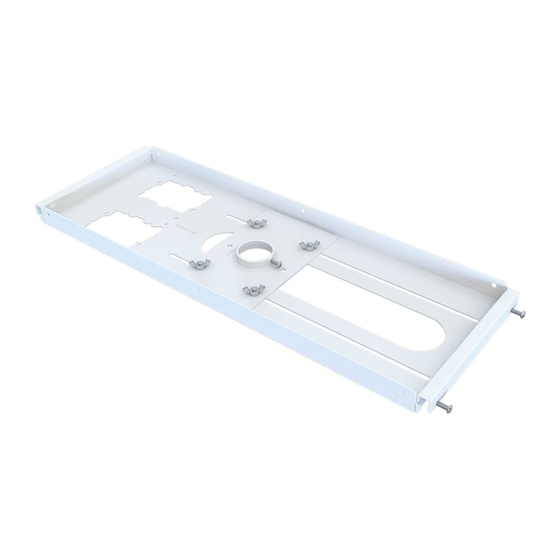
PP-FCTA
Suspended Ceiling Adapter
NORTH AMERICA
EUROPE
3130 East Miraloma Avenue
Swallow House,
Anaheim, CA 92806 USA
Shilton Industrial Estate,
USA and Canada
Shilton, Coventry, England CV79JY
Phone: 1.800.368.9700
Phone: +44 (0) 2476 614700
Fax: 1.800.832.4888
Fax: +44 (0) 2476 614710
Other Locations
Phone: (001).714.632.7100
Fax: (001).714.632.1044
9530-302-001-08
Advertisement
Table of Contents

Related Manuals for Premier Mounts PP-FCTA

Summary of Contents for Premier Mounts PP-FCTA
- Page 1 INSTALLATION INSTRUCTIONS PP-FCTA Suspended Ceiling Adapter NORTH AMERICA EUROPE 3130 East Miraloma Avenue Swallow House, Anaheim, CA 92806 USA Shilton Industrial Estate, USA and Canada Shilton, Coventry, England CV79JY Phone: 1.800.368.9700 Phone: +44 (0) 2476 614700 Fax: 1.800.832.4888 Fax: +44 (0) 2476 614710 Other Locations Phone: (001).714.632.7100...
-
Page 2: Table Of Contents
PROPER SAFETY EQUIPMENT AND TOOLS FOR THE ASSEMBLY PROCEDURE TO PREVENT PERSONAL INJURY. PREMIER MOUNTS DOES NOT WARRANT AGAINST DAMAGE CAUSED BY THE USE OF ANY PREMIER MOUNTS PRODUCT FOR PURPOSES OTHER THAN THOSE FOR WHICH IT WAS DESIGNED OR DAMAGE CAUSED BY... -
Page 3: Installation Tools
Hammer Hole Saw Parts List Make sure your Premier Mounts product has the following hardware and components before beginning installation. If there are parts missing and/or damaged, stop the installation and call Premier Mounts at (800) 368-9700. PP-FCTA Mount Hardware... -
Page 4: Features
Up to 9˝ of lateral shift Camera Screw Hole Use a 1/4”-20 screw to mount a camera alongside the projector Electrical Access Knockouts for electrical or signal junction boxes Page 4 Installation Instructions Visit the Premier Mounts website at http://www.mounts.com... -
Page 5: Pp-Fcta Installation
PP-FCTA Installation Introduction Read these instructions before installing your Premier Mounts product. Make sure you have all the parts and tools you need to safely complete the installation. Some of the steps in this installation may require two people to prevent personal injury and/or damage to the projector. -
Page 6: Camera Screw Installation (Optional)
The screw should go through both the upper and lower adapter plates. It will later be used to mount the camera (see page 11). Do not overtighten the mounting screw. Proceed to the ″Mounting the PP-FCTA″ section. 1/4”-20 x 2 3/4” pan Phillips head screw Wing nut 1/4”-20 optional holes... -
Page 7: Mounting The Pp-Fcta
Proceed to the ″Securing the Ceiling Plate″ section on page 8. 1/4”-20 optional holes M5 x 16mm Screws Ceiling Plate Assembly Upper Adapter Plate 3˝ 3˝ Mounting Hole 3˝ 3˝ T-Bar Frame Ceiling Tile Installation Instructions Page 7 Visit the Premier Mounts website at http://www.mounts.com... -
Page 8: Securing The Ceiling Plate
¯ Make all electrical connections at this time. Proceed to the ″Attaching the Turnbuckles″ section. Electrical Box Cut-out Electrical Box (Commercially Available) Page 8 Installation Instructions Visit the Premier Mounts website at http://www.mounts.com... -
Page 9: Ceiling Attachment
Recheck all hardware and installation for proper tightness and security. Proceed to the ″Securing the 1 ½˝ NPT to the Figure 2 PP-FCTA″ on page 11. Installation Instructions Page 9 Visit the Premier Mounts website at http://www.mounts.com... -
Page 10: Securing The 1 ½˝ Npt Pipe To The Pp-Fcta
Recheck all hardware and installation for proper tightness and security. Proceed to the ″Securing the 1 ½˝ NPT Pipe to the PP-FCTA″ Figure 2 section below. Securing the 1 ½˝ NPT Pipe to the PP-FCTA ... -
Page 11: Securing The Camera (Optional)
Use the screw’s wing nut to tighten the camera against the tile. Technical Specifications All measurements are in inches. 1.18 1.18 (1.00) 23.36 4.02 8.43 4.21 11.37 14.87 24.75 8.43 1.00 1.18 3.25 24.75 6.50 Installation Instructions Page 11 Visit the Premier Mounts website at http://www.mounts.com... -
Page 12: Disclaimer
What Premier Mounts Will Do At the sole option of Premier Mounts, Premier Mounts will repair or replace any product or product part that is defective. If Premier Mounts chooses to replace a defective product or part, a replacement product or part will be shipped to you at no charge, but you must pay any labor costs. - Page 13 INSTALLATION INSTRUCTIONS SPI-PRO SpiroLock™ Universal Projector Mount For 1½” NPT NORTH AMERICA EUROPE 3130 East Miraloma Avenue Swallow House, Anaheim, CA 92806 USA Shilton Industrial Estate, USA and Canada Shilton, Coventry, England CV79JY Phone: 1.800.368.9700 Phone: +44 (0) 2476 614700 Fax: 1.800.832.4888 Fax: +44 (0) 2476 614710 Other Locations...
- Page 14 PROPER SAFETY EQUIPMENT AND TOOLS FOR THE ASSEMBLY PROCEDURE TO PREVENT PERSONAL INJURY. PREMIER MOUNTS DOES NOT WARRANT AGAINST DAMAGE CAUSED BY THE USE OF ANY PREMIER MOUNTS PRODUCT FOR PURPOSES OTHER THAN THOSE FOR WHICH IT WAS DESIGNED OR DAMAGE CAUSED BY...
-
Page 15: Installation Tools
Ladder Parts List Make sure your Premier Mounts product has the following hardware and components before beginning installation. If there are parts missing and/or damaged, stop the installation and call Premier Mounts at (800) 368-9700. SpiroLock™ For 1½” NPT Hardware SpiroLock™... -
Page 16: Features
Combined with the numerous Adjustable Leveling Barrels projector plate mounting slots, the You can quickly level the mounting legs mounting legs allow for multiple without any specialized tools. mount configurations. Page 4 Installation Instructions Visit the Premier Mounts website at http://www.mounts.com... -
Page 17: Installing The Spirolock
See the Premier Mounts Website at www.mounts.com for compatible ceiling adapters. Read these installation instructions thoroughly before attempting to install the Premier Mounts product. Familiarize yourself with the contents of the package and make sure you have all the parts and tools you need to safely complete the installation. -
Page 18: Wood Stud Installation
‘wedging’ to take place, thereby reducing the likelihood of the material being split. It also reduces the possibility of the screw head getting sheared off by torque. Page 6 Installation Instructions Visit the Premier Mounts website at http://www.mounts.com... - Page 19 Do not overtighten the Lock-It™ screws. ¯ Route any cables up through the SpiroLock™ and into the ceiling structure. M6 x 6mm Lock-It™ Proceed to “Attaching the Projector Plate” on Screws page 11. Installation Instructions Page 7 Visit the Premier Mounts website at http://www.mounts.com...
-
Page 20: Solid Ceiling Installation
Remove the nut and washer from the wedge anchors. ¯ Insert a wedge anchor into each hole. If necessary, use a hammer to lightly tap each wedge anchor into place. Page 8 Installation Instructions Visit the Premier Mounts website at http://www.mounts.com... - Page 21 Do not overtighten the Lock-It™ screws. ¯ Route any cables up through the SpiroLock™ and into the ceiling structure. M6 x 6mm Lock-It™ Proceed to “Attaching the Projector Plate” on Screws page 11. Installation Instructions Page 9 Visit the Premier Mounts website at http://www.mounts.com...
-
Page 22: Attaching To A 1-1/2" Npt Pipe
See the Premier Mounts Website at www.mounts.com for compatible ceiling adapters. 1-1/2” NPT Pipe Secure a 1-1/2” NPT pipe or Premier Mounts ceiling adapter into the ceiling. This step does not require the use of the Ceiling Plate or close nipple. ®... -
Page 23: Attaching The Projector Plate
The number and placement of mounting points on projectors varies between projector manufacturers. Refer to the projector’s technical specifications for the number and location of the mounting points. Installation Instructions Page 11 Visit the Premier Mounts website at http://www.mounts.com... - Page 24 Place the SpiroLock™ Projector Plate on top of the mounting legs with the center of the plate as close as possible to the projector’s center of gravity. Front-to-Back Center of Gravity Page 12 Installation Instructions Visit the Premier Mounts website at http://www.mounts.com...
- Page 25 Do not overtighten the M6 x 12mm screw. ® Insert one (1) barrel cap into the end of each leveling barrel. Proceed to “Attaching the Projector to the Mount” on page 14. Installation Instructions Page 13 Visit the Premier Mounts website at http://www.mounts.com...
-
Page 26: Single Mounting Point Installation
“click”. If the locking tab is in the raised position or you did not hear a “click”, lower the projector and return to Step 1 Page 14 Installation Instructions Visit the Premier Mounts website at http://www.mounts.com... -
Page 27: Alignment & Fine-Tuning
° Tighten the two set screws in the spindle to lock in your adjustments. Do not overtighten the set screws. M10 x 10mm Set Screw Installation Instructions Page 15 Visit the Premier Mounts website at http://www.mounts.com... -
Page 28: Removing The Projector
Use both hands to rotate the projector plate as shown to separate it from the SpiroLock™ collar assembly. ± Place the projector on a soft, flat surface and disassemble the mounting legs from the projector, if neccessary. Page 16 Installation Instructions Visit the Premier Mounts website at http://www.mounts.com... -
Page 29: Installing The Lock-It™ Security Barrel
Optional security configurations (not supplied) include: - PCB-CSL1 Clockwise - Padlock (Combination or Keyed) Technical Specifications All measurements are in inches. Ø .328 17.25 14.75 6.86 1.50 7.49 6.14 1.70 Installation Instructions Page 17 Visit the Premier Mounts website at http://www.mounts.com... -
Page 30: Warranty
What Premier Mounts Will Do At the sole option of Premier Mounts, Premier Mounts will repair or replace any product or product part that is defective. If Premier Mounts chooses to replace a defective product or part, a replacement product or part will be shipped to you at no charge, but you must pay any labor costs.