Table of Contents
Advertisement
Quick Links
CONTENTS
CONTENTS
1. SAFETY INSTRUCTIONS . . . . . . . . . . . . . . . . . . . . . . . . . . . . . . . . . . . . . 3
2. COMPONENT IDENTIFICATION . . . . . . . . . . . . . . . . . . . . . . . . . . . . . . . 7
3. CONTROLS . . . . . . . . . . . . . . . . . . . . . . . . . . . . . . . . . . . . . . . . . . . . . . . . 8
4. PRE-OPERATION CHECKS . . . . . . . . . . . . . . . . . . . . . . . . . . . . . . . . . . 12
5. OPERATION . . . . . . . . . . . . . . . . . . . . . . . . . . . . . . . . . . . . . . . . . . . . . . 23
6. TRANSPORTING/STORAGE . . . . . . . . . . . . . . . . . . . . . . . . . . . . . . . . . 35
7. MAINTENANCE . . . . . . . . . . . . . . . . . . . . . . . . . . . . . . . . . . . . . . . . . . . 41
8. SET-UP . . . . . . . . . . . . . . . . . . . . . . . . . . . . . . . . . . . . . . . . . . . . . . . . . . 60
9. TROUBLESHOOTING . . . . . . . . . . . . . . . . . . . . . . . . . . . . . . . . . . . . . . 63
10. SPECIFICATIONS . . . . . . . . . . . . . . . . . . . . . . . . . . . . . . . . . . . . . . . . . 65
Explanation of models and types used in this manual:
Model
Type
HXE
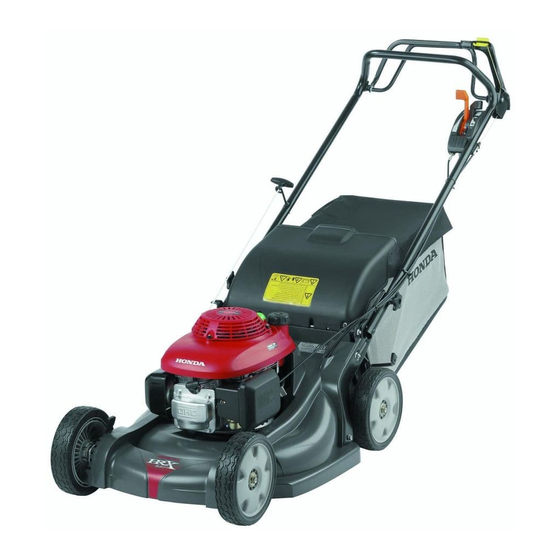
HRX537C
HME
2
Description
Honda rotary mower, grass bag, 530 mm mower
deck, 4.8 KW, clip director, hydrostatic transmission,
blade-brake clutch, European market
Electric start
E
Advertisement
Table of Contents

Related Manuals for Honda HRX537C


Summary of Contents for Honda HRX537C
-
Page 1: Table Of Contents
10. SPECIFICATIONS ......... 65 Explanation of models and types used in this manual: Model Type Description Honda rotary mower, grass bag, 530 mm mower deck, 4.8 KW, clip director, hydrostatic transmission, HRX537C blade-brake clutch, European market Electric start... - Page 2 The warranty policy is a separate document provided by your dealer. Honda Power Equipment Mfg., Inc. reserves the right to make changes at any time without notice and without incurring any obligation. No part of this publication may be reproduced without written permission.
-
Page 3: Safety Instructions
1. SAFETY INSTRUCTIONS WARNING 1. SAFETY INSTRUCTIONS – To ensure safe operation – • Honda lawn mowers are designed to give safe and dependable service if operated according to instructions. Read and understand the Owner’s Manual before operating the mower. Failure to do so could result in personal injury or equipment damage. - Page 4 1. SAFETY INSTRUCTIONS • Replace faulty mufflers. • Before using, always visually inspect to see that the blade(s), blade bolt(s) and mower housing are not worn or damaged. Replace worn or damaged blade(s) and bolt(s) in sets to preserve balance. •...
- Page 5 1. SAFETY INSTRUCTIONS • Do not start the engine when standing in front of the discharge chute opening. • Do not put hands or feet near or under rotating parts. Keep clear of the discharge opening at all times. • Never pick up or carry a lawn mower while the engine is running. •...
- Page 6 2. Conformity mark, according to the 8. Model. EEC/89/392 modified Directive. 9. Manufacturer’s name and address. 3. Nominal power in kilowatt. 4. Recommended engine speed in rpm. HONDA POWER EQUIPMENT MFG., INC. P.O. BOX 37, HONDA DRIVE, NC HWY. 119 SWEPSONVILLE, N.C. 27359 U.S.A.
-
Page 7: Component Identification
2. COMPONENT IDENTIFICATION 2. COMPONENT IDENTIFICATION A (LABEL) B (LABEL) 1. Blade control button 13. Shift lever 2. Blade control lever 14. Throttle lever 3. Drive clutch lever 15. Handlebar locking knob 4. Discharge guard 16. Fuel valve 5. Fuel tank cap 17. -
Page 8: Controls
3. CONTROLS 3. CONTROLS Fuel Valve The fuel valve [1] opens and closes the connection between the fuel tank and the carburetor. Throttle Lever The throttle lever [1] controls the following functions: HXE TYPE HME TYPE CHOKE – – – – – – – – For starting a cold engine. FAST –... - Page 9 3. CONTROLS Engine Switch [1] (HME type) Stops the engine. Running position (the key switch must be in the ON position to use the recoil starter). START Operates the electric starter. Blade Control Lever The button [1] and blade control lever [2] start and stop blade rotation.
- Page 10 3. CONTROLS Drive Clutch Lever The drive clutch lever [1] engages and disengages the transmission. Shift Lever The shift lever [1] selects and controls the mower’s drive speed. With the shift lever [1] all the way back [A] and the drive clutch lever engaged, the mower will move slowly or not at all.
- Page 11 3. CONTROLS Cutting Height Adjustment Levers 20 mm There are seven adjustment settings. 32 mm The cutting height figures are 46 mm 62 mm approximate. The actual height of cut 75 mm grass will vary with lawn and soil 88 mm conditions.
-
Page 12: Pre-Operation Checks
4. PRE-OPERATION CHECKS 4. PRE-OPERATION CHECKS CHECK YOUR LAWN For your safety and for the safety of others, always inspect the area before mowing. Objects Anything which can be picked up by the blade(s) and thrown is a potential hazard to you and others. Look for things like stones, sticks, bones, and wire. Remove them from the mowing area. - Page 13 When a blade needs sharpening or replacement take the lawn mower to an authorized Honda dealer. Or, if you have a torque wrench, you can remove and install the blades yourself (pages 53–54).
- Page 14 4. PRE-OPERATION CHECKS Engine Oil Level Check the engine oil level with the engine stopped and the mower on a level surface. Use 4-stroke motor oil that meets or exceeds the requirements for API service classification SH or equivalent. Always check the API SERVICE label on the oil container to be sure it includes the letters SH or equivalent.
- Page 15 4. PRE-OPERATION CHECKS Fuel Fuel tank capacity: 1.1 Refuel in a well-ventilated area before starting the engine. If the engine has been running, allow it to cool. Never refuel the mower inside a building where gasoline fumes may reach flames or sparks.
- Page 16 4. PRE-OPERATION CHECKS Occasionally you may hear light “spark knock” or “pinging” (metallic rapping noise) while operating under heavy loads. This is no cause for concern. If spark knock or pinging occurs at a steady engine speed, under normal load, change brands of gasoline.
- Page 17 4. PRE-OPERATION CHECKS Fuel system damage or performance problems resulting from the use of an oxygenated fuel containing more than the percentages of oxygenates mentioned above are not covered under warranty. Air Cleaner Inspection Remove cover [1]. Make sure the filter [2] is clean and in good condition. A dirty air filter will restrict air flow to the carburetor, reducing engine performance.
- Page 18 4. PRE-OPERATION CHECKS Grass Bag A lawn mower works like a vacuum cleaner; it blows air through the bag, which traps the grass clippings. Always empty the grass bag before it becomes filled to the limit of its capacity. Bagging performance will diminish after the bag becomes about 90% filled.
- Page 19 4. PRE-OPERATION CHECKS Cutting Height Check the mower deck cutting height settings, and be sure that all four adjustment levers [1] are set to the same cutting height position. To adjust cutting height, pull each adjustment lever [1] toward the wheel, and move it into another notch.
- Page 20 4. PRE-OPERATION CHECKS Clip Direction Clip Director Knob Adjustment Adjust the clip director knob [1] in any one of the ten positions to achieve the desired mowing results. To adjust the clip director knob, pull the knob downward and towards the rear of the mower.
- Page 21 4. PRE-OPERATION CHECKS Sliding Door Position The sliding door [2] can be positioned to produce different mowing results. If the preferred sliding door position is unknown, install a grass bag and begin mowing with the clip director knob [1] all the way to the BAG position. Check the appearance of the lawn.
- Page 22 4. PRE-OPERATION CHECKS Rear Discharge To discharge clippings to the rear, remove the grass bag and position the clip director knob [1] in the BAG range. Maximum rear discharge will occur when the clip director knob is all the way to the left (BAG) position. As the clip director knob is moved toward the right (MULCH) position, less grass will be discharged though the rear discharge guard.
-
Page 23: Operation
5. OPERATION 5. OPERATION MOWING PRECAUTIONS Before operating the mower for the first time, please review chapters 1 and 2. Even if you have operated other mowers, take the time to become familiar with how this mower works and practice in a safe area until you build up your skills. - Page 24 5. OPERATION HXE type: Pull the starter grip [1] lightly until you feel resistance, then pull briskly. Return the starter grip gently.. To keep the blade(s) from turning and to prevent the mower from moving forward, always release the blade control lever [2] and drive clutch lever [3] when you pull the starter...
- Page 25 5. OPERATION Manual start Turn the engine switch ON. The engine switch must be in the ON position to start the engine with the recoil starter. Place your foot on the mower deck step. Pull the starter grip lightly until you feel resistance, then pull briskly.
- Page 26 Operation at altitudes below 1,800 meters with a modified carburetor may cause the engine to overheat and result in serious engine damage. For use at low altitudes, have your authorized Honda dealer return the carburetor to original factory specifications.
- Page 27 5. OPERATION OPERATING THE CONTROLS FOR MOWING Throttle Lever For best cut quality, always mow with the throttle lever [1] in the fast position [2]. When the blade rotates at the preset fast speed, it creates a strong fan action that lifts and cuts grass more efficiently.
- Page 28 5. OPERATION Drive Clutch Lever Push the drive clutch lever [1] forward to propel the mower forward. For self-propelled mowing, press the yellow button [2] on top of the blade control lever [3], push the blade control lever forward to the handlebar, then push the drive clutch lever [1] forward.
- Page 29 5. OPERATION STOPPING THE ENGINE 1. Release the drive clutch lever [1] and blade control lever [2]. 2. HXE type: Move the throttle lever [1] to the STOP position [2] to stop the engine. HME type: Turn the key switch to the OFF [3] position. STOP HXE TYPE HME TYPE...
- Page 30 5. OPERATION SAFE MOWING PRACTICES For your safety, keep all four wheels on the ground, and be careful to avoid losing your footing and your control of the mower. Keep a firm grip on the handlebar, and walk, never run, with the mower. Be very careful when mowing uneven or rough ground.
- Page 31 5. OPERATION Obstacles Use the side of the mower to cut close to large obstacles, such as fences or walls. Release the drive clutch lever to disengage the drive when mowing around trees and other obstacles. Push the mower around obstacles for better directional control.
- Page 32 5. OPERATION MOWING TIPS When to Mow Most grasses should be mowed when they have grown 1/2 to 1 inch above their recommended height. More frequent mowing is required for mulching than for bagging. For best results, you may need to mow the lawn twice a week during the growing season.
- Page 33 5. OPERATION Blade Sharpness A sharp blade cuts cleanly. A dull blade tears the grass, leaving shredded ends that turn brown. When your blade doesn't cut cleanly anymore, have it sharpened or replaced. Dry Grass If the ground is too dry, mowing will stir up a lot of dust. Besides being unpleasant to work in, too much dust will clog the carburetor air filter.
- Page 34 5. OPERATION Mowing Patterns Your Honda mower will work most efficiently if you use the following mowing patterns as much as possible. Mower deck and equipment design, and the direction in which the blade rotates, cause these mowing patterns to give the best results.
-
Page 35: Transporting/Storage
6. TRANSPORTING/STORAGE 6. TRANSPORTING/STORAGE TRANSPORTING Before Loading If the engine has been running, allow it to cool for at least 15 minutes before loading the mower on the transport vehicle. A hot engine and exhaust system can burn you and can ignite some materials. Turn the fuel valve to the OFF position. - Page 36 6. TRANSPORTING/STORAGE Loading and Unloading Position the mower so all four wheels are on the bed of the transport vehicle. Tie the mower down with rope or straps, and block the wheels. Keep the tie- down rope or straps away from the controls, adjustment levers, cables, and the carburetor.
- Page 37 6. TRANSPORTING/STORAGE Engine Wash the engine by hand, and be careful to prevent water from entering the air cleaner. NOTICE • Using a garden hose or pressure washing equipment can force water into the air cleaner. Water in the air cleaner will soak the filters and can enter the carburetor or engine cylinder, causing damage.
- Page 38 6. TRANSPORTING/STORAGE Charging the Battery (HME type) To assure maximum reliability, the battery should be recharged (boost charged) both before and after prolonged storage. A plug-in charger is provided to recharge the battery (see page 57). NOTICE Do not charge the battery for more than 24 hours or the battery may be damaged. Disconnect the battery charger from the battery before storing the lawn mower.
- Page 39 6. TRANSPORTING/STORAGE Draining the Fuel Tank and Carburetor: WARNING Gasoline is highly flammable and explosive. You can be burned or seriously injured when handling fuel. • Stop the engine and keep heat, sparks, and flame away. • Handle fuel only outdoors. •...
- Page 40 6. TRANSPORTING/STORAGE PLACING IN STORAGE If your mower will be stored with gasoline in the fuel tank and carburetor, it is important to reduce the hazard of gasoline vapor ignition. Select a well- ventilated storage area away from any appliance that operates with a flame, such as a furnace, water heater, or clothes dryer.
-
Page 41: Maintenance
Other service tasks that are more difficult, or require special tools, are best handled by professionals and are normally performed by a Honda technician or other qualified mechanic. The maintenance schedule applies to normal operating conditions. If you operate your mower under unusual conditions, consult an authorized Honda dealer for recommendations applicable to your individual needs and use. - Page 42 Keep cigarettes, sparks, and flames away from all fuel-related parts. Remember that your Honda dealer knows your mower best and is fully equipped to maintain and repair it. To ensure the best quality and reliability, use only new, genuine Honda parts or their equivalents for repair and replacement.
- Page 43 (3) (1) Service more frequently when used in dusty areas. (2) These items should be serviced by an authorized Honda dealer, unless you have the proper tools and are mechanically proficient. Refer to the Honda shop manual for service procedures.
- Page 44 7. MAINTENANCE ENGINE MAINTENANCE Engine Oil Change Drain the oil while the engine is warm. Warm oil drains quickly and completely. 1. Put the throttle lever in the STOP position and turn the fuel valve OFF. This will reduce the possibility of fuel leakage (page 8). 2.
- Page 45 7. MAINTENANCE 5. After changing the engine oil, and before starting the engine, check the oil level with the mower on a level surface: a. Remove the filler cap/dipstick [1]. b. Wipe the dipstick [1] clean. c. Insert and remove the dipstick [1] without screwing it into the filler neck. Check the oil level shown on the dipstick.
- Page 46 7. MAINTENANCE Air Cleaner Service A dirty air filter will restrict air flow to the carburetor, reducing engine performance. If you operate the mower in very dusty areas, clean the air filter more often than specified in the MAINTENANCE SCHEDULE. NOTICE Operating the engine without an air filter, or with a damaged filter, will allow dirt to enter the engine, causing rapid engine wear.
- Page 47 7. MAINTENANCE Spark Plug Service Recommended spark plugs: NGK - BPR6ES DENSO - W20EPR-U The spark plugs listed above have an internal resistor. Resistor spark plugs reduce interference with radio and TV reception. NOTICE Incorrect spark plugs can cause engine damage. For good performance, the spark plug [1] must be properly gapped and free of deposits.
- Page 48 7. MAINTENANCE 3. Inspect the spark plug. Replace it if the electrodes are worn, or if the 0.7 ~ 0.8 mm insulator is cracked or chipped. Clean the spark plug with a wire brush if you are going to reuse it. 4.
- Page 49 7. MAINTENANCE Carburetor Adjustments 1. Start the engine outdoors, and allow it to warm up to normal operating temperature. 2. Set the throttle lever in the slow position. 3. Turn the pilot screw [1] in or out to the setting that produces the highest idle rpm.
- Page 50 Check that the blade starts when you push the lever forward and stops quickly when you release the lever. If the blade does not start or stop as it should, with correct cable adjustment, take the mower to an authorized Honda dealer for repair.
- Page 51 7. MAINTENANCE Drive Clutch Cable Adjustment 1. With the engine stopped, position the control cable bands [1] as shown. 2. Pull the shift lever all the way back to the stop position. 3. Start the engine and move the throttle lever to the FAST position.
- Page 52 7. MAINTENANCE THROTTLE CABLE ADJUSTMENT 1. Move the throttle lever [1] to the fast position [2]. 2. Remove air cleaner cover. 3. Measure clearance between control choke arm [3] and control lever [4]. Clearance should be 0 ~ 1 mm. If clearance is correct, no adjustment is necessary.
- Page 53 BLADE SHARPENING: To avoid weakening the blade(s), or causing imbalance or poor cutting, the blade(s) should be sharpened by trained staff at an authorized Honda dealer. BLADE REPLACEMENT: Use genuine Honda replacement blades or their equivalent. Blade Removal 1. HXE: Put the throttle lever in the STOP position.
- Page 54 [1] from turning. Blade bolt torque: 49 ~ 59 N·m If you do not have a torque wrench, have an authorized Honda dealer tighten the blade bolts before you use the mower. If the blade bolts are overtightened, they could break.
- Page 55 Wash the bag with a garden hose, and allow it to dry completely before use; a wet bag will clog quickly. Grass Bag Replacement Replace a worn or damaged bag with a Honda replacement bag or its equivalent. Bag Removal 1.
- Page 56 7. MAINTENANCE SPARK ARRESTER SERVICE The spark arrester must be serviced every 100 hours to keep it functioning as designed. 1. Allow the engine to cool, then remove the three bolts [1] from the muffler shield [2], using a 10 mm socket wrench. 2.
- Page 57 7. MAINTENANCE CHARGING THE BATTERY (HME TYPE) The lawn mower does not have an internal charging system. A plug-in charger is provided to recharge the battery. Use the plug-in charger after prolonged storage or anytime you notice a decrease in starter motor speed. To assure maximum reliability, the battery should be recharged (boost charged) before prolonged storage and charged again at the beginning of the mowing season.
- Page 58 7. MAINTENANCE 3. Connect the battery connector [3] to the charger [6] supplied with the mower. NOTICE Do not attempt to charge the battery with any charger other than the one supplied with the mower. Use of a charger other than the one supplied may result in damage to the electrical system or fire.
- Page 59 Never use a fuse with a rating other than 40 amperes. Serious damage to the electrical system or a fire can result. If a frequent fuse failure occurs, it usually indicates a short circuit or an overload in the electrical system. Take the mower to an authorized Honda servicing dealer for repair.
-
Page 60: Set-Up
8. SET-UP 8. SET-UP UNPACKING Remove all the cardboard from around the handlebar. HANDLEBAR SETUP Loosen the two knobs [1] on the lower handlebar enough to raise the handlebar into [1](2) the mowing position. Select a desired handlebar height adjustment position and tighten the knobs securely. - Page 61 8. SET-UP GRASS BAG ASSEMBLY Slide the grass bag frame [2] into the grass bag [3] and install the plastic clips [4] as shown. Lift the the discharge guard and install the grass bag.
- Page 62 8. SET-UP ENGINE OIL The mower is shipped WITHOUT OIL in the engine. Add enough SAE 10W-30 API service category SH or SJ oil to bring the oil level between the upper limit [1] and lower limit marks [2] on the dipstick as shown. Do not overfill engine with oil.
-
Page 63: Troubleshooting
Start engine with throttle lever in fast position (p. 26). 4. Take mower to a Fuel filter clogged, Replace or repair faulty Honda dealer, or refer carburetor malfunction, components as necessary. to shop manual. ignition malfunction, valves stuck, etc. - Page 64 9. TROUBLESHOOTING Loss of Power Possible Cause Correction 6. Take mower to a Fuel filter clogged, Replace or repair faulty Honda dealer, or refer carburetor malfunction, components. to shop manual. ignition malfunction, valves stuck, etc. VIBRATION PROBLEMS Excessive Vibration Possible Cause Correction 1.
-
Page 65: Specifications
10. SPECIFICATIONS 10. SPECIFICATIONS MODEL HRX537C TYPE DESCRIPTION CODE MAGA GENERAL Length H, M, L, F 1700 mm, 1770 mm, 1825 mm, 1100 mm (folded) [cut height adj. @ 32 mm] Handlebar height H, M, L, F 1,105 mm, 1015 mm, 925 mm, 441 mm (folded) [cut height adj. - Page 66 10. SPECIFICATIONS MODEL HRX537C TYPE DESCRIPTION CODE MAGA ENGINE Model GCV190 Type 4-stroke, single cylinder, vertical shaft, OHC Displacement 187 cc Bore and stroke 69 x 50 mm Cooling Forced air Lubrication Splash and spray Compression ratio 8.5:1 Maximum power 4.8 kW @ 3,600 rpm...
- Page 67 Rotary Mower HRX537CHXE HRX537CHME OWNER'S MANUAL MANUEL DE L'UTILISATEUR BEDIENUNGSANLEITUNG MANUAL DE EXPLICACIONES GEBRUIKSAANWIJZING MANUALE DELL'UTENT POM53750-B IPC 20000.2005.04 39VH7H11 Printed on 00X39-VH7-H110 Recycled Paper PRINTED IN U.S.A. © 2004-2005 American Honda Motor Co., Inc.—All Rights Reserved...