Honda HRX217VKA Owner's Manual
Hide thumbs
Also See for HRX217VKA:
- Owner's manual (24 pages) ,
- Setting up (2 pages) ,
- Owner's manual (24 pages)
Table of Contents
Advertisement
QUICK FIND
Air Filter..................................................
Blades ....................................................
Contact Honda .......................................
Cutting Height ..........................................
CONTENTS
FOR YOUR SAFETY ..............................
PARTS AND CONTROLS ......................
INITIAL MOWER SETUP........................
Adjust the Handlebar...........................
Assemble the Grass Bag.....................
Check Your Mower..............................
Check Your Mowing Area....................
Clip Director®......................................
Cutting Height Adjustment...................
Check the Oil Level .............................
Add Fuel ..............................................
Safe Mowing Practices........................
Operating the Controls ........................
Starting the Engine..............................
Stopping the Engine ............................
Maintenance Safety.............................
For more information about your
lawn mower, visit
www.powerequipment.honda.com
and click on FAQs or scan the QR
code shown here.
© 2013 American Honda Motor Co., Inc.
All Rights Reserved
OWNER'S MANUAL
12
Find a Dealer..........................................
11
Fuel ..........................................................
20
Fuel System Maintenance......................
6
Maintenance Schedule...........................
Maintenance Schedule......................
2
Blade Inspection................................
3
Blade Replacement ...........................
3
Oil Change ........................................
3
Air Filter .............................................
4
Spark Plug.........................................
Spark Arrester (optional part) ............
4
Blade Control Check .........................
4
5
TRANSPORTING .................................
6
6
7
Fuel ...................................................
Oil ......................................................
Cleaning ............................................
7
Storage Location ...............................
8
Handlebar..........................................
9
Removing From Storage ...................
9
Engine Will Not Start .........................
9
QUESTIONS?
Contact your Honda dealer.
There is a dealer locator at
www.powerequipment.honda.com
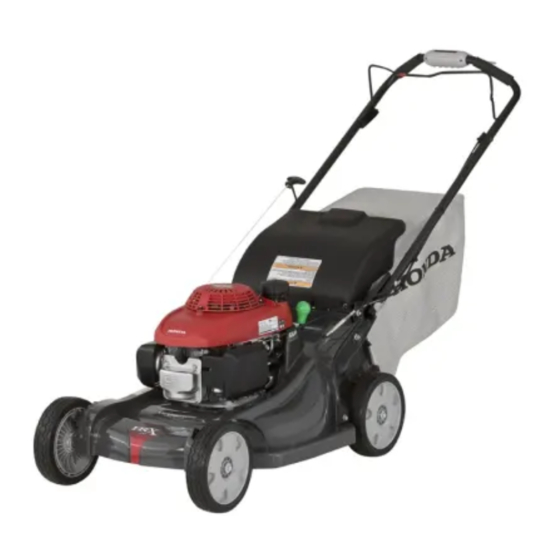
HRX217VKA
LAWN MOWER
Before operating the mower for the first time, please read this
Owner's Manual. Even if you have operated other mowers,
take time to become familiar with how this mower works and
practice in a safe area until you build up your skills.
20
Oil
Change..............................................12
7
Check.........................................6
19
Spark Plug
..............................................13
10
Coverage.................................21
10
Loss of Power.......................................
11
Vibration ...............................................
11
Mowing and Bagging Problems............
12
12
Serial Number Locations ......................
13
High Altitude Operation ........................
13
Emission Control System .....................
14
Air Index ...............................................
14
Specifications .......................................
14
FUEL SYSTEM MAINTENANCE.............
14
14
Dealer Locator Information...................
15
How to Contact Honda .........................
15
Honda Publications ..............................
15
15
EMISSION SYSTEM WARRANTY ..........
PRODUCT REGISTRATION ...................
16
16
16
16
17
17
17
18
18
19
20
20
20
20
21
22
23
Advertisement
Table of Contents

Related Manuals for Honda HRX217VKA


Summary of Contents for Honda HRX217VKA
-
Page 1: Table Of Contents
OWNER’S MANUAL HRX217VKA LAWN MOWER Before operating the mower for the first time, please read this Owner’s Manual. Even if you have operated other mowers, take time to become familiar with how this mower works and practice in a safe area until you build up your skills. -
Page 2: For Your Safety
When your mower needs scheduled maintenance, keep in mind that The safety of your children is very important to Honda. Lawn mowers Honda Power Equipment servicing dealership personnel are specially are tools, not toys. As with any equipment, bad judgments can result trained in servicing Honda lawn mowers and are supported by the in serious injuries. -
Page 3: Parts And Controls
PARTS AND CONTROLS INITIAL MOWER SETUP BLADE CONTROL List of Parts (P. 8) LEVER With help of an assistant, carefully remove the mower and loose parts REAR from the carton and compare the loose parts against the following list. DISCHARGE Contact the authorized Honda dealer from whom you purchased the (P. -
Page 4: Assemble The Grass Bag
Add Engine Oil Before Using Your Lawn Mower The mower is shipped WITHOUT All mower operators must read the following sections: OIL in the engine. Remove the oil • FOR YOUR SAFETY (page filler cap/dipstick and add the entire contents of the included •... -
Page 5: Clip Director
® Clip Director FULL BAGGING OR FULL MULCHING The Clip Director can be adjusted to any one of the ten positions to REAR DISCHARGE achieve the desired mowing results (bag, bag and mulch, or mulch). KNOB (BAG POSITION) KNOB (MULCH POSITION) To adjust the Clip Director knob, pull the knob downward and towards the rear of the mower. -
Page 6: Cutting Height
Grass Bag To adjust cutting height, ADJUSTMENT LEVERS pull each adjustment lever A lawn mower works like a vacuum cleaner; it blows air through the toward the wheel, and bag fabric, which traps the grass clippings. Always empty the grass move it into another notch. -
Page 7: Add Fuel
Add Fuel OPERATION This engine is certified to operate on regular gasoline with a pump octane rating of 86 or higher. For your safety, avoid starting or operating the engine in an enclosed Never use stale or contaminated gasoline or an oil/gasoline mixture. area, such as a garage. -
Page 8: Operating The Controls
Operating the Controls Refuel With Care Gasoline is extremely flammable and gasoline vapor can explode. Blade Control Lever Refuel only outdoors, in a well-ventilated area, with the engine OFF. Never smoke near gasoline, and keep other flames and sparks away. The blade control lever must be BLADE CONTROL LEVER Always store gasoline in an approved container. -
Page 9: Starting The Engine
Starting the Engine SERVICING YOUR MOWER The blades turn when you start the engine. Start the engine in a clear or mowed area where the blades can turn freely. Proper maintenance is essential for safe, economical, and 1. Turn the fuel valve to the ON position (page trouble-free operation. -
Page 10: Maintenance Schedule
Maintenance Schedule Before 5 hours First 50 hours 100 hours 150 hours each use of use 25 hours of use of use of use Item Action See page or first of use or every or every or every month 6 months year two years Rear shield... -
Page 11: Blades
Blade Inspection Blade Replacement 1. Turn the fuel valve OFF (page 1. Remove the two blade bolts with a 14 mm (6 point) socket wrench. Use a wooden block to prevent the blades from turning 2. Disconnect the spark plug cap from the spark plug (page 13). -
Page 12: Air Filter
Engine Oil Recommendations BLADES Oil is a major factor affecting performance and service life. Use 4-stroke automotive detergent oil. Always change the oil in accordance with the MAINTENANCE SCHEDULE (page 10). Recommended oil for general use: SAE 10W-30 Other viscosities shown in the chart may be used when the average temperature in your area is within the 10W-30... -
Page 13: Spark Plug
Spark Plug Spark Arrester (optional part) Replace the spark plug every 2 years or after 150 hours of use. The spark arrester must be serviced every 100 hours to keep it functioning as designed. Recommended Spark Plug: NGK - BPR5ES Your lawn mower engine is not factory-equipped with a spark arrester. -
Page 14: Blade Control Check
Blade Control Check TRANSPORTING 1. Start the engine outdoors. 2. Release the blade control lever; the engine should stop quickly. If the engine has been running, allow it to cool before loading the If it does not, take your mower to an authorized Honda servicing mower on the transport vehicle. -
Page 15: Cleaning
Cleaning Handlebar Remove the grass bag if installed. You can place it on top of the Mower Deck engine with the bag opening to the front. Before washing the underside of the mower deck, stop the engine and turn the fuel valve to the OFF position. Rest the mower on its right side, so the fuel cap side is up. -
Page 16: Troubleshooting
Vibration TROUBLESHOOTING Possible Cause Correction Grass and debris lodged Clean out the mower deck (page 15). Engine Will Not Start under the mower deck Possible Cause Correction Blades loose Tighten loose blade bolts (page 11). Blade control not engaged Hold blade control lever against the handlebar (page Blades bent, damaged, or... -
Page 17: Technical Information
Emission Control System TECHNICAL INFORMATION Source of Emissions The combustion process produces carbon monoxide, oxides of Serial Number Locations nitrogen, and hydrocarbons. Control of hydrocarbons and oxides of nitrogen is very important because, under certain conditions, they react to form photochemical smog when subjected to sunlight. Carbon monoxide does not react in the same way, but it is toxic. -
Page 18: Air Index
Air Index Maintenance Fuel Unleaded gasoline with a pump page 7 An Air Index Information hang tag/label is applied to engines certified octane rating of 86 or higher containing to an emission durability time period in accordance with the no more than 10% ethanol by volume requirements of the California Air Resources Board. -
Page 19: Fuel System Maintenance
FUEL SYSTEM MAINTENANCE When properly maintained, your Honda lawn mower should provide years of trouble-free operation. This includes the fuel system. However, gasoline can quickly deteriorate, causing starting or running problems and, in some cases, damage to the fuel system. Most fuel-related problems can be avoided by following the precautions listed below. -
Page 20: Contact Honda
Parts Catalog This manual provides complete, illustrated parts lists, and is available through your Honda dealer. Frequently Asked Questions The Honda Power Equipment web site provides additional information for users of Honda power equipment. Visit www.powerequipment.honda.com and click on FAQs. -
Page 21: Warranty Coverage
You must, at your expense, take the Honda Power Equipment part, accessory, apparel or Equipment Customer Relations Dept. of American Honda Motor Co., Inc. See “How to the Honda Power Equipment on which the part or accessory is installed, and proof of page 20 Contact Honda”... -
Page 22: Emission System Warranty
TO OBTAIN WARRANTY SERVICE: The California Air Resources Board and Honda are pleased to explain the You must, at your own expense, take your Honda Power Equipment engine or emission control system warranty on your 2013 and later Honda Power the product on which it is installed, along with your sales registration card or Equipment engine. -
Page 23: Product Registration
PRODUCT REGISTRATION Thank you for choosing Honda. To ensure you receive important service information in the event of a product update or recall, please register your lawn mower within 30 days of purchase. From time to time, American Honda conducts sales promotions that require you to register your lawn mower within 30 days of purchase. - Page 24 1. Go to www.PowerEquipment.Honda.com to register your unit. 2. Click on Product Registration. 3. Complete the required information and click Submit. It’s that simple! NO POSTAGE NECESSARY Product Registration IF MAILED IN THE UNITED STATES BUSINESS REPLY MAIL FIRST-CLASS MAIL PERMIT NO.