Table of Contents
Advertisement
Quick Links
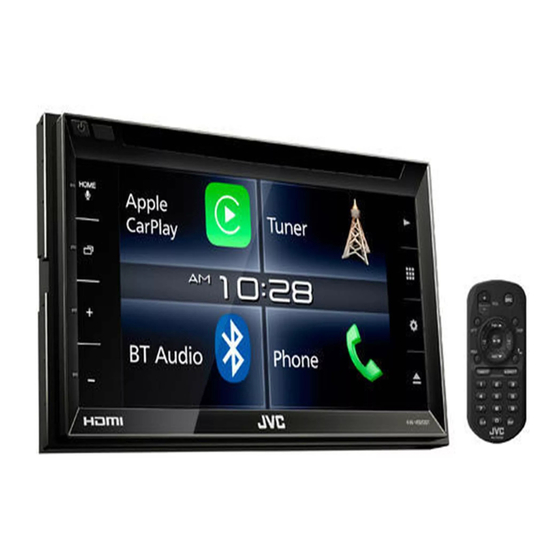
KW-V820BT
KW-V820BTM
MONITOR WITH DVD RECEIVER
INSTRUCTION MANUAL
This instruction manual is used to describe models listed below. Model availability and features
(functions) may differ depending on the country and sales area.
• Region 2 (DVD Region Code 2 area)
• Region 3 (DVD Region Code 3 area)
• Region 4 (DVD Region Code 4 area)
© 2016 JVC KENWOOD Corporation
B5A-1053-00 d (MN/M2N/XN)
Advertisement
Table of Contents

Related Manuals for JVC KW-V820BTM


Summary of Contents for JVC KW-V820BTM
- Page 1 (functions) may differ depending on the country and sales area. • Region 2 (DVD Region Code 2 area) • Region 3 (DVD Region Code 3 area) • Region 4 (DVD Region Code 4 area) © 2016 JVC KENWOOD Corporation B5A-1053-00 d (MN/M2N/XN)
-
Page 2: Table Of Contents
Class 1. It means that the unit is operations using the remote controller (RM-RK258: supplied only for KW-V820BT Region3/KW-V820BTM), utilizing laser beams that are of a weaker class. There see page 56. - Page 3 For safety... Hereby, JVC KENWOOD declares that this unit • Do not raise the volume level too much, as this “KW-V820BTM” is in compliance with the essential will make driving dangerous by blocking outside requirements and other relevant provisions of sounds, and may cause hearing loss.
-
Page 4: Initial Settings
INITIAL SETTINGS [Camera] Configure settings for the Display the <User Interface> screen. Initial setup connected rear view camera. (Page 28) When you power on the unit for the first time, the [DEMO] Activate ([ON]) or deactivate initial setting screen appears. ([OFF]) the display • You can also change the settings on the <SETUP>... -
Page 5: Basics
BASICS INITIAL SETTINGS To adjust the clock manually (when selecting 3 HOME/ (Voice) button Component names and functions [Manual] on the <Clock> window) • Displays the Home screen. (Press) (Page 7) • Activates the voice control function. (Hold) ◊ Caution on the volume setting: Display the <Clock Adjust>... -
Page 6: Common Operations
BASICS To attenuate the sound ❏ Turning on/off the AV source Common operations On the source control screen: You can activate the AV function by selecting a ❏ Turning on the power source on the Home screen. ❏ Turning off the power To restore the sound: Touch [ (Hold) To select a source not displayed on the Home... -
Page 7: Common Screen Operations
BASICS ❏ Home screen descriptions Gesture control on the source control screen: Common screen operations You can also control playback by moving your finger You can select playback sources, display setting ❏ Touch screen operations on the touch panel as follows (for some sources, the screens, or display information on the Home screen. - Page 8 BASICS ❏ Source/option selection screen ❏ Source control screen descriptions 6 Short-cut source selection buttons/the indicators for the current source descriptions You can perform source playback operations on the • Each time you touch [ ] or [ ], the items source control screen.
- Page 9 BASICS ❏ <SETUP> screen descriptions ❏ List screen descriptions ❏ Playback operations during video playback You can change the detailed settings. (Page 53) During audio/video source playback, you can select the desired item easily from the list. 1 Selects a previous chapter/track/item. 2 Displays the source control screen while playing a video.
-
Page 10: Selecting The Playback Source/Option
When iPhone compatible with CarPlay is connected and <Automotive Mirroring> is set to [ON] (Page 22), [Apple CarPlay] is displayed. Only for KW-V820BTM: When no navigation unit is connected, “No Navigation” appears. • To display more items, touch [ ]/[ ] or flick to... -
Page 11: Using The Pop-Up Short-Cut Menu
BASICS Selecting the playback source on the source ❏ Customizing the source/option Using the pop-up short-cut menu control screen selection screen Display source selection buttons by touching [ ]/ While displaying the source control screen, you can You can arrange the items to display on the source/ [ ] on the source control screen (Page 8), then jump to another screen from the pop-up short-cut option selection screen. -
Page 12: Discs
DISCS ❏ Ejecting a disc Playing a disc Playback operations On the source control screen: • If a disc does not have a disc menu, all tracks on When the operation buttons are it will be played repeatedly until you change the not displayed on the screen, touch source or eject the disc. - Page 13 DISCS Operation buttons Operation buttons • To display all available operation buttons, touch • Available buttons on the screen and operations [ ] to display the other operation button window. • Available buttons on the screen and operations differ depending on the type of disc/file being differ depending on the type of disc/file being For audio playback played back.
- Page 14 DISCS ❏ Selecting a folder/track on the list To search in the folder containing the current ❏ Activating PBC (Playback Control) track function (for VCD only) To search all folders/tracks in a disc While playing a VCD with PBC... Display the folder/track list. Select an item.
- Page 15 DISCS ❏ Video menu operations (except for ❏ Selecting playback mode • Available buttons on the screen and operations differ depending on the type of VCD) disc/file being played back. You can display the video menu screen during video [TOP] Displays the top menu.
-
Page 16: Usb
DISCS ❏ Setting items Connecting a USB device Settings for DVD playback [Menu Select the initial disc menu language. You can connect a USB mass storage class device Language] (Initial: English) (Page 69) such as a USB memory, Digital Audio Player, etc. to [Subtitle Select the initial subtitle language the unit. - Page 17 Starts/pauses playback. [IW] Playback information Playback operations • The information displayed on the screen differs Selects a folder. depending on the type of file being played back. [USB DEVICE Switches to another USB device When the operation buttons are 1 Playback mode (See below.) CHANGE] when two USB devices are not displayed on the screen, touch...
- Page 18 ❏ Selecting a track in a list From <Folder List>: Select the desired track. 1 Select the file type. • Proceed until you select the desired track. To search all folders/tracks in a USB device 2 Select the folder, then the item in the • For details about the list operation, see Display the list.
-
Page 19: Ipod/Iphone
iPod/iPhone ❏ Selecting the connection method Select the connection method of iPod/ Preparation iPhone for <APP Connection select>. Display the <SETUP> screen. ❏ Connecting iPod/iPhone On the Home screen: • For details about connecting iPod/iPhone, see page 62. • For playable iPod/iPhone types, see page 68. Connect your iPod/iPhone according to your purpose or the type of iPod/iPhone. - Page 20 iPod/iPhone Operation buttons Playback operations • Available buttons on the screen and operations differ depending on the type of file being played When the operation buttons are back. not displayed on the screen, touch Displays the track list of the category the area shown on the illustration.
- Page 21 iPod/iPhone ❏ Selecting an audio track from the list To search in the folder containing the current Select the desired track. track • Proceed until you select the desired track. To search all tracks in iPod/iPhone • For details about the list operation, see Display the list.
-
Page 22: Apps-Apple Carplay/Apps
APPS—Apple CarPlay/Apps You can use an App of the connected iPod touch/ [Automotive Select [ON] to use Apple Although the service area is expanding, CarPlay iPhone/Android on this unit. Mirroring] CarPlay. service is NOT available in some markets. • You can use an App on the following sources: [CarPlay Sidebar] Select the position of the Please check the latest information concerning –... - Page 23 “Apps” is not available. • You can operate some functions of the App on the • For Apps you can use on this unit, visit touch panel. <http://www.jvc.net/cs/car/>. • For some applications such as navigation applications, the operation buttons and ❏ Preparation information are not shown.
-
Page 24: Tuner
Tuner Operation buttons ❏ Setting the antenna control Listening to the radio [AUTO1]/ Changes the seek mode. Each time You can store the antenna automatically when the ❏ Indications and buttons on the source [AUTO2]/ you touch the button, the seek mode source is changed from the tuner to another source. - Page 25 Tuner ❏ Tuning in FM stations only with strong ❏ Selecting a preset station from the list Presetting stations signals — Local Seek Select the band (1), then select a preset station (2). ❏ Storing stations in the memory You can preset 6 stations for each band. Automatic presetting —...
- Page 26 Tuner Selecting a language for the PTY search ❏ Activating/deactivating TI Standby FM Radio Data System features Reception Display the <Tuner SETUP> screen. ❏ Searching for FM Radio Data System TI Standby Reception programs—PTY Search You can receive traffic information even while You can search for your favorite programs being listening to another source by activating TI Standby broadcast by selecting the PTY code.
- Page 27 Tuner News Standby Reception ❏ Tracing the same program—Network- • The RDS indicator lights up when the Network-Tracking Reception is activated and Tracking Reception Display the <Tuner SETUP> screen. an FM Radio Data System station is found. When driving in an area where FM reception is not sufficient enough, this unit automatically tunes in to ❏...
-
Page 28: Other External Components
OTHER EXTERNAL COMPONENTS Adjusting the parking guidelines Configure the camera settings. Using a rear view camera • Install the rear view camera in the appropriate • To connect a rear view camera, see page 64. position according to the instructions supplied • To use a rear view camera, a REVERSE lead with the rear view camera. -
Page 29: Using External Audio/Video Players-Av-In
OTHER EXTERNAL COMPONENTS ❏ Displaying the picture from the rear To exit the rear view screen Using a smartphone—HDMI/MHL view camera The rear view screen is displayed when you shift the When the operation buttons are gear to the reverse (R) position. not displayed on the screen, touch the area shown on the illustration. -
Page 30: Using The External Navigation Unit
❏ Displaying the screen of the ❏ Adjusting the guidance volume Using the external navigation unit smartphone (Only for KW-V820BTM) Display the <SETUP> screen. You can display the screen of smartphones On the Home screen: You can connect a navigation unit (commercially connected via the HDMI/MHL input terminal. -
Page 31: Bluetooth
BLUETOOTH ❏ Registering and connecting a new Information for using Bluetooth® Connecting Bluetooth devices Bluetooth device devices ❏ Activating/deactivating the Bluetooth When you connect a Bluetooth device to the unit for function the first time, pair the unit and the device. Pairing When you use the Bluetooth device, activate the allows Bluetooth devices to communicate with each Bluetooth function on the unit. - Page 32 When <Auto Pairing> is set to [ON], iOS devices Bluetooth 2.0: with A2DP or SPP: Determine usage as (such as iPhone) are automatically paired when Select the unit (“KW-V820BT/KW-V820BTM”) an audio player or a device with Apps connected via USB. (Page 40) on your Bluetooth device.
- Page 33 BLUETOOTH ❏ Connecting/disconnecting a paired ❏ Deleting a paired Bluetooth device Select the device you want to connect/ Bluetooth device disconnect. Display the <Select Device> screen. (See Two devices can be connected simultaneously. the far left column.) Display the <Device Remove> screen. Display the <SETUP>...
- Page 34 BLUETOOTH ❏ Changing the PIN code ❏ Change the device name of the unit Using a Bluetooth mobile phone displayed on the paired device Display the <Bluetooth Setup> screen. ❏ Receiving a call (Page 33) Display the <Bluetooth Setup> screen. When a call comes in... (Page 33) Display the PIN code input screen.
- Page 35 BLUETOOTH ❏ Ending a call ❏ Adjusting the volume during a call/ ❏ Switching between handsfree mode echo cancel level/noise reduction and phone mode While talking... volume While talking... Display the <Speech Quality> window. While talking... Each time you touch the button, the talking method is switched ( : handsfree mode / : phone...
- Page 36 BLUETOOTH ❏ Switching between two connected ❏ Sending dial tone during a call ❏ Making a call devices You can send dial tone during a call using the DTMF Display the phone control screen. (Dual Tone Multi Frequency) function. When two devices are connected, you can change On the Home screen: the device to use.
- Page 37 BLUETOOTH From the call history ( missed calls/ • If the initial character is a number, touch [1] From the preset list received calls/ dialed calls) and then select the number. Display the preset list (1), then select the target to • Touch [ ] to delete the last entry.
- Page 38 BLUETOOTH Voice dialing ❏ Presetting phone numbers Select a method to add a phone number to • Available only when the connected mobile phone preset list, then register the number to the You can preset up to 10 phone numbers. has a voice recognition system.
- Page 39 BLUETOOTH ❏ Editing phonebook To delete contact from the phonebook Start transferring the phonebook. Display the <Edit Phonebook> window. To transfer the phonebook If the connected Bluetooth mobile phone is (See the far left column.) compatible with Phone Book Access Profile (PBAP), Display the <Delete Phonebook>...
- Page 40 BLUETOOTH ❏ Setting items Settings for Bluetooth mobile Using the Bluetooth audio player phone <Bluetooth HF/ Select the speakers used for Audio> Bluetooth (both phone and audio • To connect a new device, see page 31. You can change various settings for using Bluetooth • To connect/disconnect a paired device, see player).
- Page 41 BLUETOOTH Operation buttons ❏ Selecting a track from the list ❏ Switching the Bluetooth audio player • Available buttons on the screen and operations Display the music list screen. Display the Bluetooth device selection differ depending on the connected device. window.
-
Page 42: Settings
SETTINGS <iPhone Select this to use Apps with Display the <AV> screen. Settings for using applications of Bluetooth> iPod/iPhone connected via iPod/iPhone/Android Bluetooth. Before using applications of iPod/iPhone/Android, <HDMI/MHL> Select this to use Apps with select the device to use and connection method. iPod/iPhone/Android device connected both by cable to Preparation:... -
Page 43: Selecting Different Sources For The Front And Rear Monitors-Zone Control
SETTINGS • When [Zone Control] is set to [Dual Zone], Select the source for front and rear, and Selecting different sources for the the following operations/performances are not adjust the volume for the rear source. front and rear monitors—Zone available. Control –... -
Page 44: Sound Adjustment-Audio
– During navigation guidance* * Only for KW-V820BTM. ❏ Setting the car type/speakers/crossover A selection window appears for car type. Select an item, then touch [Close] to close the window. - Page 45 SETTINGS ❏ Using the sound equalization Storing your own adjustments—Adjusting the • To apply the adjusted equalizer to all playback sound precisely source, touch [ALL SRC] on the <Graphic • The adjustment is memorized for each source until Equalizer> screen, then touch [OK] to confirm. Display the <Graphic Equalizer>...
- Page 46 SETTINGS ❏ Setting the listening position Adjusting the Digital Time Alignment (DTA) Touch [Level] (1), then adjust the output Make fine adjustments to the delay time of volume for each speaker (2). You can adjust the sound effects according to your the speaker output to create a more suitable listening position.
- Page 47 SETTINGS ❏ Localizing the sound image—Front Touch [Delay] (1), then adjust the sound Touch [Level] (1), then adjust the output Focus image precisely (2). volume for each speaker (2). You can localize the sound image in front of the selected seat. Display the <Position/DTA>...
- Page 48 SETTINGS ❏ Adjusting the volume balance ❏ Adjusting the volume output according to different sources Display the <Audio> screen. (Page 44) You can adjust and store the auto-adjustment Display the <Fader/Balance> screen. volume level for each source. The volume level will automatically increase or decrease when you change the source.
-
Page 49: Adjustment For Video Playback
SETTINGS <K2>* Restores the sound lost due ❏ Adjusting the sound effect Adjustment for video playback to audio compression to a Display the <Audio> screen. (Page 44) realistic sound. Display the pop-up short-cut menu. • OFF/ON (Initial) Display the <Sound Effect> screen. <Sound Virtually makes the sound Response>... -
Page 50: Changing The Display Design
SETTINGS <Backlight> Adjusts the brightness of the Select a panel color. Changing the display design backlight. (−4 to +4) ❏ Customizing the panel color <Contrast> Adjusts the contrast. (−4 to +4) <Black> Adjusts the blackness. (−4 to Display the <SETUP> screen. On the Home screen: <Brightness>... - Page 51 SETTINGS ❏ Customizing the background ❏ Storing your favorite image for the Rotate the image if necessary (1), then background confirm the selection (2). Display the <Display> screen. (Page 50) You can set your favorite image stored on the Display the <Background> screen. connected USB device.
-
Page 52: Customizing The System Settings
SETTINGS ❏ Locking the settings Select an option. Customizing the system settings You can lock the settings for <Audio> to prevent ❏ Memorizing/recalling the settings them from being changed. • You can memorize the settings changed in Display the <Special> screen. (See the far the <Audio>... -
Page 53: Setting Menu Items-Setup
SETTINGS ❏ Adjusting the touch position Display the <Touch Panel Adjust> screen. Setting menu items—SETUP You can adjust the touch position on the touch ❏ Displaying the <SETUP> menu screen panel if the position touched and the operation performed do not match. On the Home screen: Display the <SETUP>... - Page 54 (Page 58) Available when [Clock] is set to [Manual]. screen when iPhone compatible with CarPlay is connected. [Beep] Only for KW-V820BTM. • ON (Initial): Activates the key-touch tone. • OFF: Cancels. [Language Select] Select the text language used for on-screen information.
- Page 55 [Open Source Licenses] ❏ <Navigation> setting screen (Only for Show the Open Source Licenses. [Initialize] KW-V820BTM) Touch [Initialize] and then touch [Yes] to set all the [NAV Voice Volume] settings to the initial default settings. Adjust the volume of the navigation guidance.
-
Page 56: Remote Controller
REMOTE CONTROLLER ◊ Caution: Preparation For KW-V820BT Region 4: To use the remote • Keep the battery out of reach of children and in controller, purchase RM-RK258 separately. ❏ Removing the battery sheet original package until ready to use. Dispose of used batteries promptly. - Page 57 REMOTE CONTROLLER ❏ Searching for an item directly Operations using the remote ANGLE Not used for this unit. Tuner frequency controller (RM-RK258) Changes the aspect ratio. 1 Press DIRECT to enter the search mode. • To check the current aspect ratio ASPECT ❏...
- Page 58 REMOTE CONTROLLER Display the <Steering Remote Controller Repeat steps 4 and 5 as necessary. Using the steering remote Setting> screen. Finish the procedure. controller You can assign functions to the keys of the remote controller on the steering wheel. • This function is available only when your vehicle is equipped with the electrical steering remote • The unit can register/change all of the buttons’...
-
Page 59: Connection/Installation
CONNECTION/INSTALLATION • If your car’s ignition does not have an ACC • This unit has a cooling fan to decrease the Before installing the unit position, connect the ignition wires to a power internal temperature. Do not mount the unit ◊... - Page 60 CONNECTION/INSTALLATION ❏ Supplied accessories for installation ❏ Installation procedure Installing the unit 1 Wiring harness × 1 To prevent a short circuit, remove the key ❏ Installing the unit using the mounting 2 Flat head screws (M5 × 7 mm) × 6 “...
- Page 61 Connect a navigation box. (Page 64)* Page 64 Connect to the vehicle’s steering remote harness using the Steering remote cable (7). (Page 64) • Contact your JVC dealer for details. Connect the antenna cord to the antenna terminal. To use the steering wheel remote control feature, an...
- Page 62 CONNECTION/INSTALLATION ❏ Connecting the USB extension cable ❏ Connecting an iPod/iPhone for iPod/iPhone (Lightning connector “iPod”/”Apps” Connect the USB extension cable (4) to connect a models) (commercially USB device/iPod/iPhone/smartphone. • Connect the USB extension cable (4) beforehand. available) (See the left column.) USB device 1.0 m Lightning-Digital AV...
- Page 63 CONNECTION/INSTALLATION ❏ Connecting an iPhone for “Apple ❏ Connecting a smartphone CarPlay” • Connect the USB extension cable (4) beforehand. (Page 62) • Connect the USB extension cable (4) beforehand. (Page 62) Android, etc. Android, etc. (with MHL) (with HDMI) iPhone compatible with CarPlay (commercially (commercially (commercially available)
- Page 64 9 Steering wheel remote controller input • Connect to the vehicle’s steering remote harness using the Steering Remote cable (7). Contact your JVC dealer for details. p NAV I/F input* When connecting an external amplifier, connect its ground wire to the chassis of the car;...
- Page 65 CONNECTION/INSTALLATION ❏ Connecting microphone for Bluetooth ❏ Connecting the GPS antenna • Depending on the type of car, reception of the GPS satellite signals might not be possible with an Connect the microphone (8) to the MIC terminal. Connect the GPS antenna (5) to the GPS terminal. internal installation.
-
Page 66: References
REFERENCES ❏ To keep discs clean Maintenance More information Dirty discs may not play correctly. ❏ Caution on cleaning the unit ❏ File playback If a disc does become dirty, wipe it with a soft cloth Playing MPEG1/MPEG2 files Do not use any solvent (for example, thinner, in a straight line from the center to the edge. - Page 67 480) resolution For KW-V820BT: 3/4 (depending on the country and sales area) – Data size: less than 650 KB For KW-V820BTM: 2 – File type: JPEG If you insert a DVD Video disc of an incorrect Region Code, “Region Code Error” appears on the screen.
- Page 68 REFERENCES Unplayable discs ❏ USB playback • Electrostatic shock at connecting a USB device • Unplayable disc types and formats are as follows: may cause abnormal playback of the device. In this Playable files on a USB device – DVD-Audio/DVD-ROM/DVD-VR discs case, disconnect the USB device then reset this • This unit can play the following types of files –...
- Page 69 REFERENCES ❏ Language codes (for DVD language selection) • For some iPod/iPhone models, the performance may be abnormal or unstable during operation. In Afar Galician Maori Somali this case, disconnect the iPod/iPhone device, then Abkhazian Guarani Macedonian Albanian check its condition. Afrikaans Gujarati Malayalam...
-
Page 70: Error Message List
REFERENCES “Cannot play this file.”: Error message list Troubleshooting • Check whether the file is compatible with this unit. (Page 66) If an error occurs while using the unit, a message What appears to be trouble is not always serious. appears. - Page 71 – For iPod/iPhone Lightning model: Connect with Tracks on the Recordable/Rewritable discs device. Copy the tracks again, and try again. JVC KS-U60 (optional accessory) and JVC KS-U62 cannot be skipped. Tracks are not played back as you have intended (optional accessory) through a Lightning-Digital • Insert a finalized disc.
-
Page 72: Specifications
REFERENCES ❏ AV-IN The connected audio player cannot be Specifications controlled. No picture appears on the screen. • Check whether the connected audio player ❏ Monitor section • Turn on the video component if it is not on. supports AVRCP (Audio/Video Remote Control • Connect the video component correctly. - Page 73 REFERENCES ❏ DVD player section ❏ Bluetooth section Maximum Power Supply Current DC 5 V 1.5 A D/A Converter 24 bit Technology Bluetooth V3.0 D/A Converter Front/Rear 32 bit Audio Decoder Linear PCM/Dolby Digital/MP3/ Frequency 2.402 GHz to 2.480 GHz Subwoofer 24 bit WMA/AAC/WAV/FLAC/Vorbis Output Power...
- Page 74 ❏ AM tuner section (Only for KW-V820BT) ❏ General Analog RGB Input 0.7 Vp-p/75 Ω* Frequency Range (9 kHz) Operating Voltage * Only for KW-V820BTM. KW-V820BT Region 3: 14.4 V (10.5 V to 16 V allowable) 531 kHz to 1 611 kHz ❏ Audio section...
- Page 75 Bluetooth SIG, AVC VIDEO. NO LICENSE IS GRANTED OR SHALL • Manufactured under license from Dolby Inc. and any use of such marks by JVC KENWOOD BE IMPLIED FOR ANY OTHER USE. ADDITIONAL Laboratories. Dolby and the double-D symbol are Corporation is under license.
- Page 76 REFERENCES THIS SOFTWARE IS PROVIDED BY THE COPYRIGHT THIS SOFTWARE IS PROVIDED BY THE COPYRIGHT THIS SOFTWARE IS PROVIDED BY THE COPYRIGHT HOLDERS AND CONTRIBUTORS “AS IS” AND ANY HOLDERS AND CONTRIBUTORS “AS IS’’ AND ANY HOLDERS AND CONTRIBUTORS “AS IS’’ AND ANY EXPRESS OR IMPLIED WARRANTIES, INCLUDING, EXPRESS OR IMPLIED WARRANTIES, INCLUDING, EXPRESS OR IMPLIED WARRANTIES, INCLUDING,...
- Page 77 Spotify With Spotify, your music is everywhere. Working out, Operation buttons Playback operations partying or relaxing, the right music is always at your Displays the list selection screen. fingertips. There are millions of songs on Spotify— Creates new station. You can operate Spotify using the remote from old favorites to the latest hits.
- Page 78 Spotify ❏ Creating your station (Start Radio) ❏ Selecting a track • Connect iPod touch/iPhone to this unit with a cable or via Bluetooth. Display the list selection screen. – When connecting with a cable: Use KS-U62 (optional accessory) or USB 2.0 cable (accessory of the iPod/iPhone).
- Page 79 Pandora® (Only for KW-V820BT Region 4) Operation buttons Playback operations You can stream Pandora from iPod touch/iPhone , Displays the list selection screen. Android or BlackBerry devices. Thumbs down to the current track and You can operate Pandora using the remote • Install the latest version of the Pandora skips to the next track.
- Page 80 Pandora® ❏ Selecting a station from the list ❏ Creates a new station Genre list screen Display the station list screen. Display the station list screen. Select a genre, then a station. Select a station from the list. Select the type. • Scroll the page to show more items.
- Page 81 Pandora® NOTE Requirements for Pandora® • Ensure you are logged in to your smartphone iPhone or iPod touch application. If you do not have a Pandora account, • Install the latest version of the Pandora application you can create one for free from your smartphone on your iPhone or iPod touch.