
Related Manuals for Ricoh 4420NF


Summary of Contents for Ricoh 4420NF
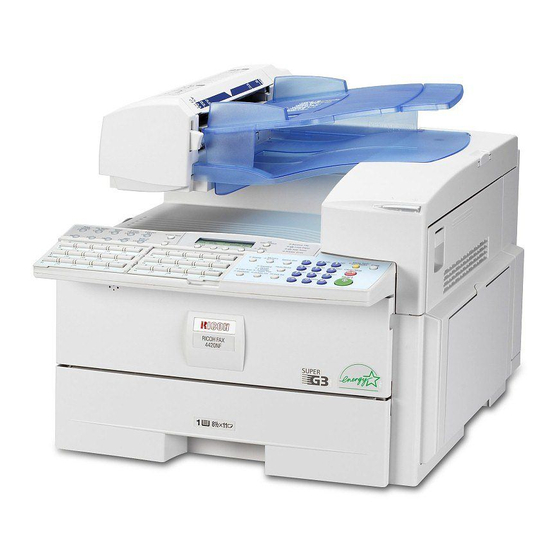
- Page 1 FAX 4420NF Operating Instructions Basic Features Getting Started Faxing Programming Troubleshooting For safe and correct use of this machine, please be sure to read the Safety Information before you use it.
- Page 2 For good copy quality, Ricoh recommends that you use genuine Ricoh toner. Ricoh shall not be responsible for any damage or expense that might result from the use of parts other than genuine Ricoh parts with your Ricoh office products.
-
Page 3: Table Of Contents
TABLE OF CONTENTS What Do You Want to Do with This Machine? ............1 Notice ........................3 Safety Information ......................3 Safety During Operation ..................3 Important Safety Instructions ................5 Grounding ........................5 Position of the R R CAUTION Label ................6 ENERGY STAR Program ..................7 Energy Saver Modes....................7 Remarks........................ - Page 4 Immediate Transmission..................37 If the Connection Could Not Be Made..............38 Canceling an Immediate Transmission ............. 39 Before Pressing the Start Key.................. 39 After Pressing the Start Key..................39 When an Original Is Jammed ................... 39 Scan Settings ....................... 40 Resolution ........................
- Page 5 Entering Characters..................... 83 Available Characters ....................83 Keys ......................... 83 How to Enter Characters..................84 4. Troubleshooting Loading Paper in the Main Paper Tray............... 87 Replacing the Toner Cartridge ................88 Toner Cartridge Storage..................90 Adjusting Volume ....................91 Clearing Original Jams..................93 Clearing a Copy, Fax, or Print Jam ..............
-
Page 7: What Do You Want To Do With This Machine
What Do You Want to Do with This Machine? This is a summary of this machine's features including which pages to consult for detailed information. I want ... Reference to specify several destinations with a single key p.47 “Using Group Dials” and p.74 “Groups” to print Quick Dial key labels that can be at- p.65 “Quick Dial Key Label (Dial Label)”... - Page 8 I want ... Reference to have backups automatically made of faxes I p.136 “Backup File Transmission Settings”, send Advanced Features to have backups automatically made of incom- p.131 “Forwarding”, Advanced Featuresand ing faxes p.163 “Personal Boxes”, Advanced Features to restrict access to the machine to specified us- p.24 “Restricted Access”...
-
Page 9: Notice
Notice R CAUTION: Use of controls, adjustments, or performance of procedures other than those specified herein may result in hazardous radiation exposure. Direct (or indirect reflected) eye contact with the laser beam may cause serious eye damage. Safety precautions and interlock mechanisms have been designed to prevent any possible laser beam exposure to the operator. - Page 10 R WARNING: • Connect the power cord directly into a wall outlet and never use an extension cord. • Disconnect the power plug (by pulling the plug, not the cable) if the power cable or plug becomes frayed or otherwise damaged. •...
-
Page 11: Important Safety Instructions
Important Safety Instructions Grounding In order to prevent potentially hazardous electrical shock, provide means of connecting to the protective grounding conductor in the building, wiring those grounding conductors of power cable and 3 pins plug. -
Page 12: Position Of The R R Caution Label
Position of the R R CAUTION Label This machine has a RCAUTION label at the position shown below. For safety, please follow the instructions and handle the machine as indicated. The inside of the machine becomes very hot. Do not touch the inside. Doing so could result in a burn. -
Page 13: Energy Star Program
ENERGY STAR Program As an ENERGY STAR Partner, we have determined that this machine model meets the ENERGY STAR Guidelines for energy efficiency. The ENERGY STAR Guidelines intend to establish an international energy-saving system for developing and introducing energy-efficient office equipment to deal with environmental is- sues, such as global warming. - Page 14 Even though the control panel display isn't on in Energy Saver mode, indicators that blink or light during communication or reception still work. When the Re- ceive File indicator lights, exit Energy Saver mode and take the appropriate ac- tion. Energy Saver Status How long be-...
- Page 15 Recycled Paper In accordance with the ENERGY STAR Program, we recommend use of recycled paper which is environmentally friendly. Please contact your sales representa- tive for recommended paper.
-
Page 16: Remarks
Remarks Be sure to read the following information before you use this machine: • Do not turn off the power during output. Make sure that output has complet- ed before you turn off the power. • Do not open the front cover, right cover, lower right cover, main paper tray, or optional paper tray unit while paper is being printed out. - Page 17 • For example, if the other party's machine has A5 paper loaded and it receives a A4 size document, the A4 size image will be reduced to A5 size and printed on A5 paper. For further information, see p.79 “When There Is No Paper of the Correct Size”, Advanced Features.
-
Page 18: How To Read This Manual
How to Read This Manual Symbols The following set of symbols is used in this manual. R WARNING: This symbol indicates a potentially hazardous situation that might result in death or serious injury when you misuse the machine without following the in- structions under this symbol. -
Page 19: Paper Mark
Paper Mark Paper directions in this book are shown as follows. GFKAMI0N Portrait direction for originals is shown as K, and landscape direction for orig- inals is shown as L. Portrait direction for paper in the paper tray is shown as K, and landscape di- rection for paper in the paper tray is shown as L. -
Page 20: Manuals For This Machine
Manuals for This Machine Basic Features (this manual) The Basic Features manual explains the most frequently used fax functions and operations. Advanced Features (on CD-ROM) The Advanced Features manual describes more advanced functions and also ex- plains settings for key operators. Each language version is in an appropriate folder on the CD-ROM in PDF file. -
Page 21: Getting Started
1. Getting Started Guide to Components Front View ZHMH030E ADF cover Main paper tray Cover for the ADF. Load paper here. Release button Optional paper tray unit Push this button to open the ADF. You can load more paper here. Auto Document Feeder (ADF) Lower right cover Set multi-page originals here to have... - Page 22 Getting Started Status indicators Original output tray guide • hAlarm Prevents originals from falling from the original output tray. Blinks red when an error occurs. Check the display and read the mes- Original output tray sage to identify the problem (such as a Scanned originals are stacked here.
-
Page 23: Side View
Guide to Components Side View ZHMH040E Output tray guide External telephone connector Pull out and raise the end fence to sup- Reference port large paper. p.196 “Connecting to a Telephone Main power switch Line”, Advanced Features The power turns your machine on and G3 line connector off. -
Page 24: Control Panel
Getting Started Control Panel ZHMS010E 0 0 0 0 1 1 1 1 keys User Function keys Each of these can be programmed for Press to move the cursor or select func- rapid access to frequently used functions. tions. { { { { OK} } } } key ❖... - Page 25 Control Panel { { { { Energy Saver/Clear Modes} } } } key Original Type key • Energy Saver: Hold down this key for • Color Scan (Optional) about 2 seconds to manually enter En- Select when scanning color originals ergy Saver mode.
-
Page 26: Reading The Display
Getting Started { { { { On Hook Dial} } } } key Number keys Use to dial a number from the number Use to dial fax numbers or enter the keys without having to lift the handset. number of copies. { { { { Pause/Redial} } } } key { { { { Start} } } } key Pause: Inserts a pause when you are dial-... -
Page 27: Standby Display
Control Panel ❖ ❖ ❖ ❖ Menu Display ZHMS230E Display for items which can be selected. Press the { { { { Cancel} } } } key to cancel the selected function or entered value, and re- turn to the previous display. Press 0 or 1 to display another function on the display or move the brack- ets to select other values. -
Page 28: Display Prompts
Getting Started ❖ ❖ ❖ ❖ Memory Reception The destination's (Sender's) name or fax number appears on the top of the dis- play. Note ❒ Even when the machine is sending a fax message from memory or receiv- ing a fax message into memory, you can still scan the next original into memory. -
Page 29: Energy Saver Mode Display
Control Panel Energy Saver Mode Display When the machine is not used for a fixed period, the machine goes into Energy Saver Mode automatically. - Exiting Energy Saver Mode To exit Energy Saver mode manually: • In Energy Saver Standby mode, press the { { { { Energy Saver/Clear Modes} } } } key. •... - Page 30 Getting Started - Restricted Access Use this function to restrict access to the machine or monitor machine usage by user or department. When turned on, users must enter a previously assigned code before they can use the machine. In order to use this function, you need to program user codes (Personal Box SUB codes) beforehand.
-
Page 31: Turning On Or Off The Power
Turning On or Off the Power Turning On or Off the Power A A A A Note Turn off the power. ❒ This machine automatically enters Energy Saver mode if you do not use the machine for a while. Turning On the Power A A A A Confirm that the power cord is plugged into the outlet firmly. - Page 32 Getting Started...
-
Page 33: Faxing
2. Faxing Transmission Modes There are two types of transmission. Important ❒ Make sure that 100% appears on ❖ ❖ ❖ ❖ Memory Transmission the display before you turn off the The fax is stored in memory, and power. If the power is turned off then transmitted automatically. - Page 34 Faxing Note ❒ You can set whether the machine is in Memory Transmission mode or Immediate Transmission mode right after the power is turned on or the { { { { Energy Saver/Clear Modes} } } } key is pressed with the User Pa- rameters (switch 00, bit 6).
-
Page 35: Placing Originals
Placing Originals Placing Originals You can place your originals in the Note ADF. ❒ When sending a fax, the image output at the other end depends on ❖ ❖ ❖ ❖ How to place A4, B5 JIS (Japanese the size and orientation of paper Industrial Standard), A5, 5 "x8 ",... -
Page 36: Placing Originals In The Adf
Faxing A A A A Adjust the original guide to match Placing Originals in the ADF the size of your originals. Align the edges of your originals and Use the ADF to scan a stack of origi- stack them in the ADF face up. nals in one operation. - Page 37 Placing Originals • Originals with a smooth or shiny front surface • Thin and soft originals • Transparent originals, such as OHP transparencies or translucent paper • Originals with pencil writing on the back Note ❒ To avoid damage to important orig- inals through mishaps such as pa- per jams, we recommend that you place copies of such originals.
-
Page 38: Memory Transmission
Faxing Memory Transmission ❒ The number of pages that you can Memory Transmission is convenient because: store in memory depends on the original images and the scan set- • Fax originals can be scanned much tings. You can store up to 560 more quickly. - Page 39 Memory Transmission D D D D E E E E Press the { { { { Start} } } } key. Dial. If you want to send the same fax to more than one destination, press the { { { { OK} } } } key, and then dial anoth- er destination.
-
Page 40: Canceling A Memory Transmission
Faxing Canceling a Memory Transmission Before Pressing the Start Key When an Original Is Jammed A A A A A A A A Press the { { { { Energy Saver/Clear Modes} } } } Read the message in the display. key. -
Page 41: While Awaiting Transmission
Canceling a Memory Transmission A A A A Press the { { { { Job Information} } } } key, While Awaiting Transmission and confirm that " 1. Cancel TX / RX " is displayed. Use this procedure to cancel a trans- mission after the original has been scanned. - Page 42 Faxing D D D D Press the { { { { OK} } } } key. E E E E Press 0 0 0 0 or 1 1 1 1 to select "Yes”. F F F F Press the { { { { OK} } } } key. The file is deleted, and the standby display reappears...
-
Page 43: Immediate Transmission
Immediate Transmission Immediate Transmission B B B B Immediate Transmission is conven- Place your original. ient when: Reference • You want to send an original im- p.29 “Placing Originals” mediately as it is scanning. C C C C • You want to quickly check wheth- Select any scan settings you re- er you have successfully connected quire. -
Page 44: If The Connection Could Not Be Made
Faxing E E E E Press the { { { { Start} } } } key. If the Connection Could Not Be Made If it is not possible to make a connec- tion with the number you specified because the line was busy or there was a line problem, the machine redi- als automatically. -
Page 45: Canceling An Immediate Transmission
Canceling an Immediate Transmission Canceling an Immediate Transmission Before Pressing the Start Key When an Original Is Jammed A A A A A A A A Press the { { { { Energy Saver/Clear Modes} } } } Read the message on the display. key. -
Page 46: Scan Settings
Faxing Scan Settings ❖ ❖ ❖ ❖ Standard (8 × × × × 3.85 lines/mm, 200 × × × × 100 You may want to send many different types of fax messages. Some of these dpi) may be difficult to reproduce at the Select for originals containing nor- other end. -
Page 47: Original Type
Scan Settings ❒ You can set the resolution type af- Limitation ter the power is turned on or the ❒ If the other party's machine does { { { { Energy Saver/Clear Modes} } } } key is not support the resolution at pressed with the User Parameters which you are sending, this ma- (switch 00;... -
Page 48: Changing Scan Settings
Faxing ❒ You can set whether Halftone is se- Changing Scan Settings lected after the power is turned on or the { { { { Energy Saver/Clear Modes} } } } When scanning multiple originals us- key is pressed with the User Pa- ing the ADF, you can set scan settings rameters (switch 00, bit 7). -
Page 49: Dialing
Dialing Dialing There are four main ways to dial a Note number: ❒ If you make a mistake, press the { { { { Clear/Stop } } } } key and enter ❖ ❖ ❖ ❖ Entering numbers directly again. See p.43 “Entering Numbers Di- ❒... -
Page 50: Pause
Faxing Note Pause ❒ When this machine is requested to Press the { { { { Pause/Redial} } } } key when di- transfer a call (i.e. becomes a aling or storing a number to insert Transfer Station), two fax numbers about a two-second pause. -
Page 51: Using Quick Dials
Dialing C C C C Press the User Function key ( { { { { F1} } } } Preparation to { { { { F10} } } } ) in which“Tone”is pro- To use the User Function key with grammed. -
Page 52: Using Speed Dials
Faxing A A A A Place your original, and then se- Using Speed Dials lect any scan settings you require. You can specify a destination simply by pressing the { { { { Speed Dial} } } } key and a Speed Dial code (000 to 199). -
Page 53: Using Group Dials
Dialing ❖ ❖ ❖ ❖ When not programmed in a Quick Dial Note Use the User Function key. Group ❒ “Enter No.” and “Search A/Z” Dial is assigned to { { { { F3} } } } as a de- are shown one after the other in fault. -
Page 54: When Specifying A Group With A Quick Dial
Faxing When specifying a group with a Quick Dial When specifying a group with the Group Preparation Note You must program Groups in ❒ Group Dial is assigned to { { { { F3} } } } as a Quick Dials beforehand. See p.74 “Groups”. - Page 55 Dialing Note ❒ Group Number is displayed. If t h e g r o u p n a m e i s p r o - grammed, the group name is also displayed. ❒ If you want to specify another Group, press the { { { { OK} } } } key, and then repeat step C above.
-
Page 56: Reception Modes
Faxing Reception Modes A A A A The machine can treat incoming fax Press the { { { { User Tools} } } } key. messages and telephone calls in two ways. ❖ ❖ ❖ ❖ Manual Receive Use this mode if your line is shared by a fax machine and a telephone but you want to answer all calls yourself and decide whether they... -
Page 57: Receiving Messages In Manual Receive
Reception Modes G G G G Press the { { { { OK} } } } key. H H H H Press 0 0 0 0 or 1 1 1 1 to select the recep- tion mode. I I I I Press the { { { { OK} } } } key. - Page 58 Faxing...
-
Page 59: Programming
3. Programming Own Name/Fax Header/Own Fax Number ❖ ❖ ❖ ❖ Own Fax Number (Required by inter- Make sure that all necessary settings are made before connecting your ma- national law) chine to the telephone line. This is your fax machine's phone number that must include country ❖... -
Page 60: Own Name / Fax Header
Programming E E E E Press the { { { { OK} } } } key. Own Name / Fax Header The following procedure describes how to program/edit/delete Own Name and Fax Header. F F F F Press 0 0 0 0 or 1 1 1 1 until "6. Fax Infor- mation"... -
Page 61: Editing
Own Name/Fax Header/Own Fax Number L L L L B B B B Press the { { { { OK} } } } key. Press 0 0 0 0 or 1 1 1 1 until " 2. Fax Fea- tures " is displayed. The programmed Own Name is C C C C displayed. -
Page 62: Deleting
Programming K K K K F F F F Press the { { { { OK} } } } key. Press 0 0 0 0 or 1 1 1 1 until "6. Fax Infor- mation" is displayed. L L L L Press the { { { { User Tools} } } } key. -
Page 63: Own Fax Number
Own Name/Fax Header/Own Fax Number F F F F Press { { { { 2} } } } { { { { 2} } } } { { { { 2} } } } { { { { 2} } } } . Own Fax Number The following procedure describes how to program/edit/delete the... -
Page 64: Editing
Programming G G G G Press the { { { { OK} } } } key. Editing A A A A Press the { { { { User Tools} } } } key. H H H H Press 0 0 0 0 or 1 1 1 1 until " 13. G3 Ana- log Line"... -
Page 65: Deleting
Own Name/Fax Header/Own Fax Number G G G G Press the { { { { OK} } } } key. Deleting A A A A Press the { { { { User Tools} } } } key. H H H H Press 0 0 0 0 or 1 1 1 1 until "... -
Page 66: Quick Dial
Programming Quick Dial To save time, you can program a fax Note number that you use often into a ❒ When a programmed Quick Dial Quick Dial key. Then, whenever you key is being used for a standby are sending a message to that loca- Memory Transmission, the mes- tion, just press that Quick Dial key to sages "... -
Page 67: Programming
Quick Dial F F F F Display the number of the Quick Programming Dial key you want to program. Press a Quick Dial key, or search Note using 0 or 1. ❒ There are 90 Quick Dials available. A A A A Press the { { { { User Tools} } } } key. - Page 68 Programming ❒ You can program SUB, SEP, Note SID, and PWD in this step with ❒ Label insertion allows the re- the Dial Option function. See c e i v e r n a m e t h a t i s p r o - p.45 “SUB/SID (SUB Code grammed in a Quick Dial or Transmission)”, Advanced Fea-...
-
Page 69: Editing
Quick Dial F F F F Display the number of the Quick Editing Dial key you want to edit. A A A A Press a Quick Dial key, or search Press the { { { { User Tools} } } } key. using 0 or 1. -
Page 70: Deleting
Programming Note Deleting ❒ Under rare circumstances, gar- bled characters may appear A A A A Press the { { { { User Tools} } } } key. during name registration if you use the { { { { Pause/Redial} } } } key to display the fax number of par- ties located in other countries. -
Page 71: Quick Dial Key Label (Dial Label)
Quick Dial G G G G B B B B Press 0 0 0 0 or 1 1 1 1 until "2. Fax Fea- Display the Quick Dial key that you want to delete. tures" is displayed. Press a Quick Dial key or search by pressing 0 or 1. -
Page 72: Label Paper
Programming Label paper GFFORM1E Quick Dial key number The name of an Auto Document The number of the Quick Dial key the The name for a document programmed destination is programmed in. as an Auto Document. Destination The name of a program The other party's name or Group name When a program is stored on the Quick programmed in the Quick Dial. - Page 73 Quick Dial The contents of the User Function FAX HEADER1 and FAX HEADER2 keys T h e n a m e p r o g r a m m e d a s F A X HEADER1 and FAX HEADER2. The contents of the User Function keys is printed.
-
Page 74: Speed Dial
Programming Speed Dial If you program numbers in Speed Di- • Select Fax Header als, you can specify the fax number You can select to print Fax simply by pressing the { { { { Speed Dial} } } } Header1 or Fax Header2 on fax key and entering a three-digit Speed messages that the other party... -
Page 75: Programming
Speed Dial F F F F Press the { { { { OK} } } } key. Programming Note ❒ There are 200 numbers available. G G G G ❒ You can specify codes 000 to 199. Display the number of the Speed Dial you want to program (000 to A A A A Press the { { { { User Tools} } } } key. - Page 76 Programming N N N N ❒ You can redial the number. Press the { { { { OK} } } } key. Press the { { { { Pause/Redial} } } } key be- The search letter is programmed. fore entering a fax number with the number keys, and the last 10 fax numbers dialed are dis- played.
-
Page 77: Editing
Speed Dial G G G G Display the number of the Speed Editing Dial you want to edit (000 to 199). A A A A Enter the Speed Dial number with Press the { { { { User Tools} } } } key. the number keys, or search using 0 or 1. -
Page 78: Deleting
Programming M M M M Enter the search letter (A/a to Z/z) Deleting for Telephone Directory. A A A A Press the { { { { User Tools} } } } key. N N N N Press the { { { { OK} } } } key. O O O O Press 0 0 0 0 or 1 1 1 1 to select "On"... - Page 79 Speed Dial G G G G Display the Speed Dial number you want to delete (000 to 199). Enter the Speed Dial number with the number keys or search using 0 or 1. H H H H Press the { { { { OK} } } } key. T h e p r o g r a m m e d d a t a ( f a x number and name) is deleted.
-
Page 80: Groups
Programming Groups If you regularly broadcast originals to Note the same set of destinations, you can ❒ You cannot program another combine these numbers into a group. function in a Quick Dial key al- Then just select the group and each ready used for a group. - Page 81 Groups ❒ The combined maximum number Group1 Group2 Total of destinations you can program in Number of all groups is 390. This number can items be composed of up to 90 Quick Quick Dial Quick Dial Dial numbers, 200 Speed Dial [01] [01] numbers, and 100 numbers en-...
- Page 82 Programming C C C C I I I I Press the { { { { OK} } } } key. Specify the destination using one of the following three methods: Enter the fax number with the number keys. Confirm that " 1. Program / Delete "...
-
Page 83: Editing
Groups L L L L S S S S Repeat steps I I I I to K K K K for all the des- Press the Quick Dial key you want tinations you want to program in to program the Group in. the Group. - Page 84 Programming A A A A G G G G Press the { { { { User Tools} } } } key. Display the number of the Group you want to edit (1 to 9). Enter the group number with the number keys, or search using 0 or H H H H Press the { { { { OK} } } } key.
- Page 85 Groups R R R R Press the { { { { Speed Dial} } } } key and en- Press 0 0 0 0 or 1 1 1 1 to select whether to ter a Speed Dial number. assign the Group to a Quick Dial key.
-
Page 86: Deleting
Programming T T T T A A A A Press the { { { { User Tools} } } } key. Press the Quick Dial key you want to assign the Group. U U U U Press the { { { { OK} } } } key. ZHMS130E If you want to edit another Group, proceed to step... -
Page 87: To Delete An Entire Group
Groups G G G G Display the group number for the To delete an entire group destination you want to delete (1 to 9). The following procedure describes how to delete all destinations from a Enter the group number with the Group. - Page 88 Programming F F F F Press the { { { { OK} } } } key. G G G G Display the number of the group you want to delete (1 to 9). Enter the group number with the number keys, or search using 0 or H H H H Press the { { { { OK} } } } key.
-
Page 89: Entering Characters
Entering Characters Entering Characters This section describes how to enter characters. Available Characters • Letters: ABCDEFGHIJKLMNOPQRSTUVWXYZabcdefghijklmnopqrstuvwxyz • Symbols: – _ (space) . , ( ) / @ & $ !” ' # p % + : ; < = > ? ^ [ ] ` { | } ∼ •... -
Page 90: How To Enter Characters
Programming • QWERTZ layout How to Enter Characters The following procedure describes how to enter characters. Note ZHMS340E ❒ When you enter a character, it is • AZERT layout displayed at the position of the cursor. If there is a character at the cursor position, the entered char- acter is displayed before the char- acter. - Page 91 Entering Characters • Multi Copy Reception See p.123 “Multi-copy Recep- - Wild Cards tion”, Advanced Features. When you program other parties' • Specified Tray Own Name or Own Fax Numbers for See p.125 “Specified Tray”, Ad- multiple destinations, you can pro- vanced Features.
- Page 92 Programming...
-
Page 93: Troubleshooting
4. Troubleshooting Loading Paper in the Main Paper Tray If there is no paper in the main paper Important tray, the B indicator on the control ❒ Do not stack paper over the lim- panel lights. it mark. Use the following procedure to load paper. -
Page 94: Replacing The Toner Cartridge
Troubleshooting Replacing the Toner Cartridge A A A A When the Add Toner indicator (D) Open the front cover. starts to blink, the toner cartridge is almost empty. About 50 pages can be printed while the Add Toner indica- tor blinks, but replace the toner car- tridge soon. - Page 95 Replacing the Toner Cartridge D D D D Remove the tape from the toner cartridge. - When Toner Runs Out Even if toner runs out and the Add Toner indicator (D) is lit, transmis- sion operations are possible. Reference p.32 “Memory Transmission”, Ba- sic Features p.37 “Immediate Transmission”, Basic Features...
-
Page 96: Toner Cartridge Storage
Troubleshooting Toner Cartridge Storage Do not incinerate spilled toner or used toner. Toner dust might ignite when exposed to an open flame. Dispose of the used toner cartridge in accordance with the local regulations. Keep toner (used or unused) and ton- er cartridge out of the reach of chil- dren. -
Page 97: Adjusting Volume
Adjusting Volume Adjusting Volume A A A A You can change the volume of the fol- Press the { { { { User Tools} } } } key. lowing sounds the machine makes: ❖ ❖ ❖ ❖ On Hook Sounds when you press the { { { { On Hook Dial} } } } key. - Page 98 Troubleshooting F F F F Press the { { { { OK} } } } key. G G G G Press 0 0 0 0 or 1 1 1 1 to select the item you want to adjust, and then press the { { { { OK} } } } key.
-
Page 99: Clearing Original Jams
Clearing Original Jams Clearing Original Jams If an original is jammed, the hindica- D D D D Close the ADF unit and ADF cov- tor blinks and “ Clear Misfed Orig- er making sure they click firmly “ is displayed. inal(s) into place. -
Page 100: Clearing A Copy, Fax, Or Print Jam
Troubleshooting Clearing a Copy, Fax, or Print Jam B B B B If a copy, fax, or printed paper is Open the blue cover. jammed, the hindicator blinks and “ “ is displayed. Clear Misfed Paper Perform the following procedure to clear the jammed paper. - Page 101 Clearing a Copy, Fax, or Print Jam When paper is caught in the right cover A Pull out the jammed paper. D D D D Close the right cover making sure it clicks firmly into place.
-
Page 102: Error Messages
Troubleshooting Error Messages The following messages may appear while you are operating or programming the machine. Message Causes and Solutions No Files Exist One of the following: • There are no documents in memory waiting for trans- mission. • Incorrect file number is entered. Check the file number and try again. - Page 103 Error Messages Message Causes and Solutions Machine is in Use. Please Wait Machine cannot print a list/file, because the plotter is not ready. Call Service Machine is out of order. Contact your service representa- tive. This Dial is in Use. Cannot Delete. This Quick Dial or Speed Dial is being used (such as for a This Dial is in Use.
-
Page 104: Indicators
Troubleshooting Indicators Problem Causes Solutions B is lit red. Paper has run out Load paper. See p.87 “Loading Paper in the Main Paper Tray”. D is lit red. Toner is exhausted Replace the toner cartridge. See p.88 “Replacing the Toner Car- tridge”. -
Page 105: Solving Problems
Solving Problems Solving Problems This table lists some common problems and their solutions. Problem Solutions Reference Cannot transmit or receive. The telephone line may p.196 “Connecting to a Telephone have become disconnected. Line”, Advanced Features Make sure it is correctly con- nected. - Page 106 Troubleshooting Problem Solutions Reference Cannot print onto paper Make sure the paper size de- p.180 “Changing the Paper Size”, even though it is of an ap- tection plate for the main Advanced Features propriate size. paper tray or optional paper tray unit matches the paper size actually loaded in that tray or unit.
-
Page 107: When Things Don't Go As Expected
When Things Don't Go as Expected When Things Don't Go as Expected This table lists operations which allow you to cancel Memory Transmission, Im- mediate Transmission, or copying, or to exit Energy Saver Mode. Problem Solutions Reference You want to cancel a Memory If the original is being p.34 “Canceling a Memory Trans- Transmission. -
Page 108: Printing The Help List
Troubleshooting Printing the Help List Press the { { { { Help} } } } key and { { { { Start} } } } key to print a copy of the Help List which contains brief descriptions about the following features: •... -
Page 109: Index
INDEX Dial label , 65 Display , 18 300 × 300 dpi , 40 Editing Add Toner indicator , 18 Groups , 77 ADF , 30 Quick Dial , 63 ADF cover , 15 Speed Dial , 71 Adjusting Volume Energy Saver/Clear Modes key , 19 Alarm , 91 Energy Saver key , 19... - Page 110 Loading Paper , 87 Quick Dial , 60 Load Paper Indicator , 18 Deleting , 64 Lower right cover , 15 Dialing , 45 Low-power Mode , 7 Dial label , 65 Editing , 63 Programming , 61 Quick Dial Key Flip Plate , 19 Main Paper Tray , 87 Quick Dial keys , 19 Main paper tray , 15...
- Page 111 tonal signals , 44 Tone , 44 Toner Cartridge Replacing , 88 Storage , 90 Transmission Modes , 27 Trans. Option key , 18 Troubleshooting , 87 Error Messages , 96 TTI→Fax Header , 53 User Function keys , 18 User Tools key , 18 Ventilation Hole , 17 Volume , 91...
- Page 112 MEMO...
- Page 113 MEMO...
- Page 114 MEMO H557-8401...
- Page 115 In the event of problems, please contact your service representative in the first instance. The CE Declaration of Conformity is available on the Internet at URL: http://www.ricoh.co.jp/fax/ce_doc/. In accordance with IEC 60417, this machine uses the following symbols for the main power switch: a means POWER ON.
- Page 116 RICOH COMPANY, LTD. 15-5, Minami Aoyama 1-chome, Minato-ku, Tokyo 107-8544, Japan Phone: +81-3-3479-3111 Ricoh shall not be responsible for any dam- age or expense that might result from the use of parts other than genuine Ricoh parts with your Ricoh office products.