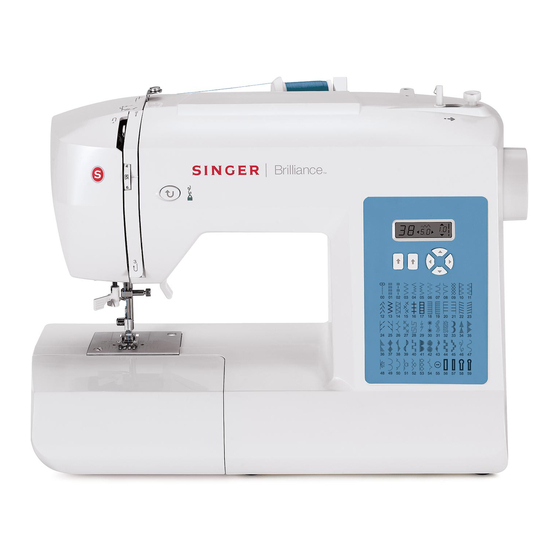
Singer Brilliance 6160 Service Manual
Hide thumbs
Also See for Brilliance 6160:
- Instruction manual (64 pages) ,
- Instruction manual (64 pages) ,
- Instruction manual (68 pages)
Advertisement
Advertisement
Table of Contents

Related Manuals for Singer Brilliance 6160


Summary of Contents for Singer Brilliance 6160
- Page 1 6160 6180 Service Manual 104 73 11-26 26 Oct 2010...
-
Page 2: Table Of Contents
Page Service Manual 2/27 MODEL 6180 / 6160 Contents SEC.01 Disassembling of outer covers *SEC.02 Positions described in this manual SEC.03 Needle height SEC.04 Timing of needle and shuttle hook SEC.05 Needle clearance SEC.06 Adjustment of shuttle race position SEC.07 Needle side motion (Left-right position) SEC.08 Timing of needle and feed dog... -
Page 3: Sec.01
Page Service Manual 3/27 MODEL 6180 / 6160 SEC.01 Disassembling of outer covers Remove face cover. Remove screw at the face cover shown in the picture below. Remove front cover and rear cover Remove screws at the rear cover shown in the picture below. Remove screws at the bottom shown in the picture below. - Page 4 Page Service Manual 4/27 MODEL 6180 / 6160 Remove spring plate at the shuttle race cover. Then remove shuttle race cover. Previous shape (left), Current shape (right) Remove thread guide pin.
- Page 5 Page Service Manual 5/27 MODEL 6180 / 6160 Remove front cover by screwdriver as shown on picture below. Machine with front cover removed Then remove rear cover...
-
Page 6: Sec.02
Page Service Manual 6/27 MODEL 6180 / 6160 *SEC.02 Positions described in this manual SEC.02, SEC.06 SEC.10 SEC.10 SEC.10 SEC.13 SEC.05 SEC.10 SEC.07-2 SEC.09 SEC.02 SEC.06 SEC.04... - Page 7 Page Service Manual 7/27 MODEL 6180 / 6160 SEC.04 SEC.12 SEC.13 SEC.03 SEC.08...
-
Page 8: Sec.03 Needle Height
Page Service Manual 8/27 MODEL 6180 / 6160 SEC. 03 Needle height Procedure of how to check and adjust needle height is described in this section. (Checking) Distance between needle plate and tip of needle should be 14.5 mm ± 0.2 mm, when needle is at its highest position under specification of design. -
Page 9: Sec.04
Page Service Manual 9/27 MODEL 6180 / 6160 SEC.04 Timing of needle and shuttle hook Procedure of how to check and adjust timing of needle and shuttle hook is described in this section. Check needle height beforehand. (Checking) Select zigzag stitch and set stitch width at maximum. Turning hand wheel slowly, bring up needle from its right hand and lowest point, until shuttle hook point comes to align with left side of needle. -
Page 10: Sec.05
Page Service Manual 10/27 MODEL 6180 / 6160 SEC.05 Needle clearance Procedure of how to check and adjust needle clearance is described in this section. (Checking) Check to see if the clearance between needle and shuttle hook point is 0 to 0.15 mm when needle and shuttle hook point are overlapped. -
Page 11: Sec.06
Page Service Manual 11/27 MODEL 6180 / 6160 SEC. 06 Adjustment of shuttle race position Procedure of how to check and adjust shuttle race position is described in this section. (Adjustment) Loosen screw (1) from the bottom of machine and screw (2) from the left. Loosen screws (4) and (5) on the shuttle shaft gear (3). -
Page 12: Sec.07
Page Service Manual 12/27 MODEL 6180 / 6160 SEC. 07 Needle side motion (Left-right position) Procedure of how to check and adjust needle position to the needle hole with maximum zigzag width is described in this section. (Checking) Select zigzag stitch at maximum width. Set needle at extreme left and right ends to check whether needle evenly Sets to the needle plate. -
Page 13: Sec.08
Page Service Manual 13/27 MODEL 6180 / 6160 SEC.08 Timing of needle and feed dog Procedure of how to check and adjust timing of needle and feed dog is described in this section. 1. Horizontal feed (Checking) Select straight stitch and set stitch length at maximum. Turn hand wheel to set needle at its highest position. - Page 14 Page Service Manual 14/27 MODEL 6180 / 6160 2. Vertical feed (Checking) Select straight stitch and set stitch length at “0”. Lowering need bar from its highest point, check to see whether top surface of feed dog is on a same level of the surface of needle plate, when needle bar approaches to 4-5mm above needle plate.
-
Page 15: Sec.09
Page Service Manual 15/27 MODEL 6180 / 6160 SEC. 09 Feed dog position (Checking) Select straight stitch and set stitch length at maximum. Turn hand wheel toward you to see whether feed dog is not hitting against needle plate at beginning and end of forward feeding of feed dog. -
Page 16: Sec.10 Feed Dog Height
Page Service Manual 16/27 MODEL 6180 / 6160 SEC. 10 Feed dog height Procedure of how to check and adjust feed dog height to needle plate is described in this section. (Checking) Move feed dog to its highest position by turning hand wheel. Check to see if feed dog height is 0.9 mm to 1 mm as shown below at the position where needle is lowered. -
Page 17: Sec.11
Page Service Manual 17/27 MODEL 6180 / 6160 SEC. 11 Needle threader height Procedure of how to check and adjust needle threader height is described in this section. 1. Horizontal direction (Checking) Check if the needle is attached properly. Raise needle to its highest position by rotating hand wheel toward you. And then check and see if the hook is inserted into the needle hole securely. - Page 18 Page Service Manual 18/27 MODEL 6180 / 6160 (Adjustment) Set needle bar at its highest position and loosen screw (1) of needle threader stopper at needle bar crank inside the bracket as shown below with 2mm hexagonal screw driver. Screw (1) It is behind the bracket.
-
Page 19: Sec.12
Page Service Manual 19/27 MODEL 6180 / 6160 SEC.12 Presser foot height (Checking) Check if presser foot is parallel to feed dog and holes of needle plate properly. Check and see if the clearance between needle plate and presser foot is about 5.5 mm. -
Page 20: Sec.13
Page Service Manual 20/27 MODEL 6180 / 6160 SEC.13 Adjustment of thread tension (Checking) Set thread tension dial at “5”, and pull thread between tension discs and check. Thread tension value with non-elastic cotton thread #60. Measured value should be 50 – 60 g. (Adjustment) when front cover is not removed: Remove front cover. - Page 21 Page Service Manual 21/27 MODEL 6180 / 6160 After desired tension is obtained, re-fit the dial at the position where indicator of thread guide plate and dial scale of “5” meets and also it can be engaged with pinion. Then tighten screw securely. (Adjustment) When front cover is removed:.
- Page 22 Page Service Manual 22/27 MODEL 6180 / 6160 SEC.14 Origin point positioning of motor 1. Zigzag bight (No switch is available) Remove the two screws (2) from the bracket supporting a stem of a pinion gear, and then remove the bracket (1). 2...
- Page 23 Page Service Manual 23/27 MODEL 6180 / 6160 2. Stitch length (Switch is available) Loosen one of two screws (6) at the pinion gear of stitch length with power off. Another screw should be fixed. Turn on the power switch, then select straight stitch and set 0 feed. At this time the shaft of the pulse motor is excited and stopped at its position.
- Page 24 Page Service Manual 24/27 MODEL 6180 / 6160 SEC.15 Circuit board 1. SW & CPU board (Unit) Reverse stitch switch LCD Unit Jumper wire Bobbin winding switch Foot control Buttonhole stitch SW Cam sensor harness Not used 84096 5P connector cable for model 6180 Connected with AC board...
- Page 25 Page Service Manual 25/27 MODEL 6180 / 6160 Reverse stitch switch LCD Unit Jumper wire Bobbin winding switch Foot control Buttonhole stitch SW Cam sensor harness Not used 84097 5P connector cable for model 6160 Connected with AC board CN10 Motor for material feeding...
- Page 26 Page Service Manual 26/27 MODEL 6180 / 6160 2. LCD Unit P/no. 84082 3. AC Power Board 87530 Transformer Secondary 5P Connector cord Connect with CPU LED lamp harness Main motor DC 120v Transformer YM-45D Primary...
- Page 27 Page Service Manual 27/27 MODEL 6180 / 6160 SEC. 16 Wiring diagram...