
Related Manuals for AT&T GL2101-0


Summary of Contents for AT&T GL2101-0
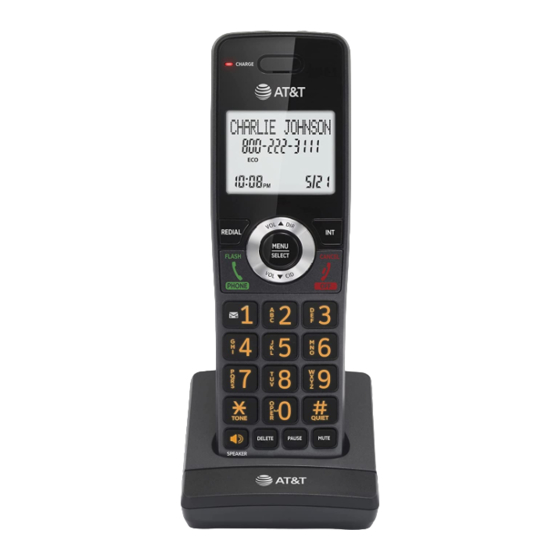
- Page 1 User’s manual GL2101-0 DECT 6.0 expansion handset for use with AT&T models GL2101/GL2101-2 DECT 6.0 cordless telephone...
- Page 2 This telephone meets the California Energy Commission regulations for energy consumption. Your telephone is set up to comply with the energy- conserving standards right out of the box. No further action is necessary. Model number: GL2101-0 Type: DECT 6.0 expansion handset...
- Page 3 Parts checklist Your telephone package contains the following items. Save your sales receipt and original packaging in the event warranty service is necessary. User’s manual GL2101-0 DECT 6.0 expansion handset for use with AT&T models GL2101/GL2101-2 DECT 6.0 cordless telephone...
-
Page 4: Table Of Contents
User’s manual GL2101-0 DECT 6.0 expansion handset for use with AT&T models GL2101/GL2101-2 DECT 6.0 cordless telephone Table of contents Getting started Important safety information ....................1 Safety information ........................1 Especially about cordless telephones ................2 Precautions for users of implanted cardiac pacemakers ........3 ECO mode ............................ -
Page 5: Getting Started
Getting started Important safety information This symbol is to alert you to important operating or servicing instructions that may appear in this user’s manual. Always follow basic safety precautions when using this product to reduce the risk of injury, fire, or electric shock. Safety information Read and understand all instructions in the user’s manual. -
Page 6: Especially About Cordless Telephones
Getting started Important safety information CAUTION: To prevent risk of fire or battery explosion, replace with the correct battery type. Dispose of used batteries according to the instructions. Disconnect the telephone line from the equipment before open the battery door. Do not use the battery in following conditions: High or low extreme temperature during use, storage or transportation. -
Page 7: Precautions For Users Of Implanted Cardiac Pacemakers
Getting started Important safety information Nickel-metal hydride rechargeable batteries: Dispose of these batteries in a safe manner. Do not burn or puncture. Like other batteries of this type, if burned or punctured, they could release caustic material which could cause injury. The RBRC Seal means that the manufacturer is voluntarily participating in an industry program to collect and recycle nickel- metal hydride rechargeable batteries when taken out of service... -
Page 8: Installation
Getting started Installation You must install and See pages 10-12 STOP! charge the battery before for easy instructions. using the telephone. Your product may be shipped with a protective sticker covering the handset display - remove it before use. For customer service or product information, visit our website at https://telephones.att.com 1 (800) 222-3111 or call... -
Page 9: Quick Reference Guide
Getting started Quick reference guide CHARGE light On when the handset is charging in the telephone base or charger. Press to show directory entries when the VOL p DIR handset is not in use. Press to scroll up while in menus. While entering names or numbers, press to move the cursor to the right. - Page 10 Getting started Quick reference guide While reviewing a caller ID log entry, press repeatedly to add or remove 1 in front of the telephone number before dialing or saving it in the directory. Press and hold to set or to dial your voicemail number.
- Page 11 Getting started Quick reference guide During a call, press to hang up. OFF/ While in a menu, press to cancel an CANCEL operation, back up to the previous menu, or exit the menu display; or press and hold this button to exit to idle mode. When the handset is ringing, press to mute the ringer temporarily.
- Page 12 Getting started Quick reference guide Feature menu Main menu Directory The selected menu item is Caller ID log highlighted. Intercom Call block Ringers Set date/time Menu Settings Using menus: 1. Press MENU/ in idle mode (when the telephone is not in SELECT use) to enter the main menu.
-
Page 13: Charger Installation
Getting started Charger installation Install the charger, as shown below. Plug the large end of the charger’s power adapter into an electrical outlet not controlled by a wall switch. Ensure the small end of the charger’s power adapter is plugged into the power jack on the bottom of the charger. -
Page 14: Battery Installation And Charging
Getting started Battery installation and charging Install the battery, as shown on page 11. Once you have installed the battery, the screen indicates the battery status (see the following table). If necessary, place the handset in the telephone base or charger to charge the battery. For best performance, keep the handset in the telephone base or charger when not in use. - Page 15 Getting started Battery installation and charging 1. Plug the battery connector securely into the socket inside the handset battery compartment. Insert the supplied battery with the label THIS SIDE UP facing up, as indicated. 2. Align the cover flat against the battery compartment, then slide it upwards until it clicks into place.
- Page 16 Getting started Battery installation and charging 3. Charge the handset by placing it face forward in the telephone base or charger. The CHARGE light on the top of the handset is on during charging. To replace the battery, press the tab and slide the battery compartment cover downwards.
-
Page 17: Registration And Deregistration
Registration and deregistration Add and register handsets Before using a new GL2101-0 handset, make sure it is registered with an AT&T GL2101/GL2101-2 telephone system (purchased separately). These telephone systems can support up to five handsets. The handset(s) provided with your telephone system are already registered as HANDSET 1, and so forth. - Page 18 Registration and deregistration Add and register handsets Notes: You cannot register a handset if any other system handset is in use. If you try to register more than five handsets to the telephone base, the telephone base shows Registration slots are full and sounds two beeps.
-
Page 19: Deregister Handsets
Registration and deregistration Deregister handsets You may need to deregister your handsets if: You have five registered handsets and need to replace a handset. -OR- You wish to change the designated handset number of your registered handsets. You must first deregister ALL handsets, and then register each handset you wish to use again, one at a time. -
Page 20: Appendix
Appendix Troubleshooting If you have difficulty with your phone, please try the following suggestions. For Customer Service, visit our website at https://telephones.att.com 1 (800) 222-3111 or call . In 1 (866) 288-4268 Canada, dial The handset registration is unsuccessful. Follow the handset registration instructions to register the handset again (see Add and register handsets on pages 13-14). - Page 21 Appendix Troubleshooting The display shows No home line. I cannot get a dial tone. Try all the suggestions mentioned above. If the previous suggestions do not work, disconnect the telephone line cord from your telephone and connect the telephone line cord to another telephone. If there is no dial tone on that other telephone either, your telephone line cord may be defective.
- Page 22 Appendix Troubleshooting My cordless handset isn’t performing normally. Make sure you plug the power cord securely into the telephone base. Plug the power adapter into a different, working electrical outlet without a wall switch. Move the cordless handset closer to the telephone base. You might have moved out of range.
- Page 23 Appendix Troubleshooting If the battery is depleted, it might take approximately 30 minutes to charge the handset before it shows Low battery. Refer to the table on page 10 for details. You might need to purchase a new battery. Refer to Battery installation and charging in this user’s manual on pages 10-12.
- Page 24 Appendix Troubleshooting If your phone is plugged in with a modem or a surge protector, plug the phone (or modem/surge protector) into a different location. If this doesn’t solve the problem, relocate your phone or modem farther apart from one another, or use a different surge protector.
- Page 25 Appendix Troubleshooting If the other phones in your home are having the same problem, contact your telephone service provider (charges might apply). Test a working phone at the phone jack. If another phone has the same problem, contact your telephone service provider (charges might apply).
- Page 26 Appendix Troubleshooting My caller ID isn’t working. Caller ID is a subscription service. You must subscribe to this service from your telephone service provider for this feature to work on your phone. The caller may not be calling from an area that supports caller ID. Both your telephone service provider and your caller’s telephone service provider must use caller ID compatible equipment.
- Page 27 Appendix Troubleshooting Make sure to plug your USB telephone adapter into a dedicated USB port on your computer. Do not plug it into a multiple port USB hub (USB splitter) that is not powered. In a few rare instances, the USB port on your computer may not have enough power.
- Page 28 Appendix Troubleshooting Common cure for electronic equipment. If the telephone does not seem to be responding normally, try putting the cordless handset in the charger. If it does not fix the problem, do the following (in the order listed): 1. Disconnect the power to the telephone base. 2.
-
Page 29: Maintenance
Appendix Maintenance Taking care of your telephone Your cordless telephone contains sophisticated electronic parts, so you must treat it with care. Avoid rough treatment. Place the handset down gently. Save the original packing materials to protect your telephone if you ever need to ship it. Avoid water Your telephone can be damaged if it gets wet. -
Page 30: For C-Ul Compliance
Appendix For C-UL compliance In compliance with the bilingual requirements for safety, caution, and warning markings of Canadian Federal and Provincial/Territorial statutes and regulations, the French version of Important safety information is included. Mesures de sécurité importantes Ce symbole vous alertera d’informations importantes ou d’instructions d’entretien pouvant apparaître dans ce guide d’utilisation. - Page 31 Appendix For C-UL compliance Remplacez les piles uniquement tel que décrit dans votre guide d’utilisation (Page 10). N’incinérez pas et ne percez pas les piles — elles contiennent des produits chimiques caustiques. L’adaptateur de courant est conçu pour être orienté verticalement ou installé sur le plancher.
- Page 32 Appendix For C-UL compliance Spécifiquement en rapport avec les téléphones sans fil Confidentialité : Les mêmes caractéristiques qui rendent les téléphones sans fil si pratiques créent également des restrictions. Les appels téléphoniques sont transmis entre le socle du téléphone et le combiné par le biais d’ondes radio, et il se peut que vos conversations téléphoniques soient interceptées par d’autres équipements de réception d’ondes radio au sein de la portée du téléphone sans fil.
- Page 33 Appendix For C-UL compliance Mesures préventives pour les utilisateurs de stimulateurs cardiaques implantés dans l’organisme Stimulateurs cardiaques (ne s’applique qu’aux téléphones sans fil numériques) : L’organisme ‘Wireless Technology Research, LLC (WTR)’, une firme de recherche indépendante, a mené une évaluation pluridisciplinaire des interférences entre les téléphones sans fil portatifs et les stimulateurs cardiaques implantés dans l’organisme.
-
Page 34: Fcc Part 68 And Acta
Appendix FCC Part 68 and ACTA This equipment complies with Part 68 of the FCC rules and with technical requirements adopted by the Administrative Council for Terminal Attachments (ACTA). The label on the back or bottom of this equipment contains, among other things, a product identifier in the format US:AAAEQ##TXXXX. - Page 35 Appendix FCC Part 68 and ACTA Industry Canada This device contains licence-exempt transmitter(s)/receiver(s) that comply with Innovation, Science and Economic Development Canada’s licence-exempt RSS(s). Operation is subject to the following two conditions: (1) This device may not cause interference. (2) This device must accept any interference, including interference that may cause undesired operation of the device.
-
Page 36: Fcc Part 15
Appendix FCC Part 15 NOTE: This equipment has been tested and found to comply with the requirements for a Class B digital device under Part 15 of the Federal Communications Commission (FCC) rules. These requirements are intended to provide reasonable protection against harmful interference in a residential installation. -
Page 37: California Energy Commission Battery Charging Testing Instructions
Appendix California Energy Commission battery charging testing instructions This telephone is set up to comply with the energy-conserving standards right out of the box. These instructions are intended for California Energy Commission (CEC) compliance testing only. When the CEC battery charging testing mode is activated, all telephone functions, except handset battery charging, will be disabled. -
Page 38: Limited Warranty
Appendix Limited warranty The AT&T brands are used under license. This product is covered by a one-year limited warranty. Any replacement or warranty service, and all questions about this product, should be directed to our website at https://telephones.att.com 1 (800) 222-3111 or call . - Page 39 Appendix Limited warranty Product to the extent that the problem experienced is caused by signal conditions, network reliability or cable or antenna systems; or Product to the extent that the problem is caused by use with non-Advanced American Telephones electrical accessories; or Product whose warranty/quality stickers, Product serial numbers plates or electronic serial numbers have been removed, altered or rendered illegible;...
- Page 40 Appendix Limited warranty State/Provincial Law Rights: This warranty gives you specific legal rights, and you may also have other rights which vary from state to state. Limitations: Implied warranties, including those of fitness for a particular purpose and merchantability (an unwritten warranty that the Product is fit for ordinary use) are limited to one year from date of purchase.
-
Page 41: Technical Specifications
Appendix Technical specifications RF frequency band 1921.536MHz — 1928.448MHz Channels Handset battery 2.4 VDC, AAA x 2, Ni-MH Charger voltage 6VDC @0.4A (DC adapter output) Max. PS1 or LPS Operating times* Talk time (handset): up to 10 hours Standby: up to 5 days * Operating times vary depending on your actual use and the age of the battery. - Page 42 https://telephones.att.com ©2021 Advanced American Telephones. All Rights Reserved. AT&T and the AT&T logo are trademarks of AT&T Intellectual Property licensed to Advanced American Telephones, San Antonio, TX 78219. SynJ® and Syn248® are trademarks of Advanced American Telephones. The RBRC Seal and 1-800-8-BATTERY® are registered trademarks of Call2recycle, Inc. Printed in China.