Advertisement
Available languages
Available languages
Quick Links
USE AND CARE GUIDE
Questions, problems, missing parts?
Contact Husky's manufacturing partner for assistance:
7 a.m. - 5 p.m., CST, Monday-Friday:
Chat: www.edsal.com/chat or www.edsal.com/contact
Email: support@edsal.com
Phone: 1-773-475-3131
To obtain replacement parts please provide: Model Number, Part Number & Description, Store Location and Date Purchased
Important Safety Information
WARNING: Excessive weight hazard!
leave children unattended while assembling this unit. High risk of injury if installed incorrectly. Follow instructions
carefully and routinely inspect this rack to ensure all components are fastened securely. DO NOT PULL ON OR
HANG FROM THIS WALL RACK. Use care when working with metal parts, wear gloves for protection. Do not use
this unit for anything other than the manufacture's intended purpose.
This unit has a total load capacity of 1000 pounds of evenly
distributed weight (not to exceed 125 lbs. per square foot), using all
hardware (included in package) and anchored into solid wood wall
studs. Do not over load. Do not attempt to mount to steel studs.
Be sure wood studs are structurally sound. Edsal is not liable for
structure failure, or damage or injury resulting from structure failure.
Warranty
GUARANTEED FOREVER. If your Husky product ever fails bring it back and we will replace it for free. This full warranty gives you
specific rights which vary from state to state. If this product is defective contact the manufacturer for repair or replacement
parts.
Use two or more people to install this rack to avoid injury. Do not
THANK YOU FOR YOUR PURCHASE
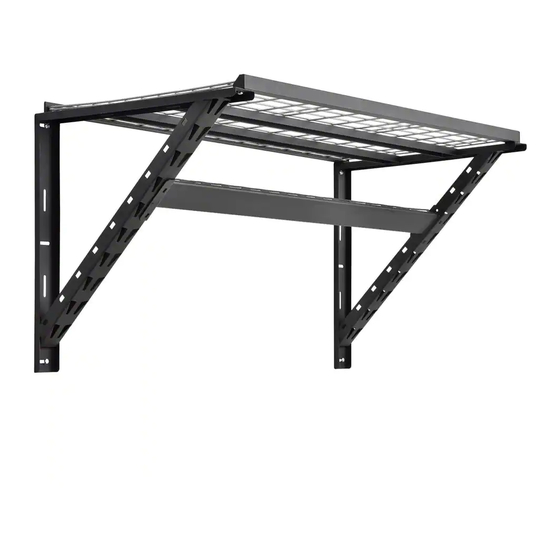
Wall Rack
Item# 1004186968
Model # CWR48B
1000 lbs.
Advertisement

Related Manuals for Husky CWR48B


Summary of Contents for Husky CWR48B
- Page 1 Warranty GUARANTEED FOREVER. If your Husky product ever fails bring it back and we will replace it for free. This full warranty gives you specific rights which vary from state to state. If this product is defective contact the manufacturer for repair or replacement parts.
- Page 2 Parts List Cross Beam Shelf Support Welded Bracket Center Support Wire Deck Slotted Hex Lag Bolt Carriage Bolt Lock Nut Large Washer Small Washer Bolt Shelf Clip-L Shelf Clip-R Tools/Items Required Magnetic Leveler Tape Measure Safety Glasses Stud Finder Rubber Mallet Pencil 7/16”...
-
Page 3: Table Of Contents
Assembly Instructions Step 1 Step 2 Determine the desired location and height for the wall Using the Welded Brackets (A) as a template, mark rack. Use a stud finder and measuring tape to locate two the three hole locations with pencil at the center of wall studs approximately 48”... -
Page 4: Figure
Assembly Instructions Step 4 Install Cross Beam (B) into the assembled welded brackets by inserting the inside tabs located on the ends of the cross beams into the two mid-center slots on both welded brackets (see figure 6). Use a rubber maller to tap down on both ends of the cross beam to properly seat the tabs into the narrow ends of the slots (see figure 7). -
Page 5: Step 5
Assembly Instructions Step 5 Assemble one Shelf Clip-L (L), one Shelf Clip-R (M) and one Shelf Support (C) to the welded brackets by lining up the holes of both shelf clips with the oblong holes located on the top rear of the welded brackets. See figure 9 for correct positions for Shelf Clip-L (L) and Shelf Clip-R (M). -
Page 6: Step 7
Assembly Instructions Step 7 Install the Wire Deck (E) by fitting into the front and rear shelf support assembly (see Figure 11). Figure 11 ✓ Step 8 Finally, tighten all six Lag Bolts into the wall (see Figure 12). Figure 12 ✓... - Page 7 Garantie GARANTI A VIE. Si votre produit Husky échoue, ramenez-le et nous le remplacerons gratuitement. Cette garantie complète vous confère des droits spécifiques qui varient d'un État à l'autre. Si ce produit est défectueux, contactez le fabricant pour les pièces de rechange ou de réparation.
- Page 8 Liste des pièces détachées Portique à traverse Support d'étagère Support soudé Support Treillis du centre métallique Tire-fonds Boulon Boulon de Grande Écrou de Petite hexagonal carrosserie blocage rondelle rondelle à fente Clip Clip d'étagère-L d'étagère-R Outils requis Niveleur magnétique Ruban à mesurer Lunettes de Localisateur sécurité...
-
Page 9: Figure 1
Instructions d'assemblage Étape 1 Étape 2 Déterminez l'emplacement et la hauteur souhaités pour le En utilisant les supports soudés (A) comme gabarit, marquez les trois emplacements de trou avec le support mural. Utilisez un localisateur de goujon et un ruban crayon au centre de chaque goujon pour les deux à... - Page 10 Instructions d'assemblage Étape 4 Installez le portique à traverse (B) dans les supports soudés assemblés en insérant les languettes intérieures situées aux extrémités des portiques transversales dans les deux fentes du milieu central des deux supports soudés (voir figure 6). Utilisez un maillet en caoutchouc pour appuyer sur les deux extrémités du portique à traverse pour bien installer les languettes dans les extrémités étroites des fentes (voir figure 7).
- Page 11 Instructions d'assemblage Étape 5 Assembler un clip-L (L), un clip-R (M) et un support d'étagère (C) aux supports soudés en alignant les trous des deux pinces à étagères avec les trous oblongs situés sur l'arrière supérieur des supports soudés. Voir la figure 9 pour les positions correctes pour le clip-L (L) et le clip-R (M) d'étagère.
- Page 12 Instructions d'assemblage Étape 7 Installez le treillis métallique (E) en le faisant monter dans l'ensemble support de l'étagère avant et arrière (voir figure 11). Figure 11 ✓ Étape 8 Enfin, serrez les six tire-fonds dans le mur (voir figure 12). Figure 12 ✓...
- Page 13 Garantía GARANTIZADO PARA SIEMPRE. Si su producto Husky alguna vez falla, tráigalo y lo reemplazaremos de forma gratuita. Esta garantía completa le otorga derechos específicos que varían de estado a estado. Si este producto está defectuoso contacte a el fabricante para reparar o partes de reemplazo.
- Page 14 Lista de Piezas Viga transversal Soporte de estante Soporte soldado Soporte Repisa de céntrico alambre Perno Arandela Perno de Perno del Tuerca de Arandela hexagonal pequeña retraso carro bloqueo grande ranurado Sujeto de Sujeto de repisa-L repisa-R Herramientas Necesarias Nivelador Magnético Cinta Métrica Lentes de seguridad Buscador de...
- Page 15 Instrucciones de Montaje Paso 1 Paso 2 Determine la ubicación y la altura deseadas para el rack de Usando los soportes soldados (A) como plantilla, pared. Utilice un localizador de los pernos y una cinta de medira marque los tres orificios ovalados con un lápiz en el para ubicar dos pernos de pared de aproximadamente 48 centro de cada perno para ambos lados (vea la figura pulgadas de distancia entre el centro y el centro de los pernos...
- Page 16 Instrucciones de Montaje Paso 4 Instale la viga transversal (B) en el soporte soldado mediante la inserción de las pestaña internas situadas en los extremos de las vigas transversales en las dos ranuras del centro de ambos soportes soldados (consulte la figura 6). Use un mazo de goma para golpear hacia abajo en ambos extremos de la viga transversal para sentar correctamente las pestaña en los extremos estrechos de las ranuras (consulte la figura 7).
- Page 17 Instrucciones de Montaje Paso 5 Ensamble un sujeto de repisa-L (L), un sujeto de repisa-R (M) y un soporte para repisa (C) en los soportes soldados alineando los orificios de ambas abrazaderas con los agujeros alargados ubicados en la parte superior trasera de la soldadura soportes. Consulte la figura 9 para ver las posiciones correctas de sujeto de repisa-L (L) y sujeto de repisa-R (M).
- Page 18 Instrucciones de Montaje Paso 7 Instale la repisa de alambre (E) encajándola en el conjunto de soporte delantero y trasero (consulte la Figura 11). Figura 11 ✓ Paso 8 Finalmente, apriete los seis Pernos en la pared (vea la Figura 12). Figura 12 ✓...