Table of Contents
Advertisement
Quick Links
Advertisement
Table of Contents

Related Manuals for AEG LF8C1612A


Summary of Contents for AEG LF8C1612A
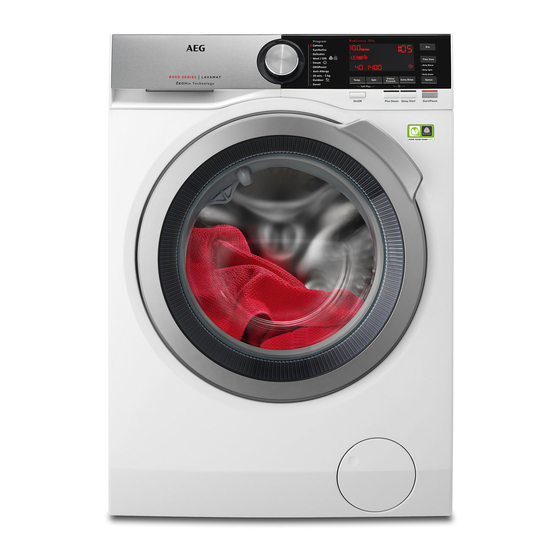
- Page 1 LF8C1612A User Manual Washing Machine USER MANUAL...
-
Page 2: Table Of Contents
17. WARRANTY ......................35 FOR PERFECT RESULTS Thank you for choosing this AEG product. We have created it to give you impeccable performance for many years, with innovative technologies that help make life simpler features you might not find on ordinary appliances. Please spend a few minutes reading to get the very best from it. -
Page 3: Safety Information
ENGLISH SAFETY INFORMATION Before the installation and use of the appliance, carefully read the supplied instructions. The manufacturer is not responsible for any injuries or damages that are the result of incorrect installation or usage. Always keep the instructions in a safe and accessible location for future reference. -
Page 4: Conditions Of Use
The ventilation opening in the base (if applicable) • must not be covered by a carpet, mat, or any floor covering. The appliance must be connected to the water mains • using the new supplied hose sets, or other new hose sets supplied by the Authorised Service Centre. - Page 5 ENGLISH Service Centre to ensure which • Do not put flammable products or accessories can be used. items that are wet with flammable products in, near or on the appliance. 3.2 Electrical connection • Make sure that all metal objects are removed from the laundry.
-
Page 6: Installation
4. INSTALLATION 4. Open the door and remove the WARNING! polystyrene piece from the door seal Refer to Safety chapters. and all the items from the drum. 4.1 Unpacking WARNING! Remove all the packaging and the transit bolts before installing the appliance. - Page 7 ENGLISH Attach the sound barriers at a room temperature. 13. Pull up the appliance in vertical position. CAUTION! Do not use alcohol, solvents or chemical products. 9. Make sure to identify the different 14. Remove the power supply cable and sizes and the positions of the sound the drain hose from the hose holders.
- Page 8 A correct adjustment of the appliance level prevents the vibration, noise and the movement of the appliance when in operation. We recommend that you keep the packaging and the transit bolts for any movement of the appliance. 4.2 Positioning and levelling 4.3 The inlet hose...
- Page 9 ENGLISH It is possible to connect the drain hose in different ways: 1. Make a U shape with the drain hose and put it around the plastic hose guide. CAUTION! Make sure that there are no leaks from the couplings. 2.
-
Page 10: Product Description
6. Connect the drain hose to the spigot The end of the drain hose and tighten it with a clamp. must always be ventilated , i.e. the inner diameter of the drain pipe (min. 38 mm - min. 1.5") must be larger than the external diameter of the drain hose. -
Page 11: Control Panel
ENGLISH 5.2 Appliance overview 12 13 Worktop Feet for levelling the appliance Detergent dispenser Drain hose Control panel Inlet hose connection Door handle Mains cable Internal light Transit bolts Rating plate Hose support Drain pump filter 6. CONTROL PANEL 6.1 Control panel description 11 10... - Page 12 Programme dial Extra rinse touch button (Extra Rinse) Display Delay start touch button (Delay Start) Energy saving touch button (Eco) Time saving touch button (Time Super steam touch button (Plus Save) Steam) Skipping phase touch button Anti-stain and prewash touch button...
-
Page 13: Dial And Buttons
ENGLISH Washing phase indicator: it flashes during prewash and wash phase. Rinsing phase indicator: it flashes during rinse phase. indicator appears when the Soft Plus option is activated. Spin and drain phase indicator. It flashes during spin and drain phase. OKO MIX indicator. - Page 14 7.3 Temp You must drain the water to unlock the door. When you select a washing programme, Touch the Start/Pause button: the the appliance automatically proposes a appliance performs only the draining default temperature. phase. Touch this button repeatedly until the...
- Page 15 ENGLISH This option increases the programme the washing programme. Touch this duration. button once to decrease the duration. • In case of smaller load, touch this If the Extra Rinse is set as a button twice to set an extra quick default option and you programme.
-
Page 16: Programmes
8. PROGRAMMES 8.1 Programme Chart Washing programmes Programme Programme description Washing programmes Cottons White cotton and coloured cotton. Normal soil and light soil. Synthetic items or mixed fabric items. Normal soil. Synthetics Delicate fabrics such as acrylics, viscose, polyester items. - Page 17 ENGLISH Programme Programme description Do not use fabric softener and make sure that Outdoor there is no softener residue in the detergent dispenser. Synthetic sport items. This programme is designed to gently wash modern outdoor sporting garments and is also suitable for sporting clothes such as gym, cycling or jogging and simi- lar.
- Page 18 Programme Default temperature Maximum spin speed Maximum load Temperature range Spin speed range 1.5 kg Steam 30 °C 1600 rpm 5 kg 60 °C - 30 °C 1600 rpm - 400 rpm OKOPower 1600 rpm 60 °C 10 kg...
-
Page 19: Before First Use
ENGLISH ■ ■ ■ ■ Time Save ■ ■ ■ ■ ■ ■ ■ ■ ■ Only Rinse ■ ■ ■ ■ ■ ■ ■ ■ ■ Spin Only ■ ■ ■ ■ ■ ■ ■ ■ ■ Drain Only ■... -
Page 20: Settings
10. SETTINGS 10.1 Child Lock Delay Start buttons simultaneously for about 6 seconds. With this option you can prevent that the If you deactivate the children play with the control panel. acoustic signals, they • To activate/deactivate this option,... - Page 21 ENGLISH 11.2 Loading the laundry Flap for powder or liquid 1. Open the appliance door. detergent. 2. Shake the items before you put them in the appliance. Always follow the 3. Put the laundry in the drum, one item instructions that you find on at a time.
- Page 22 4. To use liquid detergent, turn the flap Make sure that the flap does not cause a down. blockage when you close the drawer. 11.5 Setting a programme 1. Turn the programme dial to select the desired washing programme. The...
- Page 23 ENGLISH After touching the Start/Pause button, The drain pump can operate the maximum declared load indicator shortly before the appliance goes off, the indicator flashes, the fills water. ProSense starts the laundry load detection: 11.7 Starting a programme 1. The appliance detects the load in the with the delay start first 30 seconds: the indicator 1.
- Page 24 11.9 Programme phase 11.11 Cancelling a running indicators programme When the programme starts the indicator 1. Press the button On/Off to cancel of the running phase flashes and the the programme and to deactivate other phase indicators are steady on.
-
Page 25: Hints And Tips
ENGLISH In the display all washing phase 1. If necessary, touch the Spin button to indicators become steady and the time decrease the spin speed proposed by the appliance. area shows . 2. Touch the Start/Pause button: The indicator of the Start/Pause button •... - Page 26 12.1 The laundry load 12.3 Detergents and other treatments • Divide the laundry into: white, coloured, synthetics, delicates and • Only use detergents and other wool. treatments specially made for • Follow the washing instructions on the washing machines: laundry care labels.
-
Page 27: Care And Cleaning
ENGLISH Use the correct quantity of water softener. Follow the instructions that you find on the packaging of the product. 13. CARE AND CLEANING run a maintenance wash regularly (at WARNING! least once a month): Refer to Safety chapters. 1. Remove all laundry from the drum. 2. - Page 28 1. Open the drawer. Press the catch downwards as indicated in the picture and pull it out. 13.7 Cleaning the drain pump WARNING! 2. Remove the top part of the additive Disconnect the mains plug compartment to aid cleaning and from the mains socket.
- Page 29 ENGLISH 2. Place a suitable bowl below the drain 7. Close the drainage duct and turn the pump access to collect the water that filter anti-clockwise to remove it. flows out. 3. Squeeze the two levers and pull the drainage duct forward to open it. 8.
- Page 30 13.8 Cleaning the inlet hose and the valve filter It is recommended to clean both the filters of the inlet hose and valve occasionally to remove any deposit, collected over the time: 1. Remove the inlet hose from the tap and clean the filter.
-
Page 31: Troubleshooting
ENGLISH 13.10 Frost precautions If the appliance is installed in an area where the temperature can reach the values around 0° C or drop below, remove the remaining water from the inlet hose and the drain pump. 1. Disconnect the mains plug from the mains socket. - Page 32 • - No communication between WARNING! electronic elements of the appliance. Deactivate the appliance Switch it off and switch on again. before carrying out any check. • - The anti-flood device is on. Disconnect the appliance and close the water tap. Contact the Authorised Service Centre.
- Page 33 ENGLISH Problem Possible solution • Make sure that the couplings of the water hoses are tight and there is not water leakages. There is water on the • Make sure that the water inlet hose and the drain hose have floor.
-
Page 34: Technical Data
14.3 Emergency door opening To open the door, proceed as follows: 1. Press the On/Off button to switch the In case of power failure or functioning appliance off. failure the appliance door remains 2. Disconnect the mains plug from the locked. -
Page 35: Accessories
17. WARRANTY FOR SALES IN AUSTRALIA AND NEW This document sets out the terms and ZEALAND conditions of the product warranties for AEG Appliances. It is an important ALL AEG BRANDED APPLIANCES document. Please keep it with your... - Page 36 ‘ASC’ means AEG authorised globes, batteries, filters or similar service centres; perishable parts. e) AEG is the brand controlled by 4. Parts and Appliances not supplied by Electrolux Home Products Pty Electrolux are not covered by this Ltd of 163 O’Riordan Street, warranty.
- Page 37 Appliance. 14. You accept that if you make a 10. For AEG Appliances and services in warranty claim, Electrolux and its Australia, the Appliances come with a ASC may exchange information in...
- Page 38 Australia PLEASE CALL 13 13 50 OR EMAIL customercare@aegaustralia.com.au For the cost of a local call (Australia only) AEG SERVICE NEW ZEALAND www.aeg.co.nz FOR SERVICE or to find the address of your nearest authorised service centre in New Zealand FREE CALL 0800 10 66 10 OR EMAIL customercare@electrolux.co.nz...
- Page 39 (c) cosmetic damage which does not affect the operation of the Appliance; This document sets out the terms and conditions of the product warranties for AEG Appliances. It is an important document. Please keep it with your proof (d) damage to the Appliance caused by: of purchase documents in a safe place for future reference should there be a (i) negligence or accident;...
- Page 40 www.aeg.com/au...