Table of Contents
Advertisement
Quick Links
Advertisement
Table of Contents

Related Manuals for AEG LFM8C9612S


Summary of Contents for AEG LFM8C9612S
- Page 1 LFM8C9612S User Manual Washing Machine USER MANUAL...
-
Page 2: Table Of Contents
16. CONSUMPTION VALUES................40 FOR PERFECT RESULTS Thank you for choosing this AEG product. We have created it to give you impeccable performance for many years, with innovative technologies that help make life simpler – features you might not find on ordinary appliances. Please spend a few minutes reading to get the very best from it. -
Page 3: Safety Information
ENGLISH SAFETY INFORMATION Before the installation and use of the appliance, carefully read the supplied instructions. The manufacturer is not responsible for any injuries or damage that are the result of incorrect installation or usage. Always keep the instructions in a safe and accessible location for future reference. -
Page 4: Safety Instructions
– working environments; by clients in hotels, motels, bed & breakfast and – other residential type environments; areas for communal use in blocks of flats or in – launderettes. Do not exceed the maximum load of 9 kg (refer to the •... - Page 5 ENGLISH • Do not install or use a damaged • Do not touch the mains cable or the appliance. mains plug with wet hands. • Do not install or use the appliance • Do not pull the mains cable to where the temperature can be less disconnect the appliance.
-
Page 6: Product Description
• Make sure that all metal objects are • Please note that self-repair or non- removed from the laundry. professional repair can have safety consequences and might void the 2.5 Internal lighting guarantee. 2.7 Disposal WARNING! Risk of injury. -
Page 7: Technical Data
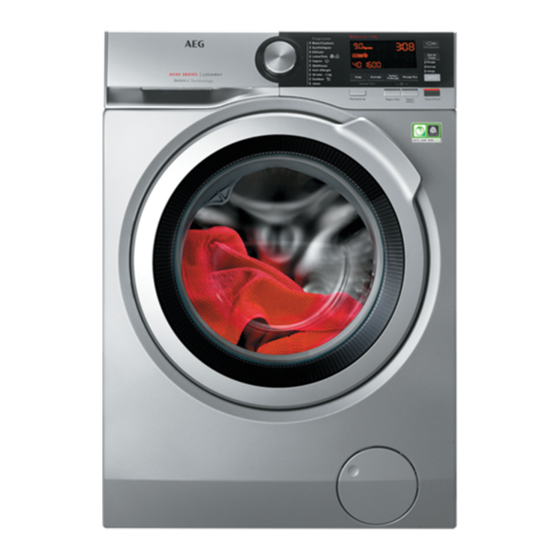
ENGLISH 3.2 Appliance overview 12 13 Worktop Feet for levelling the appliance Detergent dispenser Drain hose Control panel Inlet hose connection Door handle Mains cable Internal light Transit bolts Rating plate Hose support Drain pump filter The rating plate reports the model name (A), product number (B), electrical ratings (C) and serial number (D). -
Page 8: Installation
Level of protection against ingress of solid particles and IPX4 moisture ensured by the protective cover, except where the low voltage equipment has no protection against mois‐ ture Water supply pressure Minimum 0.5 bar (0.05 MPa) Maximum 8 bar (0.8 MPa) - Page 9 ENGLISH 5. Carefully put the appliance down on its rear side. 6. Put the front polystyrene packaging element on the floor under the appliance. • A (FRONT) = Front of the appliance • B (BACK) = Rear of the appliance 10.
- Page 10 2. Loosen or tighten the feet to adjust the level. WARNING! Do not put cardboard, wood or equivalent materials below the appliance feet to adjust the level. It is possible to see water flowing from the drain hose. This is due to the testing with water of the appliance in factory.
- Page 11 ENGLISH 2. Position it toward left or right depending on the position of the water tap. 45º 45º 20º 20º If this occurs, close the water tap and contact the authorized service centre to replace the hose. 5.5 Water drainage The drain hose should be positioned at a height of not less than 60 cm and not more than 100 cm from the floor.
- Page 12 5. Without the plastic hose guide, to a sink spigot - Put the drain hose in the spigot and tighten it with a clamp. Refer to the illustration. Make sure that the drain hose end is not immersed in the water.
-
Page 13: Accessories
6.2 Fixing plate kit If you install the appliance on a plinth that is not an accessory supplied by AEG, secure the appliance in the fixing plates. Read carefully the instructions supplied with the accessory. 6.3 Stacking kit... -
Page 14: Control Panel
7. CONTROL PANEL 7.1 Control panel description 11 10 Programme dial Extra rinse touch button (Rinçage Plus) Display Delay start touch button (Départ Energy saving touch button (Eco) Différé) Super steam touch button (Vapeur Time saving touch button (Gain de... - Page 15 ENGLISH 7.2 Display Maximum load indicator. The icon flashes during laundry load estima‐ tion (refer to "PROSENSE load detection" paragraph). Maximum laundry indicator. It flashes when the laundry load exceeds the maximum declared load of the selected programme. Delay start indicator. Door locked indicator.
-
Page 16: Dial And Buttons
Time saving indicator. Temperature indicator. The indicator appears when a cold wash is set. Spin speed indicator. Rinse hold indicator. Extra Silent indicator. Pre-wash indicator. Stain indicator. Extra rinse indicator. 8. DIAL AND BUTTONS 8.1 Marche/Arrêt 8.3 Temp. Pressing this button for a few seconds... - Page 17 ENGLISH The door stays locked. The drum Use this option to add a prewash turns regularly to reduce creasing. phase at 30 °C before the washing You must drain the water to unlock phase. the door. This option is recommended for Touch Départ/Pause button: the heavily soiled laundry, especially if appliance performs the spinning...
- Page 18 A small laundry load helps to This option can also be used reach better results. to shorten the Vapeur programme duration. 8.8 Eco 8.10 Skipping phase button The Eco option reduces the energy (Options) consumption maintaining good washing results.
-
Page 19: Programmes
ENGLISH 9. PROGRAMMES 9.1 Programme Chart Washing programmes Programme Programme description Washing programmes White cotton and coloured cotton. Normally, heavily and lightly soiled items. Blanc/Couleurs Standard programmes for the Energy Label consumption values. According to regulation 1061/2010, the programme Blanc/Couleurs at 60 °C and the programme Blanc/Couleurs at 40 °C with the option are respectively the «Standard 60°C cotton programme»... - Page 20 Programme Programme description Cotton and fast-coloured synthetic items. Complete wash‐ ing programme that, in only 59 minutes, washes the daily ÖKOPower soiled laundry intensively and ensures a good washing per‐ formance in a short time. White cotton items. This programme removes micro-organ‐...
- Page 21 ENGLISH Programme temperature, maximum spin speed and maximum load Programme Default temperature Reference spin Maximum load Temperature range speed Spin speed range 40 °C 1600 rpm 9 kg 95 °C - Cold 1600 rpm - 400 rpm Blanc/Couleurs 40 °C 1200 rpm 4 kg 60 °C - Cold...
- Page 22 ■ ■ ■ ■ ■ ■ ■ Taches Prélavage ■ ■ ■ ■ Rinçage Plus ■ ■ ■ ■ ■ ■ ■ ■ ■ ■ ■ ■ ■ ■ ■ Gain de Temps Rinçage ■ ■ ■ ■ ■...
-
Page 23: Before First Use
ENGLISH 10. BEFORE FIRST USE 3. Pour 2 litres of water into the During installation or before detergent compartment marked by first use you may observe some water in the appliance. This action activates the drain system. This is a residual water left 4. -
Page 24: Daily Use
This option increases slightly indicator comes on/goes off above the the programme duration. indicator. To activate/deactivate this option touch the Temp. button and the Essorage 12. DAILY USE WARNING! CAUTION! Refer to Safety chapters. Make sure that no laundry stays between the seal and the door. - Page 25 ENGLISH 4. To use liquid detergent, turn the flap down. Always follow the instructions that you find on the packaging of the detergent products, but we recommend that you do not exceed the maximum indicated level ( ). This quantity will however guarantee the best washing results.
- Page 26 Cancelling the delay start The indicator of the Départ/Pause button flashes. after the countdown has The display shows the maximum started declared load for the programme, the default temperature, the default spin To cancel the delay start: speed, the washing phase indicators 1.
- Page 27 ENGLISH In this case, for 30 seconds, it is possible to pause the appliance and remove the The steam phase is running: exceeding garments. The anti-crease phase is running: Once removed the exceeding garments, touch the Départ/Pause button to start the programme again.
- Page 28 12.14 Draining water out after If the temperature and level end of cycle of the water in the drum are too high and/or the drum still If you have chosen a programme or an rotates you cannot open the option that does not empty out the water door.
-
Page 29: Hints And Tips
ENGLISH Press the Marche/Arrêt button to If you set a programme or an activate the appliance again. option that ends with water The display shows the end of the last in the drum, the Stand-by set programme. function doesn't deactivate Turn the programme dial to set a new the appliance to remind you cycle. -
Page 30: Care And Cleaning
13.3 Detergent type and • sudsing, • reduced washing effect, quantity • inadequate rinsing, • a greater impact for the environment. The choice of detergent and use of correct quantities not only affects your 13.4 Ecological hints wash performance, but also helps to... - Page 31 ENGLISH 14.1 Periodic cleaning 14.3 External cleaning schedule Clean the appliance with mild soap and warm water only. Fully dry all the Periodic cleaning helps to extend the surfaces. life of your appliance. Do not use a scouring pads or any After each cycle, keep the door and the scratching material.
- Page 32 14.6 Door seal 2. Run a short cotton programme at high temperature with empty drum This appliance is designed with a self and with a small quantity of powder cleaning draining system, allowing light detergent or, if available, run the fluff fibers that fall off the clothes to be Pulizia programme.
- Page 33 ENGLISH Regularly check the drain pump filter and make sure that it is clean. Clean the drain pump if: • The appliance does not drain the water. • The drum does not turn. • The appliance makes an unusual noise because of the blockage of the drain pump.
- Page 34 Authorised Service Centre. 4. Turn the filter 180 degrees in anti- clockwise direction to open it, without removing. Let the water flow out. 10. Clean the filter under the water tap. 11. Put the filter back into the special guides by turning it clockwise.
- Page 35 ENGLISH When you drain the water with the 3. Clean the valve filter on the back of emergency drain procedure, you must the appliance with a toothbrush. activate the drain system again: a. Put 2 litres of water in the main wash compartment of the detergent dispenser.
-
Page 36: Troubleshooting
1. Put 2 litres of water in the main wash 3. Put the two ends of the inlet hose in compartment of the detergent a container and let the water flow out dispenser. of the hose. 2. Start the programme to drain the 4. - Page 37 ENGLISH • Make sure that the water tap is open. • Make sure that the pressure of the water supply is not too low. The appliance does For this information, contact your local water authority. not fill with water prop‐ •...
- Page 38 Problem Possible solution • Make sure that the mains plug is connected to the mains socket. • Make sure that the appliance door is closed. • Make sure that there is no damaged fuse in the fuse box. The programme does •...
- Page 39 ENGLISH Problem Possible solution • Increase the detergent quantity or use a different detergent. • Use special products to remove the stubborn stains before The washing results you wash the laundry. are not satisfactory. • Make sure that you set the correct temperature. •...
-
Page 40: Consumption Values
5. Take out the laundry and then close the appliance door. 6. Close the filter flap. 16. CONSUMPTION VALUES Stated values are obtained in laboratory conditions with relevant stand‐ ards. Different causes can change the data: the quantity and type of laundry and ambient temperature. - Page 41 ENGLISH Programmes Load Energy Water Approxi‐ Remain‐ (kg) consump‐ consump‐ mate pro‐ ing mois‐ tion tion (litre) gramme ture (%) (kWh) duration (minutes) 0.37 Standard 40°C cotton 1) At the end of spin phase. Off Mode (W) 0.30 Left On Mode (W) 0.30 The information given in the chart above is compliant with the EU Commission regulation 1015/2010 implementing directive 2009/125/EC .
- Page 44 www.aeg.com/shop...