Table of Contents
Advertisement
Quick Links
Advertisement
Table of Contents

Related Manuals for AEG LF8C9412AC


Summary of Contents for AEG LF8C9412AC
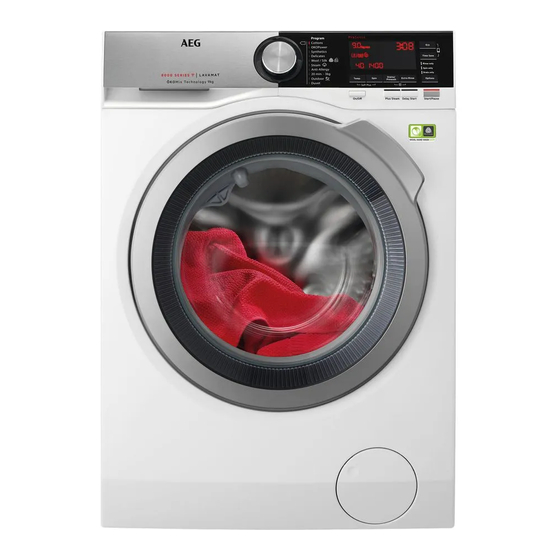
- Page 1 LF8C9412AC User Manual Washing Machine USER MANUAL...
-
Page 2: Table Of Contents
8. PROGRAMS ...................... 19 WI-FI - CONNECTIVITY SETUP..............22 10. BEFORE FIRST USE..................25 11. SETTINGS......................25 12. DAILY USE....................... 26 13. HINTS AND TIPS....................31 14. CARE AND CLEANING..................33 15. TROUBLESHOOTING..................38 16. ACCESSORIES....................43 17. WARRANTY .....................44 AEG Home app... -
Page 3: Safety Information
Products must be used, installed and operated in accordance with this manual. You may not be able to claim on the AEG manufacturer’s warranty in the event that your product fault is due to failure to adhere to this manual. - Page 4 1.1 Children and vulnerable people safety This appliance can be used by children aged from 8 • years and above and persons with reduced physical, sensory or mental capabilities or lack of experience and knowledge if they have been given supervision or instruction concerning the use of the appliance in a safe way and understand the hazards involved.
-
Page 5: Safety Instructions
ENGLISH Do not exceed the maximum load of 9 kg (refer to the • "Program chart" chapter). The operating water pressure at the water entry point • from the outlet connection must be between 0.5 bar (0.05 MPa) and 8 bar (0.8 MPa). The ventilation opening in the base must not be •... - Page 6 • Do not put a container to collect of the appliance with the use of water possible water leakage under the in the factory. appliance. Contact the Authorised • You can extend the drain hose to Service Centre to ensure which maximum 400 cm.
-
Page 7: Product Description
ENGLISH 2.6 Service • Cut off the mains electrical cable close to the appliance and dispose of • To repair the appliance contact the Authorised Service Centre. • Remove the door catch to prevent • Use original spare parts only. children or pets from becoming trapped in the drum. -
Page 8: Technical Data
3.2 Appliance overview 12 13 Worktop Feet for levelling the appliance Detergent dispenser Drain hose Control panel Inlet hose connection Door handle Mains cable Internal light Transit bolts Rating plate Hose support Drain pump filter The rating plate reports the model name (A), product number (B), electrical ratings (C) and serial number (D). -
Page 9: Installation
ENGLISH Level of protection against ingress of solid particles IPX4 and moisture ensured by the protective cover, ex‐ cept where the low voltage equipment has no pro‐ tection against moisture Water supply pressure Minimum 0.5 bar (0.05 MPa) Maximum 8 bar (0.8 MPa) Cold water Water supply Maximum Load... - Page 10 5. Carefully put the appliance down on its rear side. 6. Put the front polystyrene packaging element on the floor under the appliance. • A (FRONT) = Front of the appliance • B (BACK) = Rear of the appliance 10.
- Page 11 ENGLISH 5.2 Accessories It is possible to see water flowing from the drain hose. This is due to the testing with water of the appliance in factory. 15. Remove the three bolts by using the Spanner spanner supplied with the appliance. To remove the transit bolts.
- Page 12 45º 45º 20º 20º The appliance must be level and stable. Make sure that the inlet hose is not in vertical position. A correct adjustment of the appliance level prevents the 3. If necessary, loose the ring nut to set vibration, noise and the it in the correct position.
- Page 13 ENGLISH If this occurs, close the water tap and contact the authorized service centre to replace the hose. Make sure that the drain 5.6 Water drainage hose end is not immersed in the water. There may be a The drain hose should be positioned at a return of dirty water into the height of not less than 60 cm and not appliance.
-
Page 14: Control Panel
5. Without the plastic hose guide, to 7. Position the hose directly to a built- a sink spigot - Remove the plastic in drain pipe in the room wall and membrane from the sink trap spigot. tighten it with a clamp. - Page 15 ENGLISH 6.2 Display Maximum load indicator. The icon flashes during laundry load estima‐ tion (refer to "PROSENSE load detection" paragraph). Maximum laundry indicator. It flashes when the laundry load exceeds the maximum declared load of the selected program. Remote connection indicator. Wi-Fi connection indicator.
-
Page 16: Dial And Buttons
Anti-crease phase indicator. Child safety lock indicator. Time saving indicator. Temperature indicator. The indicator appears when a cold wash is set. Spin speed indicator. Rinse hold indicator. Extra silent indicator. Pre-wash indicator. Stain indicator. Extra rinse indicator. 7. DIAL AND BUTTONS 7.1 On/Off... - Page 17 ENGLISH 7.5 Stains/Prewash When the display shows the indicators , the appliance does not heat Press this button repeatedly to activate the water. one of the two options or both. 7.4 Spin The relevant indicator goes on in the display. When you set a program, the appliance automatically selects the maximum spin •...
- Page 18 • In case of smaller load, touch this If the Extra Rinse is set as a button twice to set an extra quick default option and you select program. a compatible washing The display shows the indicator program, the display shows .
-
Page 19: Programs
ENGLISH 8. PROGRAMS 8.1 Program Chart Washing programs Program Program description Washing programs Cottons White cotton and coloured cotton. Normally, heavily and lightly soiled items. OKOPower Cotton and fast-coloured synthetic items. Complete washing program that, in only 59 minutes, washes the daily soiled laundry intensively and ensures a good washing per‐... - Page 20 Program Program description Do not use fabric softener and make sure that Outdoor there is no softener residue in the detergent dispenser. Outdoor clothing, technical, sport fabrics, waterproof and breathable jackets, shell jackets with a removable fleece or inner insulation. The recommended laundry load is 2.5 kg.
- Page 21 ENGLISH Program Default temperature Reference spin Maximum load Temperature range speed Spin speed range 1 kg Steam Anti-Allergy 1400 rpm 60 °C 9 kg 1400 rpm - 400 rpm 20 min. - 3 kg 30 °C 1200 rpm 3 kg 40 °C - 30 °C 1200 rpm - 400 rpm 30 °C...
-
Page 22: Wi-Fi - Connectivity Setup
Only Spin ■ ■ ■ ■ ■ ■ ■ ■ ■ Only Drain ■ ■ ■ ■ ■ ■ ■ ■ ■ Delay Start ■ ■ ■ ■ ■ ■ ■ ■ ■ ■ ■ ■ ■ Plus Steam Soft Plus ■... - Page 23 Make sure that your smart device is connected to the wireless network. 1. Go to the App Store on your smart device. 2. Download and install the App "AEG Home". The access point will be open for about 3 3. Make sure you started a Wi-fi minutes.
- Page 24 When the App is installed and the wireless connection is complete, you can activate the Remote Start: Press and hold the Eco and the Time save buttons simultaneously for a few seconds. The indicator appears on the display and the door is locked. Now it is possible to start the program remotely.
-
Page 25: Before First Use
ENGLISH 10. BEFORE FIRST USE During installation or before first use you may observe some water in the appliance. This is a residual water left in the appliance after a full functional test in the factory to ensure the appliance is delivered to customers in perfect working order and is no cause for concern. -
Page 26: Daily Use
This option increases slightly off. the program duration. This option adds two rinses and the display shows To activate/deactivate this option touch the Temp. button and the Spin button 11.4 Soft Plus simultaneously until the... - Page 27 ENGLISH 12.3 Filling the detergent and 12.4 Check the position of the additives flap 1. Pull out the detergent dispenser until it stops. 2. Press the lever down to remove the dispenser. Before using the detergent dispenser, make sure that the folded tag in the compartment has been...
- Page 28 With the flap in the In case a selection is not position DOWN: possible, no indicator • Do not use gelatinous comes on and an acoustic or thick liquid signal sounds. detergents. • Do not put more 12.6 Starting a program...
- Page 29 ENGLISH Changing the delay start after this case, it will be not possible to guarantee the best washing results. the countdown has started About 20 minutes after the To change the delay start: program start, the program duration could be adjusted 1.
- Page 30 12.10 Interrupting a program 1. Touch the Start/Pause button. and changing the options In the display the related door lock indicator goes off. When the program is running, you can 2. Open the appliance door. If change only some options: necessary, add or remove the items.
-
Page 31: Hints And Tips
ENGLISH 12.14 Draining water out after 4. Press the On/Off button a few seconds to deactivate the appliance. end of cycle In any case, the appliance If you have chosen a program or an empties the water out option that does not empty out the water automatically after of the last rinse, the program is approximately 18 hours. - Page 32 Do not spray stain remover on garments shoelaces, ribbons, etc. ). near the appliance as it is corrosive to • A very small load can cause balance the plastic parts. problems with the spin phase leading to excessive vibration.
-
Page 33: Care And Cleaning
ENGLISH • hardness of the water used. • Normally soiled laundry may be washed without prewashing in order Water hardness is classified by so-called to save detergent, water and time (the "degrees" of hardness. environment is protected too!). Information on hardness of the water in •... - Page 34 14.2 Removing foreign Always follow the objects instructions that you find on the packaging of the Make sure that pockets are product. empty and all loose elements are tied up before 14.5 Maintenance wash running your cycle. Refer to...
- Page 35 ENGLISH Rust deposits in the drum may occur due part of the recess. Use a small brush to rusting foreign body in the washing or to clean the recess. tap water containing iron. Clean the drum with special products for stainless steel.
- Page 36 Regularly check the drain pump filter and make sure that it is clean. Clean the drain pump if: • The appliance does not drain the water. • The drum does not turn. • The appliance makes an unusual noise because of the blockage of the drain pump.
- Page 37 ENGLISH contact the Authorised Service Centre. When you drain the water with the emergency drain procedure, you must 10. Clean the filter under the water tap. activate the drain system again: a. Put 2 litres of water in the main wash compartment of the detergent dispenser.
-
Page 38: Troubleshooting
14.11 Emergency drain If the appliance cannot drain the water, carry out the same procedure, described in 'Cleaning the drain pump' paragraph. If necessary, clean the pump. When you drain the water with the emergency drain procedure, you must activate the drain system again: 1. - Page 39 ENGLISH 15.1 Alarm Codes and Possible failures The appliance does not start or it stops during operation. First try to find a solution to the problem (refer to the tables). WARNING! Deactivate the appliance before carrying out any check. With some problems, the display shows an alarm code and the Start/Pause button may flash continuously: If the appliance is overloaded, remove some items...
- Page 40 • Make sure that the door is properly closed. The appliance door is open or not closed correctly. • The program was not finished properly or the appliance stopped too early. Switch the appliance off and on again. Internal fail. No com‐...
- Page 41 ENGLISH Problem Possible solution • Make sure that the couplings of the water hoses are tight and there is not water leakages. • Make sure that the water inlet hose and the drain hose have no damages. There is water on the •...
- Page 42 Problem Possible solution The display shows • The appliance is downloading any available updates. Wait un‐ til the update process is complete. If you deactivate the appli‐ . All buttons are ance during update, it resumes when you activate the appli‐...
-
Page 43: Accessories
If you install the appliance on a plinth that is not an accessory supplied by To raise your appliance and make AEG, secure the appliance in the fixing loading and unloading laundry easier. plates. The drawer can be used for laundry Read carefully the instructions supplied storage e.g.: towels, cleaning products... -
Page 44: Warranty
Australia for a period conditions of the product warranties of 60 months and in New Zealand for for AEG Appliances. It is an important a period of 60 months, following the document. Please keep it with your... - Page 45 Important Notice Before calling for service, please ensure that the steps listed in clause 8 above have been followed. SERVICE AUSTRALIA aeg.com/au...
- Page 46 FOR SERVICE FOR SPARE PARTS or to find the address of your nearest au‐ or to find the address of your nearest spare thorised service centre in Australia parts centre in Australia PLEASE CALL 1300 363 664 PLEASE CALL 13 13 50...
- Page 48 AEG Home app The software in this product contains components that are based on free and open source software. AEG gratefully acknowledges the contributions of the open software and robotics communities to the development project. To access the source code of these free and open source software components whose license conditions require publishing, and to see their full copyright information and applicable license terms, please visit: http://aeg.opensoftwarerepository.com (folder NIU5)