Table of Contents
Advertisement
Advertisement
Table of Contents

Related Manuals for JVC KW-V850BTM


Summary of Contents for JVC KW-V850BTM
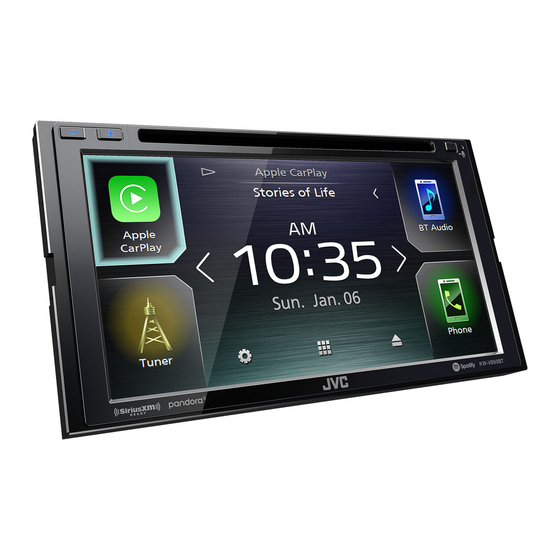
- Page 1 MONITOR WITH DVD RECEIVER KW-V850BT KW-V850BTM MONITOR WITH RECEIVER KW-M750BT KW-M750BTM INSTRUCTION MANUAL • Updated information (the latest Instruction Manual, system updates, new functions, etc.) is available from <http://www.jvc.net/cs/car/>. © 2019 JVC KENWOOD Corporation B5A-2851-00 (M/M2/X)
-
Page 2: Table Of Contents
Contents Before Use APPS—Apple CarPlay/ Android Auto™ Precautions ..............4 Apple CarPlay Operation ........23 How to read this manual ......... 5 Android Auto™ Operation ........24 Basic Operations Spotify Operation .............26 Functions of the Buttons on the Front Panel ... 6 Turning on the Unit ........... - Page 3 Bluetooth Control Remote control Information for using Bluetooth® devices ..41 Functions of the Remote control Buttons ..67 Register the Bluetooth device ......42 Connection/Installation Bluetooth Setup ............42 Playing the Bluetooth Audio Device ....44 Before Installation ............69 Using the Hands-Free Unit ........46 Installing the unit .............71 Hands-Free Setup .............51 Troubleshooting...
-
Page 4: Before Use
• When you purchase optional accessories, This condensation on the lens (also called lens check with your JVC dealer to make sure that fogging) may not allow discs to play. In such a they work with your model and in your area. -
Page 5: How To Read This Manual
Before Use • This unit can only play the following types of How to read this manual CDs. • The screens and panels shown in this manual are examples used to provide a clear explanation of • This unit may not correctly play discs which do operations. -
Page 6: Basic Operations
Basic Operations Basic Operations Functions of the Buttons on the Front Panel KW-V850BT/ KW-V850BTM KW-M750BT/ KW-M750BTM NOTE • The panels shown in this guide are examples used to provide a clear explanation of operations. For this reason, they may be different from the actual panels. -
Page 7: Turning On The Unit
Basic Operations Turning on the Unit Initial Settings The method of turning on is different Initial setup depending on the model. Perform this setup when you use this unit first Press the [FNC] button. time. Set each item as follows. h The unit is turned on. - Page 8 Basic Operations Security Code Setup ■ [Camera] Set the parameters for the camera. You can set up a security code to protect your 1 Touch [Camera]. receiver system against theft. 2 Set each item and touch [ When the Security Code function is activated, For details, see Camera Setup (P.38).
- Page 9 Basic Operations Touch [Time Zone]. Enter the same code again and touch [Enter]. Select the time zone. Now, your security code is registered. Set each item as follows. NOTE Scroll the page to show hidden items. • Touch [BS] to delete the last entry. •...
-
Page 10: Adjusting The Volume
Popup menu appears. Touch the screen gently to select an item on the screen. Touch to display the popup menu. KW-V850BT/ KW-V850BTM ● Touch and hold Touch the screen and keep your finger in place until the display changes or a message is displayed. -
Page 11: Home Screen Descriptions
• Touch and hold to forcibly eject the disc. • To forcibly eject the disc, touch it for 2 seconds and then touch [Yes] after the message is displayed. KW-V850BT/ KW-V850BTM only • Close the popup menu. KW-M750BT/ KW-M750BTM only • Short-cut buttons: The source changes to the one you have set with a short-cut. -
Page 12: Source Selection Screen Description
• Switches to Spotify. (P.26) • Switches to an external component connected to the AV-IN input terminal. (P.39) • Displays the Audio screen. (P.58) • Turns off the AV source. (P.13) • Turns off the unit. (P.7) KW-V850BT/ KW-V850BTM only... - Page 13 Basic Operations To turn off the AV source To select the playback source on the HOME screen Press the [FNC] button. h Popup menu appears. Touch [ h HOME screen appears. Touch [ Touch [AV Off]. The 4 items displayed on the source selection screen with large icons are shown on the HOME screen.
-
Page 14: Source Control Screen Descriptions
Basic Operations Customize Short-cut buttons on Source control screen HOME screen descriptions You can arrange the positions of the source There are some functions which can be icons as you like. performed from most screens. Press the [FNC] button. Indicators h Popup menu appears. -
Page 15: List Screen
Basic Operations List screen Artwork & information You can select whether to display an artwork There are some common function keys in the and song information or only song information list screens of most sources. in more detail. Function panel Displays the list type selection window. -
Page 16: Information Window
Information Window Information Window Photo Frame Touch [ h HOME screen appears. You can display a slideshow of the image Touch [ files stored in the USB memory on the HOME h SETUP screen appears. screen. Ñ Touch [User Interface]. Acceptable Picture files Max. -
Page 17: Disc
Disc Disc (KW-V850BT/ KW-V850BTM) Playing a disc DVD/ VCD Basic Operation Ñ Most functions can be controlled from the Insert a disc source control screen and playback screen. Insert the disc into the slot. NOTE • The screen shot below is for DVD. It may be different from the one for VCD. - Page 18 Disc • [Hide]: Hides the control screen. Indicator Items • [ ] : Repeats the current content. Each time • [IN]: Disc insertion status. you touch the key, repeat modes are switched White: A Disc is inside the unit. in the following sequence; Orange: Disc player failure.
-
Page 19: Music Cd/ Disc Media Basic Operation
Disc Music CD/ Disc media Basic • [ ] : Randomly plays all tracks in current folder/disc. Each time you touch the key, Operation random mode switches in the following sequence; Most functions can be controlled from the Track random ( ) (Music CD only), Folder source control screen and playback screen. -
Page 20: File Search Operation
Disc File search Operation Indicator Items (Disc media only) • [IN]: Disc insertion status. White: A Disc is inside the unit. You can search for a file according to hierarchy. Orange: Disc player failure. • [VIDEO]: Identifies the video file. NOTE •... -
Page 21: Dvd Disc Menu Operation
Disc DVD Disc Menu Operation To switch among picture angles ■ Touch [Angle]. Each time you touch this key, picture angles are switched. You can set up some functions using the DVD- VIDEO disc menu. * These keys may not function depending on Touch the framed area during playback. -
Page 22: Dvd Setup
Disc DVD Setup [Screen Ratio] ■ Sets the screen display mode. [16:9 ](Default): Displays wide pictures. You can set up the DVD playback functions. [4:3 LB]: Displays wide pictures in the Letter Touch the framed area during playback. Box format (having black stripes at the top and bottom of screen). -
Page 23: Apps-Apple Carplay/Android Auto
APPS—Apple CarPlay/Android Auto™ APPS—Apple CarPlay/Android Auto™ Apple CarPlay Operation NOTE • The connection message appears when; Apple CarPlay is a smarter, safer way to use – The iPhone you used previously is connected your iPhone in the car. Apple CarPlay takes again. -
Page 24: Android Auto™ Operation
APPS—Apple CarPlay/Android Auto™ To exit the Apple CarPlay screen Android Auto™ Operation Press the [FNC] button. Android Auto enables you to use the functions h Popup menu appears. of your Android device convenient for driving. You can easily access route guidance, make Touch [ calls, listen to music, and access convenient h HOME screen appears. - Page 25 APPS—Apple CarPlay/Android Auto™ Ñ Ñ Connect Android device Using voice control Connect an Android device via the USB Press the [FNC] button for 1 second. terminal. (P.75) To use the hands-free function, connect the Android device via Bluetooth. Press for 1 second When an Android device compatible with Android Auto is connected to the USB terminal, the device is connected via...
-
Page 26: Spotify Operation
APPS—Apple CarPlay/Android Auto™ Spotify Operation Operation keys • [ ] : Displays the Menu screen You can listen to Spotify on this unit by controlling the application installed in the • [ ] : New radio station that relates to the iPhone or Android. - Page 27 APPS—Apple CarPlay/Android Auto™ About Spotify® Note • Ensure you are logged in to your smartphone application. If you do not have an Spotify account, you can create one for free from your smartphone or at www.spotify.com. • Because Spotify is a third-party service, the specifications are subject to change without prior notice.
-
Page 28: Usb
Connecting a USB device NOTE • Install the USB device in the place where it will not affect safe driving. Connect the USB device with the USB cable. (P.74) • You cannot connect a USB device via a USB hub and Multi Card Reader. - Page 29 • [USB DEVICE CHANGE] • [ ] : Repeats the current track/folder. Each Switches to another USB device when two USB time you touch the key, repeat modes are devices are connected. switched in the following sequence: File repeat ( ), Folder repeat ( ), Repeat Indicator Items...
-
Page 30: Search Operation
Ñ Search Operation Link search You can search for a file of the same artist/ You can search music or video files by the album/genre as that in the current track. following operations. Touch [Link Search]. Touch [1]. Touch the desired tag type. You can select Touch [S]. -
Page 31: Ipod/Iphone
• iPod touch (6th generation) h Popup menu appears. NOTE • Latest compatible list of iPod/iPhone. For details, Touch [ see www.jvc.net/cs/car/ipod/. h HOME screen appears. • By connecting your iPod/iPhone to this unit with the iPod connection cable KS-U62 (optional Touch [ accessory), you can supply power to your iPod/ iPhone as well as charge it while playing music. -
Page 32: Ipod/Iphone Basic Operation
iPod/iPhone iPod/iPhone Basic Operation Operation keys • 1] : Searches for a track/file. For details on Control screen search operation, see Search Operation (P.33). • E] [F] : Searches for the previous/next track/file. Touch and hold to fast forward or fast backward. -
Page 33: Search Operation
iPod/iPhone Ñ Search Operation Link search You can search for a file of the same artist/ You can search music files by the following album/genre/composer as that in the current operations. track. Touch [1]. Touch [Link Search]. Touch [S]. Touch the desired tag type. You can select from artists, albums, genres and composers. -
Page 34: Tuner
Tuner Tuner Tuner Basic Operation Operation keys • [E] [F] : Tunes in a station. The method of Most functions can be controlled from the frequency switching can be changed (see 2 source control screen. in table). To enter Tuner source, touch [Tuner] icon in the •... -
Page 35: Memory Operation
Tuner Memory Operation Selecting Operation Ñ Ñ Auto memory (FM only) Preset select You can store stations with good reception in You can list and select memorized station. memory automatically. Select a station from the list. Touch [FM]. Touch [SSM]. Ñ... -
Page 36: Traffic Information
Tuner Traffic Information (FM only) Tuner Setup You can listen and watch the traffic You can set tuner related parameters. information automatically when a traffic Touch [ bulletin starts. However, this feature requires a Radio Data System that includes the TI information. - Page 37 Tuner [Area Setting] ■ (KW-V850BT/ KW-M750BT) The tuner channel interval changes depending on the area you use this unit. For Oceania sales area [Australia] (Default): Select this when using in Australia countries. FM/AM intervals are set to 50 kHz/9 kHz. [US]: Select this when using in North/ Central/South America.
-
Page 38: Other External Components
*1 When the front camera and rear camera are If you select [ON] for [Front Camera]. connected with this unit. [10 sec]/ [15 sec] (Default)/ [20 sec]: The front camera screen is displayed when return the gear from the reverse (R) position. [OFF]: Cancel. *2 KW-V850BT/ KW-V850BTM only... -
Page 39: External Audio/Video Players (Av-In)
Other External Components To adjust the parking guidelines External audio/video players (AV-IN) NOTE • Install the rear view camera in the appropriate position according to the instruction manual Connect an external component to the supplied with the rear view camera. AV-IN input terminal. -
Page 40: Tv Tuner
Other External Components Ñ Navigation Setup TV tuner Press the [FNC] button. You can connect the TV tuner (commercially h Popup menu appears. available) with this unit and watch TV. Preparation Touch [ • When you use TV control function, connect the h HOME screen appears. -
Page 41: Bluetooth Control
Bluetooth Control Bluetooth Control Ñ Using the Bluetooth function allows you to use About the cell-phone and various functions such as listening to the audio Bluetooth audio player file and making/receiving a call. This unit conforms to the following Bluetooth specifications: Information for using Bluetooth®... -
Page 42: Register The Bluetooth Device
Bluetooth Control Register the Bluetooth device HFP [Hands Free1]/ [Hands Free2]/ [No ■ Connection.] Select the hands-free number to connect. It is necessary to register the Bluetooth audio player or cell-phone in this unit before using A2DP/SPP [Audio/App] ■ the Bluetooth function. Select if you want to use the audio player You can register up to 10 Bluetooth devices. - Page 43 Bluetooth Control Ñ Connect the Bluetooth device To delete the registered Bluetooth device Touch [Select Device] on the Bluetooth Touch [Delete]. Setup screen. Touch the device name to check. Touch the name of the device you want to connect. [þ All] ■...
-
Page 44: Playing The Bluetooth Audio Device
• [ ] : Touch to attenuate/restore the sound. JVC Streaming DJ Bluetooth audio devices can be switched easily to play music. See JVC Streaming DJ (P.45). ] / [ • [ ] : Repeats the current track/folder. Each time you touch the key, repeat modes are... - Page 45 • If the volume is too low, raise it on your cell- phone or audio player. • : Device used normally. • : Device used for JVC Streaming DJ. Touch [ ] (white) on the left of the name of the device to be played. ] (white) changes to [ ] (Blue) and starts playback.
-
Page 46: Using The Hands-Free Unit
Bluetooth Control Using the Hands-Free Unit NOTE • If a connected Bluetooth audio device is operated You can use the telephone function by to play music, connections are switched. connecting the Bluetooth telephone to this • When a Bluetooth source is switched to another unit. - Page 47 Bluetooth Control ● Select the cell-phone to use • A first character with an accent character such as “ü” can be searched for with a When you connect two cell-phones non-accent character “u” . A character 1) Touch [ ] to select the phone with an accent character in a sentence you want to use.
- Page 48 Bluetooth Control Ñ Call by entering a phone number Receive a call Touch [ Touch [ ] to answer a phone call or ] to reject an incoming call. Enter a phone number with number keys. NOTE Touch [ • While monitoring the picture from the view camera, this screen does not appear even if a call Ñ...
- Page 49 Bluetooth Control Ñ ● Adjust the receiver volume Phone number preset Press the [–] or [+] button. You can register frequently used phone numbers in this unit. Touch [ Touch [Edit]. ● Mute your voice Touch [ ] to mute or not to mute your voice. ●...
- Page 50 Bluetooth Control Phonebook deletion ■ [Delete] To delete a preset number, touch [Delete] Touch [ and then touch [OK] on the confirmation screen. Touch the name to check. Ñ Phonebook transfer You can transfer phonebook data from your Bluetooth smartphone using PBAP. Touch [ Touch [ [þ...
-
Page 51: Hands-Free Setup
Bluetooth Control Hands-Free Setup [Auto Response]* ■ Set the automatic response time to pick-up an incoming call. You can make various settings for the Hands- [OFF ](Default): Turns off the Automatic Free function. response function. Press the [FNC] button. [1]/ [5]/ [10]/ [15]/ [20]/ [25]/ [30]: Sets the h Popup menu appears. -
Page 52: Setup
Setup Setup Monitor Screen Setup System Setup You can adjust the image quality of video, Press the [FNC] button. menu screen, etc. h Popup menu appears. Press the [FNC] button. Touch [ h Popup menu appears. Touch [Screen Adjust]. h HOME screen appears. Touch [ h Screen Adjustment screen appears. -
Page 53: User Interface Setup
Setup User Interface Setup [Time Zone] ■ Select the time zone. You can setup user interface parameters. [Clock Adjust] ■ If you select [Manual] for Clock, adjust the Press the [FNC] button. date and time manually. (P.53) h Popup menu appears. [DISP Key] ■... - Page 54 Setup Ñ Touch panel adjustment Touch the function you want to set. Touch [Touch Panel Adjust] on the User Interface screen. h Touch Panel Adjust screen appears. Follow the instruction on the screen and long touch the center of each [ Repeat steps 2 and 3 as necessary.
-
Page 55: Special Setup
Setup Special Setup NOTE • For how to update the software, see the relevant You can setup special parameters. update procedure manual which comes with the software. Press the [FNC] button. h Popup menu appears. Display Setup Touch [ h HOME screen appears. Press the [FNC] button. - Page 56 Setup Ñ Change the wallpaper image Touch [ Touch [Wallpaper Customize] on the To register an original image Display screen. You can load an image from the connected Select an image. USB device and set it as the wallpaper image. Before starting this procedure, it is necessary to connect the device which has the image to load.
-
Page 57: Av Setup
■ [AV-OUT] You can select an AV source to be output from the AV OUTPUT port. OFF, AV-IN, DISC (KW-V850BT/ KW-V850BTM only), USB, or iPod • You cannot select iPod if it is connected via Bluetooth. • If you select iPod as the main source, you cannot select DISC (Music CD/ Disc media) or USB as the AV output source. -
Page 58: Controlling Audio
Controlling Audio Controlling Audio You can adjust various settings such as audio 3-way speaker system setup balance or subwoofer level. Select the appropriate crossover network Press the [FNC] button. mode for the speaker system used (2-way or h Popup menu appears. 3-way speaker system). -
Page 59: Speaker / X'over Setup
Controlling Audio Speaker / X’over setup [Tweeter] (Only for Front) ■ You can set up the tweeter when you are selecting front speakers. Press the [FNC] button. None, Small, Medium, Large h Popup menu appears. ■ [Xʼover]* Touch [Audio]. Display the speaker crossover setup screen. h Audio screen appears. - Page 60 Controlling Audio Ñ Crossover network setup When Speaker network is set to 3-way: You can set the crossover frequency of speakers. Touch [Xʼover]. Touch the speaker to set up. [FREQ] (High Pass) ■ High Pass Filter adjustment. [HPF FREQ], [LPF FREQ] (Band Pass) ■...
-
Page 61: Controlling General Audio
Controlling Audio Controlling General Audio Touch the screen and set the Graphic Equalizer as desired. Press the [FNC] button. h Popup menu appears. Touch [Audio]. h Audio screen appears. Touch [Fader / Balance]. Gain level (area in dotted frame) ■ Adjust the gain level by touching each frequency bar. -
Page 62: Volume Offset
Controlling Audio Touch [+] or [-] to adjust the level. NOTE • [iPod] is available only for the iPod source and it is connected via USB. Ñ Save the EQ curve Adjust the EQ curve. Touch [Memory]. Select where to save. ■... -
Page 63: Sound Effect
Controlling Audio Touch [Dual Zone]. NOTE • When the rear speaker sound is switched, the audio source that is output at the AV OUTPUT terminal is also switched to the same source. • When the dual zone function is set to on, the following functions are not available. -
Page 64: Listening Position / Dta
Controlling Audio Set each parameter as follows. Listening Position / DTA Listening Position / DTA allows you to improve the sound field depending on the position of the seat you sit. Listening Position / DTA allows you to set “Listening Position” and “Front Focus”. You cannot set both at the same time. - Page 65 Controlling Audio Ñ Front Focus fine adjustment Touch [T] or [U] to adjust the delay time of the selected speaker. Touch [Adjust]. Touch [Delay]. Set each parameter as follows. Touch [Level]. Touch [T] or [U] to adjust the sound level of the selected speaker.
-
Page 66: Audio Setup Memory
Controlling Audio Audio Setup memory Audio Control settings can be memorized. The memorized settings can be recalled at any time. Press the [FNC] button. h Popup menu appears. Touch [Audio]. h Audio screen appears. Touch [Audio Memory]. [SETUP Memory] ■ Lock or unlock the Audio SETUP Memory/ Recall/Clear. -
Page 67: Remote Control
Remote control Remote control Ñ This unit can be operated using the remote Removing the battery sheet control. (outside Oceania area) For Oceania sales area, the remote control is Pull the battery sheet out from the remote the optional accessory (RM-RK258). controller to activate the battery. - Page 68 For details on the direct search mode, h The content corresponding to the see Direct search mode (P.68). number you entered is played. During DVD/VCD source, deletes a character while in direct search mode. KW-V850BT/ KW-V850BTM only Performs the selected function.
-
Page 69: Connection/Installation
Connection/Installation Connection/Installation ignition key. If you connect the ignition wire to Before Installation a power source with a constant voltage supply, such as with battery wires, the battery may be Before installation of this unit, please note the drained. following precautions. •... - Page 70 Connection/Installation Ñ • Do not press hard on the panel surface when Installation procedure installing the unit to the vehicle. Otherwise 1) To prevent a short circuit, remove the key scars, damage, or failure may result. from the ignition and disconnect the ¤ •...
-
Page 71: Installing The Unit
Connection/Installation Ñ Installing the unit Microphone unit 1) Check the installation position of the 3 or 4 microphone (accessory 2). Car Bracket 2) Clean the installation surface. 3) Remove the separator of the microphone (accessory 2), and stick the microphone to the place shown below. - Page 72 Connection/Installation Ñ Connecting wires to terminals Fuse (15A) Speaker impedance: 4-8 Ω White To front left speaker White/Black Gray To front right speaker Gray/Black Green To rear left speaker Green/Black Connect to the vehicle’s Accessory 1 parking brake detection switch harness.
- Page 73 Connect to vehicle’s steering remote harness. • For speaker setup and crossover setup, see Speaker / X’over setup (P.59). Contact your JVC dealer for details. • For how to connect speaker wires to terminals other than speaker terminals and Preout...
- Page 74 Connection/Installation Ñ Ñ Connecting a USB device Connecting an iPod/iPhone USB device USB (Gray) terminal ● Lightning connector iPod/iPhone KS-U62 (0.8m) USB (Black) terminal USB cable (1 m) USB (Gray) terminal USB (Black) terminal USB cable (1 m) USB maximum power supply current : DC 5 V = 1.5 A Sold separately iPhone (with Apple CarPlay)
- Page 75 Connection/Installation Ñ Connecting an Android smartphone Android smartphone Micro USB to USB cable USB (Gray) terminal USB (Black) terminal USB cable (1 m) USB maximum power supply current : DC 5 V = 1.5 A Sold separately English...
-
Page 76: Troubleshooting
† Pull out the antenna all the way. † Eject the disc and try inserting it again. Contact the The antenna control wire is not connected. JVC dealer if this indicator continues blinking or the † Connect the wire correctly. See Connecting the disc cannot be ejected. - Page 77 † Turn the power off and on again. If the “Error 07−67” message does not disappear, contact your nearest JVC dealer. No Device (USB device) The USB device is selected as a source although no USB device is connected.
-
Page 78: Appendix
Appendix Appendix Playable Media and Files You can play various kinds of media and files on this unit. Ñ List of playable discs (KW-V850BT/ KW-V850BTM) Disc types / Standard Support Remark DVD Video DVD Audio × DVD-VR × DVD-R* • MP3/ WMA/ AAC/ WAV/ FLAC/ Vorbis/ MPEG1/ MPEG2/ MPEG4/ H.264/ WMV/ MKV playback... - Page 79 Appendix Ñ About files The following audio and video files are supported. ■ Playable Audio files Format Bit rate Sampling frequency Bit count AAC-LC (.m4a) MPEG2/4 AAC LC 8 – 320kbps, VBR 16 – 48 kHz 16 bit HE-AAC(V1,V2) MP3 (.mp3) MPEG 1/2 Audio Layer 3 8 –...
-
Page 80: Region Codes In The World
Appendix Region Codes in the World The DVD players are given a region code according to the country or area it is marketed, as shown in the following map. ■ DVD disc marks ■ Operation regulatory marks With this DVD, some functions of this unit such as the play function may be restricted depending on the location where the DVD is Indicates a region number. -
Page 81: Dvd Language Codes
Appendix DVD Language Codes Code Language Code Language Code Language Afar Interlingua Kirundi Abkhazian Interlingue Romanian Afrikaans Inupiak Russian Amharic Indonesian Kinyarwanda Arabic Icelandic Sanskrit Assamese Italian Sindhi Aymara Japanese Sangho Azerbaijani Javanese Serbo-Croatian Bashkir Georgian Singhalese Byelorussian Kazakh Slovak Bulgarian Greenlandic Slovenian... -
Page 82: Specifications
• 48 kHz : 20 – 22,000 Hz : LED • 44.1 kHz : 20 – 20,000 Hz Total Harmonic Distortion ■ DVD player section KW-M750BT/ KW-M750BTM (KW-V850BT/ KW-V850BTM) : 0.0001 % (1 kHz) D/A Converter S/N Ratio (dB) : 24/ 32 bit KW-M750BT/ KW-M750BTM : 98.5 dB... - Page 83 KW-M750BT (for oceania sales area): 120/ 150/ 180/ 220/ 250 Hz 531 kHz – 1701 kHz (9 kHz) Slope: -6/-12/-18/-24 dB/Oct. KW-V850BTM/ KW-M750BTM: Gain: -8/-7/-6/-5/-4/-3/-2/-1/0 dB 531 kHz – 1602 kHz (9 kHz) Low pass filter Frequency: 30/ 40/ 50/ 60/ 70/ 80/ 90/ 100/ 120/...
-
Page 84: About This Unit
Gain: -8/ -7/ -6/ -5/ -4/ -3/ -2/ -1/ 0 dB trademarks owned by the Bluetooth SIG, Inc. and any Band pass filter use of such marks by JVC KENWOOD Corporation is Frequency: Through, 50/ 60/ 70/ 80/ 90/ 100/ 120/ under license. Other trademarks and trade names are 150/ 180/ 220/ 250/ 300 Hz those of their respective owners. - Page 85 Appendix • THIS PRODUCT IS LICENSED UNDER THE AVC PATENT BUT NOT LIMITED TO, THE IMPLIED WARRANTIES OF PORTFOLIO LICENSE FOR THE PERSONAL USE OF A MERCHANTABILITY AND FITNESS FOR A PARTICULAR CONSUMER OR OTHER USES IN WHICH IT DOES NOT PURPOSE ARE DISCLAIMED.
- Page 86 ואלקטרוני ישן וכן סוללות (רלוונטי למדינות English .)שמשתמשות במערכת איסוף אשפה מופרדת Hereby, JVC KENWOOD declares that the radio equipment X לא ניתן להשליך מוצרים וסוללות עם הסימון (פח אשפה עם KW-V850BTM/ KW-M750BTM is in compliance with Directive .עליו) כאשפה ביתית רגילה...
- Page 87 Appendix English...