JVC KV-MR9000 Instructions Manual
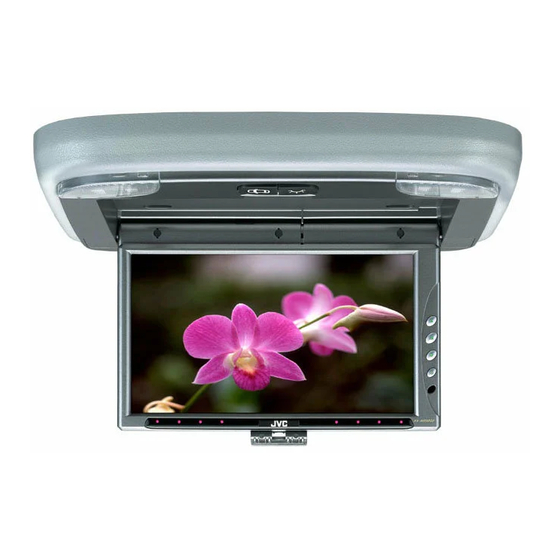
9-inch wide color monitor
Hide thumbs
Also See for KV-MR9000:
- Instructions manual (59 pages) ,
- Instructions manual (15 pages) ,
- Service manual (45 pages)
Table of Contents
Advertisement
Available languages
Available languages
Quick Links
9-INCH WIDE COLOR MONITOR
MONITOR COLOR DE PANTALLA ANCHA
DE 9-PULGADAS
MONITEUR COULEUR À ÉCRAN LARGE
DE 9 POUCES
For installation and connections, refer to
the separate manual.
Para la instalación y las conexiones,
refiérase al manual separado.
Pour l'installation et les raccordements,
référez-vous au manuel séparé.
* This system cannot receive television broadcasts and is primarily designed
for use with a VCR or a DVD player. Use the separately sold mobile TV tuner
unit KV-C10 for optional television broadcast reception.
* Este sistema no puede recibir emisiones de televisión y ha sido diseño para
utilizarse esencialmente con un VCR o un reproductor DVD. Utilice la unidad
de sintonizador de TV móvil KV-C10 vendido por separado para una recepción
opcional de emisiones de televisión.
* Ce système ne peut pas recevoir les émissions de télévision et il est
essentiellement conçu pour l'utilisation avec un magnétoscope ou un lecteur
de DVD. Utilisez le module de tuner de télévision mobile KV-C10 vendu
séparément afin de pouvoir recevoir les émissions de télévision.
INSTRUCTIONS
MANUAL DE INSTRUCCIONES
MANUEL D'INSTRUCTIONS
MONITOR
TV TUNER
TV
CH
MODE
SKIP
A.MEMO
MENU
VOCAL
R F
H / P
VOLUME
CALL
VCP
RM-RK500
For customer Use:
Enter below the Model No. and Serial
No. which are located on the top or
bottom of the cabinet. Retain this
information for future reference.
Model No.
Serial No.
KV-MR9000
KV-MR9000
KV-MR9000
LVT0986-001A
[J]
Advertisement
Chapters
Table of Contents

Related Manuals for JVC KV-MR9000


Summary of Contents for JVC KV-MR9000
- Page 1 9-INCH WIDE COLOR MONITOR KV-MR9000 MONITOR COLOR DE PANTALLA ANCHA DE 9-PULGADAS KV-MR9000 MONITEUR COULEUR À ÉCRAN LARGE DE 9 POUCES KV-MR9000 MONITOR TV TUNER MODE SKIP A.MEMO MENU VOCAL H / P VOLUME CALL RM-RK500 * This system cannot receive television broadcasts and is primarily designed For installation and connections, refer to for use with a VCR or a DVD player.
- Page 2 WARNINGS CAUTION RISK OF ELECTRIC SHOCK • DO NOT INSTALL THE MONITOR IN A LOCATION WHICH DO NOT OPEN OBSTRUCTS DRIVING, VISIBILITY OR WHICH IS PROHIBITED APPLICABLE LAWS CAUTION: TO REDUCE THE RISK OF ELECTRIC SHOCK. REGULATIONS. DO NOT REMOVE COVER (OR BACK). NO USER-SERVICEABLE PARTS INSIDE.
-
Page 3: Table Of Contents
Thank you for purchasing a JVC product. Please read all instructions carefully before operation, to ensure your complete understanding and to obtain the best possible performance from the unit. CONTENTS PRECAUTIONS ............4 CONTROLS AND FEATURES ......... 5 Wide color monitor ................. 5 Remote controller ................ -
Page 4: Precautions
PRECAUTIONS Cautions for handling the liquid crystal panel Do not drop the liquid crystal display or strike Do not expose the liquid crystal display to it sharply. direct sunlight. • Storage temperature range: –20 °C to +80 °C (–4 °F to 176 °F) +80°C –20°C –20°C to +80°C... -
Page 5: Controls And Features
• See “Specifications” for cordless • Press and hold to turn off the power. w Remote sensor headphones. It is recommended to use JVC’s Aim at this area when operating the cordless headphones KS-HP1K. monitor from the remote controller. 6 Screen hook Note: •... -
Page 6: Remote Controller
CALL button Video cassette player (VCP) section The following buttons can be used for operating Video cassette player section JVC’s KV-V8 or KZ-V10. • For specific operations, refer to the instructions for the KV-V8 or KZ-V10 e Power On/Standby button (... -
Page 7: Replacing The Battery
Before using the remote controller: When you use the remote controller for the (back side) first time, pull out the insulation sheet as illustrated to the right. • Aim the remote controller directly at the Pull out remote sensor on the color monitor. Make sure there is no obstacle in between. -
Page 8: Basic Operations
BASIC OPERATIONS Preparation Before operating the monitor system, make sure that all external components are correctly connected and installed. MONITOR TV TUNER SKIP MODE A.MEMO VOCAL MENU H / P VOLUME CALL Monitor Remote Open the liquid crystal panel. The monitor turns on. Note: If the liquid crystal panel is already open, press the Power button ) on the unit or the Power On/Standby button (... - Page 9 Select the video format—NTSC or PAL, while the indication of the video format is still on the screen. Each time you press the button, the video format alternates between NTSC (initial setting) and PAL. Select Monitor Remote whichever matches to the incoming signals. Note: When not using the KV-C10: You can preset the video format separately for “AV 1”...
-
Page 10: Other Basic Operations
: Select to listen to the radio (through the receiver). Using optional cordless headphones You can use JVC’s optional cordless headphones KS-HP1K to listen to the playback sounds of the external component. Playback sounds of the external component are transmitted through this IR transmitter to the... -
Page 11: Adjustments
ADJUSTMENTS Using the Menu You can make your own adjustments using the Menu. • For the adjustable items, see the next page. Basic procedure MONITOR TV TUNER 1, 2, SKIP MODE A.MEMO 1, 2, MENU VOCAL H / P VOLUME CALL Remote Monitor... -
Page 12: Adjustable Items On The Menu
MENU Exit from the Menu. • Press the button repeatedly until the Menu is erased. Monitor Remote Adjustable items on the menu COLOR BRIGHT MODE Appears only for TINT MENU NTSC video format DIMMER FORMAT RESET Note: Menu goes off if no operation is done for about 5 seconds. COLOR : Adjust the color of the picture—lighter or COLOR... - Page 13 FORMAT : Select an appropriate display size. • Selectable settings: FULL/NORMAL/ZOOM FORMAT FULL • Initial setting: FULL When viewing 16:9 video signals: FULL: Pictures are fully shown on the screen. • The black bars will be shown both at the top and the bottom of the screen.
-
Page 14: Maintenance
MAINTENANCE To prevent damage to the exterior • Do not apply pesticides, benzine, thinner or other volatile substances to the unit. The cabinet surface primarily consists of plastic materials. • Do not wipe with benzine, thinner or similar substances because this will results in discoloration or removal of the paint. -
Page 15: Specifications
99.99% effective image pixels. Be aware that on 0.01% Tuner: 8-pin DIN connector of the panel there may be missing pixels or (only for JVC’s KV-C10) constantly lit pixels. Output Display: 13-pin DIN connector Video: RCA pin ×... - Page 16 ADVERTENCIAS CAUTION RISK OF ELECTRIC SHOCK • NO INSTALE EL MONITOR EN UN LUGAR QUE DO NOT OPEN IMPIDA EL MANEJO O LA VISIBILIDAD, NI DONDE LOS PROHIBAN LAS LEYES Y REGLAMENTOS CAUTION: TO REDUCE THE RISK OF ELECTRIC SHOCK. DO NOT REMOVE COVER (OR BACK).
- Page 17 Muchas gracias por adquirir un producto JVC. Como primer paso, por favor lea atentamente estas instrucciones y disfrute al máximo de todas las prestaciones de esta unidad. CONTENIDO PRECAUCIONES ............4 CONTROLES Y CARACTERISTICAS ........ 5 Monitor Wide de color ..............5 Controlador remoto ................
-
Page 18: Precauciones
PRECAUCIONES Precauciones sobre el manejo del panel de cristal líquido No deje caer ni aplique un golpe fuerte al No deje la pantalla de cristal líquido panel de cristal líquido. expuesta a la luz directa del sol. • Gama de temperaturas para guardar el panel: –20 °C a +80 °C (–4 °F a 176 °F) +80°C –20°C... -
Page 19: Controles Y Caracteristicas
• Pulse y manténgalo pulsado para Se recomienda utilizar los auriculares desconectar la alimentación. inalámbricos KS-HP1K de JVC. w Sensor remoto 6 Gancho de la pantalla Apunte hacia este área cuando opere el • Para usar el monitor, desengánchelo monitor mediante el controlador remoto. -
Page 20: Controlador Remoto
Sección del reproductor de videocasete (VCP) MONITOR TV TUNER Puede utilizar los siguientes botones para operar el KV-V8 o KZ-V10 de JVC. • Para las operaciones específicas, refiérase a MODE SKIP A.MEMO las instrucciones del KV-V8 o KZ-V10 e Botón de encendido/standby (... -
Page 21: Sustitución De La Pila
Antes de utilizar el controlador remoto: Cuando se utiliza el control remoto por (lado primera vez, extraiga la lámina aislante de posterior) la manera indicada en la ilustración de la derecha. • Apunte directamente el controlador remoto Extraer hacia el sensor remoto del monitor en color. -
Page 22: Operaciones Basicas
OPERACIONES BASICAS Preparativos Antes de operar el sistema, asegúrese de que todos los componentes externos se encuentren conectados e instalados de manera correcta. MONITOR TV TUNER MODE SKIP A.MEMO VOCAL MENU H / P VOLUME CALL Monitor Remoto Abra el panel de cristal líquido. El monitor se enciende. - Page 23 Seleccione el formato de vídeo—NTSC o PAL, mientras la indicación del formato de vídeo se encuentra visualizada en la pantalla. Monitor Remoto Cada vez que pulsa el botón, el formato de vídeo cambia alternativamente entre NTSC (ajuste inicial) y PAL. Seleccione la opción que corresponda a las señales entrantes.
-
Page 24: Otras Operaciones Básicas
Selección de las señales RF para el receptor Cuando se utiliza solamente el modulador de FM KS-IF200 de JVC: Puede escuchar los sonidos de reproducción del componente externo a través de este receptor, aun cuando no se encuentre equipado con entrada de línea. -
Page 25: Ajustes
AJUSTES Uso del menú Podrá proceder a realizar sus propios ajustes utilizando el Menú. • En cuanto a las opciones ajustables, consulte la página siguiente. Procedimiento básico MONITOR TV TUNER 1, 2, MODE SKIP A.MEMO 1, 2, MENU VOCAL H / P VOLUME CALL Remoto... -
Page 26: Opciones Ajustables En El Menú
MENU Salga del Menú. • Pulse el botón repetidamente hasta que se borre el Menú. Monitor Remoto Opciones ajustables en el menú COLOR BRIGHT MODE Aparece solamente TINT MENU DIMMER para el formato de FORMAT vídeo NTSC. RESET Nota: El menú se apaga tras un período de inactividad de unos 5 segundos. COLOR : Ajusta el color de la imagen—más clara o COLOR... - Page 27 FORMAT : Se selecciona un tamaño de visualización apropiado. FORMAT FULL • Ajustes seleccionables: FULL/NORMAL/ ZOOM • Ajuste inicial: FULL Cuando se miran señales de vídeo de 16:9: FULL: Las imágenes se muestran por entero en la pantalla. • Aparecerán franjas negras en las partes superior e inferior de la pantalla.
-
Page 28: Mantenimiento
MANTENIMIENTO Para impedir daños en la parte exterior • No aplique pesticidas, bencina, diluyente u otras sustancias volátiles a la unidad. La superficie de la caja está hecha principalmente de materiales plásticos. • No la limpie con bencina, diluyente o sustancias similares porque esto puede causar descoloración o desprendimiento de la pintura. -
Page 29: Especificaciones
Tenga en cuenta que podría haber 0,5 V(rms) un 0,01% de pixeles constantemente Sintonizador: apagados o iluminados. Conector DIN de 8 clavijas (sólo para KV-C10 de JVC) Salida Pantalla: Conector DIN de 13 clavijas Vídeo: Clavija RCA × 1 circuito 1 V(p-p), 75 Ω... - Page 30 MISES EN GARDE CAUTION RISK OF ELECTRIC SHOCK • N’INSTALLEZ PAS LE MONITEUR DANS UN DO NOT OPEN ENDROIT QUI GÊNE LA CONDUITE, LA VISIBILITÉ OU QUI EST INTERDIT PAR LE CODE DE LA CAUTION: TO REDUCE THE RISK OF ELECTRIC SHOCK. ROUTE ET LES RÈGLEMENTS.
- Page 31 Merci pour avoir acheté un produit JVC. Veuillez lire attentivement toutes les instructions de ce mode d’emploi pour bien comprendre le fonctionnement de l’appareil et obtenir les meilleures performances. TABLE DES MATIÈRES PRÉCAUTIONS ............4 COMMANDES ET CARACTÉRISTIQUES ......5 Moniteur couleur à...
-
Page 32: Précautions
PRÉCAUTIONS Précautions à prendre avec l’afficheur à cristaux liquides Ne faites pas tomber l’afficheur à cristaux N’exposez pas l’afficheur à cristaux liquides liquides ni ne le heurtez trop fort. directement aux rayons du soleil. • Plage des températures de rangement: –20 °C à... -
Page 33: Commandes Et Caractéristiques
Il est recommandé d’utiliser le casque w Capteur de télécommande d’écoute sans fil JVC KS-HP1K. Dirigez la télécommander sur vers cette 6 Verrou d’écran zone quand vous l’utilisez pour • Ouvrez le verrou sur le compartiment commander le moniteur. -
Page 34: Télécommande
Touche CALL Section du magnétoscope Section du magnétoscope (VCP) Les touches suivantes peuvent être utilisées pour commander le KV-V8 ou KZ-V10 de JVC. • Pour les informations de fonctionnement du MONITOR TV TUNER KV-V8 ou KZ-V10, référez-vous aux instructions qui l’accompagnent. -
Page 35: Remplacement De La Pile
Avant d’utiliser la télécommande: Quand vous utilisez la télécommande pour la (Face arrière) première fois, retirez la feuille isolante comme montré sur l’illustration ci-àdroite. • Dirigez la télécommande directement sur le Tirez capteur de télécommande du moniteur couleur. Assurez-vous qu’il n’y a pas d’obstacle. Feuille isolante •... -
Page 36: Fonctionnement De Base
FONCTIONNEMENT DE BASE Préparation Avant d’utiliser le système, assurez-vous que tous les appareils extérieurs sont connectés et installés correctement. MONITOR TV TUNER MODE SKIP A.MEMO MENU VOCAL H / P VOLUME CALL Moniteur Télécommande Ouvrez le panneau à cristaux liquides. Le moniteur se met sous tension. - Page 37 Choisissez le format vidéo—NTSC ou PAL, pendant que l’indication du format vidéo apparaît sur l’écran. Chaque fois que vous appuyez sur la touche, le format Moniteur Télécommande vidéo alterne entre NTSC (réglage initial) et PAL. Choisissez le format correspondant aux signaux d’entrée. Remarque: Quand vous utilisez le KV-C10: vous pouvez prérégler le format vidéo séparément pour “AV 1”...
-
Page 38: Autres Fonctions De Base
: Pour écouter la radio (par le récepteur). Utilisation d’un casque d’écoute optionnel Vous pouvez utiliser le casque d’écoute sans fil optionnel KS-HP1K de JVC pour écouter les sons de lecture de l’appareil extérieur. Les sons reproduits par l’appareil extérieur sont transmis par l’émetteur IR jusqu’au casque... -
Page 39: Ajustements
AJUSTEMENTS Utilisation du menu Vous pouvez réaliser vos propres ajustements en utilisant le menu. • Pour les éléments ajustables, référez-vous à la page suivante. Procédure de base MONITOR TV TUNER 1, 2, MODE SKIP A.MEMO 1, 2 MENU VOCAL H / P VOLUME CALL Télécommande... -
Page 40: Éléments Ajustables Sur Le Menu
MENU Quittez le menu. • Appuyez répétitivement sur la touche jusqu’à ce que le Moniteur Télécommande menu disparaisse. Éléments ajustables sur le menu COLOR BRIGHT MODE Apparaît TINT MENU uniquement pour le DIMMER format vidéo NTSC FORMAT RESET Remarque: Le menu disparaît si aucune opération n'est effectuée pendant environ 5 secondes. COLOR : Permet d’ajuster la couleur de l’image—plus clair ou plus sombre. - Page 41 FORMAT : Permet de choisir la taille d’affichage appropriée. • Réglages sélectionnables: FULL/NORMAL/ FORMAT FULL ZOOM • Réglage initial: FULL Lors de l’affichage de signaux vidéo 16:9: FULL: Les images apparaissent entièrement sur l’écran. • Des barres noires apparaissent en haut et en bas de l’écran. NORMAL: Les images apparaissent au centre de l’écran.
-
Page 42: Entretien
ENTRETIEN Pour éviter d’endommager l’extérieur • Ne jamais appliquer de pesticide, benzine, diluant ou autre substance volatile sur l’unité. La surface du coffret est essentiellement constituée de matières plastiques. • Ne pas frotter l’unité à la benzine, au diluant ou toute autre substance similaire, car cela entraîne une décoloration et/ou un écaillage de la peinture. -
Page 43: Spécifications
0,5 V(efficace) possède au moins 99,99% de pixels d’image Tuner: Prise DIN à 8 broches effectifs. Notez que sur 0,01% du panneau, il (uniquement pour le KV-C10 de JVC) peut avoir des pixels manquants ou des pixels Sortie allumés constamment. - Page 44 http://www.jvcmobile.com Visit us on-line for Technical Support & Customer Satisfaction Survey. US RESIDENTS ONLY VICTOR COMPANY OF JAPAN, LIMITED EN, SP, FR 0303MNMMDWPUN © 2003 VICTOR COMPANY OF JAPAN, LIMITED...