
Related Manuals for Rinnai ORH15SR


Summary of Contents for Rinnai ORH15SR
- Page 1 Models: ORH15SR ORH18MR ORH24LR ORH32XLR Outdoor Radiant Heater Operation & Installation Manual...
- Page 2 • Local Regulations and Municipal Building Codes including local OH&S requirements This appliance must be installed, maintained and removed only by an Authorised Person� For continued safety of this appliance it must be installed and maintained in accordance with the manufacturer’s instructions� Rinnai ORH OIM...
-
Page 3: Table Of Contents
Unpacking �������������������������������������������������������������������������������������������������������������������������������������������������������� 10 Approximate Heating Area ������������������������������������������������������������������������������������������������������������������������������� 10 Outdoor Radiant Heater Mounting ������������������������������������������������������������������������������������������������������������������� 10 Clearances ������������������������������������������������������������������������������������������������������������������������������������������������������� 11 Installation Method ������������������������������������������������������������������������������������������������������������������������������������������� 12 Care & Maintenance Electrical Connections �������������������������������������������������������������������������������������������������������������������������������������� 13 Location of Electrical Connection ��������������������������������������������������������������������������������������������������������������������� 13 Multiple Installations ����������������������������������������������������������������������������������������������������������������������������������������� 13 Cleaning ����������������������������������������������������������������������������������������������������������������������������������������������������������� 14 Save A Service Call ������������������������������������������������������������������������������������������������������������������������������������������ 14 When to Call for Service ����������������������������������������������������������������������������������������������������������������������������������� 14 Warranty Contacts Rinnai ORH OIM... -
Page 4: Warnings And Important Information
ONLY be serviced by the manufacturer or the manufacturer’s agent or similarly qualified person. DO NOT install or use the appliance if the power cord is damaged. If it is damaged or requires replacing, it must be replaced by the manufacturer or the manufacturer’s agent or similarly qualified person. Ensure that the voltage and frequency of the power supply correspond to the ratings on the data plate of the appliance. Models ORH15SR, ORH18MR and ORH24LR are fitted with an Australian flexible 1m cord and 3 pin plug. A dedicated 240V 50Hz earthed 10 Amp power point must be used with this appliance. Model ORH32XLR are fitted with an Australian flexible 1m cord and 3 pin plug. A dedicated 240V 50Hz earthed 15 Amp power point must be used with this appliance. DO NOT use power boards or double adaptors for this appliance. This appliance MUST NOT be located immediately below or directly in front of a power point / electrical connection. The power point / electrical connection is to be within 1m of the appliance, yet should be located outside the physical footprint of the unit to prevent exposure to heat build-up behind the ... - Page 5 This appliance is NOT equipped with a device to control the room temperature. DO NOT use this appliance in small rooms (see “Approximate Heating Area” on page 8) when they are occupied by persons not capable of leaving the room on their own, unless constant supervision is provided. DO NOT allow young children or the infirm to remain unsupervised or sleep directly in front of or below the appliance while in operation. NO USER SERVICEABLE PARTS - NEVER dismantle the appliance. Tampering with electrical connections and components is highly dangerous and can result in equipment malfunction, property damage, personal injury and/or death. DO NOT modify this appliance. Modifying from original specifications may create a dangerous situation and will void your warranty. Rinnai 5 ORH OIM...
- Page 6 Ensure that the appliance is labelled correctly for the gas and electrical supply it is intended to be connected to. For safety and warranty purposes, appliances that may be damaged or incorrect must not be installed or operated under any circumstances. No responsibility will be accepted for installation or operation of damaged or incorrect appliances. Installation of damaged or incorrect appliances may also contravene local regulations. A NOTE ON ILLUSTRATIONS The illustrations used in this manual are for explanatory purposes only and the shape of your unit may NOTE vary slightly from that which is shown in this manual. Rinnai ORH OIM...
-
Page 7: About Your Outdoor Radiant Heater
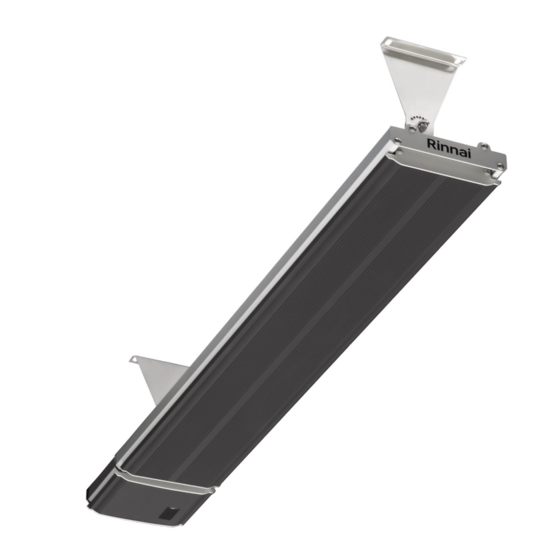
Silent Operation Electric element operation eliminates fan noise. Draft Free Non fan operation also means no drafts. IP65 Water ingress protection allows for safe cleaning of the external heater casing using a typical low pressure garden hose or by using a wet sponge. Remote Control Remote control is supplied with appliance. SPECIFICATIONS Model; ORH15SR ORH18MR ORH24LR ORH32XLR Max. rated power 1500W 1800W 2400W 3200W Rated voltage 240V 50Hz Three pin plug type... -
Page 8: General Design Layout / Carton Contents
1� Before operating the heater for the first time or after periods of non use ensure that the radiating surface is clean and free of debris or dust see "Cleaning" on page 14. 2� Ensure that the GPO for the heater is in the "ON" position, then switch "ON" the power at the isolating switch (if fitted). Ensure that the power switch on the right hand side of the appliance is set in the ‘I’ position when installing. NOTE Remote control hour Power switch to ‘I’ position indicator Rinnai ORH OIM... -
Page 9: Installation
1 and 4 The heater will be OFF in 5 hours The heater will be OFF in 6 hours hour 1 and 6 The heater will be OFF in 7 hours 2 and 6 The heater will be OFF in 8 hours 1, 2 and 6 The heater will be OFF in 9 hours 4 and 6 The heater will be OFF in 10 hours 1, 4 and 6 The heater will be OFF in 11 hours 2, 4 and 6 The heater will be OFF in 12 hours 1, 2, 4 and 6 The heater will be OFF in 13 hours REMOTE CONTROL BATTERIES 1� Insert batteries before using the remote control. The battery type used is AAA (1.5 V). 2� Remove the battery cover at the rear of the remote control. 3� Insert the new batteries and make sure that the + and - terminals of the batteries are installed correctly. 4� Reattach the battery cover. Rinnai ORH OIM... -
Page 10: Regulatory Requirements
The heater MUST be installed in accordance with AS/NZS 3000 and all other applicable local municipal building codes including OH&S requirements UNPACKING If any damage is present DO NOT INSTALL or OPERATE the appliance and contact your supplier for advice. IMPORTANT APPROXIMATE HEATING AREA Indoor Area Spot Heating Dimension ORH15SR ORH18MR ORH24LR ORH32XLR 1030 1210 1490 1900 1700... -
Page 11: Clearances
Fans, lights and sprinkler fittings 125 Min. MUST NOT 600 Min. be below heater 1500 Min. 1000 Min. to surfaces (ie table tops, ect) 2100 Min. from floor 3000 Max. from floor (recommended) 600 Min. Same both ends Rinnai ORH OIM... -
Page 12: Installation Method
Radiant Heater Mounting" on page 10 and 11 to assist with the location of the heater. 3� Set the adjustable angle mounting brackets to desired angle: For ceiling mounted installations the available mount angles are restricted to 0°, 15° and 30° only. For wall mounted installations the available mount angles are restricted to 15°, 30° and 45° only. 0° 15° 30° 45° 4� Mark the position of the two brackets, using the following minimum recommended bracket spacing below to determine the correct location. Dimension (mm) ORH15SR ORH18MR ORH24LR ORH32XLR 530 ± 50 710 ± 50 990 ± 50 1400 ± 50 5. Install the brackets onto the nominated surface or structure using appropriate fixing screws suitable for the mounted surface material and able to support more than double the weight of the heater being installed, refer to "Specifications" on page 7. 6� Hang the heater on the brackets and firmly secure in place with the mounting bracket locking plates by ... -
Page 13: Care & Maintenance
CARE & MAINTENANCE ELECTRICAL CONNECTIONS The installation of electrical wiring, power outlets, and switches MUST BE performed by an authorised electrical installer. WARNING GPO Connection The heater is provided with a power cord fitted with a 3 pin plug (models ORH15SR, ORH18MR and ORH24LR are fitted with a 10 Amp plug and model ORH32XLR is fitted with a 15 Amp plug) for connection to a dedicated single-phase 240V AC~ 50HZ earthed power outlet. Before connection, make sure that specifications of the power outlet meet the requirements of those indicated on the appliance dataplate. The power outlet MUST be equipped with an automatic circuit breaker with rated current not less than 16A. For switching the heater "ON" or "OFF" an accessible All-pole disconnection switch of suitable power rating should also be provided in accordance with wiring rules. Direct Wired Connection The heater is designed to also allow for direct connection to a suitably rated single-phase 240V AC~ 50HZ earthed power supply. Before connection, make sure that specifications of the power supply to the heater meet the ... -
Page 14: Cleaning
Exposure to extreme ambient conditions such as high winds / excessively cold temperatures can lower the heating performance of an outdoor installation. WHEN TO CALL FOR SERVICE There are no user serviceable parts in this appliance, only an authorised person can such as a qualified electrician can service or maintain this appliance. SYMPTOM CAUSE There is a burning smell and or Turn off the heater, and contact Rinnai. strange sounds (other than normal expansion and contraction noises) coming from the unit. When associated circuit breaker Turn off the heater, and contact your authorised electrical installer. (safety, ground) is thrown or a fuse is blown. Poor heating performance. -
Page 15: Warranty
(a) arrange for the Product to be repaired or replaced, at our option and expense, within a reasonable period; or (b) pay you an amount equivalent to the cost of repairing or replacing the Product. If Rinnai provides you with either the replacement cost or replacement product, ownership of the original product shall immediately transfer to Rinnai. Rinnai is responsible for reasonable costs associated with legitimate warranty claims, including call-out of an authorised Rinnai service provider to inspect the faulty product. Rinnai is not responsible for: ... - Page 16 (d) All appliances must be installed, operated and maintained in accordance with Installation / Operation Manual, and other technical or sales literature (“Manufacturer’s Instructions”). (e) Any inspection, service, repair or replacement activities associated with warranty on Rinnai products must be authorised by Rinnai Australia before commencement. (f) The warranty applies only to the components supplied by Rinnai. It does not apply to components supplied by others, such as, isolating valves, electrical switches, pipe work, electrical cables, fuses and where applicable, flue systems supplied by others, but not limited to these. (g) Where the appliance has not been sited in accordance with the installation instructions or installed such that normal service access is difficult, a service charge will apply. If at the discretion of the attending service person, access is deemed dangerous service will be refused. Any work required to gain ...
- Page 17 (c) accidental damage from external sources including fire, theft and explosion; (d) acts of God and damage or corrosion to the Product caused by environmental conditions including excessive moisture, acid rain, airborne fallout, stones, salt, sand, hail, wind, storms, lightning, floods, infestation by rodents or other vermin; (e) modification of the Product in a manner not authorised by Rinnai; (f) incorporation of parts other than Rinnai parts or other parts authorised by Rinnai; (g) normal wear and deterioration, having regard to the operating environment of the Product, including discolouration;...
- Page 18 NOTES Rinnai ORH OIM...
- Page 19 NOTES Rinnai ORH OIM...
-
Page 20: Contacts
Tel: 1300 555 545* Fax: 1300 555 655 Monday to Friday, 8.00 am to 5.00 pm EST. *Cost of a local call higher from mobile or public phones. For further information visit www.rinnai.com.au or email enquiry@rinnai.com.au innai has a Service and Spare Parts network with...