Table of Contents
Advertisement
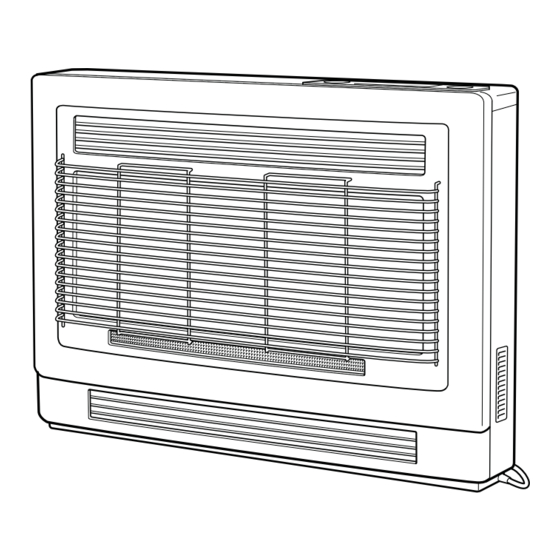
ULTIMA II
Operation / Installation Manual
MODEL REH-311FT(B) - Inbuilt
MODEL REH-311FT(C) - Console
This appliance shall be installed in accordance with:
• Manufacturer's Installation Instructions
• Current AS/NZS 3000 and AS/NZS 5601
• Local Regulations and Municipal Building Codes
This appliance must be installed, serviced and removed by an authorised person.
Flued Space Heater
All Rinnai gas products
are A.G.A. certified.
Distributed and serviced in Australia under a Quality
System certified as complying with ISO 9001 by
SAI Global
Advertisement
Chapters
Table of Contents

Related Manuals for Rinnai REH-311FT(B)


Summary of Contents for Rinnai REH-311FT(B)
- Page 1 • Manufacturer’s Installation Instructions • Current AS/NZS 3000 and AS/NZS 5601 • Local Regulations and Municipal Building Codes All Rinnai gas products Distributed and serviced in Australia under a Quality This appliance must be installed, serviced and removed by an authorised person.
- Page 2 INSTALLATION REQUIREMENTS This heater must be installed by an authorised person. The installation must conform to local regulations. The installation must also comply with the instructions supplied by Rinnai. Service and removal must be carried out by an authorised person.
-
Page 3: Table Of Contents
CARE AND MAINTENANCE..................12 CLEANING FILTERS, GRILLES AND LOUVRES..............12 SERVICE ............................ 12 TROUBLE SHOOTING CHECKLIST ..................13 ERROR CODES ......................... 13 INSTALLATION ......................15 SPECIFICATIONS .....................28 PRODUCT SPECIFICATIONS ....................28 DIMENSIONS ..........................28 CONTACT INFORMATION ..................29 Rinnai Australia Ultima II Operation/Installation Manual... -
Page 4: About Your Ultima Ii
FILTER display - when shown the filter(s) require cleaning. SET button - used to programme the heater operation. LOCK display - when shown the lock function is activated. DAY display - displays the current day. Rinnai Australia Ultima II Operation Manual... -
Page 5: Features
FEATURES • The Rinnai Ultima II is one of the most efficient gas space heaters available in Australia. This has been achieved by combining good design with the latest technology, making the heater both highly efficient and easy to use. -
Page 6: Important Points
DO NOT spray aerosols near this heater while it is in use. Most aerosols contain butane gas which can be a fire hazard if used near this heater when it is in use. Use of aerosols, paint, polishes etc. whilst this heater is in use may also cause unpleasant smells. Rinnai Australia Ultima II Operation Manual... - Page 7 When the heater is operated for the first time or after long periods of non use a slight odour may be emitted, this is normal. However if odours persist switch off the appliance and contact Rinnai. During periods of frequent operation periods the filters should be cleaned weekly, however if the Filter warning indicator illuminates, turn off the appliance immediately and clean filters before further use.
-
Page 8: Basic User Guide
CLOCK display for 10 seconds and then go blank. (The fan will continue to cycle for several minutes to cool the heater down) Rinnai Australia Ultima II Operation Manual... -
Page 9: How To Operate The Heater
This is to lower the temperature within the appliance and is NOTE normal. DO NOT disconnect the power during this time. Rinnai Australia Ultima II Operation Manual... -
Page 10: Modes To Deliver Comfort And Economy
The MODE selected will be stored in the memory of the microcomputer. if the MODE is not changed further it will be available as the initial setting when the appliance is NOTE next used. Rinnai Australia Ultima II Operation Manual... -
Page 11: Timer Operation
(unplugged) only if the heater is not going to be in use for an extended period. When NOTE the appliance is unplugged for an extended period the clock will stop and will need to be reset. However, timer programming will remain in the memory. Rinnai Australia Ultima II Operation Manual... -
Page 12: Programming Timers
AUTO OFF Repeat steps through above for the setting of the WEEKDAY PM, WEEKEND AM and WEEKEND PM timer programs as required or press the STANDBY/ON button NOTE twice to exit. Rinnai Australia Ultima II Operation Manual... -
Page 13: Operating Timers
The actual room temperature one hour prior to the programmed starting time of a timer combined with the data from previous operation governs exactly how long before the programmed On Time the micro-computer will ignite the burner. Rinnai Australia Ultima II Operation Manual... -
Page 14: Lock And Other Safety Devices
This device automatically cuts off the gas supply to the heater in the event of a gas failure. Power failure In the event of a power failure or power cut, the gas valves will automatically close. Rinnai Australia Ultima II Operation Manual... -
Page 15: Care And Maintenance
If the power supply cord or any other component of the heater are damaged, they must be replaced by Rinnai or a suitably qualified person. Any service or repair work should only be carried out by an authorised person. Rinnai has service and spare parts departments nationally see back cover for contact details. -
Page 16: Trouble Shooting Checklist
CARE AND MAINTENANCE TROUBLE SHOOTING CHECKLIST Use the following chart to help determine whether a service call is required, however if you are unsure about the way your heater is operating, contact Rinnai or your local agent. Fault Condition Possible Remedy... - Page 17 NOTES Rinnai Australia Ultima II...
-
Page 18: Installation
CLOSE GAS SUPPLY COVER ........................... 25 TEST APPLIANCE ............................... 25 INSTRUCT CUSTOMER ............................. 25 INBUILT / CONSOLE COMMISSIONING ................... 26 INBUILT / CONSOLE BURNER PRESSURE SETTING ..............27 PRODUCT SPECIFICATIONS ..........................28 DIMENSIONS ..............................28 CONTACT INFORMATION ......................... 29 Rinnai Australia Ultima II Installation Manual... -
Page 19: General - Installation
3. ELECTRICAL SUPPLY The heater has a power cord with a three pin plug supplied. Wall Rinnai recommends that the heater be plugged into a 240V, 10A Power Heater earthed power point. The power point must be a minimum of... -
Page 20: Inbuilt Installation, Masonry Fire Place
It must be fitted to all models, inbuilt and console. 4. GAS INLET UNION • For ease of connection a combined gas inlet union/ copper elbow is provided with every heater. It is situated at the bottom right hand side below the control. Rinnai Australia Ultima II Installation Manual... -
Page 21: Remove Gas Inlet Union From Heater
Gas pipe sizing must consider the gas input to this appliance as well as all other gas appliances in the premises. The gas meter and regulator must be specified for IMPORTANT the total gas rate. Suitable sizing chart such as the one in AS/NZS 5601 should be used. Rinnai Australia Ultima II Installation Manual... -
Page 22: Install The Heater
200 mm as shown. • Size:100 mm. 13. TEST APPLIANCE • See page 26. 14. INSTRUCT CUSTOMER • Instruct customer on operation and servicing of the appliance. • Remind customer of dress guard requirements. Rinnai Australia Ultima II Installation Manual... -
Page 23: Console Installation, Cavity Twin Skin Flue
If flue protrudes more than 65 mm above top plate, adaptor supports must be screwed to the flue, and positioned so that when the sealing plate is fitted it is 50 mm from the top of the flue. Rinnai Australia Ultima II Installation Manual... -
Page 24: Fit Rectangular To Round Adaptor
Drawing is viewed from rear of heater. • Actual connection is on right hand side when viewed from front. • Dimensions are to the centre of the flare fitting on the inlet elbow/union. Flare fitting suits 15 mm copper tube. Rinnai Australia Ultima II Installation Manual... -
Page 25: Install Heater
16. TEST APPLIANCE • See page 26. 17. INSTRUCT CUSTOMER • Instruct customer on operation and servicing of the appliance. • Remind customer of dress guard requirements. Rinnai Australia Ultima II Installation Manual... -
Page 26: Console Installation, Masonry Fire Place
Size:100 mm. 4. GAS INLET UNION • For ease of connection a combined gas inlet union/ copper elbow is provided with every heater. It is situated at the bottom right hand side below the control. Rinnai Australia Ultima II Installation Manual... -
Page 27: Remove Gas Inlet Union From Heater
Gas pipe sizing must consider the gas input to this appliance as well as all other gas appliances in the premises. The gas meter and regulator must be specified for IMPORTANT the total gas rate. Suitable sizing chart such as the one in AS/NZS 5601 should be used. Rinnai Australia Ultima II Installation Manual... -
Page 28: Install Heater
12. TEST APPLIANCE • See page 26. 13. INSTRUCT CUSTOMER • Instruct customer on operation and servicing of the appliance. • Remind customer of dress guard requirements. Rinnai Australia Ultima II Installation Manual... -
Page 29: Inbuilt / Console Commissioning
Please refer to AS/NZS 5601. 12. If you are unable to get the heater to work correctly, contact Rinnai or your agent. Check “ERROR CODES” on page 13. -
Page 30: Inbuilt / Console Burner Pressure Setting
Please refer to AS/NZS 5601. 17. If you are unable to get the heater to work correctly, contact Rinnai or your agent. Check “ERROR CODES” on page 13. -
Page 31: Specifications
Bottom left hand side, behind front panel. Installation type: Console or Inbuilt Weight: Console: 41 Kg. / Inbuilt: 38 Kg. Rinnai reserves the right to change or modify specifications without notice. DIMENSIONS C O N S O L E IN B U ILT Legend... -
Page 32: Contact Information
*Cost of a local call Higher from mobile or public phones. Tel: (03) 9271 6625 Fax: (03) 9271 6622 Rinnai has a Service and Spare Parts network with personnel who are fully trained and equipped to give the best service on your Rinnai appliance. If your appliance REH311-114x05 (00) requires service, please call Rinnai.