
Related Manuals for CyberPower OL6KRT3UPM


Summary of Contents for CyberPower OL6KRT3UPM
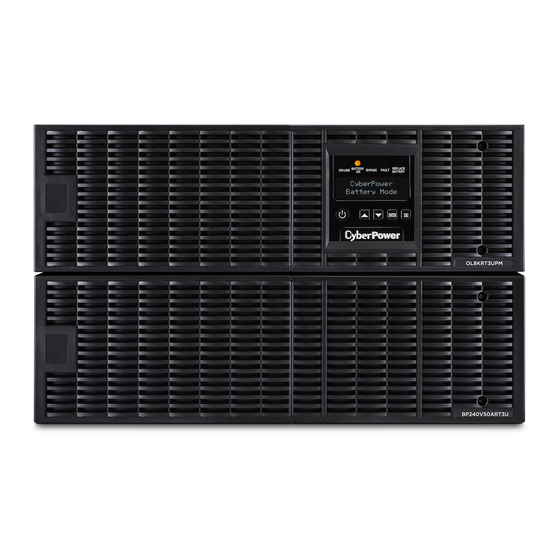
- Page 1 User’s Manual OL6000RT3U OL8000RT3U OL10000RT3U OL6KRT3UPM OL8KRT3UPM OL10RT3UPM Cyber Power Systems Inc. www.cyberpower.com K01-0000286-01...
- Page 2 重要安全警語 本手冊包含重要的操作說明,應遵循安裝並維護 UPS 和電池。請仔細閱讀並遵守所有的安裝指引與 警示。安裝前需仔細閱讀本手冊再進行安裝與操作。 注意! UPS 須接到具地線的電源插座,並有保險絲或斷路器等過電流保護器。 注意! 如需關閉連接到 UPS 的設備時,請先關閉 UPS 電源再拔掉插頭。 注意! 不得使用在醫療或生命維護設備! CyberPower 並不銷售產品在生命維護或醫療應用上, 任何影響生命維護、醫療應用或病人護理等皆不得使用。 注意! 在 UPS 電池模式下,電池接頭斷開可以切斷危險的帶電元件。 注意! 為了防止火災或觸電危險,UPS 需安裝在溫度和濕度合理控制下的室內環境。 (請參閱規格 可接受的溫度和濕度範圍) 。 注意! 為了減少觸電危險,勿取下上蓋。除電池可替換外,內部無其他可供使用者維修的零件。 注意! 為了避免觸電危險,在更換電池或作為電腦設備備用電源前,請先關閉 UPS 電源開關。 注意! 不得使用在水族箱或相關水源設備上!為降低發生火災的風險,任何有潛在水源處皆不得 使用,如壓縮機冷凝水會導致機器短路起火。 注意! 交流輸出電纜使用長度不得超過 10 米。...
- Page 3 規格說明 Smart App Online UPS 型號 額定電壓/電流 最大功率 輸入 AC 200V-240V(+6%/-10%), 30A MAX, 50/60Hz OL6KRT3UPM / OL6000RT3U 輸出 AC 200V-240V, 30A MAX, 50/60Hz 6000VA/5400W 輸入 AC 200V-240V(+6%/-10%), 40A MAX, 50/60Hz OL8KRT3UPM / OL8000RT3U 輸出 AC 200V-240V, 40A MAX, 50/60Hz 8000VA/7200W 輸入...
-
Page 4: Important Safety Instructions
IMPORTANT SAFETY INSTRUCTIONS This manual contains important instructions. Please read and follow all instructions carefully during installation and operation of the unit. Read this manual thoroughly before attempting to unpack, install, or operate the UPS. CAUTION! The UPS must be connected to a grounded AC power CAUTION! Wiring must be done by qualified personnel. - Page 5 Screw hole dust covers (14) * 2 sets USB communication cable Power cord * PowerPanel® Business Edition software is available Serial Interface Cable (RS-232) on our website. Please visit www.cyberpower.com go to the Software Section for FREE download. Copyright © 2017 Cyber Power Systems, Inc.
-
Page 6: Hardware Installation
HARDWARE INSTALLATION HARDWARE INSTALLATION These versatile UPS systems can be mounted in a rackmount or vertical Step 3: Rackmount rail Installation tower orientation. This versatility is especially important to growing The rails adjust to mount in 48-cm (19-inch) racks from 52 to 91.5cm organizations with changing needs that value having the option to (20.5 to 36 inches) deep. - Page 7 HARDWARE INSTALLATION Step 4: Adjust rackmount rails to fit your rack How to slide the UPS out from the rack Adjust the rail depth to match your rack depth. Attach the rackmount rail The UPS will be secured by a safety locking mechanism midway of to your rack with two screws and two plastic washers at the front of the pulling it out of the rack.
-
Page 8: Vertical/Tower Installation
HARDWARE INSTALLATION VERTICAL/TOWER INSTALLATION Step 1: Adhere the rubber feet on the bottom side of base stands Step 3: Rotate the Multifunction LCD Module Adhere the protective rubber feet on the bottom side of UPS. Unscrew the upper panel of the UPS. Separate the upper panel from the UPS. -
Page 9: Installing Your Ups System
When the over Make sure your equipment carries a load current within the unit’s safe temperature occurs, please check the Trouble Shooting section on page 24. If the condition persists, please contact CyberPower for technical range, (refer to the technical specifications). support. -
Page 10: Hardwiring The Input/ Output Terminals
HARDWIRING THE INPUT/ OUTPUT TERMINALS CHECK CIRCUIT BREAKER/WIRING Check branch circuit breaker rating and wiring dimensions with the following table. UPS Capacity Branch Circuit Breaker Wiring AWG Wiring mm 6KVA 10 AWG 5.5 mm 8KVA 8 AWG 8.0 mm 10KVA 6 AWG 14.0 mm INPUT/ OUTPUT CONFIGURATION... - Page 11 HARDWIRING THE INPUT/ OUTPUT TERMINALS Step 3: Input configuration Step 4: Output configuration Insert the input cable through the appropriate cable gland (not included). Insert the output cable through the appropriate cable gland (not included) Connect the three wires to the output terminal block. Connect the three wires to the input terminal block.
-
Page 12: Backfeed Protection
1. If the Bypass circuit is shorted and the UPS is running in Line Mode or Battery Mode, backfeed protection will be active and the external isolation device (Magnetic Contactor) will open. 2. Save your data and perform a controlled shutdown. 3. Contact CyberPower for repair. WITHOUT BACKFEED PROTECTION CONFIGURATION 1. Hardwire the input terminals as shown in the following diagram. -
Page 13: Basic Operation
Edition Agent software on the PC/Server connected with the USB cord. 14. Extended Runtime Battery Module Connector Connection for additional CyberPower XL Battery modules. 11. Surge Protected Communication Ports RJ-45/RJ-11 These ports are used to protect standard RJ-45/RJ-11 15. EPO (Emergency Power Off) Connector based products (ADSL, LAN, Phone/ Modem-Lines) and Enables an emergency UPS Power-Off from a remote location. - Page 14 BASIC OPERATION EXTENDED BATTERY MODULE FRONT/REAR PANEL DESCRIPTION 1. On-board Replaceable Fuse Cover Replaceable fuse is accessible from the rear panel. Service to be performed by qualified personnel only. 2. AC Circuit Breaker Provides overload and fault protection. 3. AC Output Outlet (IEC320 C13) Use this outlet to connect to the AC Input Inlet of a downstream Battery module.
- Page 15 BASIC OPERATION CONNECTION #2 : POWER MODULE WITH MULTIPLE EXTENDED BATTERY MODULES Step 1: Connect the 1 EBM to the Power module using the instructions above. Step 2: Turn off the DC breaker of the 2 EBM. Step 3: Loosen the two screws to remove the battery cable retention bracket of the 1 EBM.
-
Page 16: Led Indicators - Ups Status
OPERATION INSTRUCTIONS FOR LCD MODULE LED INDICATORS – UPS STATUS LED Indicators Color UPS Status Description ON/OFF White UPS power is on. ON-LINE Green UPS is operating in Line Mode. BATTERY ON Yellow UPS is operating in Battery Mode. BYPASS Yellow UPS is operating in Bypass Mode, Manual Bypass or ECO (Economy) Mode. -
Page 17: Lcd Setup Functions
LCD SETUP FUNCTIONS MULTI-FUNCTION LCD MAIN MENU Press “Enter” button to activate “MAIN MENU”. MAIN MENU submenu Function Description Information Displays the UPS information. Configure Displays the UPS settings that can be configured by the user. Displays most recent events, event count, time... -
Page 18: Lcd Event Log
LCD SETUP FUNCTIONS LCD EVENT LOG 3 Event Logs of UPS can be recorded. Press the “ENTER” button to activate the “MAIN MENU”. Press the “▲” and “▼” buttons to scroll to the “Event Log” option. Press the “ENTER” button to select the “Event Log” submenu. Press the “▲”... - Page 19 LCD SETUP FUNCTIONS Configure Submenu Available Settings Default Setting Output Voltage = [200V] [208V] [220V] [230V] [240V] 208V Range= [+/- 1%] [+/- 2%] [+/- 3%] [+/- 4%] [+/- 5%] Sync Freq Window +/- 5% [+/- 6%] [+/- 7%] [+/- 8%] [+/- 9%] [+/-10%] Range= [+10%/-10%] [+10%/-15%] [+10%/-20%] Bypass V Window +10%/-15%...
-
Page 20: Lcd Module Remote Control And Wall-Mounting Instructions
LCD MODULE REMOTE CONTROL and WALL-MOUNTING INSTRUCTIONS REMOTE CONTROL WALL-MOUNTING INSTRUCTIONS Step 1: Remove the Multifunction LCD Module Step 1: Remove the Multifunction LCD Module Unscrew the right panel of the Power module. Separate the right panel Unscrew the right panel of the Power module. Separate the right panel from the UPS. -
Page 21: Maintenance
Battery replacement should be performed by trained personnel correct replacement batteries. For battery procurement, log onto who are familiar with the procedures and safety precautions. Make a note www.cyberpower.com,or contact your local dealer. of the replacement Battery module number. Battery Disposal... -
Page 22: Technical Specifications
TECHNICAL SPECIFICATIONS Model OL6000RT3U OL8000RT3U OL10000RT3U Configuration Capacity (VA) 6000VA 8000VA 10000VA Capacity (Watts) 5400W 8000W 10000W Form Factor Rackmount / Tower ECO Mode EFF≧96% ECO Mode EFF≧97% Energy-saving Technology Input Input Voltage Range 200~240Vac Input Frequency Range 40~70Hz Input Power Factor 0.99 Cold Start Output... -
Page 23: Troubleshooting
Over Charge Battery is overcharged. charger voltage. Charger Failure Charger has failed. 2. Contact CyberPower for repair. High O/P V Output voltage is too high. 1. Shut down UPS and turn off input breaker. Low O/P V Output voltage is too low. -
Page 24: Product Registration
If the Product is defective in material or workmanship, CyberPower will repair or replace it at CyberPower's expense, or, if CyberPower is unable to or decides not to repair or replace the Product (if defective) within a reasonable time, CyberPower will refund to you the full purchase price you paid for the Product (purchase receipt showing price paid is required). - Page 25 (collectively, "High Risk Activities"). CyberPower expressly disclaims any express or implied warranty of fitness for High Risk Activities or with aquariums. CyberPower does not authorize use of any Product in any High Risk Activities or with Aquariums.
-
Page 26: Conformance Approvals
Cet appareil numerique de la class A respecte toutes les exigencies du Reglement sur le materiel brouilleur du Canada. This document is believed to be accurate, but CyberPower reserves the right to change or correct the contents and does not assume any responsibility for omissions or errors. - Page 27 設備名稱:不斷電系統,型號(型式): OL6000RT3U , OL8000RT3U OL10000RT3U OL6KRT3UPM , OL8KRT3UPM OL10RT3UPM Type designation (Type) Equipment name 限用物質及其化學符號 Restricted substances and its chemical symbols 六價鉻 多溴聯苯 多溴二苯醚 單元 Unit 鉛 汞 鎘 Lead Mercury Cadmium Hexavalent Polybrominated Polybrominated (Pb) (Hg) (Cd) chromium biphenyls...