Napoleon PTSS165 Accessory Mounting Instructions
Hide thumbs
Also See for PTSS165:
- Installation and operating manual (20 pages) ,
- Instructions manual (33 pages) ,
- Instructions manual (69 pages)
Advertisement
Available languages
Available languages
Quick Links
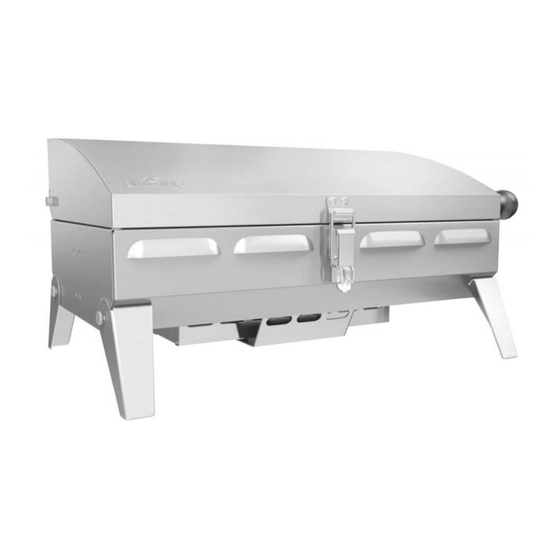
PTSS165 ACCESSORY MOUNTING INSTRUCTIONS
Use these instructions in conjunction with your main manual to properly
assemble your gas grill. Refer to the main manual for safety, operating,
cleaning and maintenance instructions.
WARNING!
Clearance to combustibles as outlined in your main manual and specified on your grill's rating
plate must be maintained.
R.V. Table Mounting Instructions
WARNING!
A grill installed on a R.V. must be installed on the opposite side as the fuel distribution/
dispensing system.
1. Attach the extruded accessory support (not included) to the outside of the R.V. or wall using appropriate screws
(not included). When attaching the support, be sure to locate a stud or some structure to screw into, as the siding
alone will not be strong enough to hold the weight of the grill. Mount approximately 40" from the ground as
illustrated. (The height of the support is approximate and can be adjusted according to individual preference.) The
mounting system must have a minimum load specification of 30lbs (13.6kg) with the system fully extended and in
the locked position.
214 Bayview Dr., Barrie, Ontario, Canada L4N 4Y8 Phone: (705)726-4278
Fax: (705)725-2564 email: wecare@napoleonproducts.com web site: www.napoleongrills.com
Napoleon Appliance Corp.,
N415-0238 NOV 18/10
Advertisement

Related Manuals for Napoleon PTSS165


Summary of Contents for Napoleon PTSS165
- Page 1 PTSS165 ACCESSORY MOUNTING INSTRUCTIONS Use these instructions in conjunction with your main manual to properly assemble your gas grill. Refer to the main manual for safety, operating, cleaning and maintenance instructions. WARNING! Clearance to combustibles as outlined in your main manual and specified on your grill’s rating plate must be maintained.
- Page 2 2. Fold shelf as indicated, engaging wire into cut out on side flanges. Engage Wire 3. Hook the entire shelf into the extruded accessory support and then pivot the shelf down. 4. Once the shelf assembly is secured in place, the grill can be mounted: a) Place the grill bottom on the assembled shelf and slide the grill forward to line up the holes in the shelf with the holes on the bottom of the grill.
- Page 3 b) Fasten the grill using the (2) thumbscrews supplied. Tighten by hand. WARNING! The grill and the shelf must be removed from the outside of the R.V. before driving. Allow the grill to cool to touch before moving or storing. Failure to do so could result in property damage, personal injury or death.
- Page 4 Rail Mount Instructions CAUTION! If mounting on a boat it is highly recommended that the grill head is removed and stored away before casting off. Allow the grill to cool to touch before moving or storing. Failure to do so could result in property damage, personal injury or death.
- Page 5 Post Mount Instructions CAUTION! If mounting on a boat it is highly recommended that the grill head is removed and stored away before casting off. Allow the grill to cool to touch before moving or storing. Failure to do so could result in property damage, personal injury or death.
- Page 6 3. Slide the grill mount over top of the post and fasten with the two thumbscrews supplied. 4. Once the mounts are secured in place, the grill can be mounted: a) Place the grill bottom on the mounting plate as illustrated. Slide the grill forward to line up the holes in the mounting plate with the holes on the bottom of the grill.
- Page 7 INSTRUCTIONS D’INSTALLATION DES ACCESSOIRES DU PTSS165 Pour assembler adéquatement le gril à gaz, suivez ces directives, de même que celles du manuel principal. Pour connaître les directives liées à la sécurité, au fonctionnement, au nettoyage et à l’entretien, consultez le manuel principal.
- Page 8 2. Pliez la tablette comme illustré, en insérant les tiges dans les encoches latérales. Insérez les tiges 3. Accrochez la tablette dans le support pour accessoire, puis abaissez-la. 4. Dès que l’assemblage de la tablette est bien fixé, le gril peut y être installé : a) Placez la base du gril sur la tablette.
- Page 9 b) Fixez le gril à l’aide des deux (2) vis de serrage fournies. Serrez à la main. AVERTISSEMENT! Avant de prendre la route, vous devez enlever le gril et la tablette installés à l’extérieur du V.R. Attendez que le gril soit froid au toucher avant de le déplacer ou de le ranger; sinon, des dommages matériels, des blessures corporelles ou même la mort pourraient s’ensuivre.
- Page 10 Instructions d’installation sur un rail ATTENTION! Si l’accessoire est installé sur un bateau, il est fortement conseillé d’enlever et de ranger le gril avant de lever l’ancre. Avant de déplacer ou de ranger le gril, attendez qu’il soit froid au toucher. Le non-respect de ces consignes pourrait entraîner des dommages matériels, des blessures corporelles ou la mort.
- Page 11 Instructions d’installation sur un poteau ATTENTION! Si l’accessoire est installé sur un bateau, il est fortement conseillé d’enlever et de ranger le gril avant de lever l’ancre. Avant de déplacer ou de ranger le gril, attendez qu’il soit froid au toucher. Le non-respect de ces consignes pourrait entraîner des dommages matériels, des blessures corporelles ou la mort.
- Page 12 3. Glissez la plaque de montage du gril sur le haut du poteau et fixez avec les deux vis de serrage fournies. 4. Dès que les éléments de montage sont bien fixés, le gril peut être installé : a) Placez la base du gril sur la plaque de montage, comme illustré. Glissez le gril vers l’avant jusqu’à ce que les trous de la plaque de montage soient alignés avec ceux de la base du gril.