Sirius Satellite Radio SU906 Installation Instructions Manual
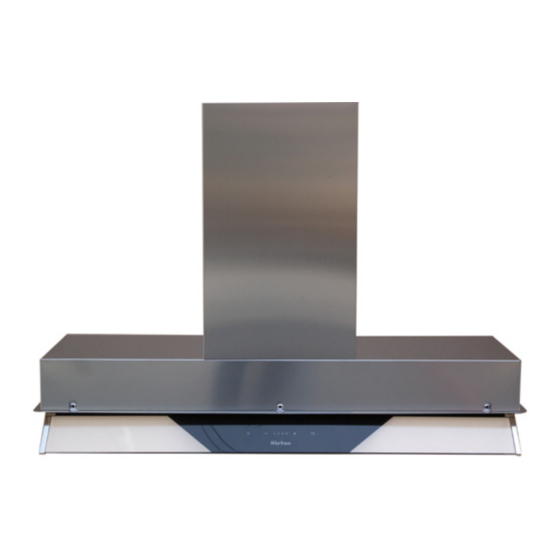
Built-in range hoods
Hide thumbs
Also See for SU906:
- Installation instructions manual (20 pages) ,
- Installation instructions manual (32 pages)
Table of Contents
Advertisement
Available languages
Available languages
Quick Links
INSTALLATION INSTRUCTIONS
INSTALLATION INSTRUCTIONS
CARE AND USE MANUAL FOR:
NOTICE D'UTILISATION ET D'ENTRETIEN POUR:
BUILT-IN RANGE HOODS
HOTTES ÎLOT
Models covered by this instructions:
Notice d'instruction pour les modèles:
SU906 SU919 SUE919
*** BEFORE INSTALLATION ***
ENSURE THERE IS NO VISIBLE OR HIDDEN DAMAGE SUSTAINED DURING SHIPPING
*** AVANT L'INSTALLATION ***
S'ASSURER QUE LES PRODUITS N'ONT SUBI AUCUN DOMMAGE PENDANT LE TRANSPORT
*** SHIPPING DAMAGE ***
MUST BE REPORTED WITHIN 5 DAYS OF RECEIPT
*** DOMMAGES DE TRANSPORT ***
DOIVENT ÊTRE NOTIFIÉS DANS LES 5 JOURS SUIVANT LA RÉCEPTION
Advertisement
Chapters
Table of Contents

Related Manuals for Sirius Satellite Radio SU906


Summary of Contents for Sirius Satellite Radio SU906
- Page 1 BUILT-IN RANGE HOODS HOTTES ÎLOT Models covered by this instructions: Notice d’instruction pour les modèles: SU906 SU919 SUE919 *** BEFORE INSTALLATION *** ENSURE THERE IS NO VISIBLE OR HIDDEN DAMAGE SUSTAINED DURING SHIPPING *** AVANT L’INSTALLATION *** S’ASSURER QUE LES PRODUITS N’ONT SUBI AUCUN DOMMAGE PENDANT LE TRANSPORT...
- Page 8 WAR NIN G Thank you for purchasing a Sirius Range Hood. Please read all the instructions in this manual before installing the appliance. Save these instructions for future reference. Only use this appliance as an exhaust ventilation system for the re- moval of cooking vapors.
-
Page 9: Table Of Contents
TABLE OF CONTENTS BEFORE YOU BEGIN DUCTING External venting Requirements ELECTRICAL Electrical Supply INSTALLATION Installation SU906 Installation SUTC919 OPERATING PROCEDURES General Advice Functions MAINTENANCE Cleaning the Filter Cleaning the Hood Substitution of the LED bar WARRANTY... -
Page 10: Before You Begin
B E FOR E Y O U B E G IN The manufacturer declines all responsibility BEFORE YOU BEGIN: It is advisable to in the event of failure to observe the instruc- test run the range hood before installa- tions given here for installation, maintenan- tion. -
Page 11: Electrical
The ducting connection to the hood must be in line with the central vertical axis of the range hood, 1” away from the back wall on which the hood is to be mounted. Range hoods may interrupt the proper flow of combustion gases from fireplaces, gas furnaces and gas water heaters. -
Page 12: Installation
(Fig. 2) them at the end of the installation. SU906 (520mm) 501 X 265mm - 19” X 10” 23/32 14/32 SU906 (850mm) 835 X 265mm - 32”... -
Page 13: Installation Sutc919
Warning! Installation SUTC919 Before connecting the flexible exhausting pipe to the motor, make sure the stop valve, Remove the grease filters before installing which is on the air outlet of the motor, can the product, in order to avoid damage to the swing. - Page 14 Place the appliance inside the cabinet and Filtering version fix it by inserting the screws supplied into the Connect the flange with a pipe suitable to holes, as shown in fig. 19. convey the air to the top of the cabinet. Con- nect the appliance with the electrical mains Both in the front and rear side of the applian- through the supply cord.
-
Page 15: Operating Procedures
O PE R AT I N G PR O C E DU RES Read all the instructions before operating FUNCTION the appliance. Save these instructions for future reference. Mod. SU (Fig. 29). A: Light ON/OFF button General Advice. B: Blower Speed 1 (low) or OFF Ensure that the grease filters are in place. - Page 16 Filter requires washing indicator: after 30 hours of use, all the buttons will light up to remind you that the grease filter should be cleaned. Follow the instructions for cleaning filters in this booklet. Once the grease filters have been cleaned and replaced, reset by pressing the timer button (F).
-
Page 17: Maintenance
M A I N TE N A NCE The hood-fan should provide many years of trouble free service provided it is maintained properly. Cleaning the Filter. Clean the grease filter either by carefully hand washing, (so as not to damage the filter design) or preferably in a dishwasher. -
Page 18: Substitution Of The Led Bar
Substitution of the LED bar: Using an appropriate tool, remove the LED bar from its seat, disconnect it electronically using the appropriate connector, then substi- tute it with a LED bar with same characteri- stics. -
Page 19: Warranty
YOU MUST REGISTER THE PURCHASE OF YOUR PRODUCT ON LINE AT HYPERLINK “http://www.siriuscappe.com/canada/warranty.htm” TO CONVALIDATE YOUR WARRANTY. YOU CAN FIND THE DATA OF YOUR HOODS ON A LABEL INSIDE THE HOOD. JUST REMOVE THE GREASE FILTER TO READ IT. WARRANTY SERVICE To qualify for warranty service, you must notify Sirius After sale service at the email address stated below or call toll free in Canada 1-800-463-2566 and provide the model number, de- scription of the fault or defect and original date of purchase. - Page 20 IN ST RU C TI ON S IM PO RTANT ES PO U R L A S É CU RIT É Merci d’avoir choisi une Hotte de Cuisine Sirius. Veuillez lire attentivement toutes les instructions avant l’installation et l’utilisation de l’appareil. Conservez ces instructions afin de pouvoir les consulter au besoin.
- Page 21 TABLE DES MATIÈRES AVANT DE COMMENCER CONDUIT Version évacuation extérieure ÉLECTRICITÉ Alimentation Électrique INSTALLATION Installation SU906 Installation SUTC919 PROCÉDURES D’UTILISATION Recommandations Générales Fonctions ENTRETIEN Nettoyage des Filtres Nettoyage de la Hotte Substitution de la barre à LED SERVICE DE GARANTIE...
-
Page 22: Avant De Commencer
AVAN T D E C OM M E NCE R Le fabricant décline toute responsabilité AVANT DE COMMENCER : On conseille en cas de dommages causés par un non de vérifier le fonctionnement de la hotte respect des instructions d’installation, d’uti- avant son installation. -
Page 23: Électricité
Le raccordement du conduit à la hotte doit être en ligne avec l’axe centrale verticale de la hotte de 1” et loin de la paroi postérieure sur laquelle la hotte sera positionnée. Les hottes peuvent empêcher la bonne éva- cuation des fumées des cheminées, des fours et des chauffe-bains à... -
Page 24: Installation
- Couper le meuble d’une façon appropriée, l’emballage et il faut la monter à la fin du pour maintenir l’appareil en position (Fig. 2). procès d’installation. SU906 (520mm) 501 X 265mm - 19” X 10” 23/32 14/32 SU906 (850mm) 835 X 265mm - 32”... -
Page 25: Installation Sutc919
Attention ! Installation SUTC919 Avant de connecter la canalisation flexible au moteur, s’assurer que la soupape - dans Avant de commencer l’installation, enlevez la sortie de l’air du moteur - peut balancer. les filtres à graisse pour ne pas endomma- ger l’appareil. - Page 26 Il est possible de débrancher la barre à Led Version recyclage par le connecteur approprié. Connecter à la buse un tuyau approprié à cheminer l’air jusqu’à la partie supérieure du Placez l’appareil dans le meuble et fixez-le meuble. Proceder à la connexion électrique dans le trou par les vis fournies à...
-
Page 27: Procédures D'utilisation
PRO CÉ D U R E S D ’ U T ILI SATI O N Lisez attentivement toutes les instructions FONCTIONS avant de mettre en marche l’appareil. Con- servez ces instructions afin de pouvoir les Mod. SU (Fig. 29). consulter au besoin. A: Touche lumière ON/OFF B: Vitesse ventilateur 1 (réduite) ou OFF Recommandations Générales. -
Page 28: Entretien
E N TR ETIE N Un entretien soigné garantit un bon fonction- nement et un bon rendement dans le temps. Nettoyage des Filtres. Les filtres peuvent être lavés à la main (en faisant attention de ne pas les endomma- ger) ou, de préférence, au lave-vaisselle. Selon l’utilisation, les filtres doivent être la- vés au moins toutes les deux semaines au lave-vaisselle. -
Page 29: Substitution De La Barre À Led
Substitution de la barre à LED : A l’aide d’un outil approprié, extraire la barre à LED de son emplacement. La débrancher électroniquement à l’aide du connecteur puis la remplacer avec une autre barre ayant les mêmes caractéristiques. -
Page 32: Service De Garantie
IL EST NÉCESSAIRE D’ENREGISTRER EN LIGNE L’ACHAT DE VOTRE PRODUIT AU SITE HYPERLINK http://www.siriuscappe.com/canada/warranty.htm POUR VALIDER LA GARANTIE. VOUS TROUVEZ LES DONNÉES DE VOTRE HOTTE SUR L’ÉTIQUETTE À L’INTÉRIEUR DE LA HOTTE. POUR LA LIRE, RETIREZ SIMPLEMENT LE FILTRE A GRAISSE. SERVICE DE GARANTIE Pour bénéficier du service de garantie, informez le Service Après Vente Sirius à...