Table of Contents
Advertisement
Quick Links
Advertisement
Table of Contents

Related Manuals for Sirius Satellite Radio SUM Series


Summary of Contents for Sirius Satellite Radio SUM Series
- Page 1 INSTALLATION INSTRUCTIONS CARE AND USE MANUAL FOR: WALL RANGE HOODS Models covered by this instructions: SUM1 - SUM6 *** BEFORE INSTALLATION *** ENSURE THERE IS NO VISIBLE OR HIDDEN DAMAGE SUSTAINED DURING SHIPPING *** SHIPPING DAMAGE *** MUST BE REPORTED WITHIN 5 DAYS OF RECEIPT...
- Page 2 W A R NI N G Thank you for purchasing a Sirius Range Hood. Please read all the instructions in this manual before installing the appliance. Save these instructions for future reference. Only use this appliance as an exhaust ventilation system for the removal of cooking vapors.
-
Page 3: Table Of Contents
TABLE OF CONTENTS Warnings Useful warnings Warnings SUM1 Types of installation Installation of the appliance Connection of the pipes Electrical connection of the hood SEM1 SUM6 Warning Installation Connection of the pipes Electrical connection to the hood Installation of the external carter WARRANTY... -
Page 4: Warnings
Warnings! The air outlet of the appliance must not be connected to a flue which is used for exhausting other fumes from appliances, such as a central heating, boilers etc.. For the external exhausting of the fumes, comply with the regulations in force. Ventilate the room suitably according to the laws in force when the appliance is wor- king together with gas, oil or coal burning appliances, at the same time. -
Page 5: Sum1
SUM 1 The appliance is designed to exhaust fumes and odours very silently and in the best way. It must be installed in the house and connected to the cooker-hood, which is in the kitchen fig.1. Types of installation: to make the installation easy, the appliance can be fixed on the wall, on the ceiling or on the floor in a horizontal position fig.2 or vertically fig. -
Page 6: Installation Of The Appliance
Installation of the appliance: after deciding the position and the type of installation, insert the anti-vibration rubber caps in the holes of the brackets supplied fig. 5C. The rubber caps must be put on the sides which are in contact with the wall. Put the brackets (fig. -
Page 7: Sum6
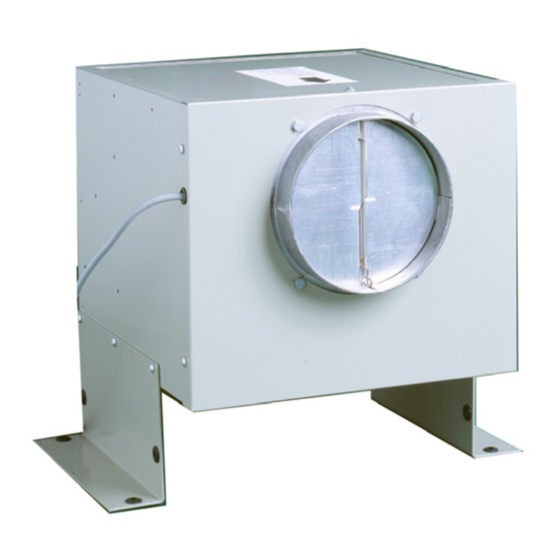
SUM 6 Warning! The remote fitted exhausting group (external motor) is built in class I plate, therefore it needs the earth connection. The appliance was designed to exhaust odors and vapors in the best way. The ap- pliance is to be installed on the outside wall of the house and connected to the cooker-hood which is in the kitchen (fig. -
Page 8: Connection Of The Pipes
Before leaning the appliance against the wall, please remove the stainless steel carter using the 8 perimetrical screws (fig. 3), then insert the supply cord in the plastic pipe. Fix the appliance without the stain- less steel external body, which was previously removed from the motor block, by matching the holes of the motor block with the holes on the wall. -
Page 12: Warranty
Three Year Limited Warranty YOU MUST REGISTER THE PURCHASE OF YOUR PRODUCT ON LINE AT www.siriuscappe. com/usa/warranty.htm TO CONVALIDATE YOUR WARRANTY. YOU CAN FIND THE DATA OF YOUR HOODS ON A LABEL INSIDE THE HOOD. JUST REMOVE THE GREASE FILTER TO READ IT. WARRANTY SERVICE To qualify for warranty service, you must notify Sirius After sale service at the email ad- dress stated below or call toll free USA 1-877-474-8770 and provide the model number,...