Table of Contents
Advertisement
Quick Links
Advertisement
Table of Contents

Related Manuals for NEFF B3ACE4H.0B


Summary of Contents for NEFF B3ACE4H.0B
- Page 1 Oven [en] User manual and installation instructions B3ACE4H.0B...
-
Page 2: Table Of Contents
en Safety 1.2 Intended use Table of contents This appliance is designed only to be built into kitchen units. Read the special installation instructions. USER MANUAL Only a licensed professional may connect ap- Safety .............. 2 pliances without plugs. Damage caused by in- correct connection is not covered under the Preventing material damage ....... -
Page 3: Safety
Safety en ▶ Keep your hands away from the hinges. Opening the appliance door creates a Components inside the appliance door may draught. Greaseproof paper may come into have sharp edges. contact with the heating element and catch ▶ Wear protective gloves. fire. -
Page 4: Preventing Material Damage
en Preventing material damage ▶ Do not let children play with packaging ma- ▶ Do not touch the glass cover. terial. ▶ Avoid contact with your skin when cleaning. Children may breathe in or swallow small WARNING ‒ Risk of electric shock! parts, causing them to suffocate. When changing the bulb, the bulb socket con- ▶... -
Page 5: Environmental Protection And Saving En- Ergy
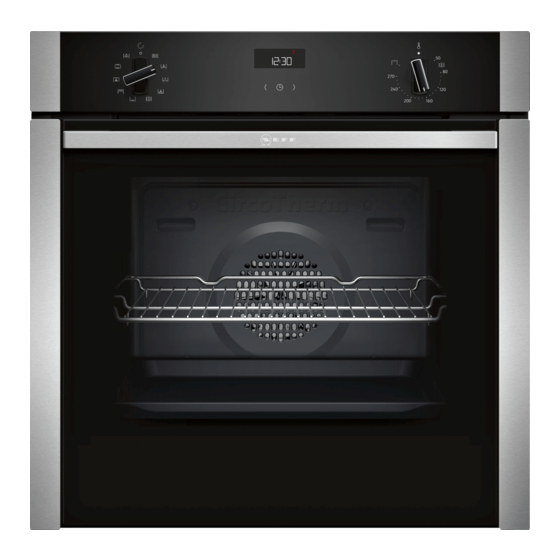
Environmental protection and saving energy en 3 Environmental protection and saving energy Help protect the environment by using your appliance in a way that conserves resources and by disposing of reusable materials properly. 3.1 Disposing of packaging The packaging materials are environmentally compat- ible and can be recycled. - Page 6 en Familiarising yourself with your appliance 4 Familiarising yourself with your appliance 4.1 Controls Buttons → "Buttons", Page 6 You can use the control panel to configure all functions Function selector of your appliance and to obtain information about the You can turn the function selector clockwise or operating status.
-
Page 7: Familiarising Yourself With Your Appliance
Familiarising yourself with your appliance en Symbol Type of heating What it's used for/how it works CircoTherm gentle Cook selected dishes gently on one level without preheating. The fan distributes the heat from the ring-shaped heating element in the back wall evenly around the cooking compartment. The food is cooked in phases us- ing residual heat. -
Page 8: Accessories
en Accessories When the appliance is in operation, the self-cleaning 4.7 Cooking compartment surfaces absorb splashes from roasting or grilling and The functions in the cooking compartment make your break them down. appliance easier to use. If the self-cleaning surfaces no longer clean themselves adequately during operation, heat up the cooking com- Rails partment specifically to the right temperature. - Page 9 You will find a comprehensive range of products for your appliance in our brochures and online: www.neff-international.com Accessories vary from one appliance to another. When Place the accessory at the shelf positions with the purchasing accessories, always quote the exact pull-out rails and pull out the pull-out rails.
-
Page 10: Basic Operation
en Before using for the first time 6 Before using for the first time Configure the settings for initial start-up. Clean the ap- 6.2 Cleaning the appliance before using it pliance and accessories. for the first time Clean the cooking compartment and accessories be- 6.1 Initial use fore using the appliance to prepare food for the first You need to make settings for initial use before you... - Page 11 Time-setting options en 8 Time-setting options Your appliance has different time-setting options, with Use the button to reset the timer duration to zero. ▶ which you can control its operation. a After a few seconds, the appliance applies the change and goes out.
- Page 12 en Childproof lock Cancelling the end time Requirements ¡ The type of heating and temperature or setting are You can delete the set end at any time. set. is highlighted on the display. Requirement: ¡ A cooking time is set. Reset the end time to the current time plus the set ▶...
-
Page 13: Childproof Lock
Basic settings en Use the function selector to set a suitable type of a When the rapid heating process ends, an audible heating. signal sounds and the heating indicator goes out. Place the food in the cooking compartment. 11 Basic settings You can configure the appliance to meet your needs. - Page 14 en Cleaning and servicing 12 Cleaning and servicing Do not use harsh or abrasive cleaning products. To keep your appliance working efficiently for a long ▶ Do not use cleaning products with a high alcohol time, it is important to clean and maintain it carefully. ▶...
- Page 15 Cleaning and servicing en Cooking compartment Area Suitable cleaning agents Notes Enamel surfaces ¡ Hot soapy water Soak any heavily soiled areas and use a brush or steel wool. Leave the appliance door open to dry the cooking compartment ¡ Vinegar water after cleaning it.
-
Page 16: Cleaning Function
en Cleaning function faces no longer clean themselves adequately during – From the inside of the appliance door operation, heat up the cooking compartment specific- – From the glass cover for the oven light ally to the right temperature. This prevents stains that cannot be removed. Remove any objects from the cooking compartment. -
Page 17: Shelf Supports
Shelf supports en 14 Shelf supports To clean the rails and the cooking compartment, or to ATTENTION! replace the rails, you can remove these. The self-cleaning surfaces in the cooking compartment may be damaged by detaching and attaching the pull- 14.1 Detaching the shelf supports out rails. - Page 18 en Appliance door Remove the pull-out rail. Push the retainer in between the lower and the upper bar. Clean the pull-out rail. → "Cleaning products", Page 14 Keep the PUSH tab pushed in and swing the pull- out rail inwards until the front retainer is located between the two bars ...
-
Page 19: Appliance Door
Appliance door en Hold the screwdriver horizontally and use it to Insert the coin in the gap in the lock and rotate as push the door lock (black component) on each side far as it will go . of the door upwards as far as it will go ... - Page 20 en Appliance door Use a coin to release both locks on the appliance WARNING ‒ Risk of injury! door. Insert the coin in the gap in the lock and ro- The appliance door has a weight of 7–10 kg and tate as far as it will go ...
- Page 21 Appliance door en Carefully lift the inner pane and remove it in the dir- Tip: When fitting the door panes, make sure that ection of the arrow . they are in the original order. Insert the intermediate pane in the direction of the arrow and push it in in the direction of the arrow un- til it is fitted in the frame.
-
Page 22: Troubleshooting
en Troubleshooting Push the inner pane downwards until it locks into place . 16 Troubleshooting You can rectify minor faults on your appliance yourself. WARNING ‒ Risk of electric shock! Read the troubleshooting information before contacting Incorrect repairs are dangerous. after-sales service. This will avoid unnecessary costs. Repairs to the appliance should only be carried out ▶... -
Page 23: Disposal
Disposal en Fault Cause and troubleshooting A message with appears in the Electronics fault display, e.g. Press the button. If required, reset the time. ‒ a If the fault was a one-off, the error message disappears. If the error message appears again, call the after-sales service. Quote the ex- act error message and the E no. - Page 24 en Customer Service 18 Customer Service If you have any queries on use, are unable to rectify The contact details for Customer Service can be found faults on the appliance yourself or if your appliance in the enclosed Customer Service directory or on our needs to be repaired, contact Customer Service.
-
Page 25: How It Works
How it works en Roasting and grilling on the wire rack Cookware without lid ¡ Use a deep roasting dish. Roasting on the wire rack works particularly well for ¡ Place the cookware onto the wire rack. large poultry or for multiple pieces at the same time. ¡... - Page 26 en How it works Food Accessories/cookware Shelf pos- Type of Temperature Cooking ition heating in °C/grill set- time in mins ting Victoria sponge cake, 2 levels 4 pcs 150-160 20-30 Ø 20 cm cake tin Biscuits, 2 or 3 levels Baking sheet on wire 140-160 15-25 rack...
- Page 27 How it works en ¡ Baking tins/dishes on the wire rack 19.6 Test dishes First wire rack: Level 3 These overviews have been produced for test institutes Second wire rack: Level 1 to facilitate appliance testing in accordance with EN Shelf positions for baking on three levels: 60350-1.
-
Page 28: Installation Instructions
en Installation instructions Grilling Food Accessories/cookware Shelf pos- Type of Temperature in Cook- ition heating °C/grill setting ing time in mins Toasting bread Wire rack / 0.5–1.5 Preheat the appliance for five minutes. Do not use the rapid heating function. 20 ... - Page 29 Installation instructions en 20.2 Appliance dimensions 20.3 Installation below a worktop You will find the dimensions of the appliance here Observe the installation dimensions and the installation instructions when installing below a worktop. ¡ To ventilate the appliance, the intermediate floor must have a ventilation cut-out. ¡...
- Page 30 en Installation instructions ¡ The power cable must be plugged in at the rear of 20.5 Installation in a tall unit the appliance until you hear a clicking sound. A 3 m Observe the installation dimensions and the installation power cable can be obtained from the after-sales instructions when installing in a tall unit.
- Page 31 Installation instructions en If required, you can adjust the gap between the ap- If required, you can adjust the height of the appli- pliance door and the panels using the adjustment ance door using the adjustment screws on the left screws on the left and right. and right.
- Page 32 Valid within Great Britain: Imported to Great Britain by BSH Home Appliances Ltd. Grand Union House Old Wolverton Road Wolverton, Milton Keynes MK12 5PT United Kingdom *9001580259* 9001580259 Constructa-Neff Vertriebs-GmbH Carl-Wery-Straße 34 010121 81739 München GERMANY...