Table of Contents
Advertisement
Quick Links
Advertisement
Table of Contents

Related Manuals for Grundig RCD 1460 DAB+


Summary of Contents for Grundig RCD 1460 DAB+
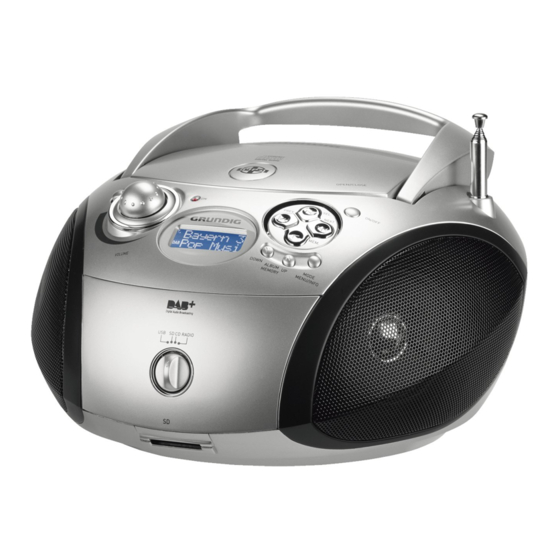
- Page 1 PORTABLE RADIO CD/MP3/USB/SD PLAYER RCD 1460 DAB+...
- Page 3 RCD1460DAB+ ___________________________________________________ FMDAB AC ~ VOLUME ON DISPLAY OPEN/CLOSE ANTENNA USBSDCDRADIO V DOWN e IISEL. ON/OFF ALBUMMEMORY ■MEM. Λ UP PREV MODEMENU/INFO NEXT 3 ENGLISH...
- Page 4 _______________________________________________________________________________ ENGLISH SET-UP AND SAFETY OVERVIEW POWER SUPPLY GENERAL FUNCTIONS RADIO MODE 10 CD/MP3/USB/SD MODE SPECIAL FUNCTIONS INFORMATION 4 ENGLISH...
-
Page 5: Set-Up And Safety
SET-UPANDSAFETY ----------------------------------------------------------------------------------------------- Please note the following instructions when set- Do not use any cleaning agent, as this may ting up the system: damage the casing. Clean the device with a clean, moist leather cloth. This device is designed for the playback of audio signals. Any other use is expressly pro- Thunderstorms are a danger to all electrical hibited. devices. Even if the device is switched off, it can be damaged by a lightning strike to the Make sure there is adequate ventilation when mains. Always remove the mains plug during... - Page 6 OVERVIEW - --------------------------------------------------------------------------------------------------------------------------------- See the figure on page 3. PREV n FM tuner mode: Press briefly NEXT to change the frequency up and AC ~ S ocket for connecting the down in steps; power cord (on the back of the p ress and hold down to start a device). forward or reverse search. H eadphone jack for connecting I n DAB tuner mode: Selects DAB a headphone set with a jack stations from the “SLT Service“ plug (ø 3.5 mm). list. T his automatically switches off I n CD, USB and SD mode: the loudspeakers. Press briefly to select the next or previous track; S witches the Ultra Bass System p ress and hold down to start a on and off. forward or reverse search. VOLUME Adjusts the volume.
-
Page 7: Power Supply
POWERSUPPLY --------------------------------------------------------------------------------------------------------------- Mainsoperation Batteryoperation Open the battery compartment by pressing the Note: catch and removing the lid. Check that the mains voltage on the type plate corresponds to your local mains sup- Insert six batteries (6 x 1.5 V/type IEC R14/ ply. UM2/C-size), observing the polarity marked on the lid of the battery compartment. If this is not the case, contact your specialist dealer. Close the lid of the battery compartment. Notes: Plug the mains cable supplied into the »AC ~ « Do not expose the batteries to extreme heat, socket on the radio recorder. caused for example by direct sunlight, heat- Plug the mains cable into the wall socket. -
Page 8: Selectingtheradioinput Source
RADIOMODE ------------------------------------------------------------------------------------------------------------------------ Selectingtheradioinput StoringDABradiostationstopre- sets source After the automatic station search, all radio sta- Move the »USBSDCDRADIO« switch to the tions will be stored in the station list. You can »RADIO« position. store your favourite radio stations on 20 presets. Select the DAB radio stations with » PREV« DABradiomode or » NEXT« and press » II SEL.« to con- For the best DAB reception, it is sufficient to firm. -
Page 9: Fm Radio Mode
RADIOMODE ------------------------------------------------------------------------------------------------------------------------ DisplayingDABstationinformation TuningFMradiostations To display information on the current DAB sta- Automaticstationsearch tion, press »MODE MENU/INFO« repeat- Activate the station search by keeping edly. » PREV« or » NEXT« pressed until the fre- – T he following display appears in succession: quency display changes to rapid run-through. I nformation from the provider (e.g. the ac- – T he search stops when a station is found. tual broadcast, the title of the song, the e- mail address), the genre, the broadcasting Manualstationsearch format, the current frequency, the bit rate, reference to signal interference (at optimum To move the frequency forward in steps, briefly signal display »Si g Er 0«). - Page 10 CD/MP3/USB/SDMODE ------------------------------------------------------------------------------- Operatingwithdisc OperatingwithMP3player,an USBmemorystickormemory The device is suitable cards for music CDs display- ing the logo shown here The device supports most MP3 Players or (CD-DA) and for CD-Rs USB memory sticks. and CD-RWs with audio The USB socket on the device does not sup- data. port a connection for a USB extension cable and is not designed for directly connecting to a computer. The USB socket of this device is a standard When burning CD-R and CD-RWs with au- socket. Due to rapid developments in tech- dio files, various problems may arise which nology and new manufacturers appearing...
-
Page 11: Additional Functions
CD/MP3/USB/SDMODE ------------------------------------------------------------------------------- Inserting/connectingamusic/ Playback storagemedium When playing music CDs, you can select tracks, when playing MP3/WMA media, you can also Insertingadisc select folders. Open the CD compartment by pressing Press » IISEL.« to start playback. »OPEN/CLOSE«. – P layback begins with the first track. Insert a disc in the compartment with its label – P layback stops at the end of the last track facing upwards. from the music-/data medium. Press » IISEL.« to pause playback. Close the CD compartment by pressing »OPEN/CLOSE«. -
Page 12: Repeat Functions
CD/MP3/USB/SDMODE ------------------------------------------------------------------------------- Repeatfunctions Creatingaplaylist You can create a playlist of up to 20 tracks for Repeatingatrack(RepeatOne) the current music/data medium in any order During playback, press you choose and then play them back in that se- »MODEMENU/INFO« once. quence. A track may be stored more than once. – D isplay: » 1«. The current track is repeat- Programming is only possible in the stop posi- ed. tion. To terminate the function, press Selectingandstoringtracks »MODEMENU/INFO« repeatedly. Press »MODEMENU/INFO« to call up the Repeatingallthetracksinanalbum... -
Page 13: Special Functions
SPECIALFUNCTIONS -------------------------------------------------------------------------------------------- Deletingallsettings(Reset) Selectsoftwareversion This function enables you to reset all the custom Move the »USBSDCDRADIO« switch to the settings back to the default settings. All settings »RADIO« position. are lost when you do this. Move the »FM DAB« switch to the »DAB« Move the »USBSDCDRADIO« switch to the position. »RADIO« position. Open the setting mode by pressing and hold- »FM DAB« switch to the »DAB« Move the ing down »MODEMENU/INFO«. position. – Display: »SELECT Manual«. -
Page 14: Technical Data
INFORMATION - ----------------------------------------------------------------------------------------------------------------- Technicaldata Environmentalnote This device is noise-suppressed This product has been manufac- according to the applicable EU tured with high quality parts and directives. materials which can be reused and are suitable for recycling. This product fulfils the European directives 2004/108/EC, 2006/95/ EC, Therefore, do not dispose the product with normal domestic waste at the end 2009/125/EC and 2011/65/EU. of its service life. The type plate is located on the bottom of the Take it to a collection point for the recycling of device. -
Page 15: Troubleshooting
INFORMATION - ----------------------------------------------------------------------------------------------------------------- Troubleshooting If a fault occurs, first refer to this information be- fore you take the device for repair. If you are unable to rectify the fault using the in- formation given here, contact your local dealer or service specialist. Under no circumstances do not attempt to repair the radio recorder yourself, as this would invali- date the guarantee. Problem Possiblecause Remedy GeneralInformation No sound. The volume setting is too low. Adjust the volume. The headphones are connected. Unplug the headphones. The batteries are flat. Replace the batteries. The batteries are incorrectly Insert the batteries correctly. inserted. The mains cable is incorrectly Connect the mains cable connected. properly. The device does not respond Static electrical discharge or Switch off the device, discon- to button commands. electrical fast transient (burst). nect the mains cable and The device suffers malfunc- plug it in again after a few tions during playback. seconds. - Page 16 Grundig Intermedia GmbH Beuthener Strasse 41 D–90471 Nürnberg www.grundig.com 72011 412 4400 15/52...