Table of Contents
Advertisement
Quick Links
Advertisement
Table of Contents

Related Manuals for Grundig RCD 1440 USB


Summary of Contents for Grundig RCD 1440 USB
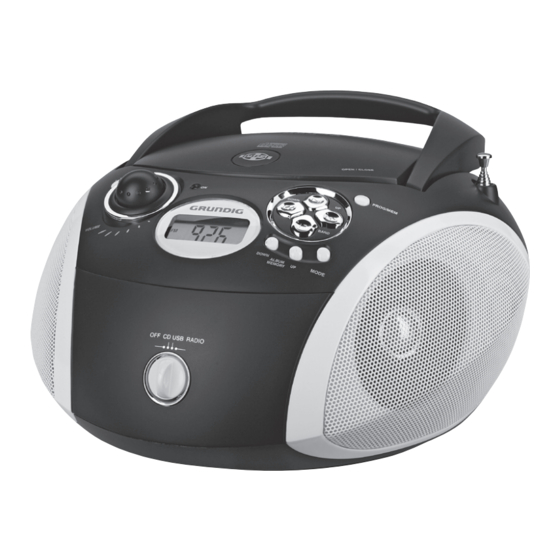
- Page 1 PORTABLE RADIO CD/MP3/USB PLAYER RCD 1440 USB...
- Page 2 RCD1440USB _ _______________________________________________________ VOLUME ON DISPLAY OPEN/CLOSE ANTENNA OFFCDUSBRADIO DOWN e II PROG/MEM ALBUMMEMORY DOWN UP UP MODE ■/BAND 3...
- Page 3 RCD1440USB _ _______________________________________________________ DEUTSCH РУССКИЙЯЗЫК БЕЗОПАСНОСТЬ И УСТАНОВКА SICHERHEIT UND AUFSTELLEN ОБЗОР AUF EINEN BLICK ЭЛЕКТРОПИТАНИЕ STROMVERSORGUNG ОБЩИЕ ФУНКЦИИ ALLGEMEINE FUNKTIONEN РЕЖИМ РАДИОПРИЕМНИКА RADIO-BETRIEB РЕЖИМ CD CD-BETRIEB РЕЖИМ MP3 MP3-BETRIEB РЕЖИМ USB USB-BETRIEB ИНФОРМАЦИЯ INFORMATIONEN ESPAÑOL ENGLISH SEGURIDAD E INSTALACIÓN SAFETY AND SET-UP VISTA GENERAL OVERVIEW ALIMENTACIÓN DE CORRIENTE POWER SUPPLY FUNCIONES GENERALES GENERAL FUNCTIONS MODO RADIO RADIO MODE MODO CD CD MODE MODO MP3 MP3 MODE MODO USB USB MODE INFORMACIÓN...
- Page 4 RCD1440USB _ _______________________________________________________ DANSK 111 SIKKERHED OG OPSÆTNING 112 KORT OVERSIGT 114 STRØMFORSYNING 115 GENERELLE FUNKTIONER 116 RADIOFUNKTION 117 CD-FUNKTION 119 MP3-FUNKTION 121 USB-FUNKTION 122 INFORMATIONER SVENSKA 124 SÄKERHET OCH INSTALLATION 125 EN ÖVERBLICK 127 STRÖMFÖRSÖRJNING 128 ALLMÄNNA FUNKTIONER 129 RADIO 130 CD-SPELAREN 132 MP3-SPELAREN 134 USB-SPELAREN 135 INFORMATION SUOMI 137 TURVALLISUUS JA ASETUKSET...
-
Page 5: Safetyandset-Up
SAFETYANDSET-UP _______________________________________________ To ensure that this device provides you with long-term Note, prolonged listening at loud vo- satisfaction and enjoyment, please observe the follow- lumes with the earphones can damage ing instructions. your hearing. This device is designed for the playback of audio Generalinformationonlaserdevices signals. Any other use is expressly prohibited. Protect the device and the CDs from rain, moisture CLASS 1 (dripping or splashing water), sand and heat. Do not LASER PRODUCT leave it next to heaters or inside parked cars in the sun. You will find a symbol similar to the one shown here on Make sure there is adequate ventilation when posi- the bottom of the device. tioning the device. There must be a free space of at least 10 cm behind the device. Do not place objects CLASS 1 LASER PRODUCT means that the laser is de- on the ventilation slots. - Page 6 OVERVIEW _____________________________________________________________ See the figure on page 3. Controls Generalinformation CDunit OFFCD Switches between CD, USB and OPEN/CLOSE O pens and closes the CD com- USBRADIO RADIO input sources; partment. s witches the device off. S tarts and pauses playback. O peration indicator. Lights up red UP Press briefly to select the next during operation. DOWN or previous track. VOLUME Adjusts the volume. Press and hold down to start a forward or reverse search. UBS S witches the Ultra Bass System on and off.
- Page 7 OVERVIEW _____________________________________________________________ Display ALBUM 00 : 00 00:00 I n radio mode: shows the frequency, ALBUM I n MP3/USB mode: shows the shows the preset number. album level. In CD-DA mode: shows the total RND I n CD mode: the tracks or titles are number of tracks and the current played back in random order. track. In MP3/USB mode: displays the I n CD mode: flashes when a track is total number of albums and the repeated. current file. In MP3/USB mode: flashes when a file is repeated. I n radio mode: FM (VHF) frequency Lights up when an album is band indicator. repeated. I n radio mode: MW (medium wave) ALL I n CD mode: lights up when the frequency band indicator.
-
Page 8: Power Supply
POWERSUPPLY _____________________________________________________ Batteryoperation Mainsoperation 1 Open the battery compartment by pressing the catch Note: and removing the lid. Check that the mains voltage on the type plate 2 Insert six batteries (6 x 1.5 V/type IEC R14/UM2/ corresponds to your local mains supply. C-size), observing the polarity marked on the lid of If this is not the case, contact your specialist dealer. the battery compartment. 1 Plug the mains cable supplied into the »AC « socket on the radio recorder (back of device). Notes: 2 Plug the mains cable into the wall socket. Do not expose the batteries to extreme heat, caused for example by direct sunlight, heaters or Caution: fire. -
Page 9: Additional Information For Units Sold In The Uk
An to the terminal marked with the letter “E”, earth symbol approved 13A, 3-pin UK plug should then be fitted by “ ”, coloured green, or green & yellow. a qualified electrician. Replacement mains lead sets can be obtained from Note: your local dealer, or by contacting Grundig Consumer The severed Euro plug must be destroyed to avoid Relations (01788 570088) a possible shock hazard should it be inserted into Moulded 3-pin lead set, suitable for UK use: a socket elsewhere. Ref: Leadset UK 8290-991-224 If a non-rewireable 3-pin plug or a rewireable 13A... -
Page 10: General Functions
GENERALFUNCTIONS ___________________________________________ Switchingonandoff SwitchingtheUltraBassSystemon andoff 1 Switch on the device with the required input source by moving the switch to the This function boosts the bass frequencies. »OFFCDUSBRADIO« position. 1 Switch the Ultra Bass System on and off with »UBS«. 2 Move the »OFF CD USB RADIO« switch to the »OFF« position to switch off the device. Listeningwithheadphones 1 Connect the headphones to the »0« headphone Selectingtheinputsource jack (ø 3.5 mm). 1 Select the input source (CD, USB or RADIO) using – T his switches off the loudspeakers. »OFFCDUSBRADIO«. Note: Excessive sound pressure from the earphones or Adjustingthevolume... -
Page 11: Radio Mode
RADIOMODE _________________________________________________________ Antennas Storingstationsonstationpositions Up to 10 stations in the FM band and up to 10 stations 1 For FM stations (VHF) extend the telescopic antenna. in the MW band can be stored. Note: If the FM signal is too strong, it is advisable to push 1 Select the frequency band (FM or MW) using in the telescopic antenna. »■/BAND«. 2 The radio recorder has a built-in rod antenna for Press »DOWN « or »UP « to select the station. MW reception. Turn the radio recorder about its own 3 Press »PROG/MEM« briefly to activate the memory axis to point the antenna. function. Selectingtheradioinputsource 4 Select the desired station position with »ALBUMMEMORYUP« or 1 Move the »OFF CD USB RADIO« switch to the »ALBUMMEMORYDOWN«. -
Page 12: Repeatingthecurrenttrack
CDMODE _ _______________________________________________________________ The device is suitable for music CDs Repeatingthecurrenttrack displaying the logo shown here (CD- Press »DOWN « briefly during playback. DA) and for CD-Rs and CD-RWs with – T he track is repeated from the beginning. audio data. When burning CD-R and CD-RWs Selectinganothertrack with audio files, various problems may arise which 1 During playback, keep pressing »DOWN « or could lead to interference in playback. This can be »UP... - Page 13 CDMODE _ _______________________________________________________________ Playingbacktitlesinrandomorder Addingtracks (Random) 1 In stop mode, press »PROG/MEM« until the preset number shown in the display is zero. 1 In stop mode, keep pressing »MODE« until »RND« appears in the display. 2 Select the number of the new track by pressing »DOWN « or »UP «. 2 Press » II« to start random playback. – A ll tracks on the CD are played back once in ran- 3 Press »PROG/MEM« to save the new track. dom order. Deletingthetrackmemory 3 To terminate the function, press »MODE« again. The device must be in the stop position. Creatingatrackmemory 1 Press »OPEN/CLOSE« to open the CD compart- You can create a track memory of up to 20 tracks for ment...
- Page 14 MP3MODE _ ____________________________________________________________ Repeatingallthefilesinanalbum The device is suitable for CD- Rs and CD-RWs with MP3 (RepeatAlbum) and WMA formats. 1 During playback, press »MODE« twice. In MP3 mode, the terms – A ll the files on the current album are played back “album” and “file” are very repeatedly. important. “Album” corresponds to a folder on a PC, 2 To quit the function, press »MODE« until the repeat “File” to a file on a PC or a CD-DA track. The device indicator goes out.
-
Page 15: Addingfiles
MP3MODE _ ____________________________________________________________ Playingbackatrackmemory 1 Start the track memory by pressing » II«. – P layback begins with the first programmed file. 2 Press »■/BAND« to end playback. 3 To play the track memory again, press II«. »PROG/MEM« and afterwards » Changingthefileselection 1 In stop mode, keep pressing »PROG/MEM« until the number of the file you want to replace appears in the display. 2 Select the number of the new file or track by pressing »DOWN « or »UP «. 3 Press »PROG/MEM« to save the new file or track. Addingfiles 1 In stop mode, keep pressing »PROG/MEM« until the file shown in the display is zero. -
Page 16: Usb Mode
USBMODE _____________________________________________________________ SelectingtheUSBinputsource The device supports most MP3 Player or USB memory sticks. For MP3/WMA mode with MP3 player or USB memo- Note: ry stick, the same playback and search functions are The device must be switched off while the USB available as for MP3 mode (see MP3 Mode section). connection is being made. If it is not switched off, Note: data can be lost. The function “Creating a track memory” is not possible in USB mode. ConnectingaMP3PlayeroranUSB 1 Move the »OFF... -
Page 17: Technical Data
INFORMATION ______________________________________________________ Powersupply Technicaldata Mains operation: 230 V 50/60 Hz This device is noise-suppressed ac- Battery operation: 6 x 1.5 V IEC cording to the applicable EU direc- (R14/UM2/C-Size) tives. Max.powerconsumption This product fulfils the European direc- Operation: 14 W tives 2004/108/EC, 2006/95/EC Standby: < 0,5 W and 2009/125/EC. Never open the device casing. The manufacturer will Output... -
Page 18: Troubleshooting
INFORMATION ______________________________________________________ Troubleshooting If a fault occurs, first refer to this information before you take the device for repair. If you are unable to rectify the fault using the informa- tion given here, contact your local dealer or service specialist. Under no circumstances should you attempt to repair the radio recorder yourself, as this would invalidate the guarantee. PROBLEM POSSIBLECAUSE REMEDY GENERALINFORMATION No sound The volume setting is too low Adjust the volume, unplug the The headphones are connected headphones The batteries are flat Replace the batteries, insert then The batteries are incorrectly inserted correctly The mains cable is incorrectly connected Connect the mains cable properly The device does not respond to button... - Page 19 72011 410 6000 12/44...