Table of Contents
Advertisement
Quick Links
Advertisement
Table of Contents

Related Manuals for Victory CYCLONE


Summary of Contents for Victory CYCLONE
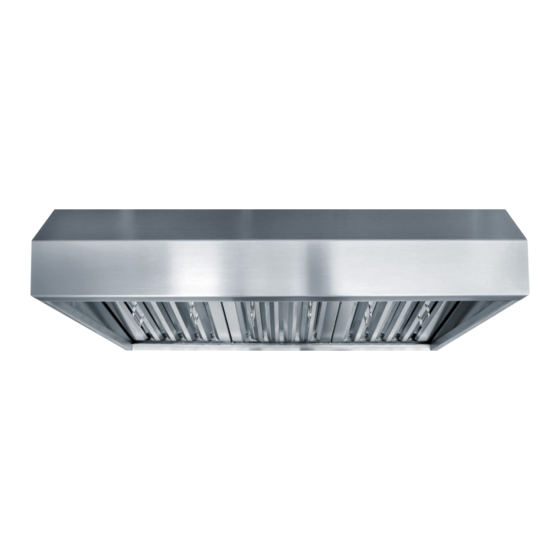
- Page 1 INSTALLATION GUIDE AND USERS MANUAL Professional BBQ Range Hood CYCLONE Model Name: Available Sizes: 36”, 42”, 48” NOTICE: For residential use only. Installer: Leave this guide with the homeowner. Homeowner: Keep this guide for future reference. Rev. 3062u.3a...
-
Page 2: Table Of Contents
Dimensions..................10 Preparation..................12 Pre-Installation.................. 14 Installation..................15 Venting Methods................18 Back Exhaust Option................ 19 Wiring Diagram................. 20 Range Hood Operations..............20 Troubleshooting................21 Use and Care Information..............22 Maintenance..................22 Warranty..................... 24 Disclaimer..................25 Contact Us..................25 | CYCLONE... -
Page 3: Important Safety Notice
Always turn range hood ON when cooking at high heat or when cooking foods that produce flames. • Use high settings on cooking range only when necessary. • Never leave surface units unattended at high settings. Boil overs cause smoking and greasy spillovers that may ignite. Heat oils slowly on low or medium settings. CYCLONE... - Page 4 The manufacturer and/or distributor/reseller will not be held responsible for any damages to personal property or real estate or any bodily injuries whether caused directly or indirectly by the range hood. | CYCLONE...
-
Page 5: Electrical Requirements
(at the range hood and at the junction box). Copies of the standards listed may be obtained from: * National Fire Protection Association Batterymarch Park Quincy, Massachusetts 02269 ** CSA International 8501 East Pleasant Valley Road Cleveland, Ohio 44131-5575 CYCLONE... -
Page 6: Venting Requirements
If available, also refer to stove top manufacturer’s height clearance requirements and recommended hood mounting height above range. Minimum Duct Size: • Round - 8” minimum • Round - 10” recommended/optional * Due to different ceiling height configurations, recommended height may not be applicable. | CYCLONE... -
Page 7: Calculating Vent System Length
4 x 35W or 6 x 35w GU10, 120V Dimmable (LED Optional) Venting Size Top 8 Inches Round or 10” (Optional) Warranty 5 YEARS ( parts warranty ) * Subject to change without notice, please contact your local reseller for details. CYCLONE... -
Page 8: Required Tools
REQUIRED TOOLS Marker or Pencil Putty Knife Tape Measure Phillips Screwdriver Level Power Drill Aluminum Tape Utility Knife Drywall Knife | CYCLONE... -
Page 9: Parts Supplied
PARTS SUPPLIED Ø - 8” Transition (Ø - 10” optional) Range Hood Baffle Filters (x3 for 36” and 42”) (x4 for 48”) Grease Tunnel CYCLONE... -
Page 10: Dimensions
DIMENSIONS ½ ” TOP VIEW ½ ” 8” 32” ¾ ” 7” 4” 14” 14” FRONT VIEW SIDE VIEW | CYCLONE... - Page 11 DIMENSIONS ( Continued ) Model: CYCLONE (36”) 32” 4” 8”- Ø Transition (optional 10”- Ø) 4 ” 7 ” 14” ¾ ” 14” Also available widths: ¾ ¾ ”, 47 ” CYCLONE...
-
Page 12: Preparation
12” of electrical cord hanging from the ceiling. Do not restore power until wiring is completed. 7. Disconnect power cord, remove the stainless steel baffle filter and grease tunnel. 8. Set aside the stainless steel baffle filters and grease tunnel until the range hood is properly installed. | CYCLONE... - Page 13 Wall Vent & cable entry ” Placement of duct will be Power Supply location shorter of model width selected cable entry location Cyclone BBQ Range Hood 14” and 8” Transition placement ¾ ¾ ¾ ”, 41 ”, or 47 ”...
-
Page 14: Pre-Installation
For safety purpose, pre-drilled mounting holes are provided through the back of the hood. For a more secure installation, use as many mounting holes as needed to secure from the inside of hood. Studs behind the wall 16” spacing Cut out drywall for 2”x 6” plywood brace support Screw brace onto studs | CYCLONE... -
Page 15: Installation
Screw on plywood to cut out drywall to the exposed studs to accommodate 2”x 6” (woodscrews not included) plywood brace support. The inserted plywood should be the same depth Placement of as the drywall slab it is Range Hood replacing. CYCLONE... - Page 16 Distance from wall to transition circumference edge for 8” - Ø Transition will be ⅛” Use 8” round steel pipe (follow building codes in your area) to connect the exhaust on the hood to the ductwork above. Use aluminum tape to make all joints secure and air tight. | CYCLONE...
- Page 17 SIDE VIEW Slide toward and into the recess behind the front of hood while raising the filter at the rear. Lower filter while sliding back until it rests onto Grease Tunnel. CYCLONE...
-
Page 18: Venting Methods
• Colder climates require wrap- 36” ping insulation around the ducts typical and optional blowers. • Some areas require optional backdraft Dampers. * Due to different ceiling height configurations, recommended height may not be applicable. | CYCLONE... -
Page 19: Back Exhaust Option
The top blower hole must be sealed with the same plate that was re- moved from the back. An 8”- Ø duct must be used for rear- vent installations. Please contact Victory Range Hoods if you have any further questions. CYCLONE... -
Page 20: Wiring Diagram
Rotate the switches clockwise to switch the blower ON. The switch has 5 positions: OFF, SPEED 1,2,3,4. LIGHT SWITCH: Rotate the switches clockwise to switch the lights ON. The light switch allows you to control the intensity of the light via Typical rotary switch rotary dimmer. | CYCLONE... -
Page 21: Troubleshooting
Reduce the number of elbows and length of duct work. Check if all joints are properly con- nected, sealed, and taped. • Make sure the power is on high speed for heavy cooking. NOTE: For all other inquiries, please contact Victory Range Hoods. CYCLONE... -
Page 22: Use And Care Information
DO NOT allow salt solutions, disinfectants, bleaches, or cleaning compounds to remain in contact with stain- less steel for extended periods. Many of these compounds contain chemicals, which may be harmful. Rinse with water after exposure and wipe dry with a clean cloth. | CYCLONE... - Page 23 ® very dirty. Dry the filters and re-install before using the hood. Replacing Filters: • Should filters wear out due to age and prolonged use, please contact Victory Range Hoods for replacement filters. Replacing the light bulb: • Please contact Victory Range Hoods if you require a replacement light.
-
Page 24: Warranty
Subject to the conditions and limitations set forth below, Victory Range Hoods will, at its option, either repair or replace any part of its products that prove defective by reason of improper workmanship or materials. Repaired parts or replace- ment products will be provided by Victory Range Hoods on an exchange basis, and will be either new or refurbished to be functionally equivalent to new. -
Page 25: Disclaimer
Toll Free: 1-800-394-4020 info@kitchenhoods.ca The information in this document is subject to change without notice, please contact Victory Range Hoods for updated details. CYCLONE... - Page 26 583 Nicola Avenue | Port Coquitlam | BC | Canada | V3B 0M3 www.kitchenhoods.ca...