Table of Contents
Advertisement
Quick Links
Advertisement
Table of Contents

Related Manuals for JVC LT-27CM69B


Summary of Contents for JVC LT-27CM69B
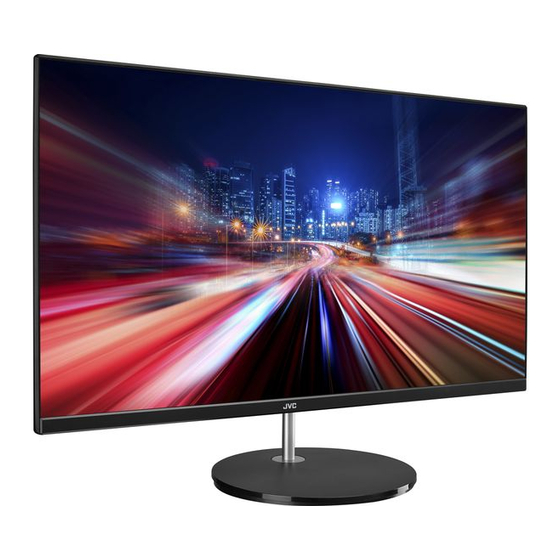
- Page 1 Instruction Manual 27" FULL HD LED MONITOR WITH BUILT-IN SPEAKERS LT-27CM69B...
-
Page 2: Table Of Contents
Contents Safety Warnings ........................3 Unpacking ..........................6 Installing / Removing the Base Stand ..................7 Assembling the Base Stand..........................7 Detaching the Base ............................9 Mounting the Monitor ...........................10 Product Overview ........................11 Main Unit ................................11 Connection ..........................12 Adjusting the Angle ........................14 Basic Operating ........................15 Monitor Controls ..............................15 Auto Adjust Image (VGA Signal).........................15... -
Page 3: Safety Warnings
Safety Warnings • Read all the instructions carefully before • Only use the screws supplied with the wall using the unit and keep them for future mount bracket when attaching the monitor reference. to the bracket. See your monitor instructions for screw type. - Page 4 Screen Burn • In the interests of safety and to avoid unnecessary energy consumption, never • A characteristic of Plasma and Monitor leave the unit switched on while unattended Panels is that displaying the same image for long periods of time, e.g. overnight, while for a long time may cause a permanent on holiday or while out of the house.
- Page 5 Maintenance CAUTION • Ensure to unplug the unit from the mains RISK OF ELECTRIC SHOCK socket before cleaning. DO NOT OPEN • Do not use any type of abrasive pad or The lightning flash with arrowhead abrasive cleaning solutions as these may symbol, within an equilateral damage the unit’s surface.
-
Page 6: Unpacking
Thank you for purchasing your new JVC LED Monitor. We recommend that you spend some time reading this instruction manual in order that you fully understand all the operational features it offers. You will also find some hints and tips to help you resolve any issues. -
Page 7: Installing / Removing The Base Stand
Installing / Removing the Base Stand The LCD display is very fragile, and must be protected at all times when installing and removing the base stand. Be sure that no hard or sharp object, or anything that could scratch or damage the LCD display, comes into contact with it. - Page 8 2. Align the screw hole, then secure with the screws (screw A) provided. 3. Snap the plastic covers and press down until you here the click sound. • Note the orientation of the plastic back covers with the shorter edge facing at the top of monitor. •...
-
Page 9: Detaching The Base
5. Secure with the screw B provided. Detaching the Base • Remove the stand assembly before mounting the TV onto the wall. • To remove the stand assembly, lay the monitor on a flat surface with a cushioned material between the monitor and the surface to prevent damage. -
Page 10: Mounting The Monitor
Mount this monitor according to the instructions included in the mounting kit. Due to space restrictions, we recommend that you make all connections before mounting on to the wall. 75 mm Monitor Weight (Without Stand): LT-27CM69B: 3.30 kg Four mounting holes (size M4 screw) -
Page 11: Product Overview
Product Overview Main Unit Front View 1. Power LED • Illuminates when the monitor is in On mode. • Flash when the monitor is On but haven’t received any signal (Standby mode). • Light will go off when the monitor is in Off mode. Rear View 2. -
Page 12: Connection
Connection Signal Input Insert the desired cable into the matching connector on your computer. HDMI AUDIO Connect the input signal cable and tighten it by turning the screws clockwise. To HDMI Cable VGA Cable prevent disconnection secure the cable (included) (not included) firmly, do not over tighten. - Page 13 Turning the Monitor On 1. Connect the power cord from the monitor DC IN power supply to a mains socket. HDMI AUDIO 2. Press the button to turn on the monitor. The LED light at the bottom of monitor will light up.
-
Page 14: Adjusting The Angle
Adjusting the Angle 1. Place the monitor in an upright position, mounted on the –5° 15° stand base. 2. Adjust the angle of the screen. The angle of the screen can be adjusted forwards or backwards from -5° to 15° for a comfortable viewing experience. -
Page 15: Basic Operating
Basic Operating Monitor Controls 1. Press the desired button at the rear of the monitor. 2. Press the buttons to change the value of the menu then press the M button to confirm the selection. 3. To return to the upper menu or exit the OSD menu, press the E button. -
Page 16: Eco Friendly Function
Eco Friendly Function The unit features an ECO-Power / Standby mode. If the monitor does not receive an input signal for serveral seconds, it will automatically switch the monitor into standby mode. The LED light at the side of monitor will keep flashing. Once have input signal come in, the monitor will automatically switch on. - Page 17 Each option is described below. Menu Settings Description BRIGHTNESS Increases or decreases the amount of white in the picture. CONTRAST Adjusts the difference between light and dark levels in the picture. Select among picture mode: STANDARD / TEXT / GAME / MOVIE / FPS (First-person BRIGHTNESS shotter game) / RTS (Real-time strategy game).
- Page 18 LANGUAGE Allows you to select your desired on screen menu language. The default is English. OSD H. POS. Adjusts OSD horizontal position. OSD V. POS. Adjusts OSD vertical position. OSD TIMER Adjusts OSD display time. OSD SETTING TRANSPARENCY Adjusts OSD transparency. IMAGE AUTO Auto adjusts the horizontal / vertical ADJUST...
-
Page 19: Maintenance
Maintenance Cleaning the Unit Ensure the unit is fully unplugged from the mains socket before cleaning. • Use a soft dry cloth to wipe away the dust from the screen and surfaces. • If the surfaces are extremely dirty, clean the monitor with a cloth which has been dipped in a slightly soapy water. - Page 20 Flashing Screen • The power is insufficient to connect the monitor or is too weak. • To avoid a magnetic field around the monitor, move devices like speakers, flourescent lights, AC transformers, table fans, etc. farther away. • By pressing the E button, the Auto Adjust Image function will automatically apply optimized settings to the display.
-
Page 21: Product Fiche And Specifications
Product Fiche and Specifications Brand Model LT-27CM69B Energy Efficiency Class Screen Size (measured diagonally) Approx. 68.6 cm (27 inch) Power Consumption 30.0 W Average Annual Energy 44 kWh Consumption * (Please refer to *1 under this table) Standby Power Consumption 0.40 W... - Page 22 LT-27CM69B kWh/annum Watt 68.6 inch 2020 2010/1062 -...
-
Page 23: Useful Information And Licences
Useful Information and Licences All the support you need. Whether it’s a tech emergency or you need plain good advice, Currys.co.uk we’re always on hand to help, call (UK) 0344 5611234 or (Ireland) 1 890 818 575. Visit Partmaster.co.uk today for the easiest way to buy electrical spares and accessories. - Page 24 Click on SEARCH and enter the model number. The product is distributed and warranted exclusive by DSG Retail Ltd. “JVC” is the trademark of JVCKENWOOD Corporation, used by DSG Retail Ltd. under license. (IB-LT-27CM69B-191025V2)