Advertisement
Advertisement
Table of Contents

Related Manuals for DK Digital AS-120


Summary of Contents for DK Digital AS-120
- Page 2 . . . for choosing one of our Home Theatre Systems. For your own safety and in order to learn all about the functions available, please read this manual and keep it for future reference. And if you once sell the unit please include the manual. www.dk-digital.com © 2005 Copyright, DK digital AG...
-
Page 3: Important Safety Instructions, Please Read Carefully
Important Safety Instructions, please Read Carefully! • This unit is meant to reproduce audio signals in 5.1- or stereo format. Using it in any other way warranty invalidates the warranty and you risk electric shock. • Never attempt to open the housings of your surround speaker set or to service the product beyond that described in this manual. -
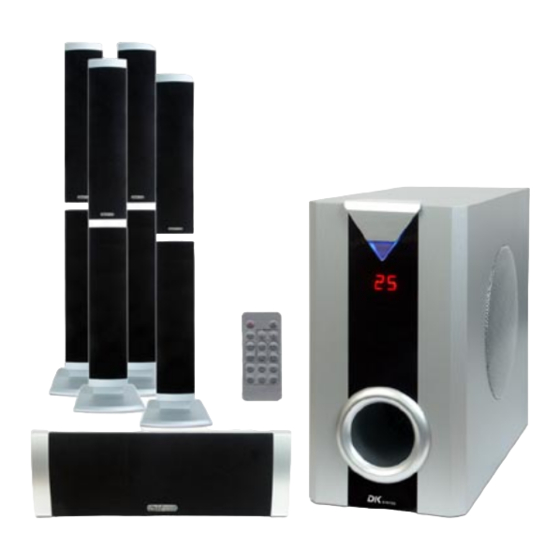
Page 4: Scope Of Delivery
Scope of delivery 1. Remote control handset 2. Subwoofer / main unit 3. Centre speaker 4. Front speaker 5. Surround speaker 6. This manual 7. Speaker cable Mounting the system You can mount the speakers of your new home cinema system on a plane and stable surface. - Page 5 Operating elements at the subwoofer At the front . . . 1) The indicator lamp lights up in blue, when the unit is in operating mode. In standby mode the indicator shows red light. 2) DISPLAY: Here the unit shows you information about the current volume setting and operating modes.
- Page 6 SR Connect the right surround speaker to the SR (+/-) terminals at the subwoo- fer’s rear panel. SL Connect the left surround speaker to the SL (+/-) terminals at the subwoofer’s rear panel. CEN Connect the centre speaker to the CEN (+/-) terminals at the subwoofer’s rear panel.
-
Page 7: The Remote Control
The Remote Control 1 STANDBY: Use this key to switch the unit on and off in stand-by mode, provided the MAIN POWER switch on the subwoofer’s rear panel is in ON position (I). 2 RESET: If you want to restore the unit’s initial factory settings, press this button. -
Page 8: Establishing The Connection
Establishing the connection In order to avoid malfunctions and / or damage of the speakers or other connected devices, please establish all connections while the device is switched off. Please take care to connect the marked wire (white line) of the speaker cable with the red terminal of both the subwoofer and the speakers. -
Page 9: Installing The Battery
Installing the Battery The remote control uses a pre-installed lithium battery. To prevent an anticipated discharge of the battery, we’ve inserted an insulating strip. Please pull it out prior to first operation. Should the r/c start to work unreliably replace the battery with a new one of the same type. - Page 10 — Set a suitable overall volume. — Push CEN + or - button, to adjust the centre speaker’s loudness. Push SUR + or - button, to adjust the rear speaker’s loudness. Push SW + or - button, to adjust the subwoofer’s loudness. 6.
-
Page 11: Specifications
Specifications Output Power: Subwoofer Front Centre Surround Operating voltage RMS / P.M.P.O. 40 watts / 100 watts 12 watts / 12 watts / 12 watts / AC230V~, 50 Hz 30 watts per channel 30 watts 30 watts per channel... - Page 12 We reserve the right to correct errors and make technical alterations. This manual is copyrighted. All rights reserved. Neither the manual as a whole nor excerpts may be reproduced without our prior written permission. DK digital AG 40878 Ratingen Germany...