Table of Contents
Advertisement
Quick Links
Advertisement
Table of Contents

Related Manuals for Interlogix TruVision TVP-5104


Summary of Contents for Interlogix TruVision TVP-5104
- Page 1 TruVision IP PTZ Camera Configuration Manual P/N 1073399-EN • REV A • ISS 15MAY18...
- Page 2 Copyright © 2018 United Technologies Corporation. Interlogix is part of UTC Climate, Controls & Security, a unit of United Technologies Corporation. All rights reserved. Trademarks and Trade names used in this document may be trademarks or patents registered trademarks of the manufacturers or vendors of the respective products.
-
Page 3: Table Of Contents
Content Introduction 3 Contact information and manuals/tools/firmware 3 Network connection 4 Checking your web browser security level 4 Activating the camera 5 Overview of the camera web browser 8 Camera configuration 10 Configuration menu overview 10 Local configuration 11 System time 12 Network settings 14 Recording parameters 18 ROI encoding of an image 21... - Page 4 Restore default settings 66 Import/export a configuration file 67 Upgrade firmware 67 Reboot camera 67 System service 68 About 68 Camera operation 69 Logging on and off 69 Live view mode 69 Playing back recorded video 69 Snapshots 71 Searching event logs 72 Index 78 TruVision IP PTZ Camera Configuration Manual...
-
Page 5: Introduction
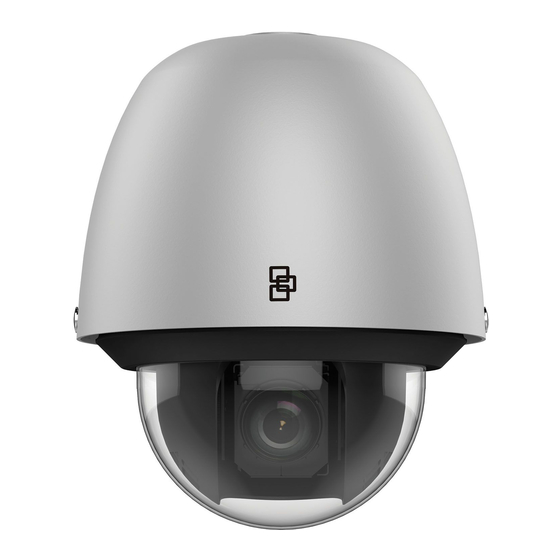
(2.0 MPX wall mount, 36X, 200m IR, H.265) Contact information and manuals/tools/firmware For contact information and to download the latest manuals, tools, and firmware, go to the web site of your region. Americas: www.interlogix.com EMEA: www.firesecurityproducts.com Manuals are available in several languages. Australia/New Zealand: www.utcfs.com.au... -
Page 6: Network Connection
Network connection This manual explains how to configure the camera over the network with a web browser. TruVision IP PTZ cameras can be configured and controlled using Microsoft Internet Explorer (IE) and other browsers. The procedures described use Microsoft Internet Explorer (IE) web browser. -
Page 7: Activating The Camera
Under Reset Custom Settings, click the security level for the whole zone in the Reset To box, and select Medium. Click Reset. Then click to return to the “Internet Options Security” tab window. 5. Click Apply in the Internet Options Security tab window. - Page 8 You can activate a password via a web browser and via TruVision Device Manager (included on the CD to find the IP address of the camera). Activation via the web browser: 1. Power on the camera and connect the camera to the network. 2.
- Page 9 3. Enter the password in the password field, and confirm it. Note: A valid password range must be between 8 and 16 characters. You can use a combination of numbers, lower and upper case letters, and special characters : _ - , . * &...
-
Page 10: Overview Of The Camera Web Browser
Overview of the camera web browser The camera web browser lets you view, record, and play back recorded videos on the optional SD card as well as manage the camera from any PC with Internet access. The browser’s easy-to-use controls give you quick access to all camera functions. See Figure 1 below. - Page 11 Name Description Display Control Click each tab to adjust the layout and the stream type of the live view. You can also click the drop-down menu to select the plug-in (WebComponents or QuickTime). For IE (internet Explorer) users, web components and Quick Time are selectable.
-
Page 12: Camera Configuration
Camera configuration This chapter explains how to configure the cameras through a web browser. Once the camera hardware has been installed, configure the camera’s settings through the web browser. You must have administrator rights in order to configure the cameras over the internet. -
Page 13: Local Configuration
Item Description Security Defines who can use the camera, their passwords and access privileges, RTSP authentication, IP address filter, and telnet access. Network Defines the network parameters required to access the camera over the internet. Video/Audio Defines recording parameters. Image Defines the image parameters, OSD settings and text overlay. -
Page 14: System Time
Parameters Description 2. Latency Specifies the transmission speed. Options include: Shortest Delay, Balanced or Fluent. 3. Enable Meta Data Overlay It refers to the rules on your local browser. Specify whether or not to display the colored marks when motion detection is triggered. For example, when the rules option is enabled and motion is detected, the moving object will be marked with a green rectangle in live view. - Page 15 2. From the Time Zone drop-down menu, select the time zone that is the closest to the camera’s location. 3. NTP: Select and enter the server NTP address to synchronize with an NTP server. The time interval can be set from 1 to 10080 minutes. - Or - Manual Time Sync.: Enable the Manual Time Sync...
-
Page 16: Network Settings
Network settings Accessing the camera through a network requires that you define certain network settings. Use the “Network” folder to define the network settings. See Figure 4 and Table 4 below for further information. Figure 4: Network window (TCP/IP tab shown) Table 4: Network parameters Parameters Description... - Page 17 Parameters Description function. Some routers prohibit the use of multicast function in case of a network storm. DNS Server: Specifies the DNS server for your network. Host Name Configuration: Specifies the DNS name the user can define. DDNS Specifies IP server, DynDNS and ezDDNS. PPPoE Use this option when using a direct modem connection between the camera and ISP.
- Page 18 To define the DDNS parameters: 1. From the menu toolbar, click Camera Configuration > Network > DDNS. 2. Select Enable DDNS to enable this feature. 3. Select DDNS Type. Two options are available: DynDNS and IPServer. • DynDNS: Enter the following information: Domain name: DynDNS web site Server address: members.dyndns.org Host name: URL created in DynDNS...
- Page 19 To define the 802.1x parameters: Note: The switch or router to which the camera is connected must also support the IEEE 802.1X standard, and a server must be configured. Please apply and register a user name and password for 802.1X in the server. 1.
-
Page 20: Recording Parameters
Sender’s Address: The email address of the sender. SMTP Server: The SMTP Server IP address or host name. SMTP Port: The SMTP port. The default is 25. Enable SSL: Select the check box to enable SSL if it is required by the SMTP server. - Page 21 Note: When you add the camera to a recorder, you need to set-up the recording parameters in the recorder. Figure 5: Video & Audio Settings menu (Video tab shown) Parameter Description Stream Type Specifies the streaming method used. Options include: Main Stream (Normal), Substream, and Third Stream. Use main stream for live viewing and recording with high resolutions and bandwidth.
- Page 22 Parameter Description Frame Rate Specifies the frame rate for the selected resolution. The frame rate is the number of video frames that are shown or sent per second. Note: The maximum frame rate depends on the camera model and selected resolution. Please check the camera specifications in its datasheet.
-
Page 23: Roi Encoding Of An Image
Figure 7: Display video analytics information menu Description When Dual-VCA mode is enabled, the camera sends video analytics results (metadata) to an NVR or other platforms to generate a VCA alarm. ROI encoding of an image You can select an important area of detail or ROI (Region of interest) in a stream, such as a number plate or face. -
Page 24: Ptz Parameters
ROI Level: Choose the image quality enhancing level. Default is 6. Region Name: Enter the desired region name. 5. Using the mouse, draw an area on the image. 6. Enable Face Tracking Target Tracking (4), if required. This is an intelligent analysis feature that facilitates auto-tracking. - Page 25 2. Configure the following settings: Basic Settings: Proportional Pan If you enable this function, the pan/tilt speeds change according to the amount of zoom. When there is a large amount of zoom, the pan/tilt speed will be slower for keeping the image from moving too fast on the live view image.
- Page 26 Auto Scan Speed The camera provides five scan modes: auto scan, tilt scan, frame scan, random scan and panorama scan. The scan speed can be set from level 1 to 40. Max. Tilt Angle Define the maximum tilt angle of the lens. There are sixteen options: -15 to 90, -14 to 90, -13 to 90, -12 to 90, -11 to 90, -10 to 90, -9 to 90, -8 to 90, -7 to 90, -6 to 90, -5 to 90, -4 to 90, -3 to 90, - 2 to 90, -1 to 90, 0 to 90.
- Page 27 2. Select the Enable Limit check box to enable the limit function. 3. Click the button and use the PTZ control panel to set the limits of the camera movement. You can also call up defined presets and set them as the limits of the camera.
- Page 28 To define a scheduled task: 1. From the menu toolbar, click Camera Configuration > > Scheduled Tasks. 2. Select the Enable Scheduled Task check box. 3. Choose the task type from the drop-down list. You can choose from one of the following: OFF (Default) Preset Tour...
- Page 29 5. Click Save to save changes. Park actions This is the action that will run automatically after the dwell time. A park action can be, for example, a scan, preset, preset tour, or a shadow tour. Note: The Scheduled Tasks function (see page 25) has priority over the Park Action function.
- Page 30 Privacy masks Privacy masks let you conceal sensitive areas (such as neighboring windows) to protect them from view on the monitor screen and in the recorded video. The masking appears as a blank area on screen. You can create up to 24 privacy masks per camera. Note: There may be a small difference in size of the privacy mask area depending on whether local output or the web browser is used.
- Page 31 Note: The active zoom ratio is the magnification level the camera will zoom into when motion is detected. 7. Click Save to save changes. Clear PTZ configurations Use this menu to clear all presets, preset tours, shadow tours, privacy masks, PTZ limits, scheduled tasks, and park actions.
- Page 32 2. Select Enable Intelligent Tracking. 3. Using the PTZ control buttons, point the camera at the desired area, or select a predefined preset position, where you want to set intelligent tracking. 4. Set the duration time. This is the time during which the camera follows the moving object or person.
- Page 33 2. Select Network or RS-485 from the drop-down list. 3. Set the delay time (the range is between 2 and 200 s). 4. Click Save to save changes. Position settings Use this menu to configure the PTZ position settings, including the position information of the device.
- Page 34 3. When the PTZ dome changes its direction, click Point to North and the PTZ dome returns to the north direction. 4. You can manually set GPS information including longitude and latitude. 5. Click Save to save changes. Rapid focus This function allows you to calibrate the camera to rapidly focus in on a specific area when zooming into a predefined view, such as a preset.
-
Page 35: Overlay Text
5. Click Start Calibration. The notice Calibrating appears on the live view image and the camera lens performs auto focus. 6. After calibration, a notice appears on the live view image that the calibration was successful. 7. Click Save to save changes. Overlay text You can add up to eight lines of text on screen. -
Page 36: Video Image
Video image You may need to adjust the camera image depending on the camera model or location background in order to get the best image quality. You can adjust the brightness, contrast, saturation, hue, and sharpness of the video image. Use this menu to also adjust camera behavior parameters such as exposure time, iris mode, video standard, day/night mode, image flip, WDR, digital noise reduction, white balance, and indoor/outdoor mode. - Page 37 Parameter Description according to the brightness of the environment. Iris Priority: The iris value needs to be adjusted manually. The shutter and gain values will be adjusted automatically according to the brightness of the environment. Shutter Priority: The value of shutter needs to be adjusted manually. The iris and gain values will be adjusted automatically according to the brightness of the environment.
- Page 38 Parameter Description 6. White Balance White Balance White balance (WB) tells the camera what the color white looks like. Based on this information, the camera will then continue to display all colors correctly even when the color temperature of the scene changes such as from daylight to fluorescent lighting, for example.
-
Page 39: Osd
Parameter Description Local Output Select ON or OFF to enable or disable the BNC output. Default is ON. Note: Not all camera models support all these parameter settings. In addition to the camera name, the camera also displays the system date and time on screen. -
Page 40: Image Parameters Switch
• Not transparent & Not flashing. The image is behind the text. This is default. • Not transparent & Flashing. The image is behind the text. The text flashes on and off. 8. Select the OSD size that you want. 9. -
Page 41: Motion Detection Alarms
Select a predefined preset from the drop-down list (see “PTZ parameters” on page 22 for information on setting up a preset). Select a period check box and set the start and end time periods as well as the linked scene. Up to four periods can be configured for a selected preset. 4. - Page 42 1. Area Settings: Define the on-screen area that can trigger a motion detection alarm as well as the detection sensitivity level (see Figure 11, item 1). 2. Arming Schedule: Define the schedule which the system detects and records motion (see Figure 11, item 2). See “Recording schedule” on page 56 for further information.
-
Page 43: Tamper-Proof Alarms
Trigger Recording Triggers the recording to start in the camera. Trigger Alarm Output Trigger external alarm outputs when an event occurs. Select one of the options: Select Trigger Alarm Output, A->1, or A- >2. Note: This option is only supported by cameras that support alarm output. -
Page 44: Alarm Input
6. Click Save to save changes. Alarm input To define an external alarm input: 1. From the menu toolbar, click Camera Configuration > Alarm/Event Setup > Alarm Input. 2. Select Alarm Input No. Alarm Type from the drop-down lists. The alarm type can be NO (Normally Open) or NC (Normally Closed). -
Page 45: Alarm Output
Alarm output To define an alarm output: 1. From the menu toolbar, click Camera Configuration > Alarm/Events Setup> Alarm Output. 2. Select one alarm output channel from the Alarm Output drop-down list. You can also set a name for the alarm output. 3. -
Page 46: Audio Exception Detection
• HDD Error: Errors occurred while files were being written to the storage, no storage or storage had failed to initialize. • Network Disconnected: Disconnected network cable. • IP Address Conflicted: Conflict in IP address setting. • Invalid Login: Wrong user ID or password used to login to the cameras. To define exception alarms: 1. -
Page 47: Face Detection
2. Select Audio Loss Exception. 3. Select Sudden Increase of Sound Intensity Detection and set the sensitivity and sound intensity threshold. 4. Select Sudden Decrease of Sound Intensity Detection and set the sensitivity. 5. Set the arming schedule for the alarm input. See “To set up motion detection” on page 39 on page for more information. - Page 48 face looking directly into the camera, not side views. This feature is best suited when the camera is in front of a door or is located in a narrow corridor. To set up face detection: 1. From the menu toolbar, click Camera Configuration >...
-
Page 49: Intrusion Detection
Upload to FTP/Memory Capture the image when an alarm is triggered and upload the Card/NAS picture to NAS or FTP server. Trigger Recording Triggers the recording to start in the camera. Trigger Alarm Output Trigger external alarm outputs when an event occurs. Select one of the options: Select Trigger Alarm Output, A->1, or A- >2. -
Page 50: Line Crossing Detection
Sensitivity: The sensitivity value defines the size of the object that can trigger the alarm. When the sensitivity is high, a small object can trigger the alarm. The range is between 1 and 100. Detection Target: You can select Human, Vehicle, or All (Human &Vehicle) as the detection target from the dropdown list. - Page 51 2. Select Enable to enable the function. 3. Select Draw Area and a crossing plane will show on the image. 4. Click the line and two red squares appear at each end. Drag one of the red squares to define the arming area. Select the direction as A<->B, A ->B, or B->A from the drop down menu: A<->B: Only the arrow on the B side is displayed.
-
Page 52: Region Entrance Detection
Trigger Alarm Output Trigger external alarm outputs when an event occurs. Select one of the options: Select Trigger Alarm Output, A->1, or A- >2. Note: This option is only supported by cameras that support alarm output. 10. Click Save to save changes. Region entrance detection This function detects people, vehicles or other objects that enter a designated region from outside the designated region. -
Page 53: Region Exiting Detection
7. Set the arming schedule for the region entrance detection. The arming schedule configuration is the same as that for motion detection. See “Motion detection alarms” on page 39 for more information. 8. Select the actions to be used for the region entrance detection. The options are: Notify Surveillance Center Send an exception or alarm signal to remote management software when an event occurs. -
Page 54: Unattended Baggage Detection
3. Click Draw Area, and then draw a rectangle on the image as the designated region. When you draw the rectangle, all lines should connect end-to-end to each other. Up to four areas are supported. Click Clear to clear the areas you have drawn. The designated region parameters can be set up separately. - Page 55 2. Select Enable to enable the function. 3. Click Draw Area, and then draw a rectangle on the image as the designated region. When you draw the rectangle, all lines should connect end-to-end to each other. Up to four areas are supported. Click Clear to clear the areas you have drawn.
-
Page 56: Object Removal Detection
Trigger Alarm Output Trigger external alarm outputs when an event occurs. Select one of the options: Select Trigger Alarm Output, A->1, or A- >2. Note: This option is only supported by cameras that support alarm output. 7. Click Save to save changes. Object removal detection Object removal detection function detects objects removed from a designated region, such as exhibits on display, and a series of actions can be configured to occur when... -
Page 57: Rs-485 Settings
5. Set the arming schedule for the object removal detection. The arming schedule configuration is the same as that for motion detection. See “Motion detection alarms” on page 39 for more information. 6. Select the actions to be used for the object removal detection. The options are: Notify Surveillance Center Send an exception or alarm signal to remote management software when an event occurs. -
Page 58: Recording Schedule
3. Click Save to save changes. Recording schedule You can define a recording schedule for the camera in the “Record Schedule” window. The recording is saved on to the SD card or NAS in the camera. The camera’s SD card provides a backup in case of network failure. -
Page 59: Format Storage Devices
Enter the start time (hour and Enter the end time (hour and minutes) minutes) 8. Set the recording periods for the other days of the week if required. Click to copy the recording periods to another day of the week. 9. -
Page 60: Nas Settings
2. Under Management, select the desired storage device and click Initialize. A window appears to select your formatting permission. Click to start formatting. 3. Define the quota storage capacity and percentage for snapshots and recordings in the storage devices connected to the camera. 4. -
Page 61: Snapshot Parameters
4. Click Save to save changes. Snapshot parameters You can configure scheduled snapshots and event-triggered snapshots. The captured snapshots can be stored in the SD card (if supported) or the NAS. You can also upload the snapshots to an FTP server. Note: If you have configured the FTP settings and selected Upload Picture in the FTP... - Page 62 2. Select Enable Timing Snapshot to enable continuous snapshots. Select the Enable Event-triggered Snapshot to enable event-triggered snapshots. 3. Select the snapshot format (JPEG only), resolution and quality. 4. Set the time interval between two snapshots. The time interval can be in milliseconds, seconds, minutes, hours, or days.
-
Page 63: Camera Management
Camera management This chapter describes how to use the camera once it is installed and configured. The camera is accessed through a web browser. User management This section describes how to manage users. You can: Add or delete users ... - Page 64 Types of users A user’s access privileges to the system are automatically defined by their user type. There are three types of user: Admin: This is the system administrator. The administrator can configure all settings. Only the administrator can create and delete user accounts. Admin cannot be deleted.
-
Page 65: Rtsp Authentication
6. Assign permissions to users. Basic permissions Camera permissions Remote parameter settings Remote live view Remote log search/Interrogate working Remote PTZ control status Remote manual record Remote upgrade/format Remote playback Remote two-way audio Remote shutdown/reboot Remote notify surveillance center/Trigger alarm output Remote video output control Remote serial port control 7. -
Page 66: Ip Address Filter
2. Under RTSP Authentication, select digest digest/basic to choose RTSP authentication type. 3. Click Save to save the changes. To define web authentication: 1. From the menu toolbar, click Camera Configuration > Security > Authentication. 2. Under Authentication, select digest digest/basic to choose web authentication type. -
Page 67: Defining The Security Service
To define an IP address filter: 1. From the menu toolbar, click Camera Configuration > Security > IP Address Filter. 2. Check the Enable check box. 3. Select the type of IP address filter in the drop-down list, Forbidden or Allowed. 4. - Page 68 2. Select Enable Invalid Login Lock. 3. Click Save to save changes. Note: 1. The IP address will be locked if the admin user performs seven failed user name/password attempts (10 attempts for the operator/user). 2. If the IP address is locked, you can try to login the device after five minutes. Restore default settings Use the Default menu to restore default settings to the camera.
- Page 69 Only the new features are added with their default settings. To upgrade the firmware through the web browser: 1. Download on to your computer the latest firmware from our web site at: www.interlogix.com/library 2. In the Camera Configuration folder, select the System tab.
- Page 70 System service To set the live view connection: 1. From the menu toolbar, click Camera Configuration > System > System Service. 2. Input a number in text field as the upper limit of the remote connection number. For example, when you specify the remote connection number as 10, then the 11th remote connection cannot be established.
- Page 71 Camera operation This chapter describes how to use the camera once it is installed and configured. Logging on and off You can easily log out of the camera browser window by clicking the Logout button on the menu toolbar. You will be asked each time to enter your user name and password when logging in.
- Page 72 Figure 14: Playback window Name Description Playback button Click to open the Playback window. Search calendar Click the day required to search. Search Start search. Set playback time Input the time and click to locate the playback point. Control playback Click to control how the selected file is played back: play, stop, slow and fast forward playback.
- Page 73 Name Description Recording type The color code displays the recording type. Recording types are schedule recording, alarms recording and manual recording. The recording type name is also displayed in the current status window. To play back recorded video 1. Select the date and click the Search button.
- Page 74 Searching event logs You must configure NAS or insert a SD card in the PTZ camera to be able to use the log functions. The number of event logs that can be stored on NAS or SD card depends on the capacity of the storage devices.
- Page 75 1. Major Type 4. Start search 2. Minor Type 5. Export searched logs 3. Start and end search time You can search for recorded logs by the following criteria: Major type: There are three types of logs: Alarm, Exception, and Operation. You can also search all.
- Page 76 PTZ control panel Figure 16: PTZ control panel Description Directional buttons: Controls the movements and directions of the PTZ. Center button is used to start auto-pan by the PTZ dome camera. Zoom, focus and iris: Adjusts zoom, focus and iris. PTZ movement: Adjusts the speed of PTZ movement.
- Page 77 Table 6: Predefined preset settings Special Function Special Function Preset Preset Auto flip Set limit stops manually Back to initial position Remote reboot Call preset tour 1 Stop a scan Call preset tour 2 Start random scan Call preset tour 3 Start frame scan Call preset tour 4 Start auto scan...
- Page 78 Using preset tours A preset tour is a memorized series of presets. The camera stays at a preset for a set dwell time before moving on to the next preset. A preset tour can be configured with up to 32 presets. You can configure up to eight preset tours.
- Page 79 3. Click to enable recording the panning, tilting and zooming actions. 4. Use the PTZ control buttons to move the lens to the desired position after the information: • Pan the PTZ dome to the right or left. • Tilt the PTZ dome up or down. •...
- Page 80 Index 802.1x parameters, 17 Hard drive capasity, 57 formatting, 57 Alarm outputs, 43 Alarm inputs, 42 Alarm types Integration protocol parameters, 18 motion detection, 39 Intrusion detection, 47 Alarms Invalid access HDD error, 43 lock, 65 HDD full, 43 IP address illegal login, 43 limit access, 64 IP address conflicted, 43...
- Page 81 Pre-event time Shadow tours description, 56 call up, 76 Preset set up, 76 link to preset, 38 Snapshot settings, 11, 59 Preset tours Snapshots call up, 76 archiving snapshots from recorded files, 71 set up, 76 search, 71 Presets SNMP parameters, 16 call up, 75 System time set up, 75...