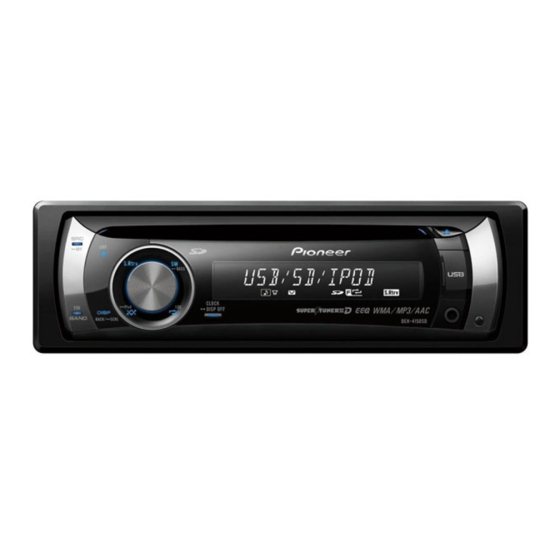
Pioneer DEH-4150SD Installation Manual
Cd player
Hide thumbs
Also See for DEH-4150SD:
- Operation manual (112 pages) ,
- Service manual (83 pages) ,
- Brochure (64 pages)
Advertisement
Available languages
Available languages
Quick Links
CD RECEIVER
RADIO CD
CD PLAYER
DEH-4150SD
DEH-3100UB
Installation Manual
Manual de instalación
Manual de instalação
Printed in China
<YRD5271-A/S> ES
<KMINX> <08H00000>
Installation
English
3. Install the unit as illustrated.
Note
• Check all connections and systems before final
Mounting sleeve
Dashboard
installation.
• Do not use unauthorized parts. The use of
182
unauthorized parts may cause malfunctions.
• Consult with your dealer if installation requires
Rubber bush
53
drilling of holes or other modifications of the
vehicle.
• Do not install this unit where:
Screw
— it may interfere with operation of the vehicle.
— it may cause injury to a passenger as a result
of a sudden stop.
• The semiconductor laser will be damaged if it
overheats. Install this unit away from hot places
such as near the heater outlet.
Removing the Unit
• Optimum performance is obtained when the unit is
1. Extend top and bottom of the trim
installed at an angle of less than 60°.
ring outwards to remove the trim
ring. When reattaching the trim ring,
60°
push the trim ring onto the unit until
it clicks. (If the trim ring is attached
upside down, the trim ring will not
• When installing, to ensure proper heat dispersal
fit properly.)
when using this unit, make sure you leave ample
• It becomes easy to remove the trim ring if the
space behind the rear panel and wrap any loose
front panel is released.
cables so they are not blocking the vents.
DIN Front/Rear-mount
Trim ring
This unit can be properly installed either from
"Front" (conventional DIN Front-mount) or
"Rear" (DIN Rear-mount installation, utilizing
threaded screw holes at the sides of unit
chassis). For details, refer to the following
installation methods.
2. Insert the supplied extraction keys
DIN Front-mount
into both sides of the unit until
they click into place.
Installation with the rubber bush
1. Insert the mounting sleeve into the
dashboard.
• When installing in a shallow space, use a
supplied mounting sleeve. If there is enough
space behind the unit, use factory supplied
mounting sleeve.
2. Secure the mounting sleeve by
using a screwdriver to bend the
metal tabs (90°) into place.
3. Pull the unit out of the dashboard.
Installation
English
DIN Rear-mount
1. Extend top and bottom of the trim
ring outwards to remove the trim
ring. When reattaching the trim ring,
push the trim ring onto the unit until
it clicks. (If the trim ring is attached
upside down, the trim ring will not
fit properly.)
• It becomes easy to remove the trim ring if the
front panel is released.
Trim ring
2. Determine the appropriate position
where the holes on the bracket and
the side of the unit match.
3. Tighten two screws on each side.
• Use either truss screws (5 mm × 8 mm)
or flush surface screws (5 mm × 9 mm),
depending on the shape of screw holes in the
bracket.
Screw
Dashboard or Console
Factory radio mounting bracket
Advertisement

Summary of Contents for Pioneer DEH-4150SD
- Page 1 — it may cause injury to a passenger as a result front panel is released. of a sudden stop. • The semiconductor laser will be damaged if it DEH-4150SD overheats. Install this unit away from hot places Trim ring such as near the heater outlet.
- Page 2 1. This product 1. This product 26. Power amp 2. Rear output or (sold separately) subwoofer output 6. Wired remote input 31. Subwoofer output 23. To rear output or Hard-wired remote control subwoofer output 6. Wired remote input 3. Antenna jack adaptor can be connected Hard-wired remote control 26.
-
Page 3: Instalación
Instalación Español Instalación Español Instalação Português (B) Instalação Português (B) 3. Instale la unidad como se muestra. Montaje trasero DIN 3. Apriete los dos tornillos en cada 3. Instale o aparelho como mostrado. Montagem traseira DIN 3. Aperte dois parafusos em cada Nota Nota lado. - Page 4 安裝 中文 安裝 中文 3. 如圖安裝本機。 DIN後方安裝 注意 安裝盒 1. 將墊圈的上部和底部向外壓,取下墊 • 在正式安裝本機之前,請先檢查所有連接和系 擋板 圈。當重新裝回墊圈時,將墊圈壓入本 統。 機直到吻合到位。(安裝墊圈時如果上 • 請勿使用未被認可的零件,否則有可能會引起故 障。 下顛倒,則無法完全吻合。) 橡膠墊 • 如安裝時需要鑽孔或其他改裝,請向經銷商諮 • 如果前面板已經鬆開,墊圈就很容易卸下。 詢。 • 請勿在以下位置安裝本機: 螺絲 墊圈 — 會妨礙駕駛的地方。 — 突然剎車時會傷及乘客的地方。 • 半導體鐳射受到過熱會被損壞。請勿將本機安裝 在高溫處,如加熱器通風口。 • 若要本機達到最佳性能,請在安裝本機時保持與 拆卸本機...
- Page 5 Connecting the units English Connecting the units English Conexión de las unidades Español Conexión de las unidades Español Connection Diagram Diagrama de conexión • Control signal is output through blue/white cable • La señal de control se emite a través del cable Note Nota when this unit is powered on.
-
Page 6: Conexão Dos Componentes
Conexão dos componentes Português (B) Conexão dos componentes Português (B) 連接本機 中文 連接本機 中文 Diagrama de conexão • O sinal de controle é emitido através do cabo azul/ 連接圖 Nota 注意 branco quando este aparelho é ligado. Conecte-o a um terminal de controle remoto de sistema de •...


