
Related Manuals for A&D UA-767JP


Summary of Contents for A&D UA-767JP
- Page 1 Digital Blood Pressure Monitor Model UA-767JP Instruction Manual English Original 使用手冊 中文 翻譯 사용설명서 한국어 번역본 ﺩﻟﻳﻝ ﺍﻟﺗﻌﻠﻳﻣﺎﺕ ﻋﺭﺑﻲ ﺗﺭﺟﻣﺔ 1WMPD4002956B...
-
Page 2: Table Of Contents
Contents Dear Customers ..............2 Preliminary Remarks ............. 2 Precautions ................2 Parts Identification ..............5 Symbols ................6 Operation Mode ..............8 Using the Monitor ............... 10 Installing / Changing the Batteries ......... 10 Connecting the Air Hose ..........11 Connecting the AC Adapter .......... -
Page 3: Dear Customers
Dear Customers Congratulations on purchasing a state-of-the-art A&D blood pressure monitor, one of the most advanced monitors available today. Designed for ease of use and accuracy, this monitor will facilitate your daily blood pressure regimen. We recommend that you read through this manual carefully before using the device for the first time. - Page 4 When reusing the device, confirm that the device is clean. Used equipment, parts and batteries are not treated as ordinary household waste, and must be disposed of according to the applicable local regulations. When the AC adapter is used, make sure that the AC adapter can be readily removed from the electrical outlet when necessary.
- Page 5 Do not apply the cuff on an arm receiving an intravenous drip or blood transfusion. It may cause injury or accidents. Do not use the device where flammable gases such as anesthetic gases are present. It may cause an explosion. Do not use the device in highly concentrated oxygen environments, such as a high-pressure oxygen chamber or an oxygen tent.
-
Page 6: Parts Identification
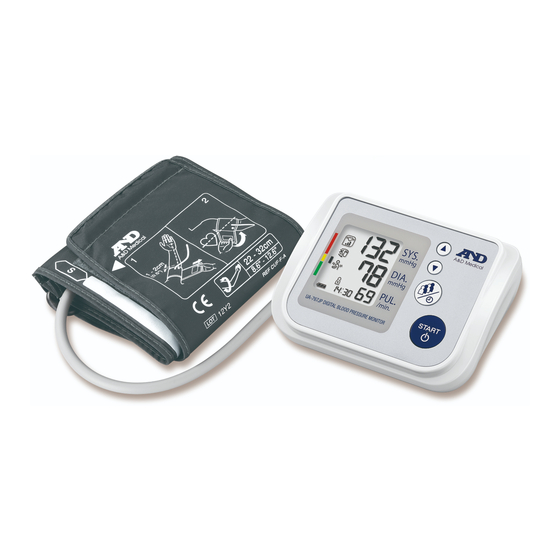
Parts Identification Button Button Button AC Adapter Plug DC Jack Air Connector Plug Button START Air Socket Display Air Hose Proper Fit Range Artery Position Mark Index Mark Arm Cuff Battery Compartment Battery Cover 1.5V Batteries (R6P, LR6 or AA) Display Average MEMORY... -
Page 7: Symbols
Symbols Symbols that are printed on the device case Symbols Function / Meaning Standby and Turn the device on. Systolic blood pressure in mmHg Diastolic blood pressure in mmHg Pulse per minute Battery installation guide Direct current Type BF: Device, cuff and tubing are designed to provide special protection against electrical shocks. - Page 8 Symbols Symbols Function / Meaning Recommended Action The reading may yield an Appears during measurement when incorrect value. Apply the the cuff is attached loosely. cuff correctly, and take another measurement. Detected rate of IHB/AFib in memory Number of detected IHB/AFibs in memory x100 [%] %IHB/AFib =...
-
Page 9: Operation Mode
Operation Mode 1. Normal Measurement Press the button. Blood pressure is measured and the data is START stored in memory. This device can store the last 60 measurements for each of the four users in memory. 2. Recalling the Data Press the button to recall the data in memory. - Page 10 Operation Mode 4. Deleting Data Stored in Memory In standby mode, press both the buttons. mark, battery indicator and user mark will appear. When you would like to delete the memory data of the currently displayed user, press and hold both the buttons until the illuminated mark starts blinking.
-
Page 11: Using The Monitor
Using the Monitor Installing / Changing the Batteries Step 1 1. Remove the battery cover. Step 3 Step 1 2. Remove the used batteries and insert new batteries into the battery compartment as shown, taking Step 2 care that the polarities (+ and -) are correct. -
Page 12: Connecting The Air Hose
Using the Monitor Connecting the Air Hose Air socket Insert the air connector plug into the air socket firmly. Air connector plug Connecting the AC Adapter Insert the AC adapter plug into the DC jack. Next, connect the AC adapter to an electrical outlet. -
Page 13: Adjusting The Built-In Clock
Using the Monitor Adjusting the Built-in Clock Adjust the clock prior to use. Press and hold 1. Press and hold the button until the year starts blinking. 2. Select the year using the button. Press the button to set the current year and move to month/day selection. -
Page 14: Selecting The Correct Cuff Size
Adult Cuff CUF-F-A Arm size: The circumference at the biceps. Note: Model UA-767JP is not designed for using a small cuff. Applying the Arm Cuff Do not roll up shirtsleeve tightly. 1. Wrap the cuff around the upper arm, about 1-2 cm above the inside of the Cuff elbow, as shown. - Page 15 Using the Monitor Symbols that are printed on the cuff Symbols Function / Meaning Recommended Action Set the mark on the artery of the upper arm or Artery position mark in line with the ring finger on the inside of the arm. Index ▲...
-
Page 16: How To Take Accurate Measurements
Using the Monitor How to Take Accurate Measurements For the most accurate blood pressure measurement: Sit comfortably on a chair. Rest your arm on the table. Do not cross your legs. Keep your feet on the floor and straighten your back. Relax for about five to ten minutes before measurement. -
Page 17: Measurements
Measurements Before measurement, read “Notes for Accurate Measurement” on the next page. Normal Measurement Press the button to select a user from 1 to 4. At heart level Press START Place the cuff on the arm (preferably the left arm). Sit quietly during measurement. -
Page 18: Measurement With The Desired Systolic Pressure
Measurements Measurement with the Desired Systolic Pressure Model UA-767JP is designed to detect the pulse and to inflate the cuff to a systolic pressure level automatically. Use this method when re-inflation occurs repeatedly or when the results are not displayed even if the pressure decreases to 20 mmHg or less. -
Page 19: Recalling The Memory Data
Recalling the Memory Data Note: This device stores the last 60 measurements for each of the four users in memory. 1. Press the button. Press The average of all measurements and the number of data are displayed. Average systolic (If no data, “0” is displayed. Press the Average diastolic button to turn the START... - Page 20 4. Press the button to change the user and display the memory display for that user. User 1 5. Press the button to turn the START device off. After one minute of non-operation, the device will turn off automatically. User 2 User 3 User 4 English 19...
-
Page 21: What Is The Ihb/Afib Indicator
What Is The IHB/AFib Indicator? When the monitor detects an irregular rhythm during the measurements, the IHB/AFib indicator will appear on the display with the measurement values. Note: We recommend contacting your physician if you see this IHB/AFib indicator frequently. What Is The AFib? The heart contracts due to electrical signals occurring in heart and sends blood through the body. -
Page 22: Pressure Bar Indicator
Pressure Bar Indicator The indicator monitors the progress of pressure during measurement. Pressurizing Releasing air Inflation in progress Measurement in progress Inflation complete WHO Classification Indicator Each segment of the bar indicator Example: corresponds to the WHO blood pressure classification described on the next page. WHO Classification Indicator Severe hypertension Moderate hypertension... -
Page 23: About Blood Pressure
About Blood Pressure What is Blood Pressure? Blood pressure is the force exerted by blood against the walls of the arteries. Systolic pressure occurs when the heart contracts. Diastolic pressure occurs when the heart expands. Blood pressure is measured in millimeters of mercury (mmHg). -
Page 24: Troubleshooting
described in this manual to get to know your normal blood pressure. Regular readings give a more comprehensive blood pressure history. Be sure to note the date and time when recording your blood pressure. Consult your doctor to interpret your blood pressure data. Troubleshooting Problem Possible Reason... -
Page 25: Maintenance
However it is generally recommended to have the device inspected every 2 years, to ensure proper functioning and accuracy. Please contact the authorized dealer in your area or A&D for maintenance. Technical Data Type UA-767JP Measurement method Oscillometric measurement Measurement range Pressure: 0 - 299 mmHg... - Page 26 Useful life Device: 5 years (when used six times a day) Cuff: 2 years (when used six times a day) AC adapter: 5 years (when used six times a day) Accessory AC adapter The adapter is to connect the device to a power source at home. Please contact your local A&D dealer for purchasing.
- Page 27 MEMO English 26...
- Page 28 A&D Company, Ltd. 1-243 Asahi , Kitamoto-shi, Saitama 364-8585, JAPAN Telephone: [81] (48) 593-1111 Fax: [81] (48) 593-1119 Emergo Europe B.V. Prinsessegracht 20, 2514 AP The Hague, The Netherlands Tel: [31] (70) 345-8570 Fax: [31] (70) 346-7299 A&D INSTRUMENTS LIMITED Unit 24/26 Blacklands Way, Abingdon Business Park, Abingdon, Oxfordshire OX14 1DY United Kingdom Telephone: [44] (1235) 550420...