Table of Contents
Advertisement
Quick Links
Advertisement
Table of Contents
Troubleshooting

Related Manuals for Zeiss Axioskop 2 FS plus


Summary of Contents for Zeiss Axioskop 2 FS plus
-
Page 2: Copyright
INTRODUCTION Axioskop 2 FS plus Carl Zeiss Copyright Axioskop 2 FS Knowledge of this manual is required for the operation of the instrument. Would you therefore please make yourself familiar with the contents of this manual and pay special attention to hints concerning the safe operation of the instrument. -
Page 3: Table Of Contents
................0-13 CHAPTER 1 INSTRUMENT DESCRIPTION ..................1-2 Name and intended application................... 1-2 Instrument description and main features..............1-2 Axioskop 2 FS plus (manual) microscope configurations and modules......1-4 Axioskop 2 FS microscope configurations and modules......... 1-8 Objectives......................... 1-12 Eyepieces........................1-14 Stage micrometers and eyepiece reticles.............. -
Page 4: Contents
Changing the binocular tube ..................2-33 2.2.11 Attachment of intermediate tube with height adjustment ..........2-34 2.2.12 Attachment of adapter for the Axioskop 2 FS plus............2-35 2.2.13 Installing and Removing “Push&Click” Modules ............2-36 2.2.14 Changing the filter set in the FL P&C reflector module..........2-37 2.2.15... - Page 5 CHAPTER 3 OPERATION ......................3-3 Overview of operation and function controls ............... 3-3 3.1.1 Operation and function controls of the Axioskop 2 FS plus, manual ......3-4 3.1.2 Keypad for objective focusing of the Axioskop 2 FS (single-hand control) .... 3-13 Switching on and basic settings.................
- Page 6 INTRODUCTION Axioskop 2 FS plus Carl Zeiss Contents Axioskop 2 FS Page CHAPTER 4 CARE, MAINTENANCE, TROUBLESHOOTING AND SERVICE ........4-3 Instrument care....................... 4-3 Instrument maintenance ....................4-4 4.2.1 Performing checks ......................4-4 4.2.2 Changing the fuses ......................4-4 Troubleshooting......................4-5 Spares, consumables and tools ..................4-9 Requesting service......................4-10...
-
Page 7: Microscopy In A Few Steps
Microscopy in a few steps using the example of "Setting of transmitted-light brightfield according to KÖHLER" Before starting to use the Axioskop 2 FS plus and/or Axioskop 2 FS microscopes, make sure to read the notes on instrument safety and the Description (Chapter 1) and Start-up (Chapter 2) chapters. -
Page 8: Notes On Instrument Safety
Notes on instrument safety Axioskop 2 FS Notes on instrument safety The Axioskop 2 FS plus and Axioskop 2 FS microscopes were designed, produced and tested in compliance with DIN 61010-1 (IEC 1010-1), Safety requirements for electrical measuring, control and laboratory instruments, and meet the requirements of appendix I of directive 73/23/EC and the relevant CSA and UL directives. - Page 9 If it is established that the protection measures are no longer effective, the instrument must be switched off and safeguarded against inadvertent operation. Contact a Zeiss service agency or Carl Zeiss microscopy service for the repair of the instrument.
- Page 10 The instruments must be operated by trained personnel only who must be aware of the possible danger involved with microscopy and the relevant application. The Axioskop 2 FS plus / Axioskop 2 FS is an optical precision instrument which can be impaired in its performance or damaged when handled improperly.
-
Page 11: Notes On Warranty
With the exception of the work specified in this manual, no maintenance or repair of the Axio- skop 2 FS plus / Axioskop 2 FS may be performed. Repairs may only be performed by Zeiss service staff or specially authorized personnel. Should any defect occur with the instrument, please get in touch with your local Zeiss agency. -
Page 12: Overall View Of Axioskop 2 Fs Plus
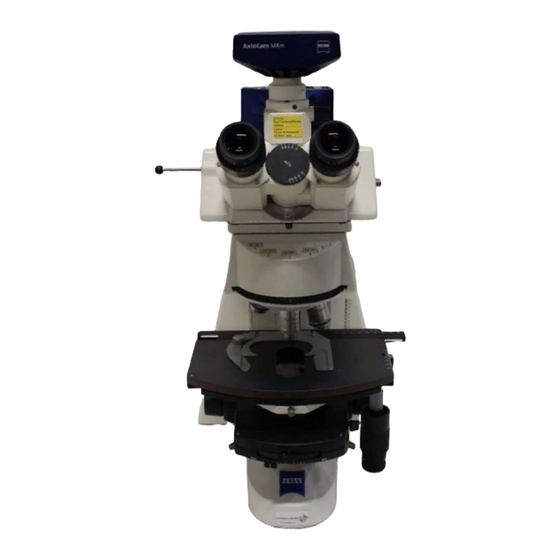
INTRODUCTION Axioskop 2 FS plus Carl Zeiss Overall view of the Axioskop 2 FS plus Axioskop 2 FS Overall view of the Axioskop 2 FS plus Eyepieces Binocular tube Stand Incident-light illuminator Transmitted-light illuminator Condenser Mechanical stage Objectives 0-12 B 40-076 e... -
Page 13: Overall View Of Axioskop 2 Fs Mot
Axioskop 2 FS plus INTRODUCTION Axioskop 2 FS Overall view of the Axioskop 2 FS Carl Zeiss Overall view of the Axioskop 2 FS Eyepieces Binocular ergotube Stand Incident-light illuminator Transmitted-light illuminator Key panel Condenser Mechanical stage Objectives B 40-076 e... - Page 14 INTRODUCTION Axioskop 2 FS plus Carl Zeiss Axioskop 2 FS 0-14 B 40-076 e 02/01...
- Page 15 Contents INSTRUMENT DESCRIPTION..................1-2 Name and intended application ..................1-2 Instrument description and main features ................ 1-2 Axioskop 2 FS plus (manual) microscope configurations and modules ....... 1-4 Axioskop 2 FS microscope configurations and modules ..........1-8 Objectives ........................1-12 Eyepieces ........................
-
Page 16: Name And Intended Application
Axioplan 2, such as tubes, intermediate tubes and condensers, are easy to attach. The Axioskop 2 FS plus is offered as a manual and a motorized version. The basic stand is equipped with either manual (Axioskop 2 FS plus) or motorized operation and function controls (Axioskop 2 FS but is otherwise identical for both versions. - Page 17 Instrument description and main features Carl Zeiss Major instrument features of the Axioskop 2 FS plus (manual): − Stable and sturdy diecast stand with T-shaped base in the pyramid design − Object focusing via ball-type planetary gear and coaxial drive −...
-
Page 18: Axioskop 2 Fs Plus (Manual) Microscope Configurations And Modules
INSTRUMENT DESCRIPTION Axioskop 2 FS plus Carl Zeiss Axioskop 2 FS plus microscope configurations ... Axioskop 2 FS Axioskop 2 FS plus (manual) microscope configurations and modules Fig. 1-1 Axioskop 2 FS plus (manual) microscope configurations B 40-076 e 02/01... - Page 19 Axioskop 2 FS plus INSTRUMENT DESCRIPTION Axioskop 2 FS Axioskop 2 FS plus microscope configurations ... Carl Zeiss Key to Fig. 1-1: Stand Eyepiece Binocular tube 30° /23 HBO 100 W transformer HBO 103 illuminator HAL 12 V 100 W halogen lamp...
- Page 20 Conversion filter 3200 ... 5500 K 467850-9901-000 Stage and condenser carriers: "Axioskop 2 FS plus" stage carrier with condenser carrier for the attachment of Zeiss stages 452327-0000-000 Special "Axioskop 2 FS plus" condenser carrier for the attachment of non-Zeiss stages...
- Page 21 459311-0000-000 Dust cover G (large) 459312-0000-000 Additional accessories The "Axioskop 2 FS plus" research microscope can be equipped with the following additional accessories: Intermediate tube with height adjustment for binocular ergotube / phototube 452341 / 452342 452376-0000-000 Adapter for Axioskop 2FS plus to allow the use of tubes / intermediate tubes from the Axioplan 2 line...
-
Page 22: Axioskop 2 Fs Mot Microscope Configurations And Modules
INSTRUMENT DESCRIPTION Axioskop 2 FS plus Carl Zeiss Axioskop 2 FS microscope configurations ... Axioskop 2 FS Axioskop 2 FS microscope configurations and modules Fig. 1-2 Axioskop 2 FS microscope configurations B 40-076 e 02/01... - Page 23 Axioskop 2 FS plus INSTRUMENT DESCRIPTION Axioskop 2 FS Axioskop 2 FS microscope configurations ... Carl Zeiss Key to Fig. 1-2: Stand Eyepiece Binocular ergotube 6-25° /23 HBO 100 W transformer HBO 103 illuminator HAL 12 V 100 W halogen illuminator...
-
Page 24: Fig. 1-2 Axioskop 2 Fs Mot Microscope Configurations
Conversion filter 3200 ... 5500 K 467850-9901-000 Stage and condenser carriers: "Axioskop 2 FS plus" stage carrier with condenser carrier for the attachment of Zeiss stages 452327-0000-000 Special "Axioskop 2 FS plus" condenser carrier for the attachment of non-Zeiss stages... - Page 25 Intermediate tube with height adjustment for binocular ergotube / phototube 452341 / 452342 452376-0000-000 Adapter for Axioskop 2 FS plus to allow the use of tubes / intermediate tubes from the Axioplan 2 line 452969-0000-000 MC 80 microscope camera for 24 mm x 36 mm...
-
Page 26: Objectives
Achroplan 10x/0,3W Ph1 ∞/− where 10x : objective magnification, with a defined color ring on the objective being allocated to each magnification step (Zeiss color code) : numerical aperture ∞ : infinite image distance; these objectives... - Page 27 (do not forget to unlock them again!). The following objectives are ideal for the Axioskop 2 FS plus and Axioskop 2 FS microscopes: Microscopy technique...
-
Page 28: Eyepieces
Axioskop 2 FS plus Carl Zeiss Eyepieces / Stage micrometers and ... Axioskop 2 FS Eyepieces The following eyepieces are offered for the Axioskop 2 FS plus und Axioskop 2 FS Eyepiece Image angle Application Cat. No. Eyepiece W-PL 10x/23 Br. foc. (2x) 49.4°... - Page 29 Axioskop 2 FS plus INSTRUMENT DESCRIPTION Axioskop 2 FS Stage micrometers and ... Carl Zeiss Illustration Description, Technical Data Cat. No. Eyepiece reticle / d = 26 mm 474064-0000-000 Crossline micrometer 10:100, d = 26 mm 474066-9901-000 gradation length = 10 mm increments = 0.1 mm...
-
Page 30: Technical Data
HAL 100..approx. 280 mm x 670 mm x 500 mm Axioskop 2 FS plus / FS with ergo-phototube and HBO 103 ..approx. 280 mm x 800 mm x 500 mm Weight Axioskop 2 FS plus ......................approx. 18 kg Axioskop 2 FS ......................approx. 18 kg Ambient conditions Storage and transport (in packaging) Permissible ambient temperature..................-10 to +60 °... - Page 31 Axioskop 2 FS plus INSTRUMENT DESCRIPTION Axioskop 2 FS Technical data Carl Zeiss Separate 12 V DC 100 W power unit, stabilized Operation........................... closed rooms Protection class............................I Enclosure protection ........................IP 20 Line voltage ......................100 to 240 V ±10 % Change of line voltage is not required! Line frequency ........................
- Page 32 INSTRUMENT DESCRIPTION Axioskop 2 FS plus Carl Zeiss Technical data Axioskop 2 FS Opto-mechanical data Stand with manual objective focusing coarse drive ......................6 mm / rotation fine drive ................0.1 mm / rotation; 1 µm increments lifting range ....................... max. 11 mm Achromatic-aplanatic universal condenser 0.9 with...
-
Page 33: Start-Up
Changing the binocular tube ..................2-33 2.2.11 Attachment of intermediate tube with height adjustment ..........2-34 2.2.12 Attachment of adapter for the Axioskop 2 FS plus............2-35 2.2.13 Installing and Removing “Push&Click” Modules ............. 2-36 2.2.14 Changing the filter set in the FL P&C reflector module ........... 2-37 2.2.15... - Page 34 START-UP Axioskop 2 FS plus Carl Zeiss List of illustrations Axioskop 2 FS List of illustrations Fig. 2-1 Setting up the microscope....................2-5 Fig. 2-2 Remove transport locking device ..................2-6 Fig. 2-3 Attachment of binocular tube ..................2-7 Fig. 2-4 Remove the stage carrier....................
- Page 35 Changing the binocular tube ..................2-33 Fig. 2-47 Attachment of intermediate tube with height adjustment ..........2-34 Fig. 2-48 Attachment of adapter for Axioskop 2 FS plus ............... 2-35 Fig. 2-49 Changing the technique module..................2-36 Fig. 2-50 Changing the filter set in the P&C FL reflector module ........... 2-37 Fig.
- Page 36 START-UP Axioskop 2 FS plus Carl Zeiss List of illustrations Axioskop 2 FS B 40-076 e 02/01...
-
Page 37: Initial Start-Up
The Axioskop 2 FS plus / Axioskop 2 FS can be installed, converted and started up by the customer himself. However, it is also possible to have the microscope installed or converted by Zeiss service staff against an extra charge. - Page 38 To exclude damage to the precision objective focusing drive during transport, Axioskop 2 FS plus / FS microscopes equipped with two safety screws and a carrying handle. When the microscope has been set up, these items must be removed. • Remove both safety screws (2-2/1) using a SW 3 ball-headed screwdriver.
-
Page 39: Attachment Of Binocular Tube Or Phototube
All the binocular tubes included in the microscope configurations listed in section 1.3 or 1.4 can be attached Axioskop 2 FS plus / Axio- skop 2 FS as described below. • Loosen hexagonal screw (2-3/3) using the SW3 ball-headed screwdriver. Remove dust covers (2-3/2) from the tube underside and the dovetail mount on the stand. -
Page 40: Screw In Objectives
START-UP Axioskop 2 FS plus Carl Zeiss Initial start-up Axioskop 2 FS 2.1.5 Screw in objectives • Remove the stage carrier (see 2.1.4) and place it on the table in such a way that toppling is prevented. • Move front objective mount (2-5/2) into the work position via the pushrod (2-5/1) (also see page 3-8). -
Page 41: Attachment Of The Condenser
Axioskop 2 FS plus START-UP Axioskop 2 FS Initial start-up Carl Zeiss 2.1.6 Attachment of the condenser It is recommended to remove the stage carrier before you insert the condenser. • Remove the stage carrier (if not yet done - see 2.1.4) and safely place it on the table. -
Page 42: Insertion Of Dic Slider
START-UP Axioskop 2 FS plus Carl Zeiss Initial start-up Axioskop 2 FS 2.1.7 Insertion of DIC slider If the microscope equipment was ordered for applications in differential interference contrast, the DIC sliders are already inserted in the objective sliders and centered. -
Page 43: Attach Stage Carrier And Align Its Height
Axioskop 2 FS plus START-UP Axioskop 2 FS Initial start-up Carl Zeiss 2.1.8 Attach stage carrier and align its height Please proceed as follows to attach the stage carrier to the stand: • Hold the stage carrier (2-9/1) with your left... -
Page 44: Insertion Of Eyepieces And Centering Telescope
START-UP Axioskop 2 FS plus Carl Zeiss Initial start-up Axioskop 2 FS 2.1.9 Insertion eyepieces centering telescope • Remove both dust covers (2-11/1 and 4) from the binocular tube. • Remove both eyepieces (2-11/2) from the cases and insert them in the binocular tube until stop. -
Page 45: Setting Of The Interpupillary Distance Of The Binocular Tube
Axioskop 2 FS plus START-UP Axioskop 2 FS Initial start-up Carl Zeiss Compensation of ametropia when eyepiece reticles are used The correct use of an eyepiece reticle requires two focusing eyepieces, e.g. E-PL 10x/23 Br. foc., to allow the user to compensate for differences in the visual performance of his two eyes. -
Page 46: Connect The Instrument To The Line And Switch The Illumination On/Off
Axioskop 2 FS 2.1.12 Connect the instrument to the line and switch the illumination on/off The Axioskop 2 FS plus / FS microscopes do not have their own line connection in order to avoid voltage potentials in the microscope which might affect electrophysiological examinations. - Page 47 Axioskop 2 FS plus START-UP Axioskop 2 FS Initial start-up Carl Zeiss Connect HBO 103 illuminator and switch it on/off The HBO 103 illuminator (for epi-fluorescence) is supplied via a separate transformer and switched on/off via the power unit of this transformer.
-
Page 48: Hal 100 Halogen Illuminator
START-UP Axioskop 2 FS plus Carl Zeiss Initial start-up Axioskop 2 FS 2.1.13 HAL 100 halogen illuminator Attachment HAL 100 halogen illuminator • Remove cover from transmitted-light tube (2-17/3). • Insert dovetail (2-18/2) of lamp housing (2-17/1) in transmitted-light tube (2-17/3) on... -
Page 49: Hbo 103 Illuminator
Axioskop 2 FS plus START-UP Axioskop 2 FS Initial start-up Carl Zeiss Fine adjustment • Attach illuminator to the stand again and tighten clamping screw (2-17/2). • Remove diffusion disk (3-1/12) and filters (3-1/15), if switched in, from the beam path. - Page 50 START-UP Axioskop 2 FS plus Carl Zeiss Initial start-up Axioskop 2 FS • Insert multi-pin plug of the HBO 103 illuminator (2-19/3) into socket (2-20/1) of the HBO 100 W transformer and secure it with captive coupling ring (also see 2.1.12).
- Page 51 Axioskop 2 FS plus START-UP Axioskop 2 FS Initial start-up Carl Zeiss Fig. 2-23 Focal spots of HBO 103 before coarse Fig. 2-24 Focal spots of HBO 103 after coarse adjustment adjustment During coarse adjustment of the focal spots, adjusting screws (2-22/2 and 5) must not be changed, since they influence the reflector setting in the HBO 103 illuminator.
- Page 52 START-UP Axioskop 2 FS plus Carl Zeiss Initial start-up Axioskop 2 FS • If required, set knurled knob (2-22/6) and adjusting screw (2-22/4) alternately until both focal spots have the same dimension (see Fig. 2-24). • Use adjusting screws (2-22/1 and 3) to adjust the brighter focal spot in the adjusting circle, e.g. on the left side, in the same way as the focal spot image (2-25).
-
Page 53: Connect Control Unit And Keypad To The Axioskop 2 Fs Mot
Axioskop 2 FS plus START-UP Axioskop 2 FS Initial start-up Carl Zeiss 2.1.15 Connect control unit and keypad to the Axioskop 2 FS Focusing of the Axioskop 2 FS is performed exclusively using the motorized z-adjustment of the objective slider. The high-precision step motor... -
Page 54: Attachment Of Round Cable Holder
START-UP Axioskop 2 FS plus Carl Zeiss Initial start-up Axioskop 2 FS 2.1.17 Attachment of round cable holder The round cable holder supplied with the mechanical stages can be used to attach electrical cables, e.g. from dictating machines. For this purpose, the round cable holder should be adhered to a suitable position on the microscope. -
Page 55: Attachments And Conversions
Axioskop 2 FS plus START-UP Axioskop 2 FS Attachments and conversions Carl Zeiss Attachments and conversions The steps required for attachments to and conversions of the microscope are explained in the following. After this, the respective modules must be reset in a functioning status again. -
Page 56: Changing The Phase Stop For Phase Contrast Or Darkfield In The Universal Condenser (If Required)
START-UP Axioskop 2 FS plus Carl Zeiss Attachments and conversions Axioskop 2 FS 2.2.2 Changing the phase stop for phase contrast darkfield universal condenser (if required) • Tighten both centering screws (2-31/1) until stop using SW 1.5 Allen screwdriver. • To loosen the cover on the condenser underside (2-31/2), loosen both grub screws and remove the cover. -
Page 57: Changing The Dic Prism In The Universal Condenser
Axioskop 2 FS plus START-UP Axioskop 2 FS Attachments and conversions Carl Zeiss 2.2.3 Changing the DIC prism in the universal condenser • To loosen the cover on the condenser underside (2-32/1), loosen both grub screws using the SW 2 screwdriver remove cover. -
Page 58: Attachment Of Polarizer D
START-UP Axioskop 2 FS plus Carl Zeiss Attachments and conversions Axioskop 2 FS 2.2.5 Attachment of Polarizer D • Hold polarizer (2-34/6) parallel to the underside of the condenser carrier (2-34/3) and screw stop bolt (2-34/4) of the polarizer (2-34/6) into... -
Page 59: Changing The Hal 100 Halogen Lamp
Axioskop 2 FS plus START-UP Axioskop 2 FS Attachments and conversions Carl Zeiss 2.2.7 Changing the HAL 100 halogen lamp • Switch off the separate power unit of the halogen lamp as described in section 2.1.12, remove illuminator plug from the 12 V / 100 W socket of the power unit and allow the unit to cool down for approx. - Page 60 START-UP Axioskop 2 FS plus Carl Zeiss Attachments and conversions Axioskop 2 FS After expiry of the average operation time of 300 h, the HBO 103 W/2 mercury vapor short-arc lamp must be exchanged. The operating time of the lamp can be checked on...
- Page 61 Axioskop 2 FS plus START-UP Axioskop 2 FS Attachments and conversions Carl Zeiss • Loosen the fixing screw (2-40/5) on the heat sink (2-40/6) and remove heat sink. If you cannot remove (or replace) the heat sink, take out the screw completely, screw it into the neighboring threaded hole and use it to press out the heat sink.
-
Page 62: Changing The Mechanical Stage
START-UP Axioskop 2 FS plus Carl Zeiss Attachments and conversions Axioskop 2 FS 2.2.9 Changing the mechanical stage Depending on type, mechanical stages can be fixed or they can be rotated or centered. The movement range is 75 mm in x-direction and 50 mm in y-direction. - Page 63 Axioskop 2 FS plus START-UP Axioskop 2 FS Attachments and conversions Carl Zeiss • Press stage to the front against spring pin and lower its back in the stage carrier (2-42/3), then let go. • Tighten screwing cap (2-42/2). Centering the stage...
- Page 64 START-UP Axioskop 2 FS plus Carl Zeiss Attachments and conversions Axioskop 2 FS Adjusting the travel on ergo-drive On the mechanical stages with ergo-drive, the travel range of the X and Y adjustment can be extended by a max. 15 mm by axial movement of the drive buttons.
-
Page 65: Changing The Binocular Tube
Axioskop 2 FS plus START-UP Axioskop 2 FS Attachments and conversions Carl Zeiss To ensure long life of the stage, the scuff from the specimen holders should be removed at regular intervals. Make sure that the scuff does not get into the guiding components for the x- movement. -
Page 66: Attachment Of Intermediate Tube With Height Adjustment
START-UP Axioskop 2 FS plus Carl Zeiss Attachments and conversions Axioskop 2 FS 2.2.11 Attachment of intermediate tube with height adjustment The intermediate tube with height adjustment may only be used in combination with a binocular ergotube. When removing the intermediate tube and... -
Page 67: Attachment Of Adapter For The Axioskop 2 Fs Plus
Attachments and conversions Carl Zeiss 2.2.12 Attachment of adapter for the Axioskop 2 FS plus The adapter for the Axioskop 2 FS plus is used to attach intermediate tubes and/or tubes of the Axioplan 2 Axioskop 2 FS plus / Axio- skop 2 FS •... -
Page 68: Installing And Removing "Push&Click" Modules
START-UP Axioskop 2 FS plus Carl Zeiss Attachments and conversions Axioskop 2 FS 2.2.13 Installing and Removing “ Push&Click” Modules FL P&C reflector module # 000000-1046-281 Optovar module 1,25x (for transmitted-light only) # 000000-1046-284 Optovar module 1,6x (for transmitted-light only) # 000000-1046-283... -
Page 69: Changing The Filter Set In The Fl P&C Reflector Module
Axioskop 2 FS plus START-UP Axioskop 2 FS Attachments and conversions Carl Zeiss 2.2.14 Changing the filter set in the FL P&C reflector module The filter sets for the FL P&C reflector module can be combined and assembled individually by the customer. - Page 70 START-UP Axioskop 2 FS plus Carl Zeiss Attachments and conversions Axioskop 2 FS • Now tip up the module half on top (2-52/1) and remove from the retaining elements (2-52/5b) of the bottom module half. • Remove the beam splitter (2-52/2) and spring frame (2-52/3) from the bottom module half.
-
Page 71: Operation
Contents OPERATION ........................3-3 Overview of operation and function controls..............3-3 3.1.1 Operation and function controls of the Axioskop 2 FS plus, manual........3-4 3.1.2 Keypad for objective focusing of the Axioskop 2 FS (single-hand control)....3-13 Switching on and basic settings ..................3-19 3.2.1... - Page 72 Carl Zeiss List of illustrations Axioskop 2 FS List of illustrations Fig. 3-1 Operation and function controls of the Axioskop 2 FS plus, manual ......... 3-4 Fig. 3-2 Universal condenser ......................3-7 Fig. 3-3 Mechanical stage with universal mounting frame............. 3-8 Fig.
-
Page 73: Overview Of Operation And Function Controls
OPERATION Overview of operation and function controls The Axioskop 2 FS plus research microscopes are offered in a manual version and in a version with a motorized focusing drive. The major difference between the two versions is that objective focusing of the Axioskop 2 FS only possible by motor via control unit and keypad. -
Page 74: Operation And Function Controls Of The Axioskop 2 Fs Plus, Manual
Axioskop 2 FS plus Carl Zeiss Operation and function controls Axioskop 2 FS 3.1.1 Operation and function controls of the Axioskop 2 FS plus, manual Fig. 3-1 Operation and function controls of the Axioskop 2 FS plus, manual B 40-076 e 02/01... - Page 75 Axioskop 2 FS plus OPERATION Axioskop 2 FS Operation and function controls Carl Zeiss Key to Fig. 3-1: Eyepieces Binocular tube Centering screws for luminous-field diaphragm (incident light) Pushrod for luminous-field diaphragm (incident light) Compartment for filter slider Centering screws for aperture diaphragm (incident light)
- Page 76 OPERATION Axioskop 2 FS plus Carl Zeiss Operation and function controls Axioskop 2 FS Eyepieces − Both eyepiece versions, PL 10x/23 Br. foc. and W-PL 10x/23 Br. foc., enable compensation of ametropia of the user's eyes (see section 2.1.3) and also accept eyepiece reticles (see section 1.7).
- Page 77 Axioskop 2 FS plus OPERATION Axioskop 2 FS Operation and function controls Carl Zeiss Lever to swing in / out the diffusion disk The integrated diffusion disk (3-1/12) ) is used to achieve homogeneous illumination, though at a slight loss of light.
- Page 78 OPERATION Axioskop 2 FS plus Carl Zeiss Operation and function controls Axioskop 2 FS Mechanical stage with universal mounting frame − Mounting, positioning and fixation of the specimens on the universal mounting frame (3-3/1). Pushrod for objective change − Sliding and lowering function for objective change via pushrod (3-4/1) in single-hand operation.
- Page 79 Axioskop 2 FS plus OPERATION Axioskop 2 FS Operation and function controls Carl Zeiss Luminous-field diaphragm − Wheel (3-5/2) for the continuous setting of the luminous-field diaphragm (transmitted light). − Additional mount (3-5/1) for filters with diameter d = 32 mm.
- Page 80 OPERATION Axioskop 2 FS plus Carl Zeiss Operation and function controls Axioskop 2 FS Binocular ergo-phototube 6-25° /23 (100/100) The camera port (3-7/1) of the binocular ergo- phototube allows the attachment of SLR-cameras, microscope cameras and video cameras via the relevant adapters.
- Page 81 Axioskop 2 FS plus OPERATION Axioskop 2 FS Operation and function controls Carl Zeiss Filter mount The filter mount allows three additional dia. 32mm color filters to be swung in the beam path together or separately. • Insert filter in one of the three filter plates (3-9/1).
- Page 82 Intermediate tube with height adjustment Attachment of the intermediate tube with height adjustment allows the viewing height of the Axioskop 2 FS plus to be increased continuously from 60 to 110 mm. This intermediate tube can only be used in combination with the binocular ergotube 6-25°...
-
Page 83: Keypad For Objective Focusing Of The Axioskop 2 Fs (Single-Hand Control)
Axioskop 2 FS plus OPERATION Axioskop 2 FS Operation and function controls Carl Zeiss 3.1.2 Keypad for objective focusing of the Axioskop 2 FS (single-hand control) Keypad Display Handwheel for fine adjustment of the focusing drive Fig. 3-11 Keypad of the Axioskop 2 FS... - Page 84 OPERATION Axioskop 2 FS plus Carl Zeiss Operation and function controls Axioskop 2 FS Function keys of the keypad Function Key for upward motion of focusing drive (positive direction, away from the specimen) Key for downward motion of focusing drive (negative direction, towards the specimen) Set Slow-Speed values (in combination with the Pos.
- Page 85 Axioskop 2 FS plus OPERATION Axioskop 2 FS Operation and function controls Carl Zeiss Display The set step width or the positive or negative position deviation with reference to the zero point is shown in the display field of the keypad. When setting functions are performed, the display is used Fig.
- Page 86 OPERATION Axioskop 2 FS plus Carl Zeiss Operation and function controls Axioskop 2 FS • Then set the required speed step in the range from 0 to 15 via the Pos. 3 and Pos. 4 keys The display value 0 corresponds to the slowest and 15 to the fastest speed step which can be set. The Pos.
- Page 87 Axioskop 2 FS plus OPERATION Axioskop 2 FS Operation and function controls Carl Zeiss Defined leaving and relocation of the current focus position (Home function) The Home function permits the defined leaving and activation of the work range. This enables a work position left via the Home function to be reproducibly relocated with an accuracy in the µm range.
- Page 88 OPERATION Axioskop 2 FS plus Carl Zeiss Operation and function controls Axioskop 2 FS Perform steps • Each press of the Step key moves the objective slider one step further in the set direction. • Press the Step L/H key to set the speed in the Step mode to slow (L = low) or to maximum (H = high).
-
Page 89: Switching On And Basic Settings
3.2.1 Axioskop 2 FS plus, manual The Axioskop 2 FS plus microscope does not have any on/off switches for the illumination equipment on the stand itself. The illumination systems need only be switched on/off as required via the power supply unit. -
Page 90: Illumination And Contrasting Techniques
Axioskop 2 FS plus − The manual Axioskop 2 FS plus has been set up as described in chapter 2. − Switch on the transmitted-light illumination via the separate power unit. • Set the image brightness via the light intensity control (3-1/24) of the separate power unit. - Page 91 Fig. 3-16 Microscope settings on the • Insert eyepiece in the tube again. Axioskop 2 FS plus in transmitted- light brightfield Since field size and objective aperture change after every objective change, the setting of the luminous-field diaphragm and the aperture diaphragm must be repeated to obtain optimum results.
- Page 92 − Switch on the control unit for motorized objective focusing. • Set KÖHLER illumination as described in section 3.3.1 (3) for the manual Axioskop 2 FS plus. • Unlike the Axioskop 2 FS plus, focusing is made via the keypad of the control unit.
-
Page 93: Setting Of Transmitted-Light Darkfield
This is one of the reasons why even fine structures can be resolved, although they are below the resolving power of the light microscope and appear very bright on a dark background. Transmitted-light darkfield configuration for the manual Axioskop 2 FS plus and the Axioskop 2 FS −... - Page 94 OPERATION Axioskop 2 FS plus Carl Zeiss Illumination and contrasting techniques Axioskop 2 FS • Insert eyepiece in the tube again. • If the height of the dark field condenser has been set correctly and sensibly enough, any visible brightening in the field of view can be reduced, and the luminous-field diaphragm image will be almost perfectly in focus.
-
Page 95: Setting Of Transmitted-Light Phase Contrast
Configurations of the manual Axioskop 2 FS plus and the Axioskop 2 FS − Phase contrast objectives with phase rings Ph 1, Ph 2 or Ph 3 for different average numeric apertures which can also be used in brightfield without any restriction. - Page 96 OPERATION Axioskop 2 FS plus Carl Zeiss Illumination and contrasting techniques Axioskop 2 FS Transmitted-light phase contrast settings manual Axioskop 2 FS plus Axioskop 2 FS • Swing phase contrast objective, e.g. Ph 1, in the beam path. • Insert phase stop labelled like the phase contrast objective, e.g.
-
Page 97: Setting Of Transmitted-Light Differential Interference Contrast (Dic)
(intensities). A λ-compensator (lambda plate) subsequently changes the gray values to colors. Axioskop 2 FS plus and Axioskop 2 FS configuration − Objectives offered with DIC equipment −... - Page 98 • Remove centering telescope and insert eyepiece again. Setting of transmitted-light DIC on Axioskop 2 FS plus) and Axioskop 2 FS • Move the DIC-suitable objective in the objective slider in the work position via the pushrod (3-22/2).
- Page 99 Reflector turret Pushrod of objective slider Sliding knob for aperture diaphragm SENARMONT polarizer Pushrod of the rotating polarizer Fig. 3-22 Components for the transmitted-light DIC technique on the Axioskop 2 FS plus B 40-076 e 02/01 3-29...
-
Page 100: Setting Of Epi-Fluorescence
2.1.14 by using the adjusting aid. If required, re-adjustment must be performed depending on the operation time. Setting of epi-fluorescence on the Axioskop 2 FS plus and Axioskop 2 FS Initial epi-fluorescence setting is made much easier if a strongly fluorescent specimen is used first. - Page 101 Fig. 3-23 Components for epi-fluorescence edge of the field of view. on the Axioskop 2 FS plus • Either open the luminous-field diaphragm until it just disappears behind the edge of the field of view or, if there is a risk of specimen bleaching, reduce it until it is visible in the field of view.
-
Page 102: Documentation
Documentation 3.4.1 Attachment of photomicrography equipment The Axioskop 2 FS plus / Axioskop 2 FS equipped with a binocular phototube (3-24/5) can be switched from observation to photomicrography (pushrod pulled out) using the pushrod (3-24/7). The special T2 adapter 2.5x and other T2 adapters permit commercially available 35 mm SLR cameras (SLR - Single Lens Reflex) and special microscope cameras (e.g. - Page 103 Attachment of a microscope camera, e.g. MC 80 or MC 200 from Carl Zeiss CHIP The Axioskop 2 FS plus / Axioskop 2 FS microscope allows not only attachment of SLR cameras, but also of microscope cameras, e.g. MC 80 or MC 200 from Carl Zeiss.
- Page 104 OPERATION Axioskop 2 FS plus Carl Zeiss Documentation Axioskop 2 FS The following T2 adapters are available for SLR cameras: T2 Adapter for SLR cameras Cat. No. T2 Adapter for CONTAX (CONTAX-bayonet) 416010-0000-000 T2 Adapter for OLYMPUS OM (OM-bayonet) 416002-0000-000...
-
Page 105: Attachment Of Videomicroscopy Equipment
3.4.2 Attachment of videomicroscopy equipment Due to ICS optics from Carl Zeiss, the completely corrected intermediate image falls directly on the target of the video camera. This permits optimum quality of the image transfer, even if high-resolution video cameras are used. -
Page 106: Attachment Of Adapter For Digital Compact Cameras
Documentation Axioskop 2 FS The 60 - 44 adapter also allows video adapters with 44 mm interface to be used with the phototube of the Axioskop 2 FS plus / Axioskop 2 FS with 60 mm interface. Video adapter Suitable for: Comments (Cat. -
Page 107: Quantitative Microscopy
Quantitative microscopy 3.5.1 Measurement of lengths The measurement of lengths using the Axioskop 2 FS plus / Axioskop 2 FS requires the following, for example: − stage micrometer, positive 5 + 100/100 y, D = 0.17 mm as the object −... -
Page 108: Height Measurement
OPERATION Axioskop 2 FS plus Carl Zeiss Quantitative microscopy Axioskop 2 FS After exchange of the stage micrometer for the specimen to be measured, the measuring distance of interest results from the number of increments of the crossline micrometer (tenth estimated), multiplied by the scale value k’. - Page 109 Axioskop 2 FS plus OPERATION Axioskop 2 FS Quantitative microscopy Carl Zeiss Example: The upper (3-27/1) and lower side (3-27/2) of a specimen were focused using a dry objective = 1,0). The indicated intervals of the mechanical fine drive are 15.0 and 24.5, which means that d’ = 9.5 µm with an interval of 1 µm.
- Page 110 OPERATION Axioskop 2 FS plus Carl Zeiss Axioskop 2 FS 3-40 B 40-076 e 02/01...
- Page 111 Axioskop 2 FS plus CARE, MAINTENANCE, TROUBLESHOOTING ... Axioskop 2 FS Contents / List of illustrations Carl Zeiss CARE, MAINTENANCE, TROUBLESHOOTING AND SERVICE Contents CARE, MAINTENANCE, TROUBLESHOOTING AND SERVICE ........4-3 Instrument care ....................... 4-3 Instrument maintenance....................4-4 4.2.1 Performing checks......................4-4 4.2.2...
- Page 112 CARE, MAINTENANCE, TROUBLESHOOTING ... Axioskop 2 FS plus Carl Zeiss Axioskop 2 FS B 40-076 e 02/01...
-
Page 113: Care, Maintenance, Troubleshooting And Service
CARE, MAINTENANCE, TROUBLESHOOTING AND SERVICE Instrument care Care of the Axioskop 2 FS plus / Axioskop 2 FS is limited to the following operations: • Switch off the instrument after every use and place instrument cover on it to protect it from dust and humidity. -
Page 114: Chapter 4 Care, Maintenance, Troubleshooting And Service
CARE, MAINTENANCE, TROUBLESHOOTING AND SERVICE Axioskop 2 FS plus Carl Zeiss Instrument maintenance Axioskop 2 FS Instrument maintenance 4.2.1 Performing checks • Make sure that the instrument(s) comply with the required line voltage (e.g. the HBO 100 transformer). • Check line cable and plug for defects. -
Page 115: Troubleshooting
Axioskop 2 FS plus CARE, MAINTENANCE, TROUBLESHOOTING ... Axioskop 2 FS Troubleshooting Carl Zeiss Troubleshooting Problem Cause Remedy Shadows or inhomogeneous The vis/phot pushrod on the Move the vis/phot pushrod on image brightness in the field of camera tube is not in the correct the phototube in the correct view;... - Page 116 CARE, MAINTENANCE, TROUBLESHOOTING ... Axioskop 2 FS plus Carl Zeiss Troubleshooting Axioskop 2 FS Problem Cause Remedy Low resolving power and poor Aperture diaphragm opening not Set aperture diaphragm opening image contrast. set correctly. in accordance with the 2/3 rule or depending on the specimen features, see p.
- Page 117 Axioskop 2 FS plus CARE, MAINTENANCE, TROUBLESHOOTING ... Axioskop 2 FS Troubleshooting Carl Zeiss Problem Cause Remedy Great focus differences after Focusing eyepieces are not set Set focusing eyepieces to the objective change. correctly. appropriate ametropia, s. p. 2-13. Objective not screwed in until Screw in objective until stop.
- Page 118 CARE, MAINTENANCE, TROUBLESHOOTING ... Axioskop 2 FS plus Carl Zeiss Troubleshooting Axioskop 2 FS Problem Cause Remedy The 12 V 100 W halogen lamp Line cable not connected to the Connect line cable to the line and does not function although the line.
-
Page 119: Spares, Consumables And Tools
Axioskop 2 FS plus CARE, MAINTENANCE, TROUBLESHOOTING ... Axioskop 2 FS Spares, consumables and tools Carl Zeiss Spares, consumables and tools Description Cat. No. Application 12 V 100 W halogen lamp 380079-9540-000 for HAL 100 illuminator HBO 103 W/2 mercury pressure short-arc... -
Page 120: Requesting Service
To ensure the optimum setting and trouble-free function of your microscope even for a longer period of time, we would recommend you to conclude a service/maintenance contract with Carl Zeiss. In the case of subsequent orders or when service is required, please get in touch with your local Zeiss agency. -
Page 121: Annex
Axioskop 2 FS plus ANNEX Axioskop 2 FS Overview Carl Zeiss ANNEX List of abbreviations...........................A-3 List of key words ..........................A-5 Certification in accordance with DIN ISO 9001 / EN 46001 EC conformity declaration B 40-076 e 02/01... - Page 122 ANNEX Axioskop 2 FS plus Carl Zeiss Axioskop 2 FS B 40-076 e 02/01...
-
Page 123: List Of Abbreviations
Axioskop 2 FS plus ANNEX Axioskop 2 FS List of abbreviations Carl Zeiss List of abbreviations Alternating Current A-Plan Achromatic objectives featuring improved image flatness (ICS line) Suitable for eyeglass wearers Charge Couple Device Canadian Standards Association Cover slip thickness Darkfield Diameter (e.g. - Page 124 ANNEX Axioskop 2 FS plus Carl Zeiss List of abbreviations Axioskop 2 FS International Protection (protection class) International Organization for Standardization Measuring distance (length measurement) Light Emitting Diode Microscope Camera / mot. Motorized Refractive index of the medium Refractive index of D-line (sodium)
- Page 125 Axioskop 2 FS plus ANNEX Axioskop 2 FS List of key words Carl Zeiss List of key words Page Activate / deactivate end switches....................3-18 Adapter ............................2-35 Adjusting aid ............................. 3-6 Ambient conditions ......................... 1-16 Ametropia ............................. 2-13 Analyzer............................3-20 Analyzer module ..........................
-
Page 126: Eyepieces
ANNEX Axioskop 2 FS plus Carl Zeiss List of key words Axioskop 2 FS Page Diffusion disk .............................3-7 Digital compact cameras ........................3-36 Dimensions ............................1-16 Display.............................3-15 Documentation ..........................3-32 End switches of the work range......................3-18 Epi-fluorescence..........................3-30 Eyepiece reticle ..........................2-13 Eyepieces ....................... 2-5, 2-12, 2-17, 3-6 Filter .......................... -
Page 127: Objectives
Axioskop 2 FS plus ANNEX Axioskop 2 FS List of key words Carl Zeiss Page Keypad for objective focusing ......................3-13 KÖHLER .......................... 3-9, 3-20, 3-28 Length measurement........................3-37 Light intensity............................ 3-9 Light sources ........................... 1-17 Line voltage............................. 1-17 Luminous-field diaphragm ................3-5, 3-6, 3-9, 3-21, 3-26, 3-31 Mechanical stage ..................2-5, 2-30, 2-33, 3-5, 3-7, 3-8... - Page 128 ANNEX Axioskop 2 FS plus Carl Zeiss List of key words Axioskop 2 FS Page Screw in objectives ...........................2-8 SENARMONT polarizer ......................3-27, 3-28 Set end switches ..........................3-18 Set step width..........................3-17 Set the zero point ..........................3-16 Smoothness ...........................2-32 Spares..............................4-9 Speed of the focusing drive ......................3-15 Stage carrier ......................