Canon imageCLASS D320 Basic Manual
Canon imageclass d320: basic guide
Hide thumbs
Also See for imageCLASS D320:
- Printer manual (121 pages) ,
- Setup sheet (8 pages) ,
- Specification (2 pages)

Related Manuals for Canon imageCLASS D320


Summary of Contents for Canon imageCLASS D320
- Page 1 Basic Guide Basic Guide Please read this guide before operating this equipment. After you finish reading this guide, store it in a safe place for future reference.
-
Page 2: Using Your Documentation
NOTE Copyright Copyright ©2003 by Canon, Inc. All rights reserved. No part of this publication may be reproduced, transmitted, transcribed, stored in a retrieval system, or translated into any language or computer language in any form or by any means, electronic, mechanical, magnetic, optical, chemical, manual, or otherwise, without the prior written permission of Canon, Inc. -
Page 3: Laser Safety
Laser Safety This machine complies with 21 CFR Chapter 1 Subchapter J as a Class 1 laser product under the U.S. Department of Health and Human Services (DHHS) Radiation Performance Standard according to the Radiation Control for Health and Safety Act of 1968. This means that the machine does not produce hazardous laser radiation. Since radiation emitted inside the fax is completely confined within protective housings, and external covers, the laser beam cannot escape from the machine during any phase of user operation. -
Page 4: Users In The Usa
If such changes or modifications should be made, you could be required to stop operation of the equipment. One Canon Plaza, Lake Success, NY 11042, U.S.A. Users in Canada • This Class B digital apparatus meets all requirements of the Canadian Interference-Causing Equipment Regulations. -
Page 5: Table Of Contents
Contents Chapter 1: Introduction Customer Support ...1-1 Important Safety Instructions ...1-1 Main Components of the Machine ...1-4 Operation Panel ...1-6 Standby Display ...1-7 Energy Saver Mode...1-8 Setting the Energy Saver Mode Manually ...1-8 Restoring from the Energy Saver Mode ...1-8 Chapter 2: Paper Handling Print Media Requirements...2-1 Printing Areas ...2-2... - Page 6 Chapter 8: Troubleshooting Clearing Jams ...8-1 Removing Jammed Paper from Inside the Main Unit...8-1 Removing Jammed Paper from the ADF (Only for the imageCLASS D340 model) ...8-4 LCD Messages ...8-5 Paper Feeding Problems...8-7 Copying Problems ...8-8 Print Quality Problems ...8-9 Printing Problems ...8-11 General Problems ...8-11 If You Cannot Solve the Problem ...8-12...
-
Page 7: Type Conventions Used In This Guide
Type Conventions Used in This Guide Please read the list below of symbols, terms, and abbreviations used in this guide. • Indicates a warning concerning operations that may lead to death or injury to persons if not performed correctly. In order to use the machine safely, always pay attention to these warnings. WARNING •... -
Page 8: Where To Find Help
For live technical support, call 1-800-828-4040, Monday – Friday, 8 am – 8 pm EST (except holidays). 24-hour, 7 days/week automated support for troubleshooting issues on most current models, call 1-800-423-2366. CANADA Users – call for technical support 24 hours/day, 7 days/week at 1-800-OK-CANON. Support programs are subject to change without notice. - Page 9 Legal Limitation on Usage of Your Product and the Use of Images Using your product to scan, print or otherwise reproduce certain documents, and the use of such images as scanned, printed or otherwise reproduced by your product, may be prohibited by law and may result in criminal and/or civil liability.
-
Page 10: Chapter 1: Introduction
• Place the machine on a flat, stable, vibration-free surface that is strong enough to support its weight (approx. 35.2 lb./16.0 kg imageCLASS D340, 31.9 lb./14.5 kg imageCLASS D320). • Make sure the area is free from dust. • Avoid poorly ventilated locations. -
Page 11: Power Supply
• Make sure the location is not affected by extreme temperature changes, and always stays between 59°F and 80.6°F (15°C and 27°C). • Make sure the relative humidity of the area is between 20% and 80%. • Keep the machine away from direct sunlight. •... - Page 12 Handling • Do not drop paper clips, staples, or other metal objects inside the WARNING machine. Also do not spill water, liquid or inflammable substances inside the machine. If these items come into contact with high-voltage parts inside of the machine, it may result in a fire or electrical shock. If these items are dropped or spilled in the machine, unplug the power cord immediately with dry hands.
-
Page 13: Main Components Of The Machine
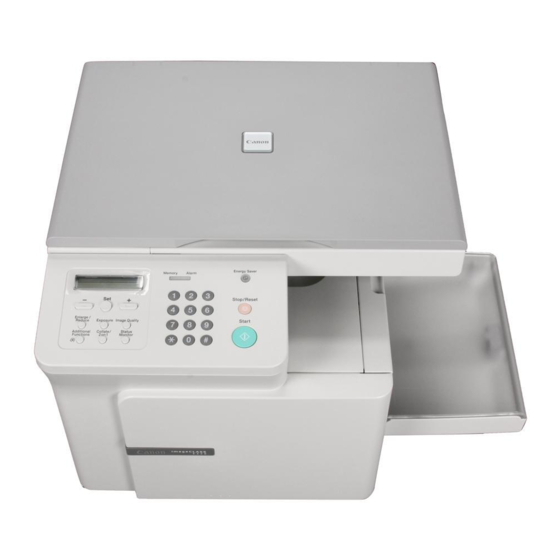
LEFT COVER Open it when you output paper face up or remove jammed paper. POWER CORD CONNECTOR USB INTERFACE CONNECTOR imageCLASS D320 LEFT COVER Open it when you output paper face up or remove jammed paper. POWER CORD CONNECTOR USB INTERFACE CONNECTOR DOCUMENT FEEDER TRAY Place documents for copying. - Page 14 Right Side View imageCLASS D340 imageCLASS D320 PLATEN GLASS COVER Open it when you place documents on the platen glass for copying. PLATEN GLASS Place documents for copying. OUTPUT TRAY Outputs printed pages. RIGHT COVER Open it when you install the cartridge, or remove jammed paper.
-
Page 15: Operation Panel
Operation Panel This section describes keys used when making copies and setting the Additional Functions. Enlarge/Reduce key Sets an enlargement or reduction ratio of the copy. Enlarge / Reduce Additional Functions Additional Functions key Customizes the way your machine operates. 4 (–) , e (+) keys Scroll through the selections so you can see other settings. -
Page 16: Standby Display
Standby Display The standby display is as follows: Copy Ratio Paper Size Exposure Copy Quantity Image Quality • When the machine is plugged in, the LCD displays PLEASE WAIT for a while, then the standby display NOTE appears. -
Page 17: Energy Saver Mode
Energy Saver Mode This machine provides an energy saver function. When no operations are performed for about 5 minutes, the machine automatically enters the energy saver mode. • The time until the machine enters the energy saver mode can be specified in a range of 3 minutes to 30 NOTE minutes. -
Page 18: Chapter 2: Paper Handling
Paper Handling Print Media Requirements For high-quality copies, we recommend using paper and transparencies recommended by Canon. Some types of paper available at office supply stores may not be suitable for this machine. If you have any questions about paper and transparencies, consult your dealer or Canon Customer Relations. -
Page 19: Printing Areas
The term “printing area” represents both the recommended area for optimum print quality and the entire area where the machine can technically print from your computer. Printing area (light shade) : Canon recommends that you print within this area. Paper 13/64"... -
Page 20: Loading Paper
Loading Paper This section describes how to load paper in the cassette and in the multi-purpose tray. • When loading paper, take care not to cut your hands on the edges of the paper. CAUTION • The paper in the multi-purpose tray is fed prior to the paper in the cassette. •... -
Page 21: Loading Envelopes In The Cassette
Loading Envelopes in the Cassette • The recommended envelopes are COM10, MONARCH, DL, ISO-C5. Using other envelopes may affect the quality of the copy image. IMPORTANT Arrange the stack of envelopes on a firm, clean surface, and press down firmly on the edges to make the folds crisp. -
Page 22: Loading Paper In The Multi-Purpose Tray
Loading Paper in the Multi-purpose Tray Use the multi-purpose tray when you want to copy or print on paper of a different type from that loaded in the cassette. You can load up to 10 sheets of letter-size (20-lb bond or 75 g/m type of compatible paper. -
Page 23: Loading An Envelope In The Multi-Purpose Tray
Loading an Envelope in the Multi-purpose Tray Use the multi-purpose tray when you want to copy or print an envelope one by one. • The multi-purpose tray has priority over the cassette. NOTE Set the multi-purpose tray. Insert an envelope with the print side up (a flap should not be visible) and load it so that the left side (sender's address side) feeds first in the multi-purpose tray. - Page 24 For high-quality copies, be sure to use the paper and transparencies recommended by Canon. (→ p. 2-1) • When making copies of a small size document or thick paper, etc., the copy speed may be slightly slower than usual.
-
Page 25: Selecting The Paper Output Area
Selecting the Paper Output Area Face down paper output delivers paper with the printed side down. Face up paper output delivers paper with the printed side up. Select the output area depending on your purpose by opening or closing the left cover. Open the left cover for face up paper output or close the left cover for face down paper output. -
Page 26: Face Down Paper Output Area
Face Down Paper Output Area The paper is delivered with the printed side down on the output tray. Paper is stacked in printed order. With left cover, closed. • Do not place the output paper back on the output tray. •... - Page 27 2-10...
-
Page 28: Documents You Can Copy
(e.g. tracing paper* etc.) – Book Size (W × L) imageCLASS D340 Max.: Letter size (8 (216 mm × 279 mm) imageCLASS D320 Max.: Legal size (8 (216 mm × 356 mm) Quantity 1 sheet Weight Max. 4.4 lb (2 kg) When copying a transparent document such as tracing paper or transparencies, place a plain piece of white paper behind the document. -
Page 29: Scanned Area Of A Document
Problem Documents • Make sure any glue, ink, or correction fluid on the document is completely dry before placing it on the platen glass or loading it into the ADF*. • Remove all fasteners (staples, paper clips, etc.) before loading the document into the ADF*. •... -
Page 30: Setting Up Documents
Setting Up Documents For scanning, place your documents on the platen glass or load them into the ADF*. Where you set up your documents depends on the size and type of documents you have. (→ p. 3-1) * Only for the imageCLASS D340 model Open the platen glass cover. -
Page 31: Loading Documents In The Adf (Only For The Imageclass D340 Model)
Loading Documents in the ADF (Only for the imageCLASS D340 model) Make sure there is no document on the platen glass. Fan the edges that will feed into the machine first, then tap the edges of multiple page documents on a flat surface to even the stack. -
Page 32: The Paper Path Of The Automatic Document Feeder (Only For The Imageclass D340 Model)
The Paper Path of the Automatic Document Feeder (Only for the imageCLASS D340 model) Scanning unit • When documents are set in the ADF, the scanning unit moves to the position shown in the figure above NOTE and it is fixed there. When documents are not set in the ADF, the scanning unit moves to scan it. -
Page 34: Chapter 4: Making Copies
Chapter 4 Making Copies Documents You Can Copy For information on the types of documents you can copy, their requirements, and details on setting up documents, → Chapter 3. Copying Documents Prepare the document and load it face up in the ADF* or place it face down on the platen glass. -
Page 35: Canceling The Copy Job
Canceling the Copy Job While Scanning Documents in the ADF (Only for the imageCLASS D340 model) Press Stop/Reset. STOP KEY PRESSED PRESS SET KEY After Scanning Documents Press Stop/Reset. CANCEL COPYING? <YES Press Set. • The document that has stopped in the ADF will come out. -
Page 36: Basic Copying Functions
Basic Copying Functions Making Multiple Copies You can make multiple copies. Use the numeric keys to enter the number of copies you want. 100% TEXT • The LCD displays the number of copies you entered. • You can make up to 99 copies. Specifying the Paper Size and the Type (Common for Cassette and Multi-purpose Tray) •... -
Page 37: Specifying The Paper Type
* When FREESIZE is selected, specify the horizontal and vertical size of the paper in millimeter (mm). Available setting range in horizontal size : 5” (127 mm) to 14” (356 mm) Available setting range in vertical size Refer to the following conversion table for inches and millimeters. Inch Millimeter 3”... -
Page 38: Setting Enlarging/Reducing
Setting Enlarging/Reducing You can enlarge or reduce the copy size using preset copy ratios or using custom copy ratios. Enlarging/Reducing Using Preset Copy Ratios Press Enlarge/Reduce. PRESET RATIO 100% Use 4 (–) or e (+) to select the copy ratio. PRESET RATIO 78% LGL →LTR •... -
Page 39: Setting The Image Quality
Setting the Image Quality You can adjust image quality to the appropriate level best suited for a document with text or photos. Three modes are available for adjusting image quality. Press Image Quality to select the image quality. 100% TEXT/PHOTO Each time Image Quality is pressed, the image quality mode changes as follows: TEXT... -
Page 40: Special Features
Special Features The machine has the following SPECIAL COPY features. These features allow you to sort copies in page order, and create special copies easily. – Collate Copy Sorts copies in page order. – 2 on 1 Reduces 2 letter-size documents to fit on a single letter-size paper. –... -
Page 41: When Placing A Document On The Platen Glass
When Placing a Document on the Platen Glass Place the first page of a document on the platen glass. Press Collate/2 on 1. 100% COL. TEXT • COL. appears in the LCD. Use the numeric keys to set the copy quantity. -
Page 42: On 1 Copy
2 on 1 Copy Use 2 on 1 to reduce 2 sheets to fit on one sheet. Two letter-size documents are automatically reduced to fit on a letter-size page. • The 2 on 1 copy function is not available with an enlarging or reducing function. •... - Page 43 When Placing a Document on the Platen Glass Press Collate/2 on 1 twice. 2ON1 TEXT • 2ON1 appears in the LCD. Use the numeric keys to set the copy quantity. (→ p. 4-3) Place the first page of a document on the platen glass.
-
Page 44: Reserve Copy
Reserve Copy This feature allows you to reserve the next job while the machine is printing out a current job. Reserving the Next Copy Job Press Stop/Reset twice while the machine is printing out. 100% TEXT • Make sure that the machine has finished scanning all the documents, then press NOTE Stop/Reset. -
Page 45: Deleting The Copy Job You Reserved
Deleting the Copy Job You Reserved Press Stop/Reset while the machine is printing out. SELECT JOB TO CANCEL A0044 Use 4 (–) or e (+) to display the job to be deleted. SELECT JOB TO CANCEL 0045 4-12 Press Set. CANCEL COPYING? <YES 02 ×30... -
Page 46: Chapter 5: Basic Printing From Your Computer
Chapter 5 Basic Printing from Your Computer Before Printing Before printing, the printer driver must be installed in your computer. • If not, please see the Set-Up Sheet. Check if the machine is selected as the default printer. • You can check if your machine is set as the default printer when you open the Print dialog box in an application and your machine is selected in the printer box (see below for details). -
Page 47: Canceling Printing
Canceling Printing If you want to cancel printing before clicking [OK], click [Cancel] in the Print dialog box. If printing has already begun, follow this procedure to cancel printing from Windows On the Windows 98 desktop, click [Start], point to [Settings], then click [Printers]. Changing Print Settings Your machine is initially installed using factory-predefined settings, enabling you to print immediately. -
Page 48: Chapter 6: Status Monitor
Chapter 6 Status Monitor Checking the Status of Copy, Print and Report Jobs Use Status Monitor to confirm or delete the following jobs. - Copy jobs - Print jobs - Report jobs Confirming or Deleting a Copy Job Press Status Monitor. COPY STATUS A0002 06 ×01... - Page 49 Confirming or Deleting Report Jobs Press Status Monitor three times. REPORT STATUS A00 USER DATA LIST • If there is no job, NO REPORT JOBS EXIST is displayed. NOTE If there are report jobs and if you want to delete them, press Set. CANCEL REPORT? <YES If you decide to delete the job, press 4 (–)
-
Page 50: Chapter 7: Maintenance
Chapter 7 Maintenance Periodic Cleaning Your machine requires little periodic maintenance. This section describes the necessary cleaning procedures for your machine. • When cleaning the machine’s exterior or the platen glass, be sure to disconnect the power cord CAUTION before cleaning the machine. •... - Page 51 Cleaning the Read Area of the Platen Glass (Only for the imageCLASS D340 model) Black lines may appear in copies when the ADF is used to feed documents. This can be caused by glue, ink, correction fluid, or other foreign matters in the read area of the platen glass (shaded area).
-
Page 52: When To Replace The Cartridge
When to Replace the Cartridge The cartridge is a consumable item needs to be replaced when the toner runs out. The following guidelines will help you to determine when to replace the cartridge. If white streaks or light bands are displayed on copies, the toner in the cartridge is running low. -
Page 53: Copy Yield
This section describes the approximate number of copies that can be made per cartridge. Approximate Copy Yield Canon S35 Cartridge : approx. 3500 copies (A4 at 5% dot coverage*). * The term “A4 at 5% dot coverage” denotes an original on which the area covered with black ink is 5% of the total area of an A4-size sheet. -
Page 54: Storage Precautions
If you do not have the protective bag or shipping box for the cartridge, store the cartridge in a dark location. Recycling Used Cartridges Canon has instituted a worldwide recycling program for cartridges called “The Clean Earth Campaign.” This program preserves precious natural resources by utilizing a... -
Page 55: Replacing The Cartridge
Replacing the Cartridge This section describes how to remove the used cartridge and replace it with a new one. Before replacing the cartridge, be sure to read the section “When to Replace the Cartridge”. (→ p. 7-3) Open the right cover. Remove the cartridge from the machine. - Page 56 Hold the cartridge and position the arrow mark on the cartridge towards the inside of the machine shown below. Align the projections on both sides of the cartridge to the guides machine (location ) and gently slide the cartridge into the machine until the right cover slightly rises up (location •...
-
Page 57: The Clean Earth Campaign
The Clean Earth Campaign THE CANON CARTRIDGE RECYCLING PROGRAM The Canon Cartridge Recycling Program fulfills the first initiative of Canon’s Clean Earth Campaign, which supports four critical environmental areas: • Recycling in the Workplace • Conserving Environmental Resources • Scientific Research and Education •... -
Page 58: U.s.a. Program
Maximum length = 108 inches Maximum girth (length + 2 × width + 2 × height) = 130 inches If your shipment exceeds the above limits, please call 1-800-OK-CANON for special shipping information. Please Note: Do not send defective cartridges for replacement. -
Page 59: Shipping
Apply the UPS authorized returning label provided in this guide. Residents of Alaska and Hawaii: Do not use the UPS authorized returning label. For Alaska and Hawaii Canon set up alternative mail service with the U.S. Postal Service. Please call 1-800-OK-CANON to receive U.S. Postal Service merchandise returning label. -
Page 60: Canada Program-Canada Programme
Working to preserve endangered species is a long-standing Canon interest. To this end, for every cartridge collected, Canon Canada donates $1, shared equally between World Wildlife Fund Canada and the Nature Conservancy of Canada. This donation is utilized in Canada. -
Page 61: Repacking And Transporting Your Machine
Repacking and Transporting Your Machine Be sure to unplug the power cord before transporting the machine. If the machine is likely to be subjected to vibration (e.g., when transporting over long distances), the following precautions should be taken. If you do not follow these precautions, the machine may be damaged or the quality of your copy images may be adversely affected. -
Page 62: Carrying The Machine By The Sides
Carrying the Machine by the Sides Remove the cassette, the multi-purpose tray and the document feeder tray*. Grip the handles on the sides of the machine and lift up the machine, as shown in the illustration above. * Only for the imageCLASS D340 model •... - Page 63 7-14...
-
Page 64: Chapter 8: Troubleshooting
Chapter 8 Troubleshooting Clearing Jams This section describes how to remove jammed paper. Removing Jammed Paper from Inside the Main Unit When print media jams inside the main unit, the LCD displays REC. PAPER JAM. • There are some areas inside the machine and cartridge which are subject to high voltages and CAUTION high temperatures. - Page 65 Hold both sides of the jammed paper and carefully move it inward, then gently pull it out. • Do not pull the jammed paper upward; the toner on the paper will stain the printer and IMPORTANT cause a permanent reduction in print quality. Roll the trailing edge of the paper so that the printed surface is on the inside of the roll, then gently pull the rolled up paper out...
- Page 66 Gently pull the jammed paper between the output rollers until the leading edge emerges from the machine. Carefully pull the jammed paper through the rollers and out of the machine. Carefully pull the jammed paper straight out. • If the jammed paper is badly folded, similar to the folds of an accordion, ease the jammed paper loose and then pull it out of the printer.
-
Page 67: Removing Jammed Paper From The Adf (Only For The Imageclass D340 Model)
Removing Jammed Paper from the ADF (Only for the imageCLASS D340 model) When print media jams in the ADF, the LCD displays CHECK DOCUMENT or DOCUMENT TOO LONG. • Do not open the platen glass cover until the jammed paper is removed. Doing so will result in damaging the document and the paper. -
Page 68: Lcd Messages
LCD Messages The following messages are displayed in the LCD when the machine performs a function or if it encounters an error. This section describes the general messages and ones related to copy functions. Message CHECK DOCUMENT* There is a paper jam in the ADF. The ADF roller rotates without feeding documents. - Page 69 Message PRINTER DATA ERROR REC. PAPER JAM SCANNING MAKING SPACE IN MEM PLEASE WAIT START AGAIN STOP KEY PRESSED PRESS SET KEY* SUPPLY REC. PAPER SYSTEM ERROR Exxx* Only for the imageCLASS D340 model. xxx stands for a number. Cause Abnormality has occurred in the data transmission between the machine and computer.
-
Page 70: Paper Feeding Problems
The transparencies for color copiers may be loaded in the multi-purpose tray. • Do not use any transparencies for color copiers. They will cause a paper jam. Please use transparencies recommended by Canon. Paper feeds curled. Unacceptable paper is loaded. -
Page 71: Copying Problems
Rough paper stacked. Unacceptable paper is loaded. • Load proper paper in the cassette or multi-purpose tray. (→ chapter 2) • Select TRANSPARENCY in the PAPER TYPE of the Additional Functions. (→ p. 4-4) Repeated paper jams occur. The paper you are using may be causing the jams. •... -
Page 72: Print Quality Problems
The machine’s memory is full. • Print or delete any documents stored in memory to free up space in the machine’s memory, then start again. (→ p. 4-12) If the documents have black streaks or appear dirty after you feed them in the ADF. The read area of the platen glass is dirty. - Page 73 The copy images are partly missing or shaded when you make copies on thick paper. PAPER TYPE of PAPER SETTINGS of the Additional Functions may not be set correctly. • Select SPECIAL PAPER 1 in PAPER TYPE. (→ p. 9-2) The copy images are missing when you make copies on rough paper.
-
Page 74: Printing Problems
Printing Problems The Alarm indicator comes on. The machine may have a paper jam, or there may be no paper in the cassette or multi-purpose tray. • Clear the paper jam, or load paper in the cassette or multi-purpose tray. (→ pp. 8-1 to 8-4, 2-3 to 2-7) •... -
Page 75: If You Cannot Solve The Problem
If You Cannot Solve the Problem If you have a problem with your machine and you cannot solve it by referring to the information in this chapter, call your service representative. (→ p. vii) • If the machine makes strange noises, emits smoke or strange smells, unplug the power cord CAUTION immediately, and then call your service representative. -
Page 76: Chapter 9: Setting The Additional Functions
Chapter 9 Setting the Additional Functions Understanding the “Additional Functions” The menus of the Additional Functions can allow you to specify or register various settings. This chapter explains the procedure to access the menus, and the contents of the menus related to the common settings and the copy functions. -
Page 77: Menu Descriptions
Menu Descriptions PAPER SETTINGS Name PAPER SIZE PAPER TYPE COMMON SETTINGS Name PRINT EXPOSURE TONER SAVER MODE DISPLAY LANGUAGE Descriptions Selects the paper size. LTR, LGL, EXECUTIV, ENVELOPE (COM10, MONARCH, DL, ISO-C5), FREESIZE (horizontal and vertical size can be specified in millimeters),A4,B5,A5 Select the paper type. -
Page 78: Copy Settings
COPY SETTINGS Name STD. IMAGEQUALITY STANDARD EXPOSURE AUTO* MANUAL STD ZOOM RATIO STANDARD COPY QTY AUTO SORT* PAPER SIZE GROUP INCH SHARPNESS STANDARD EXPOSURE automatically changes to MANUAL when TEXT/PHOTO or PHOTO is selected. STD. IMAGEQUALITY automatically changes to TEXT ORIGINAL when AUTO is selected. Only for the imageCLASS D340 model. -
Page 79: Printer Settings
PRINTER SETTINGS Name PRESET PRINT QTY AUTO ERROR SKIP ERROR TIME OUT PRINTER RESET TIMER SETTINGS Name AUTO CLEAR ENERGY SAVER PRINT LISTS Name USER DATA Descriptions Sets the standard number of pages of the printer function. 01 to 99 (01) Sets either printing with skipping an error automatically, or without skipping an error. -
Page 80: Appendix: Specifications
Features are subject to change without notice due to product improvements. For high-quality copies, we recommended using paper and transparencies recommended by Canon. Some types of paper available at office supply stores may not be suitable for this copier. If you have any questions about paper and transparencies, consult your dealer or Canon Customer Relations. -
Page 82: Index
Index 4 (–) key ...1-6 e (+) key...1-6 2 on 1 copy...4-9 key...1-6 Additional Functions accessing ...9-1 key ...1-6, 9-1 understanding...9-1 ADF (Automatic Document Feeder) capacity ...3-4 jams in...8-4 loading documents in...3-4 AUTO CLEAR setting...4-1, 9-4 AUTO ERROR SKIP setting ...9-4 AUTO SORT setting...9-3 CANCEL COPYING? message ...6-1 CANCEL PRINTING? message ...6-1... - Page 83 Energy Saver key...1-6 ENERGY SAVER setting ...1-8, 9-4 Enlarge/Reduce key...1-6 setting...4-5 Envelopes loading ...2-4, 2-6 printing area ...2-2 ERROR TIME OUT setting ...9-4 Exposure automatically...4-6 key...1-6 manually...4-6 Feeder ...1-4 Guides document ...1-4, 3-4 Handling, safety instructions ...1-3 Image Quality key ...1-6, 4-6 Image Quality, setting...4-6 INCORRECT PAPER SIZE message ...8-5 Indicator...
- Page 84 Paper cassette ...1-5 feeding problems...8-7 jam...2-1 loading...2-3 printing area ...2-2 requirements...2-1 PAPER SETTINGS ...9-2 PAPER SIZE GROUP setting ...9-3 PAPER SIZE setting ...9-2 PAPER TYPE setting ...9-2 Plain paper ...2-1 Platen glass...1-5 glass cover...1-4 PLEASE WAIT message ...8-6 Positioning documents...3-3 Power cord connector ...1-4 Power supply, safety instructions ...1-2 PRESET PRINT QTY setting ...9-4...
- Page 85 STOP KEY PRESSED PRESS SET KEY message...8-6 Stop/Reset key...1-6, 4-1 SUPPLY REC. PAPER message ...8-6 SYSTEM ERROR message ...8-6 TIMER SETTINGS...9-4 Toner in the cartridge...7-3 TONER SAVER MODE setting...9-2 Transparencies...2-1, 3-1 Tray multi-purpose ...1-5 output ...1-5 USB interface connector...1-4 USER DATA setting ...9-4 Weight document...3-1 machine ...A-1...
- Page 86 CANON INC. 30-2, Shimomaruko 3-chome, Ohta-ku, Tokyo 146-8501, Japan CANON U.S.A., INC. One Canon Plaza, Lake Success, NY 11042, U.S.A. CANON CANADA INC. 6390 Dixie Road Mississauga, Ontario L5T 1P7, Canada CANON EUROPA N.V. Bovenkerkerweg 59-61 P.O. Box 2262, 1180 EG Amstelveen, The Netherlands CANON FRANCE S.A.