Advertisement
Quick Links
Package Contents
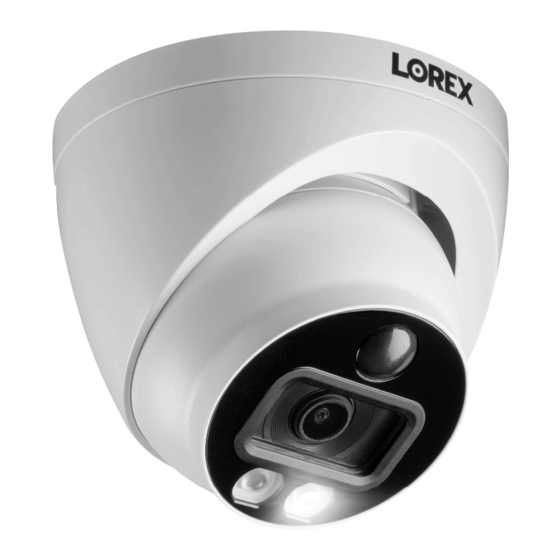
• 4K Active Deterrence Eyeball Camera
• Mounting Kit*
• BNC / Power Extension Cable*
• Power Adapter**
* Per camera in multi-camera packs.
** A multi-camera power adapter that provides power to multiple
cameras or individual power adapters may be provided depending on
product configuration.
ATTENTION:
A REGULATED UL / CSA APPROVED power supply is REQUIRED for use
with this camera (included). Use of a non-regulated, non-conforming
power supply can damage this product and voids the warranty.
Installation Tips
• Point the camera where there is the least amount of obstructions
(i.e., tree branches).
• Install the camera where vandals cannot easily reach.
• Secure cabling so that it is not exposed or easily cut.
• This camera is rated for outdoor use. Installation in a sheltered
location is recommended.
Using Deterrence Features
Use your Lorex app to manually activate the camera's white light when
connected to a compatible Lorex recorder.
PREREQUISITE:
Connect to your Lorex system using the app
specified in your recorder documentation.
To activate deterrence features manually:
1. Launch the app and tap your recorder to view connected channels.
2. Tap a connected deterrence camera to open it in single-channel view.
3. Tap
(A) to activate the white light.
Lorex Home
A
NOTE:
You can also set schedules and active areas of the camera image where
the white light will be triggered automatically when motion is detected. For full
instructions, refer to the app manual on your product page at lorex.com.
C861XC_QSG_EN_R2.indd 1
C861XC_QSG_EN_R2.indd 1
Resources
Visit us online for up-to-date software
1
Visit lorex.com
Search for the model
2
number of your product
Click on your product
3
in the search results
4
Click on the Downloads tab
Dimensions
Safety Precautions
• Read this guide carefully and keep it for future reference.
• Follow all instructions for safe use of the product and handle with care.
• Use the camera within given temperature, humidity and voltage levels
noted in the camera's specifications.
• Do not disassemble the camera.
• Do not point the camera directly towards the sun or a source of
intense light.
• Use only the supplied regulated power supply provided with the
Lorex Cloud
product. Use of a non-regulated, non-conforming power supply can
damage the product and void the warranty.
• Periodic cleaning may be required. Use a damp cloth only. Do not use
any harsh, chemical-based cleaners.
• The supplied cable is rated for surface mounting only. Cables for in-wall
and floor-to-floor installations are sold separately (CMR type). These
and other cables are available at lorex.com.
Disclaimers
A
• For a full list of compatible recorders, visit lorex.com/compatibility.
• Not intended for submersion in water. Installation in a sheltered
location recommended.
• This camera includes an Auto Mechanical IR Cut Filter. When the
camera changes between Day/Night viewing modes, an audible
clicking noise may be heard from the camera. This clicking is normal,
and indicates that the camera filter is working.
Copyright © 2019 Lorex Corporation
As our products are subject to continuous improvement, Lorex reserves the right
to modify product design, specifications and prices, without notice and without
incurring any obligation. E&OE. All rights reserved.
Need Help?
and complete instruction manuals
4.3" /
110mm
3.9" /
98mm
C861XC_QSG_EN_R2
4K Active Deterrence Eyeball Camera
Quick Start Guide
English Version 2.0
C861XC SERIES
www.lorex.com
2019-11-27 3:39:15 PM
2019-11-27 3:39:15 PM
Advertisement

Related Manuals for Lorex C861XC Series


Summary of Contents for Lorex C861XC Series
- Page 1 • This camera is rated for outdoor use. Installation in a sheltered location is recommended. 3.9” / 98mm Using Deterrence Features Use your Lorex app to manually activate the camera's white light when connected to a compatible Lorex recorder. Safety Precautions PREREQUISITE: Connect to your Lorex system using the app specified in your recorder documentation.
- Page 2 • Video is permanently black & white (even during day time). • Video is unclear, soft, or distorted. Mounting Surface 4. For more information on extension cables, visit lorex.com. Connect the female power Drywall Anchors (×3) head to the included power Troubleshooting adapter.