Daikin FXKQ25MVE Installation Manual
Hide thumbs
Also See for FXKQ25MVE:
- Operation manual (8 pages) ,
- Installation manual (14 pages) ,
- Operation manual (8 pages)
Table of Contents
Advertisement
Quick Links
SYSTEM
MODELS
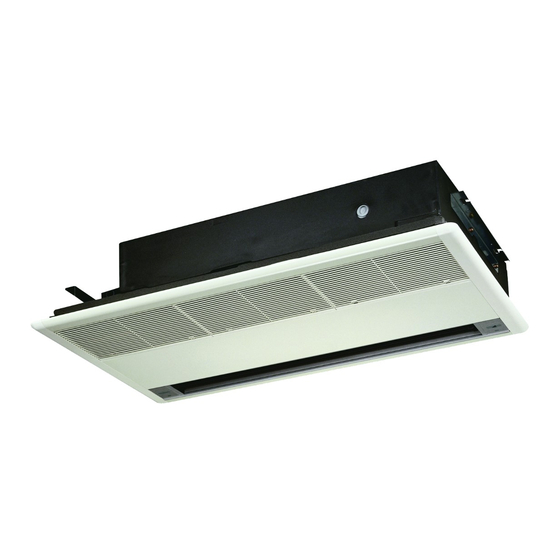
Ceiling-mounted cassette type (corner model)
FXKQ25MVE
FXKQ32MVE
FXKQ40MVE
FXKQ63MVE
CAREFULLY READ THESE INSTRUCTIONS BEFORE INSTALLATION.
KEEP THIS MANUAL IN A HANDY PLACE FOR FUTURE REFERENCE.
LESEN SIE DIESE HINWEISE VOR DER INSTALLATION SORGFÄLTIG DURCH.
BEWAHREN SIE DIESE ANLEITUNG AN EINEM LEICHT ZUGÄNGLICHEN ORT FÜR
SPÄTERES NACHSCHLAGEN AUF.
VEUILLEZ LIRE ATTENTIVEMENT CES INSTRUCTIONS AVANT L'INSTALLATION.
CONSERVEZ CE MANUEL EN LIEU SÛR POUR POUVOIR VOUS Y REPORTER ULTÉRI-
EUREMENT.
LEA DETENIDAMENTE ESTAS INSTRUCCIONES ANTES DE LA INSTALACIÓN.
CONSERVE ESTE MANUAL PARA POSIBLES CONSULTAS FUTURAS.
PRIMA DELL'INSTALLAZIONE, LEGGERE ATTENTAMENTE LE PRESENTI ISTRUZIONI.
CONSERVARE IL PRESENTE MANUALE IN UN LUOGO FACILMENTE ACCESSIBILE PER
RIFERIMENTO FUTURO.
ΔΙΑΒΑΣΤΕ ΠΡΟΣΕΚΤΙΚΑ ΑΥΤΕΣ ΤΙΣ ΟΔΗΓΙΕΣ ΠΡΙΝ ΤΗΝ ΕΓΚΑΤΑΣΤΑΣΗ.
ΦΥΛΑΞΤΕ ΑΥΤΟ ΤΟ ΕΓΧΕΙΡΙΔΙΟ ΣΕ ΒΟΛΙΚΟ ΜΕΡΟΣ ΓΙΑ ΜΕΛΛΟΝΤΙΚΗ ΑΝΑΦΟΡΑ.
LEES DEZE INSTRUCTIES ZOGVULDIG DOOR VOORDAT MET DE INSTALLATIE WORDT
BEGONNEN.
BEWAAR DEZE HANDLEIDING VOOR TOEKOMSTIG GEBRUIK OP EEN GESCHIKTE
PLAATS ONDER HANDBEREIK.
LEIA ATENTAMENTE ESTAS INSTRUÇÕES ANTES DA INSTALAÇÃO.
MANTENHA ESTE MANUAL NUM LOCAL DE FÁCIL ACESSO PARA CONSULTA.
ПЕРЕД УСТАНОВКОЙ ВНИМАТЕЛЬНО ПРОЧИТАЙТЕ ДАННЫЕ ИНСТРУКЦИИ.
ХРАНИТЕ ДАННОЕ РУКОВОДСТВО В ЛЕГКО ДОСТУПНОМ МЕСТЕ ДЛЯ ЕГО
ПОСЛЕДУЮЩЕГО ИСПОЛЬЗОВАНИЯ.
INSTALLATION MANUAL
FXKQ25MAVE
FXKQ32MAVE
FXKQ40MAVE
FXKQ63MAVE
Air Conditioners
FXKQ25MAVE9
FXKQ32MAVE9
FXKQ40MAVE9
FXKQ63MAVE9
English
Deutsch
Français
Español
Italiano
Ελληνικά
Nederlands
Português
Русский
Advertisement
Table of Contents

Related Manuals for Daikin FXKQ25MVE


Summary of Contents for Daikin FXKQ25MVE
- Page 1 INSTALLATION MANUAL English SYSTEM Air Conditioners Deutsch MODELS Français Ceiling-mounted cassette type (corner model) FXKQ25MVE FXKQ25MAVE FXKQ25MAVE9 Español FXKQ32MVE FXKQ32MAVE FXKQ32MAVE9 FXKQ40MVE FXKQ40MAVE FXKQ40MAVE9 FXKQ63MVE FXKQ63MAVE FXKQ63MAVE9 Italiano CAREFULLY READ THESE INSTRUCTIONS BEFORE INSTALLATION. KEEP THIS MANUAL IN A HANDY PLACE FOR FUTURE REFERENCE.
-
Page 2: Table Of Contents
VRV SYSTEM Air Conditioners Installation manual CONTENTS Otherwise, this may lead to an accident due to oxygen defi- ciency. 1. SAFETY PRECAUTIONS..........1 • Be sure to use only the specified parts and accessories for 2. BEFORE INSTALLATION ..........2 installation work. -
Page 3: Before Installation
• Install the air conditioner, power supply wiring, remote con- • Where the air contains high levels of salt such as that troller wiring and transmission wiring at least 1 meter away near the ocean and where voltage fluctuates greatly from televisions or radios to prevent image interference or such as that in factories. -
Page 4: Selecting Installation Site
OPTIONAL ACCESSORIES c. Points for explanation about operations • The optional decoration panel and remote controller are The items with WARNING and CAUTION marks in the required for this indoor unit. (Refer to Table 1, 2) instruction manual are the items pertaining to possibilities for Table 1 bodily injury and material damage in addition to the general usage of the product. -
Page 5: Preparations Before Installation
(3) Use suspension bolts for installation. Check whether (3) Install the suspension bolts. the ceiling is strong enough to support the weight of (Use M8 size suspension bolts.) the unit or not. If there is a risk, reinforce the ceiling Use anchors for existing ceilings and embedded inserts, before installing the unit. -
Page 6: Refrigerant Piping Work
• The refrigerant is pre-charged in the outdoor unit. • When connecting the pipings to the air conditioner, make sure to use a spanner and a torque wrench as shown in Fig. 1. • For the dimension of flared part and the tightening torque, refer to the Table 3. -
Page 7: Drain Piping Work
DRAIN PIPING WORK CAUTION <<Rig the drain pipe as shown below and take measures CAUTION TO BE TAKEN WHEN BRAZING REFRIGER- against condensation. Improperly rigged piping could lead ANT PIPING to leaks and eventually wet furniture and belongings.>> Do not use flux when brazing refrigerant piping. Therefore, use the phosphor copper brazing filler metal (BCuP-2: JIS Z 3264/ B-Cu93P-710/795: ISO 3677) which does not require flux. -
Page 8: Electric Wiring Work
• If converging multiple drain pipes, install according to the procedure shown below. Power supply T-joint converging drain pipes 1-220-240V Power supply Select converging drain pipes whose gauge is suitable for the terminal board PC board operating capacity of the unit. (2) After piping work is finished, check drainage flows smoothly. -
Page 9: Wiring Example And How To Set The Remote Controller
ELECTRICAL CHARACTERISTICS NOTE 1: Details of terminal block for power supply Power Units Fan motor Electric parts box supply Voltage Model Hz Volts MCA MFA range FXKQ25 · 32M(A)VE(9) 0.015 0.2 Power supply wiring 220- Max. 264 FXKQ40M(A)VE(9) 0.020 0.2 Plastic clamp and ground wiring (*) Min. - Page 10 HIGH CEILING INSTALLATION CAUTION FOR WIRING (1) This unit can be installed in ceilings up to 3.8 meters high. • For connection to the terminal block, use ring type crimp style If the ceiling height exceeds 2.7 meters, however, connect terminals with insulation sleeve or insulate the wirings prop- the connector on the terminal board (A2P) of indoor units as erly.
- Page 11 WIRING EXAMPLE 3. When including BS unit • Fit the power supply wiring of each unit with a switch and fuse Power as shown in the drawing. Outdoor unit supply 220-240V Control box IN/D OUT/D COMPLETE SYSTEM EXAMPLE (3 systems) 50Hz BS unit BS unit...
-
Page 12: Decoration Panel Installation
Wiring Method (See “ELECTRIC WIRING WORK”) 11. FIELD SETTING (3) Remove the electric parts box lid. Make sure the terminal box lids are closed on the indoor (4) Add remote control 2 (slave) to the terminal block for and outdoor units. remote controller (P1, P2) in the electric parts box. - Page 13 3P258319-8N EM02A082F (1904) HT...