Table of Contents
Advertisement
Quick Links
Advertisement
Table of Contents

Related Manuals for Daikin VRV FXKQ32AV16


Summary of Contents for Daikin VRV FXKQ32AV16
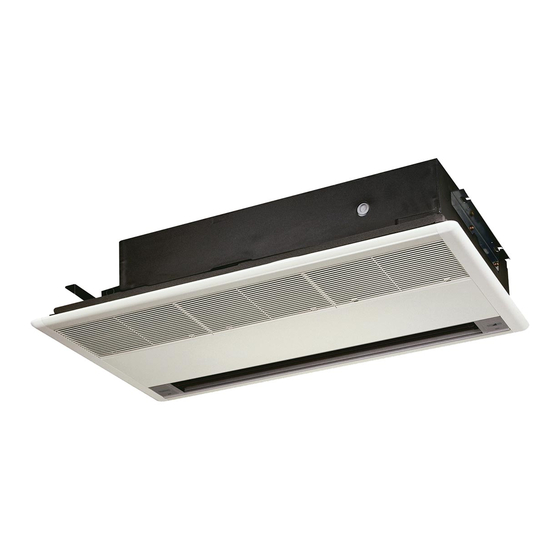
- Page 1 DAIKIN 3P714597-6B INSTALLATION MANUAL Model Ceiling Mounted Cassette (Single Flow) Type FXKQ32AV16 FXKQ40AV16 FXKQS0AV16 FXKQ63AV16 CAREFULLY READ THESE INSTRUCTIONS BEFORE INSTALLATION. KEEP THIS MANUAL IN A HANDY PLACE FOR FUTURE REFERENCE.
-
Page 2: Table Of Contents
I NSTAL LATION MANUAL FXKQ32AV16 FXKQ40AV16 FXKQ50AV16 FXKQ63AV16 CONTENTS 1.Safety precautions ............. 2 2.Before installation .............. 3 2-1 . Caution ..............3 2-2.Accessories ............... 4 2-3.Optional accessories ..........4 3.Selecting installation locations ........... 5 4.Preparations before installation ......... 5 5. lndoor unit installation ............6 6.Decorative panel installation.......... -
Page 3: Safety Precautions
A foundation of insufficient strength may result in the unit indoor unit as far away from fluorescent lamps as possible. falling and causing damage and injuries. • Install the drain pipe according to the manual to ensure proper drainage, and insulate the pipe to prevent •... -
Page 4: Before Installation
R41 0A contains no chlorine, does not destroy the components and parts may result in the unit falling, water ozone layer and so does not reduce the earth's leakage, electric shocks or fire hazards. protection against harmful ultraviolet radiation. R41 0A •... -
Page 5: 2-2.Accessories
2-2.Accessories 2-3.0ptional accessories • Please refer to catalogue of the indoor unit. Check if the following accessories are supplied with your air When performing installation work or checking after conditioner. completing installation, pay special caution to the installation manual following items. a.Main check items after completing installation. -
Page 6: Selecting Installation Locations
3. Selecting installation locations 4. Preparations before installation (1 )Determine the relative positions of the ceiling opening, -&_Caution---------------- units and lifting screw. (Unit [mm]) • Be sure to grasp the hanger bracket when carrying the air [When mounting by matching with panel] [Unit: conditioner with the package being opened or already opened. -
Page 7: Lndoor Unit Installation
or other field-supply parts for the newly-mounted Levelness of unit should not exceed 0.5 deg down at opposite ceiling. Before continuing installation, adjust the side of drain pump. clearance between the lifting screw and the ceiling to 50-80mm. [Installation example] Roof Long nut or thread line equipment... - Page 8 Screwing overtight will damage the flaring and result in Wrap to the flaring refrigerant leakage. nut joint. Please note that do not apply the oil to other parts excluding Figure 12 the flaring nut. Appling the oil to resin part, etc. will result in -,&.
-
Page 9: Drain Piping Installation
• Before brazing the refrigerant piping, perform nitrogen Caution--------------- replacement first, or charging nitrogen into the refrigerant If drain stagnates in the drain piping, the piping may be clogged. piping (Caution 1) during brazing (Caution 2), then connect with the indoor unit using the flaring. •... -
Page 10: Electrical Wiring Work
9. Electrical wiring work (2}Check if the drainage is proper after completing installation. After completing wiring installation 9-1.0verview • To prevent water from gathering in the electrical • Always shut down the power supply before performing any components such as the drain pump, add about electrical work. -
Page 11: 9-3.Electrical Characteristics
-.&, The lengths of remote controller wiring and transmission Caution---------------- wirings are as follows: • Outside the air conditioner, don't route the remote controller (1) Remote controller wiring wiring and transmission wiring together with other electrical (indoor unit - remote controller) ..... Max. 500 m wiring. - Page 12 System 2 Group control or 2 remote controllers control 1 indoor unit Transmission Power supply and Power Single phase ~220-240V wiring must be 50Hz Outdoor unit as Figure 20. i - - " " � I Note: No need to input the indoor unit address during group control. L_ _ J (After turning on the power supply, it will be set automatically.) Earth wire from field...
-
Page 13: 10-2.Two Remote Controllers Control One Indoor Unit
• To connect with the panel's connecting wires, refer to the panel installation manual for derailed information. If the factory setting 11. Decorative panel installation has not been changed, then only one remote for test run controller's setting needs to be changed. To perform test run without installing the decorative panel, Connecting method (refer to the chapter of "Electrical wiring read the chapter "12. - Page 15 DAIKIN OPERATION MANUAL Model Ceiling Mounted Cassette (Single Flow) Type FXKQ32AV16 FXKQ40AV16 FXKQ50AV16 FXKQ63AV16...
- Page 16 FXKQ32AV16 FXKQ40AV16 FXKQ50AV16 OPERATION MANUAL FXKQ63AV16 CONTENTS 1. Safety precautions 1.Safety precautions ............. 1 To gain full advantage of the air conditioner's functions 2.Names and functions of parts ..........4 and to avoid malfunction due to mishandling, please read 3.Maintenance (For service person) ........4 this operation manual carefully before use.
- Page 17 Beware of a fire in case of refrigerant leakage. Do not relocation and reinstallation of the air conditioner by yourself. If the air conditioner is not operating correctly, i.e. not Improper installation work may result in leakage, electric generating cool or warm air, refrigerant leakage could be shocks or a fire.
- Page 18 Do not place appliances that produce naked flames in Do not place objects direct proximity of the outdoor places exposed to the airflow from the air conditioner unit and do not let leaves and other debris accumulate as this may impair combustion of the burner. around the unit.
- Page 19 • Ask the technical expertise to install the optional accessories. Be use to use the specified accessories by Daikin. Improper installation by yourself may result in water leakage, electric shocks and fire hazards. -_&CAUTION-------------- •...
- Page 20 • Do not dry the air filter by a fire as it may catch fire. available. • Minimum storage period of key components and parts Daikin will have the key components and parts in stock ®Use a dust collector or@ wash with the for 9 years at least after discontinuing the production of water to remove the dust.
- Page 21 Non-trouble symptoms Following symbols are not troubles Following symptoms have their own causes and are not troubles, continue using this unit. Symbols Description Does not operate immediately • To protect the unit, start it again 3 minutes later after the operation stopped. •...
- Page 22 Check again Following symptoms have their own causes and are not troubles, continue using this unit. Symbols Description Are the breaker switch or fuse disconnected? ► Is the power off? Air conditioner does not work Is the timer's setting method proper? Is the air filter dirty? Are the indoor and outdoor unit's suction inlet and air outlet blocked? ►...