Table of Contents
Advertisement
Available languages
Available languages
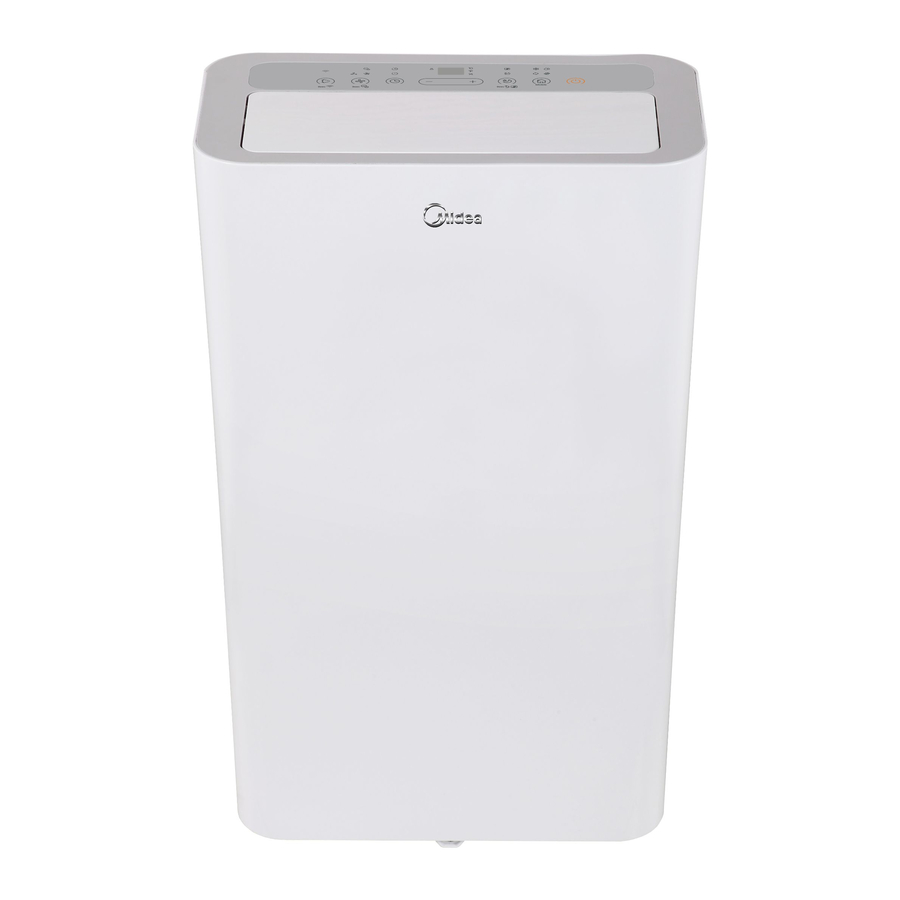
Item No. 888153 SKu No. 21615024 Model NO. MP72SQWBA2RCM
Item No. 888
PORTABLE AIR CONDITIONER
Owner's Manual
Customer Service / Service à la clientèle:
Our customer service staff is available to help you. For any problem with your purchase, or to receive further
information about this product, please call our toll-free number.
SAVE THIS MANUAL
Keep this manual and the original sales invoice in a safe, dry place for future reference.
Notre personnel du service à la clientèle est disponible pour vous aider. En cas de problème avec votre achat, ou pour
obtenir plus d'informations à propos de ce produit, veuillez composer notre numéro sans frais.
CONSERVEZ CE GUIDE
Conservez ce manuel avec la facture d'origine dans un endroit sûr et sec pour référence future.
149 SKu No.
21615025 Model NO. MP86SQWBA2RCM
Warranty
1
Limitée
1-866-646-4332
Advertisement
Chapters
Table of Contents

Related Manuals for Midea MP72SQWBA2RCM


Summary of Contents for Midea MP72SQWBA2RCM
- Page 1 Item No. 888153 SKu No. 21615024 Model NO. MP72SQWBA2RCM Item No. 888 149 SKu No. 21615025 Model NO. MP86SQWBA2RCM Warranty PORTABLE AIR CONDITIONER Owner's Manual Limitée Customer Service / Service à la clientèle: 1-866-646-4332 Our customer service staff is available to help you. For any problem with your purchase, or to receive further information about this product, please call our toll-free number.
-
Page 2: Table Of Contents
Table of Contents Safety Precautions Safety Precautions ................................Installation Instructions Preparation ................................ Design Notice ..............................Ambient Temperature Range For Unit Operating ..................Exhaust Hose Installation ..........................Choosing The Right Location ......................... Energy Rating Information ..........................Tools Needed ..............................Accessories ................................ Window Installation Kit ........................... -
Page 3: Safety Precautions
Safety Precautions Read Safety Precautions Before Operation and Installation To prevent death or injury to the user or other people and property damage, the following instructions must be followed. Incorrect operation due to ignoring of instructions may cause death, harm or damage. CAUTION WARNING This symbol indicates the possibility of... - Page 4 In a thunderstorm, the power must be cut off to avoid damage to the machine due to lightning. • Your air conditioner should be used in such a way that it is protected from moisture. • e.g. condensation, splashed water, etc. Do not place or store your air conditioner where it can fall or be pulled into water or any other liquid.
- Page 5 Disconnect the power if strange sounds, smell, or smoke comes from it. • Do not press the buttons on the control panel with anything other than your fingers. • Do not remove any fixed covers. Never use this appliance if it is not working properly, or if it has •...
- Page 6 WARNING (for using R32 refrigerant only) • Do not use means to accelerate the defrosting process or to clean, other than those recommended by the manufacturer. • The appliance shall be stored in a room without continuously operating ignition sources (for example: open ames, an operating gas appliance) and ignition sourcesor (for example:an operating electric heater) close to the appliance.
- Page 7 Explanation of symbols displayed on the unit(For the unit adopts R32 Refrigerant only): WARNING refrigerant is leaked and exposed to an external ignition source, there is a risk CAUTION This symbol shows that the operation manual should be read carefully. This symbol shows that a service personnel should be handling this CAUTION equipment with reference to the installation manual.
- Page 8 WARNINGS (for using R32 refrigerant only) 6)No ignition sources No person carrying out work in relation to a refrigeration system which involves exposing any pipe work that contains or has contained ammable refrigerant shall use any sources of ignition in such a manner that it may lead to the risk of re or explosion. All possible ingition sources, including cigarette smoking, should be kept su ciently far away from the site of installation, repairing, removing and disposal, during which ammble refrigerant can possibly be released to the surrounding space.
- Page 9 WARNINGS (for using R32 refrigerant only) 2)Particular attention shall be paid to the following to ensure that by working on electrical components, the casing is not altered in such a way that the level of protection is a ected. This shall include damage to cables, excessive number of connections, terminals not made to original speci cation, damage to seals, incorrect tting of glands, etc.
- Page 10 WARNINGS (for using R32 refrigerant only) Removal and evacuation When breaking into the refrigerant circuit to make repairs or for any other purpose conventional procedures shall be used. However, it is important that best practice is followed since ammability is a consideration. Opening of the refrigeration systems shall not be done by brazing.
- Page 11 WARNINGS (for using R32 refrigerant only) d) Pump down refrigerant system, if possible. e) If a vacuum is not possible, make a manifold so that refrigerant can be removed from various parts of the system. f) Make sure that cylinder is situated on the scales before recovery takes place. g) Start the recovery machine and operate in accordance with manufacturer's instructions.
-
Page 12: Installation Instructions
Installation Instructions Preparation NOTE: All the illustrations in the manual are for explanation purpose only. Your machine may be slightly di erent. The actual shape shall prevail. The unit can be controlled by the unit control panel alone or with the remote controller. -
Page 13: Choosing The Right Location
Choosing The Right Location Your installation location should meet the following requirements: -Make sure that you install your unit on an even surface to minimize noise and vibration. -The unit must be installed near a grounded plug, and the Collection Tray Drain (found on the back of the unit) must be accessible. -
Page 14: Tools Needed
the proper air conditioner, determine the square footage of the room you want to cool by multiplying the room length by its width. You also need to know the air conditioner's BTU (British Thermal Unit) rating, which indicates the amount of heat it can remove from a room. A higher number means more cooling power for a larger room. -
Page 15: Window Installation Kit
Window Installation Kit Exhaust hose Step One: Preparing the Exhaust Hose assembly Exhaust hose assembly Press the exhaust hose into the window slider adaptor Unit adaptor Window slider and unit adaptor, clamp automatically by adaptor elastic buckles of the adaptors. Type window installation Step Two: Install the Exhaust hose assembly to Hook... - Page 16 Window slider B Window slider Window (if required) B(if required) slider A Window slider A 2. Insert the window slider assembly into the window opening. Foam seal C Foam seal C (Non-adhesive type) (Non-adhesive type) 3. Cut the non-adhesive foam seal C strip to match the width(or height) of the window. Insert the seal between the glass and the window frame to prevent air and insects from getting into the room.
-
Page 17: Operating Instructions
Operating Instructions Control Panel Features NOTE: The following control panels are for explanation purpose only. The control panel of the unit you purchased may be slightly di erent according to the models. Your machine may not contain some indicators or buttons. - Page 18 Sleep(Eco)/Filter button Swing/Wireless(On some models) button Used to initiate the Auto swing feature. Used to initiate the SLEEP/ECO operation. Press the SWING button can stop the louver NOTE: After 250 hours of operation, the lter at the desired angle. indicator light illuminates. This feature is a Used to initiate the Wireless connection mode.
-
Page 19: Operation Instructions
NOTE: When one of the above malfunctions occurs, turn off the unit and unplug the power cord. turn off the unit, and check for any obstructions. Contact the manufacturer or its service agents or a Restart the unit, if the malfunction is still present, similar qualified person for service. -
Page 20: Other Features
Other features FOLLOW ME/TEMP SENSING feature Water drainage NOTE:This feature can be activated from the remote · During dehumidifying modes, remove the upper control ONLY. The remote control serves as a remote drain plug from the back of the unit, install the drain thermostat allowing for the precise temperature connector(5/8"... -
Page 21: Maintenance
NOTE: Make sure the hose is secure so there are no NOTE: Be sure to reinstall the bottom drain plug rmly leaks. Direct the hose toward the drain, making sure to prevent leakage before using the unit. that there are no kinks that will stop the warter owing. When the water drainage function is not in use, Place the end of the hose into the drain and make sure keep the upper and the lower drain plug rmly to... -
Page 22: Store The Unit When Not In Use
Store the unit when not in use · Drain the unit’s water collection tray according to the instructions in the following section. · Run the appliance on FAN mode for 12 hours in a warm room to dry it and prevent mold. ·... - Page 23 Remote Control Specifications Model RG57H4(B)/BGEF 3.0V(Dry batteries R03/LR03×2) Rated Voltage Signal Receiving Range -5 C~60 C(23 F~140 F) Environment CAUTION: INGESTION HAZARD - Contains small batteries, Keep out of reach of small children. If swallowed, seek immediate medical attention. Page 23 ...
- Page 24 Function Buttons Before using your new air conditioner, make sure to familiarize yourself with the remote controller. The following is a brief introduction to the remote controller. For instructions on how to operate your air conditioner, refer to the "How to Use the Basic Functions" section of this manual. SHORT CUT ON/OFF Sets and activates your...
- Page 25 Handling the Remote Controller TIPS FOR USING THE REMOTE CONTROLLER The remote controller must be used within 8 UNSURE ABOUT A FUNCTION meters of the unit. Refer to the "How to Use Basic Functions" and "How to Use Advanced Functions" sections The unit will beep when the remote signal is of this manual for a detailed description of received.
- Page 26 Remote LED Screen Indicators Transmission indicator Lights up when the remote sends asignal to the unit. ON/OFF display MODE display Appears when the unit is turned on Displays the current and disappears when it is turned off. mode, including: TIMER OFF display TIMER ON display AUTO Displays when TIMER...
- Page 27 How to Use the Basic Functions SETTING THE TEMPERATURE The operating temperature range for units is 17-30 C (62 F-86 F). You can increase or decrease the set tem perature in 1 C (1 F) increments. AUTO Operation In Auto mode, the unit will automatically select the COOL, FAN, HEAT, or DRY mode based on the set temperature.
- Page 28 How to Use the Basic Functions DRY Operation (dehumidifying) 1. Press the MODE button to select the DRY mode. 2. Set your desired temperature using the Temp or Temp button. 3. Press the ON/OFF button to start the unit. NOTE: FAN SPEED cannot be changed in DRY mode.
- Page 29 How to Use the Basic Functions HEAT Operation 1. Press the MODE button to select the HEAT mode. 2. Set your desired temperature using the Temp or Temp button. 3. Press the FAN button to select the fan speed: AUTO, LOW, MED,or HIGH. 4.
- Page 30 Setting the TIMER Function Your air conditioning unit has two timer-related functions: TIMER ON- sets the amount of time after which the unit will automatically turn on. TIMER ON TIMER ON TIMER OFF- sets the amount of time after which the unit will automatically turn off. TIMER ON Function The TIMER ON function allows you to set a period of time after which the unit will...
- Page 31 TIMER OFF Function The TIMER OFF function allows you to NOTE: When setting the TIMER ON or set a period of time after which the unit TIMER OFF functions up to 10 hours, will automatically turn off for instance when the time will increase in 30-minute you wake up.
- Page 32 Setting TIMER ON and TIMER OFF at the Same Time Keep in mind that the time periods you set for both functions refer to hours after the current time. For example, if the current time is 1:00 PM and you want the unit to turn on automatically at 7 PM, operate for 2 hours, and automa-tically turn off at 9 PM, do the following: TIMER ON...
- Page 33 Example: Setting the unit to turn on after 6 hours, operate for 2 hours, then turn off (see the figure below). Your remote display Timer on Timer is set to turn ON 6 hours from the current time Timer off Timer is set to turn OFF 8 hours from the current time Unit turns...
- Page 34 How to Use the Advanced Functions SLEEP Function The SLEEP function is used to decrease energy use while you sleep (and don t need the same temperature settings to stay comfortable). This function can only be activated via remote control. Note: The SLEEP function is not available in FAN or DRY mode.
- Page 35 NOTE: -Buttons design is based on a typical model and may be slightly different from the actual unit you purchased. In such case, actual unit buttons shall prevail. -All the functions described are accomplished by the unit. Inoperative features on the unit. -If the function description in the OPERATOR'S MANUAL and "Remote Controller Illustration"...
-
Page 36: Air Conditioner Limited Warranty
(failure, missing part, etc.), please contact one of our service technicians at our toll- free service line at 1-866-646-4332 from 8 AM to 6 PM EST, Monday to Friday, and 8 AM to 4 PM EST, Saturday. Midea reserves the right to repair or replace the defective product, at its discretion. - Page 39 No. d'article 888153 Réf. 21615024 Modèle NO. MP72SQWBA2RCM No. d'article 888149 Réf. 21615025 Modèle NO. MP86SQWBA2RCM Warranty CLIMATISEUR PORTATIF Manuel de l'utilisateur Limitée Customer Service / Service à la clientèle: 1-866-646-4332 Our Customer service staff is available to help you. For any problem with your purchase, or to receive further information about this product, please call our toll-free number.
- Page 40 Table des Matières Prcautions de Sécurité Précautions de Sécurité......................Guide d’Installation Préparation ........................... Avis de Conception........................Plage de Température Ambiante pour le Fonctionnement de ............Choisir le bon emplacement ......................Installation Recommendée ......................Information sur l'Évaluation Énergétique ..................Outils Nécessaires........................... Accessoires.............................
-
Page 41: Précautions De Sécurité
Précautions de Sécurité Lisez les Précautions de Sécurité Avant l’Opération et l’Installation pour éviter tout risque fatale ou de blessure à l'utilisateur ou d'autres personnes, ainsi que pour les dommages matériels, les instructions suivantes doivent être suivies. Une mauvaise opération due au non- respect des instructions peut causer des dommages corporels ou des dommages à... - Page 42 qu'elle ne subit aucun dommage. Si vous pensez que l'appareil a été endommagé, contactez un technicien ou le service à la clientèle pour obtenir de l'aide. En cas d'orage, le courant doit être coupé pour éviter que la machine ne soit endommagée •...
- Page 43 N'utilisez pas ce produit pour des fonctions autres que celles décrites dans ce manuel • d'instructions. Avant le nettoyage, éteignez l’appareil et débranchez-le. • Débranchez le cordon d'alimentation s’il y a des sons, de l’odeur ou de la fumée étranges en émanent. Appuyez sur les boutons du panneau de commande qu’avec vos mains.
- Page 44 AVERTISSEMENT : (pour utiliser uniquement le réfrigérant R32) • N'utilisez pas de moyens pour accélérer le processus de décongélation ou pour nettoyer, autres que ceux recommandés par le fabricant. • L'appareil doit être entreposé dans une pièce sans fonctionnement continu (par exemple : ammes nues, appareil à...
- Page 45 Explication des symboles a chés sur l'appareil (pour que l'unité adopte le réfrigérant R32 uniquement) : Ce symbole indique que cet appareil utilisait un réfrigérant AVERTISSEMENT in ammable. Si le uide frigorigène fuit et est exposé à une source PRÉCAUTION Ce symbole indique que le manuel d'utilisation doit être lu attentivement.
- Page 46 AVERTISSEMENTS (pour l'utilisation du réfrigérant R32 uniquement) 5) Présence d'extincteur Si un travail à chaud doit être e ectué sur l’équipement de réfrigération ou sur toute pièce associée, un équipement d’extinction approprié doit être disponible. Avoir un extincteur à poudre sèche ou à CO2 à proximité de la zone de chargement. 6) Aucune source d'in ammation Aucune personne e ectuant des travaux en relation avec un système de réfrigération impliquant l'exposition de tuyauteries contenant ou ayant contenu des frigorigènes...
- Page 47 CONSIGNES D'INSTALLATION • Réparation de composants scellés 1) Pendant les réparations des composants scellés, toutes les alimentations électriques doivent être débranchées de l'équipement sur lequel on travaille avant de retirer les couvercles scellés, etc. S'il est absolument nécessaire de fournir une alimentation électrique à...
- Page 48 CONSIGNES D'INSTALLATION • Enlèvement et évacuation Lors de la pénétration dans le circuit de réfrigérant pour e ectuer des réparations ou pour tout autre usage, des procédures conventionnelles doivent être utilisées. Cependant, il est important de suivre les meilleures pratiques car l’in ammabilité est une considération.
- Page 49 CONSIGNES D'INSTALLATION d) Si possible, pomper le système de réfrigération. e) Si le vide n’est pas possible, fabriquez un collecteur de sorte que le uide frigorigène puisse être retiré de diverses parties du système. f) Assurez-vous que le cylindre est situé sur la balance avant la récupération. g) Démarrer la machine de récupération et opérer conformément aux instructions du fabricant.
-
Page 50: Guide D'installation
Guide d’Installation Préparation NOTE : Les illustrations dans le manuel sont à des ns d'explication seulement. Votre machine peut être légèrement di érente. La forme réelle prévaudra. L’appareil peut être contrôlé par le panneau de commande seulement ou avec la télécommande. Panneau de commande lame de persienne... -
Page 51: Installation Recommendée
Choisir L’Emplacement Correct Votre emplacement d'installation doit répondre aux exigences suivantes : -Assurez-vous d’installer votre appareil sur une surface plate a n de minimiser le bruit et les vibrations. -L'appareil doit être installé à proximité d'une prise mise à la terre et le Drain du Bac Collecteur (situé... -
Page 52: Outils Nécessaires
plus d'énergie de refroidissement pour une pièce plus grande.(Soyez sûr que vous ne comparez que de nouveaux modèles les uns aux autres - les modèles plus anciens peuvent sembler avoir une capacité plus élevée, mais sont en fait les mêmes).Assurez- vous de “grandir”... -
Page 53: Kit D'installation Pour La Fenêtre
Kit d’Installation pour la Fenêtre Ensemble de Tuyau d’évacuation tuyau d'évacuation Adaptateur Adaptateur de patin I'appareil d'étanchéité élastiques des adaptateurs. Crochet Assise de trou d'évacuation dans la rainure inférieure de la sortie d'air de l'appareil tandis que le crochet Assurez-vous que Rainure inférieure Adaptateur l'adaptateur est inséré... - Page 54 Battant coulissant Battant coulissant Battant coulissant pour la fenêtre B pour la fenêtre B pour la fenêtre A (Si nécessaire) (Si nécessaire) Battant coulissant pour la fenêtre A 2. Coupez la joint d’étanchéité de mousse non adhésive C en fonction de la largeur (ou de la hauteur) de la fenêtre.
-
Page 55: Instructions Opérationnelles
Instructions opérationnelles Caractéristiques du panneau de commande NOTE : Les panneaux de commande suivants servent uniquement d’explication. Le panneau de commande de l'appareil que vous avez achetée peut être légèrement di érent selon les modèles. Votre appareil peut ne pas contenir d’indicateurs ou de boutons. La forme réelle prévaudra. Indicateur Fonction Fonction... - Page 56 Bouton Veille (Eco)/Filtre Utilisé pour lancer l'opération VEILLE/ ECO. NOTE : Après 250 heures de fonctionnement, le voyant du ltre s’allume. Cette fonction vous rappelle de nettoyer le ltre à air pour un fonctionnement plus e cace. Appuyez sur ce bouton pendant 3 secondes pour annuler le rappel.
-
Page 57: Instructions D'opération
NOTE : Lorsque l'un des dysfonctionnements ci-dessus se présent, éteignez l'appareil et débranchez le cordon produit, éteignez l'appareil et vérifiez qu'il n'est pas d'alimentation. Contactez le fabricant ou ses agents de obstrué. Redémarrez l'appareil, si le dysfonctionnement service ou une personne qualifiée similaire pour le service. est toujours Instructions d’Opération Opération REFROIDISSEMENT... -
Page 58: Autres Caractéristiques
Autres caractéristiques Fonction SUIVEZ-MOI / DÉTECTION DE TEMPÉRATURE Drainage de l'eau NOTE : Cette fonction peut être activée à distance · En mode déshumidification, retirez le bouchon de SEULEMENT. La télécommande sert de thermostat à vidange supérieur situé à l'arrière de l'appareil, puis distance permettant un contrôle précis de la installez le connecteur de vidange (raccord femelle température à... -
Page 59: Maintenance
NOTE : Assurez-vous que le tuyau est sécurisé a n qu'il n'y NOTE : Assurez-vous de réinstaller fermement le ait pas de fuites. Dirigez le tuyau vers le drain, en vous bouchon de vidange inférieur pour éviter les fuites avant assurant qu'il n'y a pas de plis qui empêcheraient l'eau de d'utiliser l'appareil. -
Page 60: Conservez L'appareil Lorsqu'il N'est Pas Utilisé
Conservez l'appareil lorsqu'il n'est pas utilisé · Videz le bac collecteur d’eau de l’appareil conformément aux instructions de la section suivante. · Faites fonctionner l'appareil en mode VENTILATEUR pendant 12 heures dans une pièce chaude pour le sécher et éviter les moisissures. ·... - Page 61 RG57H4(B)/BGEF Page 23 ...
- Page 62 Fonctionnement des boutons Avant d'utiliser votre nouveau climatiseur, prenez le temps de vous familiariser avec la télécommande. Ce qui suit est une brève introduction à la télécommande. Pour les instructions d'utilisation de votre climatiseur, veuillez vous reporter à la section Utilisation des fonctions de base du présent manuel. ON/OFF (allumer/éteindre) SHORT CUT (raccourci) Pour régler et activer vos...
- Page 63 Fonctionnement des boutons VOUS NE SAVEZ PAS À QUOI SERT UNE FONCTION? Consultez la description détaillée de votre climatiseur dans les sections Utilisation des fonctions de base et Utilisation des fonctions avancées du présent manuel. REMARQUE SPÉCIALE Les conceptions des boutons de votre appareil peuvent légèrement différer de l'exemple illustré.
- Page 64 Témoins de l'écran à DEL de la télécommande Témoin de transmission S'allume lorsque la télécommande envoie un signal à l'appareil. Affichage ON / OFF Écran MODE Apparaît lorsque l'appareil est Affiche le mode allumé, et disparaît quand il est éteint. actuel, y compris : Écran TIMER OFF Écran TIMER ON...
- Page 65 Utilisation des fonctions de base RÉGLAGE DE LA TEMPÉRATURE La température de fonctionnement de l'appareil se situe entre 17 et 30 °C (62 et 86 °F). La température réglée peut être augmentée ou diminuée en incréments de 1 °C (1 °F). Utilisation du mode AUTO (automatique) L'appareil en mode AUTO (automatique) sélectionnera automatiquement le mode COOL...
- Page 66 Utilisation des fonctions de base Utilisation du mode DRY (assèchement) 1. Appuyer sur le bouton MODE pour sélectionner le mode DRY (assèchement). 2. Régler à la température désirée à l'aide du bouton Temp (arrow up) ou Temp (arrow down). 3. Appuyer sur le bouton ON/OFF (allumer/éteindre) pour démarrer l'appareil.
- Page 67 Utilisation des fonctions de base Utilisation du mode HEAT (chaleur) 1. Appuyer sur le bouton MODE pour sélectionner le mode HEAT (chaleur). 2. Régler à la température désirée à l'aide du bouton Temp (arrow up) ou Temp (arrow down). 3. Appuyer sur le bouton FAN (ventilation) pour sélectionner la vitesse de ventilation : AUTO (automatique), LOW (faible), MED (moyen) ou HIGH (élevé).
- Page 68 Réglage de la fonction TIMER (minuterie) Votre climatiseur a deux fonctions de minuterie connexes : La fonction TIMER ON (minuterie activée) TIMER ON TIMER ON fixe la période de temps après laquelle l'appareil s'allumera automatiquement. La fonction TIMER OFF (minuterie désactivée) fixe la période de temps après laquelle l'appareil s'éteindra automatiquement.
- Page 69 Fonction TIMER OFF (minuterie désactivée) REMARQUE : Chaque pression des fonctions La fonction TIMER OFF (minuterie désactivée) TIMER ON et TIMER OFF équivaut à 30 vous permet de de fixer une période de temps minutes jusqu'à concurrence de 10 h. Après après laquelle l'appareil s'éteindra 10 h et jusqu'à...
- Page 70 Réglage des fonctions TIMER ON et TIMER OFF en même temps Prendre note que les périodes de temps que vous réglez pour les deux fonctions font référence aux heures après l'heure actuelle. Par exemple, s'il est actuellement 13 h, et vous souhaitez que l'appareil s'allume automatiquement à...
- Page 71 Exemple : réglage pour que l'appareil s'allume après 6 heures, fonctionne pendant 2 heures, s'éteigne (voir la figure ci-dessous). Écran de votre télécommande Timer on La minuterie est réglée pour que l'appareil s'allume 6 heures après l'heure actuelle. Timer off La minuterie est réglée pour que l'appareil s'éteigne 8 heures après l'heure actuelle.
- Page 72 Utilisation des fonctions avancées Fonction SLEEP (veille) La fonction SLEEP permet de réduire la consommation énergétique pendant que vous dormez (la température n'a pas besoin d'être la même pour être confortable). Cette fonction s'active uniquement avec la télécommande. REMARQUE : La fonction SLEEP n'est pas disponible en mode FAN ou DRY.
- Page 73 REMARQUE : La conception des boutons repose sur le modèle habituel et peut légèrement différer de celle de votre appareil actuel. Le cas échéant, la forme actuelle prévaudra. Toutes les fonctions décrites sont exécutées par l'appareil. Si votre appareil n'est pas doté...
- Page 74 à un technicien au 1-866-646-4332, du lundi au vendredi de 8 h à 18 h HNE, le samedi de 8 h à 16 h HNE. Midea se réserve le droit de réparer ou remplacer le produit défectueux à sa discrétion.