Table of Contents
Advertisement
Quick Links
MIDEA
8
Function
L
Wall Oven 82 / 600mm
Warning notices: Before using this product,
please read this manual carefully and keep
it for future reference. The design and
specifications are subject to change without
prior notice for product improvement.
Consult with your dealer or manufacturer
for details.
INSTALLATION
INSTRUCTIONS
USER GUIDE
310
503
Advertisement
Table of Contents

Related Manuals for Midea 310503


Summary of Contents for Midea 310503
- Page 1 INSTALLATION INSTRUCTIONS USER GUIDE MIDEA Function Wall Oven 82 / 600mm Warning notices: Before using this product, please read this manual carefully and keep it for future reference. The design and specifications are subject to change without prior notice for product improvement.
-
Page 2: Table Of Contents
CONTENTS SAFETY INFORMATION Intended use Warning Causes of Damage INSTALLATION KNOW YOUR APPLIANCE Control Panel Operating Modes Accessories OPERATE YOUR APPLIANCE First use Selecting Modes ENERGY EFFICIENT USE ENVIRONMENT HEALTH MAINTENANCE YOUR APPLIANCE Cleaning Agent Appliance Door CURE YOUR APPLIANCE WHEN NEEDED CUSTOMER SERVICE TIPS AND TRICKS TYPICAL RECIPES... -
Page 3: Safety Information
SAFETY INFORMATION Intended Use Thank you for buying Vogue Built-in Oven. Before unpacking it, please read these instructions carefully. Only then will you be able to operate your appliance safely and correctly. Warmly recommend retain the instruction manual and installation instructions for future use or for subsequent owners. - Page 4 Risk of burns! The appliance becomes very hot. Never touch the interior surfaces of the appliance or the heating elements. Always allow the appliance to cool down. Keep children at a safe distance. Accessories and ovenware become very hot. Always use oven gloves to remove acces sories or ovenware from the cavity.
-
Page 5: Causes Of Damage
Causes of Damage Accessories, foil, greaseproof paper or ovenware on the cavity floor: do not place accessories on the cavity floor. Do not cover the cavity floor with any sort of foil or greaseproof paper. Do not place ovenware on the cavity floor if a temperature of over 50 ºC has been set. -
Page 6: Installation
INSTALLATION min.35 min. min. min. min. min.585 min. min. max.595 min.35 min.35 To operate this appliance safe , please be sure that it has been installed to a professional standard respecting the installation instructions . Damages occur because of incorrect installation are not within the warranty. -
Page 7: Know Your Appliance
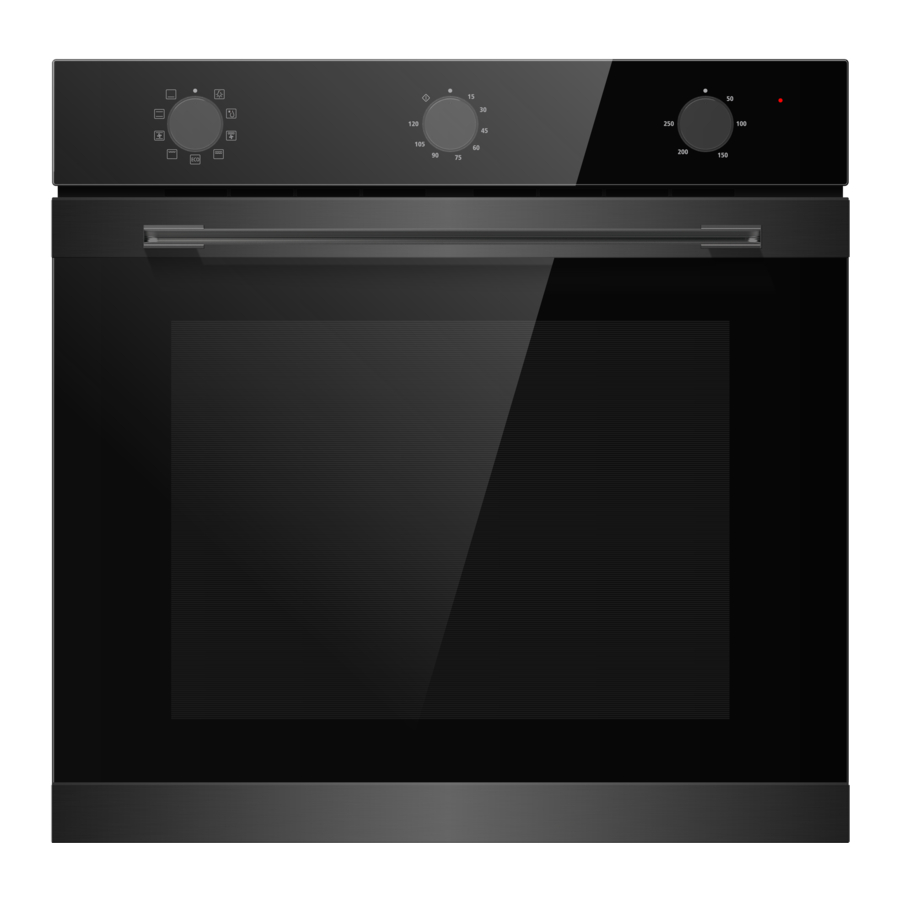
KNOW YOUR APPLIANCE IDENTIFYING THE APPLIANCE In this chapter, we will explain the control panel and accessories. At the same time you will also find out about the various functions of your appliance. Note: Depending on the appliance model, individual details and colors may different. CONTROL PANEL Knobs Turn these knobs to set operating mode, each knob is well fitted with the nearby... -
Page 8: Operating Modes
OPERATING MODES Your appliance has various operating modes which make your appliance easier to use. To enable you to find the correct type of heating for your dish, we have explained the differences and scopes of application here. The symbols for each type help you to remember them. Types of heating Heating Mode Temperature... - Page 9 Notes To defrost big portions of food, it is possible to remove the side-racks and place the container on the cavity floor. To warming tableware, it is beneficial to remove the side-racks and the heating modes “Hot Air Grilling” and “Fan Heating” with temperature setting of 50°C are useful. “Hot Air Grilling”...
-
Page 10: Accessories
ACCESSORIES Your appliance is accompanied by a range of accessories. Here, you can find an overview of the accessories included and information on how to use them correctly. Accessories included Your appliance is equipped with the following accessories: Wire Rack Baking Tray For ovenware, cake tins and For tray bakes and small... - Page 11 Locking function The accessories can be pulled out approximately halfway until they lock in place. The locking function prevents the accessories from tilting when they are pulled out. The accessories must be inserted into the cavity correctly for the tilt protection to work properly. When inserting the wire rack, ensure the wire rack is onto the right facing direction like the picture When inserting the backing tray, ensure the backing tray is onto the right facing direction...
-
Page 12: Operate Your Appliance
Note Not all optional accessories are suitable for every appliance. When purchasing, please always quote the exact identification number of your appliance. → "Customer Service" on page 26 OPERATE YOUR APPLIANCE First use Before using the appliance to prepare food for the first time, you must clean the cavity and accessories. -
Page 13: Selecting Modes
Settings Heating Mode Temperature 250°C Time After the appliance has cooled down: Clean the smooth surfaces and the door with soapy water and a dish cloth. Dry all surfaces. Install the side-racks. Selecting Modes The default operating mode is switching off. If you would like to select a cooking operat- ing mode, you can do so using left mode-control knob. - Page 14 Switching On As now you already finished the setting of the operating mode and temperature. If you would like to turn the appliance on, you can do so using time-control knob. There is a pointer on the knob, turn this knob to make the pointer to point to the cooking time which you would like to choose.
- Page 15 Turn the temperature-control knob from present to others while the appliance is operat- ing means to get the cooking temperature changed while food is being cooked. By this time, if you turn the knob back to the original position, the heating elements will be switched off.
-
Page 16: Energy Efficient Use
ENERGY EFFICIENT USE Remove all accessories, which are not necessary during the cooking & baking process Do not open the door during the cooking & baking process. If you open the door during cooking & baking, switch the mode to “Lamp” (Without change the temperature setting). -
Page 17: Health
HEALTH Acrylamide occurs mainly by heating up starchy food (i.e. potato, French fries, bread) to very high temperatures over long times. Tips Use short cooking times. Cook food to a golden yellow surface color, do not burn it to dark brown colors. Bigger portions have less acrylamide. - Page 18 Area Appliance exterior Cleaning Hot soapy water: Clean with a dish cloth and then dry with a soft cloth. Remove flecks of limescale, grease, starch and albumin (e.g. egg Appliance exterior white) immediately. Stainless steel front Corrosion can form under such flecks. Special stainless steel cleaning products suitable for hot surfaces are available from our after-sales service or from specialist retailers.
- Page 19 Area Appliance exterior Cleaning Hot soapy water: Accessories Soak and clean with a dish cloth or brush. If there are heavy deposits of dirt, use a stainless steel scouring pad. Hot soapy water: Rails Soak and clean with a dish cloth or brush. Hot soapy water: Clean with a dish cloth or a brush.
-
Page 20: Appliance Door
APPLIANCE DOOR With good care and cleaning, your appliance will retain its appearance and remain fully functional for a long time to come. This will tell you how to remove the appliance door and clean it. For cleaning purposes and to remove the door panels, you can detach the appliance door. The appliance door hinges each have a locking lever. - Page 21 Fitting the appliance door Reattach the appliance door in the opposite sequence to removal. When attaching the appliance door, ensure that both hinges are placed right onto the installing holes of the front panel of the cavity. Ensure that the hinges are inserted into the correct position. You must be able to insert them easily and without resistance.
- Page 22 Change the power cord Position A show the terminal box position on the back of the back outer case and it’s closed. Steps: a. cut off the power, use small flat screwdriver to open two snap 1,2. b. use Phillips crewdriver to take off screws 3,4 ,5and6. c.
-
Page 23: Cure Your Appliance When Needed
Caution! While the appliance door is well installed, the door cover can also be taken off, by this time. Removing the door cover means to set the inner glass of the appliance door free, the glass can be easily moved and cause damage or injury. As removing the door cover and inner glass means to reduce the overall weight of the appliance door. - Page 24 Fan does not work all the time in This is a normal operation due to the best possible heat the mode: “Fan Heating” distribution and best possible performance of the oven. After a cooking process a noise The cooling fan is still working, to prevent high can be heard and a air flow in the moisture conditions in the cavity and cool down the near of the control panel can be...
- Page 25 WARNING Risk of electric shock! When replacing the lamp, the lamp socket contacts are live. Before replacing the lamp, unplug the appliance from the mains or switch off the circuit breaker in the fuse box. Risk of burns! The appliance becomes very hot. Never touch the interior surfaces of the appliance or the heating elements.
-
Page 26: Customer Service
When calling us, please give the model number and S/N so that we can provide you with the correct advice. The rating plate bearing these numbers can be found when you open the appliance door. Model: 310503 Rated voltage: 220-240V~ Rated frequency:... -
Page 27: Tips And Tricks
TIPS AND TRICKS You want to cook your Try to use settings of similar recipes first and optimize own recipe the cooking process due to the result. Put a wooden stick inside the cake about 10 minutes before the given baking time is reached. If there is no raw Is the cake baked ready? dough at the stick after pulling out, the cake is ready. - Page 28 Every heat resistant baking ware can be used. It is recommended not to use aluminum in direct contact with Which kind of baking ware can be used? food, especially when it is sour. Please ensure a good fitting between container and lid. Preheat the oven for 5 minutes and place the food in the level given by this manual.
-
Page 29: Typical Recipes
TYPICAL RECIPES Duration CAKE Form Level Mode Temp.in °C in minutes Sponge Cake (simple) Conventional in a Box shape with Fan Sponge Cake (simple) Conventional in a Box shape Sponge Cake with Round form Conventional Fruits in a round Form with Fan Sponge Cake with Tray... -
Page 30: Bread
Duration CAKE Form Level Mode Temp.in °C in minutes Hefezopf (Callah) Tray Conventional with Fan p.h.t.: 8:00 Butter Yeast Cake Tray Conventional b.t.: 30:00 p.h.t.: 8:00 Shortbread Tray Conventional b.t.: 13:00 Shortbread 2 Trays Tray Conventional p.h.t:8:20 with Fan b.t.: 12:00 Vanilla Cookies Tray Conventional... -
Page 31: Test Food According To En 60350-1
TEST FOOD ACCORDING TO EN 60350-1 RECIPESA Accessories Level Time(min) Pre-heat ℃ Sponge cake Springform Φ26cm 35-45 Sponge cake Springform Φ26cm 35-45 Small cake 1 tray 40-50 Cheese cake Springform Φ26cm 70-80 Apple pie Springform Φ20cm 70-80 Apple pie Springform Φ20cm 70-80 Bread 1 tray... -
Page 32: Energy Efficiency According To En 60350-1
The determination of the cavity volume carried out for the usage “Defrost” as described on page 14. To ensure an efficient use of the oven, all accessories including side-racks are removed. DATASHEET (EU 65/2014 & EU 66/2014) 310503 No of Cavities Heat Source Electric Usable Volume...