
Related Manuals for Belkin F5D6000


Summary of Contents for Belkin F5D6000
- Page 2 Installing the Notebook Network Card Drivers for Windows NT ..21–22 Installing Belkin 11Mbps Wireless Setup Utility ..... . 23 Using the Belkin 11Mbps Wireless Setup Utility .
- Page 3 Thank You for purchasing the Belkin 11Mbps Wireless Desktop Network Adapter and/or the Belkin 11Mbps Wireless Notebook Network Card. Now you can take advantage of the wireless world of networking that frees you from using cables with your home or office network. The Wireless Network Card Adapter serves as a way for your PCs to communicate on a wireless network.
- Page 4 There are two ways to use your Wireless Notebook Network Adapter. 1. Use in a desktop computer with the optional PCI adapter. If you are using the Optional PCI adapter, go to the section on page 3 titled "Installing the Wireless Notebook Network Adapter using the Optional PCI Adapter"...
- Page 5 1. Network cards are sensitive to static electricity, which can damage their delicate electronic components. To protect your device, always: Touch the metal chassis of your computer before you pick up the card. This grounds the electrostatic charge. Avoid touching any of the electrical components when handling the card.
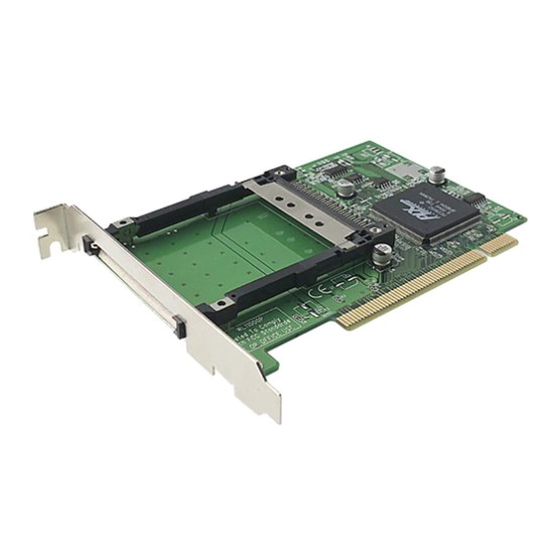
- Page 6 6. Secure the card into the slot using a standard case screw. 7. Carefully insert the Wireless Notebook Network Card into the slot on the Wireless Desktop Network Adapter until it connects to the Network adapter. The PCMCIA card MUST be installed into the PCI adapter before installing the software drivers.
- Page 7 1. Turn on the power to the PC. After Windows starts up, Windows will automatically detect that a new device has been installed and will display the following windows. Insert the CD into your CD-ROM drive. 2. Windows will tell you that it is unable to locate a driver.
- Page 8 6. Windows will now ask you to restart. Click "Yes" to restart your computer. Hardware and software driver installation is now complete for Windows 95. The next step is to install the Belkin 11Mbps Wireless Setup Utility. Go to page 23.
- Page 9 1. Turn on the power to the PC. After Windows starts up, Windows will automatically detect that a new device has been installed and will display the following window: 2. The "Add New Hardware Wizard" will begin. Click "Next". 3. When asked, "What do you want Windows to do?"...
- Page 10 Hardware and software driver installation is now complete for Windows 98/ME. The next step is to install the Belkin 11Mbps Wireless Setup Utility. Go to page 23.
- Page 11 1. Turn on the power to the PC. After Windows starts up, Windows will automatically detect that a new device has been installed and will display the following window: 2. The "Found New Hardware Wizard" will start. Click "Next". 3. In the next screen, select "Search for a suitable driver for my device (recommended)"...
- Page 12 4. This screen will appear. Insert the CD (provided with the card) into your CD-ROM drive. Select "CD-ROM drive" then click "Next". 5. This screen will appear. Click "Next". 6. The "Digital Signature Not Found" screen will appear. This does not mean there is a problem.
- Page 13 Click "Finish" to complete the installation. If Windows prompts you to restart your computer, do so. Hardware and software driver installation is now complete for Windows 2000. The next step is to install the Belkin 11Mbps Wireless Setup Utility. Go to page 23.
- Page 14 "Settings" then click on "Control" panel to open the "Control Panel" Window. 3. Double-click on the "Network Icon". The screen below will appear. A list of adapter may appear in the window, however the Belkin PCI adapter will not. Click on "Add".
- Page 15 Wireless PCI Adapter Card" then click "OK". 6. This screen will appear. Click "OK". Hardware and driver installation is now complete for Windows NT. The next step is to install the Belkin 11Mbps Wireless Setup Utility. Go to page 23.
- Page 16 1. Insert the Wireless Notebook Network Card in the PCMCIA slot of your notebook with the color label facing up. 2. Install the drivers for your particular operating system. Go to the next section that applies to your operating system.
- Page 17 1. Turn on the power to your laptop PC. After Windows starts up, Windows will automatically detect that a new device has been installed and will display the windows Below. Insert the CD into your CD-ROM drive. 2. Windows will tell you that it is unable to locate a driver.
- Page 18 6. Windows will now ask you to restart. Click "Yes" to restart your computer. Hardware and software driver installation is now complete for Windows 95. The next step is to install the Belkin 11Mbps Wireless Setup Utility. Go to page 23.
- Page 19 1. Insert the PCMCIA card into your Notebook PC. Turn on the power to the PC. After Windows 98/Me starts up, the "Add New Hardware Wizard" will begin. Click "Next". 2. When asked, "What do you want Windows to do?" select "Search for the best driver for your device.
- Page 20 Hardware and software driver installation is now complete for Windows 98/ME. The next step is to install the Belkin 11Mbps Wireless Setup Utility. Go to page 23.
- Page 21 1. Insert the PCMCIA card into your Notebook PC. Turn on the power to the PC. After Windows 2000 starts up, insert the CD into your CD-ROM drive. 2. The "Found New Hardware Wizard" will start. Click "Next". 3. In the next screen, select "Search for a suitable driver for my device (recommended)"...
- Page 22 If Windows prompts you to restart your computer, do so. Hardware and software driver installation is now complete for Windows 2000. The next step is to install the Belkin 11Mbps Wireless Setup Utility. Go to page 23.
- Page 23 Panel" Window. 3. Double-click on the "Network Icon". The screen below will appear. A list of adapter may appear in the window, however the Belkin PCI adapter will not. Click on "Add". 4. The screen below will appear. Select "Have Disk".
- Page 24 Wireless PCI Adapter Card" then click "OK". 7. This screen will appear. Click "OK". Hardware and driver installation is now complete for Windows NT. The next step is to install the Belkin 11Mbps Wireless Setup Utility. Go to page 23.
- Page 25 The Belkin 11Mbps Wireless Setup Utility allows you to setup the Wireless Network Card/Adapter’s wireless Ethernet settings. 1. Insert the CD-ROM that came with your Belkin Wireless Notebook Network Card or Belkin Wireless Desktop Adapter into your CD-ROM. 2. From your desktop, double-click on "My Computer", then double-click on your CD-ROM Drive.
- Page 26 The Belkin 11Mbps Wireless Setup Utility will launch automatically when your computer starts with a Wireless adapter installed. To launch the Belkin 11Mbps Wireless Setup Utility manually, click "Start", "Programs", then select "Belkin 11Mbps Network" and select "Configuration Utility". When the utility is running, the Icon below will appear in the system tray.
- Page 27 1. State Associated: The PC is connected to the wireless network. Scanning: The PC is searching for an available Wireless Network Access Point (WAP). If "associated" does not appear, the card cannot detect the SSID for the WAP. 2. Current Channel Each country’s regulatory commission (FCC for the US) has a specified set of channels for 802.11b to operate on.
- Page 28 Click-on the Configuration tab and the following screen will appear: 1. Mode Infrastructure Mode A setup that uses a WAP to connect a wireless LAN to a wired LAN is called an infrastructure configuration, and the setup is referred to as being in Infrastructure Mode.
- Page 29 computers can exist at a single time in a BSS. This is due to the ability of the WAP to handle no more than 64 clients. The diagram below illustrates how the access point will effectively double the distance between wireless equipped computers in a BSS.
- Page 30 Notebook with Wireless Notebook Network Card Ad-Hoc mode: This is used when the network is set up wirelessly. This mode allows wireless PC card to wireless PC card communications and does not require the use of a WAP. 2. SSID The Service Set Identifier (SSID) is like a name for the wireless network and is sometimes called the "Network Name".
- Page 31 Click-on the Encryption tab and the following screen will appear: Encryption For secure data transmissions the Belkin Wireless Desktop Network Adapters are capable of encrypting, or "scrambling" the information that is sent over the air between your computers. The WAP uses a form of encryption called WEP (Wired Equivalent Privacy).
- Page 32 "Passphrase" generates four keys in 64-bit encryption mode and one key in 128-bit encryption mode. A user of a laptop needs only to enter the passphrase and the key number into their computer’s wireless management software to be able to communicate while using encryption. All computers on the network must use the same encryption rate and passphrase.
- Page 33 After the program is installed, Windows may ask you to restart your computer. Please do so. 4. Repeat these steps for each computer that you are connecting to your network. 5. Once you have installed the Belkin SOHO Networking Software on all of your computers, continue on to the next section.
- Page 34 1. Once your computer has restarted, click "Start", "Programs", highlight "Belkin SOHO Networking" and select "Belkin NetSetup" to launch this easy-to- use computer configurator. The following screen will appear: 2. Select "I am setting up my own network" and click "Next". The following screen will appear.
- Page 35 No and move to step 11. 9. If you clicked Yes, you will be prompted to insert a floppy disk into the PC’s floppy disk drive. Label a floppy disk "Belkin Networking" and insert it into the floppy disk drive. Click OK.
- Page 36 Click "Next". 3. Windows will now prompt you to insert the newly created client setup disk into the PC’s floppy drive. Insert the disk you labeled "Belkin Networking" into the floppy drive and click OK. The following screen will appear: 4.
- Page 37 7. When finished filling in the fields, click "Next". The following screen will appear: 8. If you want to share files and printers on this computer, select "I want to share files and printers on my computer" and click "Finish". If not, select "I do not want to share files and printers on my computer"...
- Page 38 CD-ROM drives, you must set sharing settings for each PC in the network. Belkin has simplified the sharing of files, peripherals, and internet connections by providing you with the Belkin NetShare Utility to set up your sharing options. 1. From the Start menu, click...
- Page 39 4. If you double-click on the Entire Network icon, all network resources available to you will be accessible. 5. If you press the File Sharing tab the following screen will appear: 6. This screen will show you all the PC drives available for sharing with the entire network.
- Page 40 10.Click on the Printers tab and the following screen will appear: 11.This screen will list all printers connected to your PC. Highlighting the printer you would like to share (or not share) and select the Sharing button the following screen will appear: 12.Select the preferred sharing option for this printer.
- Page 41 1. From the Start menu, go to Programs and select Belkin NetShare Utility. The following screen will appear: 2. Select Browse Your Network. The following screen will appear: 3. Double-click on the Entire Network icon and your workgroup will appear.
- Page 42 An Ad-Hoc wireless LAN is a group of computers each with Ad-Hoc LAN adapters, connected as an independent wireless LAN. Notebook with Wireless Notebook Network Card Ad-Hoc Mode The core infrastructure of a network. The portion of the Backbone network that transports information from one central location to another central location where it is unloaded onto a local system.
-
Page 43: Infrastructure Network
An integrated wireless and wired LAN is called an Infrastructure Infrastructure configuration. A wireless LAN mobile user moves around an ESS Roaming and maintains a continuous connection to the Infrastructure network. Desktop PC Transmitters contending for the medium may not be RTS Threshold aware of each other. - Page 44 DNS stands for Domain Name System, which allows Internet Address host computers to have a domain name (such as belkin.com) and one or more IP addresses (such as 192.34.45.8). A DNS server keeps a database of host computers and their respective domain names and IP addresses, so that when a domain name is requested (as in typing "belkin.com"...
- Page 45 Network Address Translation. This process allows all of the computers on your home network to use one IP address. Using the NAT capability of the Belkin 4-Port Cable/DSL Gateway Router, you can access the Internet from any computer on your home network without having to purchase more IP addresses from your ISP.
-
Page 46: Fcc Statement
• Consult the dealer or an experienced radio/TV technician for help. Modifications The FCC requires the user to be notified that any changes or modifications to this device that are not expressly approved by Belkin Components may void the users authority to operate the equipment. F5D6020... - Page 47 • EN 300 328 Technical requirement for radio equipment • ETS 300 826 General EMC requirements for radio equipment. To determine the type of transmitter, check the identification label on your Belkin product. Products with the CE marking comply with the EMC Directive (89/336/EEC) and the Low Voltage Directive (72/23/EEC) issued by the Commission of the European Community.
- Page 48 Belkin Components warrants this product against defects in materials and workmanship for its lifetime. If a defect is discovered, Belkin will, at its option, repair or replace the product at no charge provided it is returned during the warranty period, with transportation charges prepaid, to the authorized Belkin dealer from whom you purchased the product.
- Page 49 7 Bowen Cresent • West Gosford NSW 2250 • Australia Tel: +61 (2) 4372 8600 Fax: +61 (2) 4325 4277 P73851-A © 2002 Belkin Components. All rights reserved. All trade names are registered trademarks of respective manufacturers listed. 150000005700E R02...