
Related Manuals for Banner American BA-EZ27


Summary of Contents for Banner American BA-EZ27
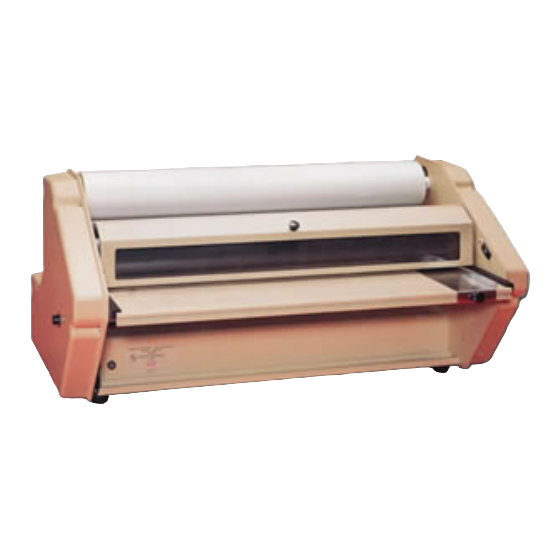
- Page 1 OPERATING INSTRUCTIONS EZ27 Roll Laminator Revised October 2, 2003...
-
Page 2: Table Of Contents
TABLE OF CONTENTS Safety Messages and Electrical Safeguards ... 1-2 Introduction ... 2-3 Laminator Features ... 3 Specifications ... 3 Initial Set-up ... 4-5 Unpacking ... 4 Feed Table Assembly ... 4 Components ... 4,5 Operation ... 5-8 Loading Laminating Film ... 5,6 Threading Laminating Film ... -
Page 3: Safety Messages And Electrical Safeguards
IMPORTANT SAFETY MESSAGES AND ELECTRICAL SAFEGUARDS For your protection, do not connect the laminator to electrical power or attempt to operate it until you read these instructions completely. Keep these instructions in a convenient location for future reference. This instruction manual and labels affixed to the laminator are important safety messages. -
Page 4: Introduction
Unplug the laminator before moving it or when it is not in use for an extended period of time as a precaution against the possibility of an internal malfunction that could create a fire hazard. Do not operate the laminator with a damaged power supply cord or plug, or after it malfunctions or has been damaged in any manner. -
Page 5: Laminator Features
Your EZ27 is preset at the factory for most applications so any adjustments should be minor. A thermometer provides continual indication of the Heat Shoe temperature and may be adjusted as needed. Laminator Standard Features... Preset laminating roller pressure and speed require no adjustment. Feed table with adjustable guide. -
Page 6: Initial Setup
INITIAL SETUP Unpacking and assembly... Before unpacking the unit, inspect the shipping container for signs of damage. Notify the carrier and your dealer immediately if any damage is noted. The laminator, without the feed table CAUTION! and mounting slides installed, weighs approxi- mately 70 lbs. -
Page 7: Feed Table Assembly
PARTS LIST AND ILLUSTRATIONS This section contains reference drawings and parts lists to assist you when repairing and servicing your laminator. The drawings show only those parts that may be replaced by the dealer. Item Part Number Description Supply Mandrel Assembly 600021 Core Gripper 627110... -
Page 8: Threading Laminating Film
Threading Laminating Film... These instructions apply to poly-in film rolls (shiny side out, dull side in) 1. For the top supply roll place the mandrel ends into the slots in the top of the laminator. If you are facing the front of the laminator the film should unwind toward you from the bottom of the roll as in Figure 3 below. -
Page 9: Heat Shoe Temperature
PROBLEM: Stretch lines appear on laminated items running parallel with the outside edges. ACTION: Increase roller tension on top and/or bottom supply rolls. Reduce heat shoe temperature. Clean heat shoes of residual adhesive. See MAINTENANCE section for cleaning instructions. PROBLEM: Blistering of the film appears over the item or along the edge. -
Page 10: Laminating
Setting Heat Shoe Temperature... The laminator temperature should be adjusted according to the film thickness and the item being laminated. See Table 1 below for recommended temperature settings. Keep in mind that the temperatures listed are approximate and different brands of laminating film may require different temperatures. 1.