Table of Contents
Advertisement
Quick Links
Advertisement
Table of Contents

Related Manuals for Elation CUEPIX BLINDER WW2


Summary of Contents for Elation CUEPIX BLINDER WW2
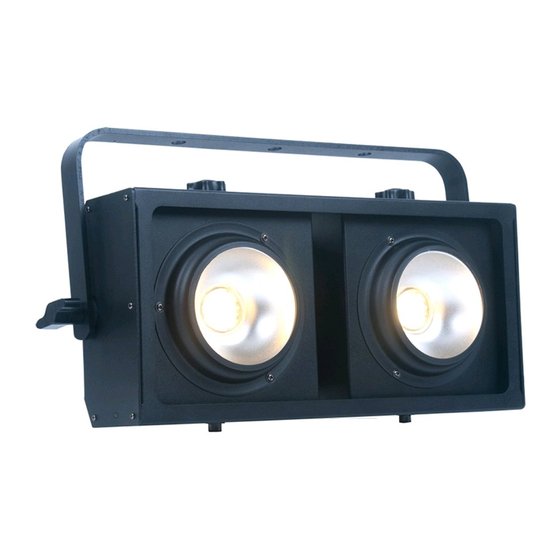
- Page 1 CUEPIX BLINDER WW2 User Manual...
- Page 2 +31 45 546 85 66 | +31 45 546 85 96 fax | www.elationlighting.eu info@elationlighting.eu Elation Professional Mexico | AV Santa Ana 30 | Parque Industrial Lerma, Lerma, Mexico 52000 +52 (728) 282-7070 DOCUMENT VERSION Due to additional product features and/or enhancements, an updated version of this document may be available online.
-
Page 3: Table Of Contents
CONTENTS General Information Limited Warranty (USA Only) Safety Guidelines Cleaning and Maintenance Fixture Overview Installation Instructions System Menu DMX Channel Functions And Values Specifications Optional Accessories... -
Page 4: General Information
BOX CONTENTS Power Cable CUSTOMER SUPPORT Contact ELATION Service for any product related service and support needs. Also visit forums.elationlighting.com with questions, comments or suggestions. ELATION SERVICE USA - Monday - Friday 8:00am to 4:30pm PST 323-582-3322 | Fax 323-832-9142 | support@elationlighting.com ELATION SERVICE EUROPE - Monday - Friday 08:30 to 17:00 CET +31 45 546 85 63 | Fax +31 45 546 85 96 | support@elationlighting.eu... -
Page 5: Limited Warranty (Usa Only)
It is the owner’s responsibility to establish the date and place of purchase by acceptable evidence, at the time service is sought. B. For warranty service, send the product only to the Elation Professional factory. All shipping charges must be pre-paid. If the requested repairs or service (including parts replacement) are within the terms of this warranty, Elation Professional will pay return shipping charges only to a designated point within the United States. -
Page 6: Safety Guidelines
This fixture is a sophisticated piece of electronic equipment. To guarantee a smooth operation, it is important to follow all instructions and guidelines in this manual. Elation Professional is not responsible for injury and/or damages resulting from the misuse of this fixture due to the disregard of the information printed in this manual. - Page 7 SAFETY GUIDELINES DO NOT TOUCH the fixture housing during operation. Turn OFF the power and allow approximately 15 minutes for the fixture to cool down before serving. DO NOT shake fixture, avoid brute force when installing and/or operating fixture. DO NOT operate fixture if the power cord is frayed, crimped, damaged and/or if any of the power cord connectors are damaged and do not insert into the fixture securely with ease.
-
Page 8: Cleaning And Maintenance
Regular inspections are recommended to insure proper function and extended life. There are no user serviceable parts inside this fixture, please refer all other service issues to an authorized Elation service technician. Should you need any spare parts, please order genuine parts from your local Elation dealer. -
Page 9: Fixture Overview
OVERVIEW LCD Menu Control Display UP Button ENTER Button DOWN Button MODE/ESC Button 5pin DMX IN 5pin DMX OUT 3pin DMX OUT 3pin DMX IN Power IN Power OUT Safety Cable Rigging Pint Fuse... -
Page 10: Installation Instructions
INSTALLATION INSTRUCTIONS FLAMMABLE MATERIAL WARNING Keep fixture minimum 5.0 feet (1.5m) away from flammable materials and/or pyrotechnics. ELECTRICAL CONNECTIONS A qualified electrician should be used for all electrical connections and/or installations. USE CAUTION WHEN POWER LINKING OTHER MODEL FIXTURES AS THE POWER CONSUMPTION OF OTHER MODEL FIXTURES MAY EXCEED THE MAX POWER OUTPUT ON THIS FIXTURE. - Page 11 CLAMP MOUNTING Center Rigging Hole The fixture provides an integrated yoke/rigging bracket. When mounting this fixture to truss be sure to secure an appropriately rated clamps to the yoke/ rigging bracket using a M10 screw fitted through the center hole. SECURING Regardless of the rigging option you choose for your fixture always be sure to secure your fixture with a...
-
Page 12: System Menu
10 seconds. The LCD Menu Control Display will shut OFF automatically about 30-seconds from the last button press. INFORMATION DISPLAYED DURING INITIAL POWER ON When the fixture is initially powered ON, the display shows the following information: CUEPIX Update Wait... ELATION BLINDER V1.07... - Page 13 SYSTEM MENU Features subject to change without notice MAIN MENU OPTIONS / VALUES DESCRIPTION CHANNEL CH: 01, 02, 03, 04 Set desired DMX Channel Mode DMX MODE ADDR: 001 - 512 DMX Address Setting SECONDARY MODE: Set unit to Secondary Mode Set manual Dimming value for COB Module 1 DIMMER C1: 00-99...
- Page 14 DIMMER CURVE MODES - Dim Curve Select desired DIMMER MODE: Standard, Stage, TV, Architectural, Theatre, Stage2 (only available with v1.15 or later).
-
Page 15: Dmx Channel Functions And Values
DMX CHANNEL FUNCTIONS AND VALUES ELATION© CUEPIX BLINDER WW2™ DMX Channel Values / Functions VERSION 3 (4 DMX Channels) Release Date: 2013 | Supports Software Versions: ≥ 1.04 Features subject to change without notice *Control of LEFT and RIGHT COB Modules chase direction depends on the Flip setting. - Page 16 ELATION© CUEPIX BLINDER WW2™ DMX Channel Values / Functions VERSION 3 (4 DMX Channels) Release Date: 2/1/2016 | Supports Software Versions: ≥ 1.10 Features subject to change without notice *Control of LEFT and RIGHT COB Modules chase direction depends on the Flip setting.
-
Page 17: Specifications
SPECIFICATIONS SOURCE (2) 100W Warm White 3,200K COB LEDs 100,000 Hour Average Life* *LED Life may vary depending on several factors including but not limited to: Environmental Conditions, Power/Voltage, Usage Patterns (On-Off Cycling), Control, and Dimming. PHOTOMETRIC DATA 5900 Max LUX (548 fc) @1M (Full On) EFFECTS Strobe Variable / Selectable Dimming Curves... - Page 18 PHOTOMETRIC DATA DIMENSIONS...
-
Page 19: Optional Accessories
OPTIONAL ACCESSORIES ORDER CODE ITEM TRIGGER CLAMP Heavy Duty Wrap Around Hook Style Clamp EWDMXSYSTEM Wireless DMX System (1 Transmitter, 1 Receiver) EWDMXT Wireless DMX Transmitter EWDMXR Wireless DMX Receiver PLC3 3' (1m) Power Link Cable PLC6 6' (1.8m) Power Link Cable AC3PDMX5PRO 5 ft.