Table of Contents
Advertisement
Advertisement
Table of Contents

Related Manuals for Singer EM9305


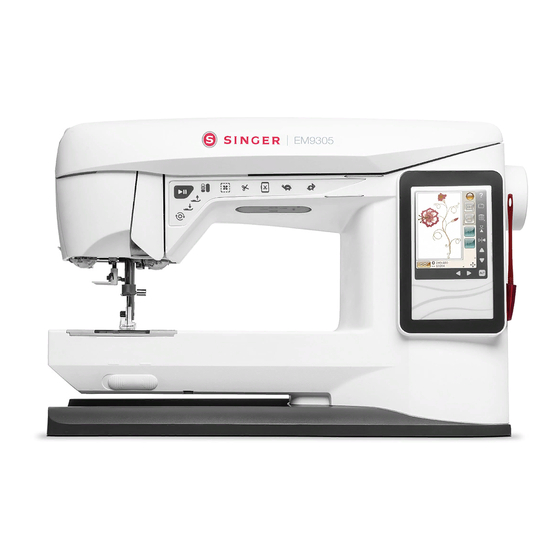
Summary of Contents for Singer EM9305
- Page 1 USER’S GUIDE EM9305...
- Page 2 This household embroidery machine is designed to comply with IEC/EN/CSA C22.2 No. 60335-1 & 60335-2-28 and UL1594. IMPORTANT SAFETY INSTRUCTIONS When using an electrical appliance, basic safety precautions should always be followed, including the following: Read all instructions before using this household embroidery machine. Keep the instructions in a suitable place close to the machine.
- Page 3 SAVE THESE INSTRUCTIONS FOR CENELEC COUNTRIES ONLY: This appliance can be used by children aged from 8 years and above and persons with reduced physical, sensory or mental capabilities or lack of experience and knowledge if they have been given supervision or instruction concerning use of the appliance in a safe way and understand the hazards involved.
-
Page 4: Table Of Contents
Embroidery Unit Overview File Manager Embroidery Hoop Overview Available Memory Built-In Designs SINGER ® EM9305 Sampler Book ......... 4:2 File Formats Connect the Embroidery Unit Browse File Manager Remove the Embroidery Unit List View/Thumbnail View ..........7:3 My Files................7:3 Attach the Embroidery Foot R USB ................ - Page 5 Move Up One Folder Level ........... 7:3 Organize Create a New Folder ............7:4 Move a File or Folder ............. 7:4 Copy/paste a File or Folder ..........7:4 Delete a File or Folder ........... 7:4 File Manager Pop-up Messages MAINTENANCE Cleaning the machine Troubleshooting Technical Specification...
-
Page 6: Getting To Know Your Machine 1:6
GETTING TO KNOW YOUR MACHINE This section of the User’s Guide will give you an overview of your machine and its accessories. -
Page 7: Machine Overview 1:7
MACHINE OVERVIEW 1. Lid 17. Spool pin 2. Pre-tension thread guide 18. Spool caps 3. Thread tension discs 19. Auxiliary spool pin 4. Thread take-up lever 20. Thread cutter for bobbin thread 5. Thread tension for bobbin winding 21. Bobbin spindle, Bobbin stop 6. -
Page 8: Accessories
39. Brush 40. Spool cap, large (attached on the machine at delivery) 41. Spool cap, medium (attached on the machine at delivery) 42. Spool cap, small 43. SINGER ® Snap On Embroidery Foot R ® 44. SINGER bobbins, group EF (6) 45. -
Page 9: Set Up
SET UP This section of the User’s Guide will help you get started with your machine. Learn how to thread your machine, wind the bobbin, change needle and how to update your machine. -
Page 10: Unpacking 2:2
4. Wipe the machine, particularly around the needle and stitch plate to remove any oil before embroidering. Note: Your SINGER EM9305 embroidery machine is adjusted ® to provide the best stitch result at normal room temperature. Extreme hot and cold temperatures can affect the result. -
Page 11: Usb Port 2:3
USB PORT On the right side of your machine you will find a USB port to connect your USB stick. Note: Make sure that the USB stick you use has the format FAT32. Connect to and remove from USB port Insert the USB stick in the USB port on the right side of your machine. The USB plug can only be inserted one way - do not force it into the port! To remove, carefully pull the USB stick out straight. Using the USB embroidery stick When loading from or saving to the USB embroidery stick an hourglass appears on the screen. Note: Do not remove the USB embroidery stick when the hourglass is shown on the screen or while the file manager is shown. -
Page 12: Spool Pins And Spool Caps 2:4
SPOOL PINS AND SPOOL CAPS Your machine has two spool pins, a main spool pin and an auxiliary spool pin. The spool pins are designed for all types of thread. The main spool pin is adjustable and can be used in a horizontal position (the thread reels off the stationary spool) or in a vertical position (the thread spool rotates). Use the horizontal position for all regular embroidery threads and the vertical position for large spools or specialty threads. Horizontal Position Lift the spool pin up slightly from its horizontal position to easily place the thread spool on the pin. The thread should reel over the top, in a counterclockwise direction, as shown in the picture. Slide on a spool cap and then move the spool pin back to the horizontal position. Each machine comes with two spool caps on the spool pin. For medium sized thread spools, the medium sized cap (A) is placed in front of the spool. For large thread spools, the large cap (B) is placed in front of the spool. The flat side of the spool cap should be pressed firmly against the spool. There should be no space between spool cap and thread spool. A small spool cap is included as an accessory for your machine. The small spool cap can be used for small thread spools. Note: Not all thread spools are manufactured in the same way. -
Page 13: Threading The Upper Thread 2:5
THREADING THE UPPER THREAD Make sure the presser foot is raised and the needle is in the up position. 1. Place the thread on the spool pin and the spool cap on the 3. Bring the thread down between the thread tension discs spool pin as described on page 2:4. (C). 2. Spool pin in horizontal position: 4. Continue threading in the direction indicated by the arrows Bring the thread over and behind the pre-tension thread in the illustration above. Bring the thread from the right guide (A) and under the thread guide (B). into the slot on the take-up lever (D). pool pin in vertical position: 5. Take the thread down and behind the last guide just above Instead of bringing the thread into the pre-tension guide... -
Page 14: Needle Threader 2:6
NEEDLE THREADER The needle must be in the up position to use the built-in needle threader. We also recommend lowering the presser foot. 1. Use the handle to pull the needle threader all the way down, catching the thread under the guide (A). 2. Push back to bring the needle threader forward until the metal flanges cover the needle. A small hook will pass through the needle eye (B). 3. Place the thread under the flanges in front of the needle, so the thread catches into the small hook (C). 4. Let the needle threader gently swing back. The hook pulls the thread through the needle eye and forms a loop behind the needle. 5. Pull the thread loop out behind the needle. Note: The needle threader is designed to be used for size 70- 110 needles. You cannot use the needle threader for size 60 needles or smaller. -
Page 15: Winding The Bobbin Using
WINDING THE BOBBIN USING THE VERTICAL SPOOL PIN 1. Place an empty bobbin on the bobbin spindle on the top of the machine. The bobbin only fits on one way, with the logo facing up. Use only original SINGER bobbins, group ® 2. Place the large spool cap and a felt pad under the spool on the main spool pin set in the vertical position. 3. Bring the thread over and behind the pre-tension thread guide (A) and down around the thread tension disc (B), then through thread guide (C) as illustrated. 4. Guide the thread through the hole in the bobbin (D) from the inside to the outside. 5. Push the bobbin winder spindle to the right to wind. A pop-up appears on the screen to inform you that bobbin winding is active. To adjust winding speed, use the slider in the pop-up. Start bobbin winding by touching the start/stop button. When the bobbin is full, it will stop winding. Touch the start/stop button to stop the bobbin winder motor from running. Move the bobbin winder spindle to the left and the pop-up will close. Remove the bobbin and cut the thread using the bobbin thread cutter. -
Page 16: Inserting The Bobbin 2:8
INSERTING THE BOBBIN 1. Remove the bobbin cover by sliding it towards you. 2. Place the bobbin in the bobbin case. It drops in only one way with the logo facing up. The thread unreels from the left of the bobbin. The bobbin will then rotate counter- clockwise when you pull the thread. 3. Place your finger on the bobbin to keep it from turning as you pull the thread firmly to the right and then to the left into the tension spring (E) until it “clicks” into place. 4. Continue threading around (F) and to the right of the thread cutter (G). Slide on the bobbin cover (H). Pull the thread to the left to cut (I). THREAD SENSOR If the upper thread breaks or bobbin thread runs out, the machine stops and a pop-up appears on the screen. If upper thread breaks: Re-thread the machine and touch OK on the pop-up. If bobbin thread runs out: replace with a wound bobbin and continue embroidering. Note: When the bobbin thread is almost empty, the bobbin thread low pop-up appears on the screen. You can continue embroidering without closing the pop-up before the bobbin thread runs out completely. -
Page 17: Changing The Needle 2:9
CHANGING THE NEEDLE 1. Loosen the needle screw while holding the needle. 2. Remove the needle. 3. Insert the new needle. Push the new needle upwards with the flat side away from you until it will go no further. 4. Tighten the needle screw. NEEDLES The needle plays an important role in successful embroidering. Use only quality needles. We recommend needles of system 130/705 H or 130/705 H-S. Universal Needle – SINGER Style 2000 ® Universal needles have a slightly rounded point and come in a variety of sizes. For general embroidery on a variety of fabric types and weights. SINGER Style 2000 needles have a grey ® shank. Stretch Needle – SINGER Style 2001 ® Stretch needles have a special scarf to eliminate skipped stitches when there is a flex in the fabric. For knits, swimwear, fleece, synthetic suedes and leathers. SINGER... -
Page 18: Threads 2:10
THREADS STABILIZERS Embroidery Thread Tear-Away Stabilizers Embroidery thread is made of various fibers: rayon, polyester, Tear-away stabilizers are used with stable woven fabrics. Hoop acrylic or metallic. These threads create a smooth glossy with the fabric when embroidering. Tear away excess stabilizer appearance for embroidery and other decorative stitching. after stitching. Note: When using a metallic thread for embroidering, you Iron-on Tear-Away may need to use a needle with a larger eye and lower the Iron-on tear-away is a totally stable stabilizer that has a slick embroidery speed. -
Page 19: How To Update Your Machine 2:11
The update starts automatically and you can release the update button when the progress bar shows. Note: It might take up to one minute before the progress bar shows and you can release the update button. • When the update is completed the machine will restart automatically. Check the software version number in the SET Menu. COMPLIMENTARY SOFTWARE A complimentary PC software package is available for your SINGER EM9305 embroidery machine. You will find ® download information together with your unique activation code on the Product Activation Code sheet, included with your machine. 2:11... - Page 20 2:12...
-
Page 21: Settings & Function Buttons
SETTINGS & FUNCTION BUTTONS This section of the User’s Guide will guide you through the basic settings and function buttons on your machine. Learn how to navigate the functions and settings on the Interactive Color Touch Screen and how to use the function buttons on the machine head. -
Page 22: Function Buttons
FUNCTION BUTTONS 1. Start/Stop 6. SPEED - and + Press Start/Stop to start or stop the machine embroidering. Each stitch type in a design has a pre-set maximum speed at which it can be embroidered. To reduce the speed when using Your machine stops automatically at color changes and when specialty threads or embroidering on delicate fabrics, press the embroidery is finished. -
Page 23: Overview Touch Area 3:3
OVERVIEW TOUCH AREA The screen on your SINGER EM9305 is very easy to work with - just touch it with your stylus or your finger tip to make your ® choices. In this chapter we will describe the area outside the Color Touch Screen. This part will not change its appearance. -
Page 24: Color Touch Screen 3:4
COLOR TOUCH SCREEN START MENU Start Menu Touch the Start Menu icon to open the Toolbar. The Toolbar is used for selecting and activating different windows. TOOLBAR From the toolbar you will be able to enter the Design Menu, Embroidery Font Menu, Embroidery Text Edit, File Manager and SET Menu. -
Page 25: Set Menu 3:5
SET MENU SET Menu In the SET Menu you can make personal adjustments to the Machine Settings and Embroidery Settings. Touch the icons to activate a function or open a list of choices. When changing the Embroidery Settings, the settings are saved after turning off the machine. -
Page 26: Embroidery Settings
These are specialty hoops. For example, E stands for endless hoop and M for metal hoop. Presser Foot Height You can adjust the height of the presser foot in Embroidery Stitch-Out mode when using your SINGER ® Snap On Embroidery Foot R. -
Page 27: Frequently Used Icons 3:7
FREQUENTLY USED ICONS Embroidery Edit In the lower left corner of the Embroidery Edit window, you have a GO! icon. Touch the icon to enter the Embroidery Stitch-Out. Embroidery Stitch-Out The Return icon is in the lower left corner of the Embroidery Stitch out mode window. -
Page 29: Embroidery Set Up
EMBROIDERY SET UP This section of the User’s Guide will help you get started to Embroider. -
Page 30: Embroidery Unit Overview 4:2
150 designs and 1 embroidery font in three sizes are built into the memory in your machine. SINGER EM9305 SAMPLER BOOK ® On www.singer.com you can find the SINGER EM9305 ® Sampler book. Here you can see all the designs and fonts that are built into the machine. -
Page 31: Connect The Embroidery Unit 4:3
2. Press the button at the left, underneath the embroidery unit (B) and slide the unit to the left to remove it. ATTACH THE EMBROIDERY FOOT R When embroidering, use the SINGER Snap On Embroidery ® foot R. See page 2:8 for instructions on how to snap on or off the presser foot. -
Page 32: To Hoop The Fabric 4:4
TO HOOP THE FABRIC For the best embroidery results, place a layer of stabilizer beneath the fabric. When hooping stabilizer and fabric make sure that they are smooth and securely hooped. 1. Open the Quick Release (A) on the outer hoop and loosen the screw (B). -
Page 33: Getting Started Embroidering
GETTING STARTED EMBROIDERING 1. Attach the embroidery unit and embroidery foot and insert a bobbin with bobbin thread. Design Menu 2. Touch the Start Menu to open the Toolbar. Open the Design Menu or the File Manager on the toolbar and touch the design, it will load to Embroidery Edit. - Page 34 6. Clear sufficient space around the machine to accommodate movement of the embroidery arm and the hoop. Hold the needle thread and touch the Start/Stop button. The machine starts embroidering. Note: This machine features Automatic Jump Stitch Trim. When activated the machine trims the top jump stitch threads and pulls the thread ends to the underside of the fabric.
-
Page 35: Embroidery Edit
EMBROIDERY EDIT In this section we will take a closer look at how to edit your designs before embroidering them. -
Page 36: Embroidery Edit Mode 5:2
EMBROIDERY EDIT MODE Start Menu In Embroidery Edit Mode you can adjust, combine, save and delete designs. You do not need to have the embroidery unit connected to your machine to edit your design(s). Design Menu START MENU Touch the Start Menu icon to open the toolbar. From Font Menu the toolbar you can load a design, load a font, reach the Embroidery Text Editor, Enter the File Manager and make... -
Page 37: Embroidery Text Editor
EMBROIDERY TEXT EDITOR If you touch the Embroidery Text Editor icon, a window will open so you can edit an embroidery text that you have created. You can insert or delete letters or change font. To use the Editor Use the stylus and touch the characters you want to add to the text. -
Page 38: Color Touch Screen Icons
To select the correct hoop size, touch the My Hoops icon. A pop-up will appear with hoop choices, including hoops that are available to purchase from your authorized SINGER ® retailer. After selecting your hoop size, the pop-up will close... -
Page 39: Zoom Options/Pan
SCALE When Scale is active, you can increase or decrease the size of the selected design or a group of designs. By default, the proportions are locked. This is indicated with a closed padlock icon. To unlock, just touch the padlock. Height and width can now be changed individually by using the arrows. -
Page 40: Save To My Files 5:6
Rename Cancel SAVE TO MY FILES Touch the Save to My Files icon to open the dialogue for saving the actual design(s). A new window will open where you can select where to save your design. You can save either in My Files or to an approved USB device. -
Page 41: Embroidery Edit Pop-Up Messages 5:7
EMBROIDERY EDIT POP-UP MESSAGES Embroidery combination is too complex This pop-up message appears for one of the following reasons: • The design combination contains too many color blocks. • There are too many designs in the combination. Remove hoop This pop-up will appear when a function has been chosen that forces the embroidery unit to move outside the limits for the attached hoop. -
Page 43: Embroidery Stitch-Out
EMBROIDERY STITCH-OUT This section will help you get started to embroider. -
Page 44: To Enter Embroidery Stitch-Out 6:2
TO ENTER EMBROIDERY STITCH-OUT To embroider your design(s), enter Embroidery Stitch-Out by touching the GO! icon in the lower left hand corner of the Embroidery Edit window. The embroidery unit must be connected when the machine enters Embroidery Stitch-Out. Note: If the embroidery unit has not been calibrated before it will calibrate when you enter Embroidery Stitch-Out. A popup will inform you. -
Page 45: Start Menu 6:3
START MENU Start Menu Touch the Start Menu icon to open the toolbar. From the toolbar in the Stitch-Out Mode you can only make changes in the SET menu. SET Menu MOVE HOOP Use the Move Hoop functions to move the embroidery arm and hoop to different positions. -
Page 46: Basic Design Positioning 6:4
BASIC DESIGN POSITIONING Basic Design Positioning allows you to place a design on an exact spot on your fabric. It is also used when you want to embroider a design next to a previously embroidered design. Move Hoop Read more about how to use the Basic Design Positioning on page 6:6. -
Page 47: Number Of Stitches In Embroidery Combination 6:5
THREAD TENSION When embroidering with specialty thread or fabric you may need to adjust the thread tension to achieve the best result. Thread tension can be adjusted using the arrows below the thread tension control. Thread tension ZOOM/PAN Touch Zoom/Pan and the Zoom to Hoop icon will appear. Pan is always active. -
Page 48: Basic Design Positioning 6:6
BASIC DESIGN POSITIONING Basic Design Positioning allows you to place a design on an exact spot on your fabric. It is also used when you want to connect a design to a previously embroidered design. Cancel Touching ALT in this view gives you access to extra Zoom Options/Pan icons, see page 6:7. -
Page 49: Corner Icons
CORNER ICONS Use the corner icons to set the locking point for Basic Design Positioning in a corner of the design or at the center. This is the easiest and most precise way since the connecting point will be Corner icons automatically placed exactly in the corner. -
Page 50: Embroidery Stitch-Out Pop-Up Messages 6:8
EMBROIDERY STITCH-OUT POP-UP MESSAGES Embroidery Unit Calibration When entering Embroidery Stitch-Out Mode by touching Go! or when connecting the embroidery unit in Stitch-Out Mode, a pop-up message will ask you to slide off the hoop and clear the machine area for calibrating the embroidery arm. You will also be reminded to attach the correct embroidery foot. - Page 51 Check Needle Thread The machine stops automatically if the needle thread runs out or breaks. Re-thread the needle thread, close the pop-up message, go back a few stitches using the Step Stitch-by-Stitch control and start embroidering again Machine needs to rest If the machine stops and this pop-up appears on the screen, the machine needs to rest.
- Page 52 6:10...
-
Page 53: File Manager
FILE MANAGER In this section we will take a closer look at how to organize your designs and files in your machine. -
Page 54: File Manager 7:2
FILE MANAGER Start Menu The File Manager is used to open, organize, add, move, remove and copy your designs and fonts. Use either built-in memory or an external device connected to your machine for storing designs and files. To open the File Manager, touch the Start Menu icon and touch the File Manager icon. -
Page 55: Browse File Manager 7:3
BROWSE FILE MANAGER When File Manager is open you can reach your My Files folder and your USB stick (if you have one connected). Folder Touch any of these icons to display their contents in the selection area. LIST VIEW/THUMBNAIL VIEW Touch the List/Thumbnail view icon to show the files in the current folder listed in alphabetical order. - Page 56 ORGANIZE CREATE A NEW FOLDER Touch the create new folder icon to create a new folder. A pop- up message opens where you can enter a name for your folder. List/Thumbnail view Rename a file or folder Paste a file or folder MOVE A FILE OR FOLDER Copy a file or folder Use cut and paste to move a file or folder to another storage...
- Page 57 MAINTENANCE In this section you will find information about how to take care of your machine and also a troobleshooting guide.
- Page 58 CLEANING THE MACHINE To keep your machine operating well, clean it often. No lubrication (oiling) is needed. Wipe the exterior surface of your machine with a soft cloth to remove any dust or lint build up. Wipe the screen with a clean, soft and slightly damp microfiber cloth.
- Page 59 A sample will often give much better information than words. General Problems Bobbin alarm does not work? Clean lint from bobbin area and use only the original SINGER bobbins ® approved for this model.
- Page 60 (SystemReport01.dmp or higher number). Save the file to a USB stick. Send the file together with a short description of what you were doing before the pop- up appeared to product.improvement@singer.com. After sending the file, remove it from your machine.
- Page 61 TECHNICAL SPECIFICATION Sewing Speed Rated Voltage Nominal Consumption The technical specifications 750 stitches/minute maximum 100–240V, 50–60Hz <100W and this user’s guide can be changed without prior notice. Light Safety Class Machine Dimensions LED Lights II (Europe) Length: 445 mm Width: 210 mm Height: 300 mm Net Weight Machine only: 8 kg...
- Page 62 INDEX Accessories ................1:8 Current Color Block ............. 6:5 Add a Letter into a Text ............5:3 Current Stitch Position ............6:3 ALT ................ 3:3, 5:4, 6:7 Cursor ................... 6:4 ALT in stitch-out mode ............6:4 Cut ..................7:4 Attach correct hoop .............. 6:8 Cut Thread End ..............
- Page 63 Font Menu ................3:4 Move Hoop ..............6:2, 6:3 Font Size ................5:3 Move to bobbin position ............6:8 Foot Control ................. 2:2 Move to Hoop ..............5:4 Free arm ................1:7 Move Up One Folder Level ..........7:3 Frequently used icons ............3:7 My Files ................
- Page 64 Quick Help ................3:3 Take-up lever ..............1:7, 2:5 Quick Release ............... 4:2, 4:4 Technical Specification ............8:4 Text Editor ................5:3 There is not enough available memory ........ 7:4 Thread cutter ............1:7, 2:6, 8:3 Remove hoop ............... 5:7 Thread cutter for bobbin thread ...........
- Page 65 Patents protecting this product are listed on a label positioned underneath the Embroidery Machine. SINGER and the Cameo “S” design are trademarks of The SINGER Company Limited S.à.r.l. or its Affiliates. ©2019 The SINGER Company Limited S.à.r.l. or its Affiliates. All rights reserved.
- Page 68 471 06 80-26A • ©2019 The SINGER Company Limited S.à.r.l. or its Affiliates. • All rights reserved...