Spirit CS800 Owner's Manual
Hide thumbs
Also See for CS800:
- Owner's manual (40 pages) ,
- Owner's manual (28 pages) ,
- Owner's manual (38 pages)
Advertisement
Quick Links
Advertisement

Related Manuals for Spirit CS800


Summary of Contents for Spirit CS800
- Page 1 CS800 STEPPER OWNER’S MANUAL...
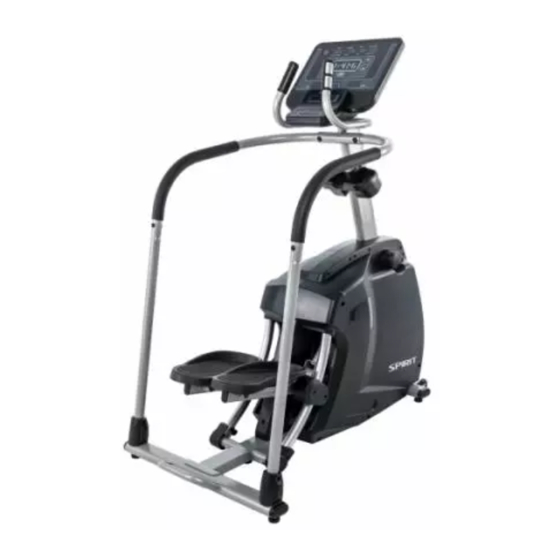
- Page 2 CONSOLE CONSOLE FAN PULSE GRIPS CUP HOLDERS CONSOLE MAST HANDLEBARS FLYWHEEL PEDALS FRONT STABILIZER REAR STABILIZER WITH HANDLEBAR MAIN FRAME Spirit Fitness Spirit Fitness...
-
Page 3: Table Of Contents
TABLE OF CONTENTS PRODUCT REGISTRATION IMPORTANT SAFETY INSTRUCTIONS IMPORTANT ELECTRICAL INSTRUCTIONS IMPORTANT OPERATION INSTRUCTIONS CS800 ASSEMBLY INSTRUCTIONS CONSOLE OPERATION PROGRAMMABLE FEATURES HEART RATE PROGRAM GENERAL MAINTENANCE MANUFACTURER’S LIMITED WARRANTY EXPLODED VIEW PARTS LIST Thank you for purchasing our product, please save these instructions. Please do not perform or attempt any customizing, adjustments, repair or maintenance that is not described in this manual. - Page 4 Congratulations on your new stepper and welcome to the Spirit Fitness family! Thank you for your purchase of this quality stepper from Spirit Fitness. Your new stepper was manufactured by one of the leading fitness manufacturers in the world and is backed by one of the most comprehensive warranties available.
- Page 5 Please record the serial number of this fitness product in the space provided below. Serial Number: REGISTER YOUR PURCHASE The self-addressed product registration card must be completed in full and returned to Spirit Fitness. You can also go to http://www.spiritfitness.com/warranty under the Support tab to register online. www.spiritfitness.com...
-
Page 6: Important Safety Instructions
Do not operate stepper on deeply padded, plush or • more accurate method of heart rate analysis. Various shag carpet. Damage to both carpet and stepper factors, including the user’s movement, may affect the may result. accuracy of heart rate readings. The pulse sensors Spirit Fitness... -
Page 7: Important Electrical Instructions
are intended only as exercise aids in determining your warranty. If you suspect the voltage is low, heart rate trends in general. contact your local power company or a licensed electrician for proper testing. NEVER expose this Wear proper shoes. High heels, dress shoes, sandals •... -
Page 8: Important Operation Instructions
Set your desired resistance level on the to a 2-pole receptacle as shown below if a properly computer console and release the adjustment button. The computer will obey the command gradually. Spirit Fitness... - Page 9 Use caution while participating in other activities while pedaling on your stepper; such as watching television, • reading, etc. These distractions may cause you to lose balance which may result in serious injury. Do not use excessive pressure on console control buttons. They are precision set to function properly with little •...
- Page 10 CS800 PRE-ASSEMBLY UNPACKING TOOLS INCLUDED: 1. Cut the straps, then lift the box over the unit and unpack. ‰ 13/14m/m_Wrench (116) ‰ 12/14m/m_Wrench (117) 2. Carefully remove all parts from the carton and inspect for any ‰ Phillips Head Screw Driver (118) damage or missing parts.
- Page 11 CS800 STEP ZERO 1. Use L Allen Wrench (No.119) to remove two 3/8”x3/4” Socket Head Cap Bolts that hold the protective Side Back (No.17) onto the mounting plate on the Main Frame. Discard the bolts and set the Side Back (No.17) aside.
- Page 12 CS800 STEP ONE HARDWARE FOR STEP 1 PART TYPE DESCRIPTION HEX HEAD BOLT 3/8” x 3-3/4” SOCKET HEAD CAP BOLT 3/8” x 3/4” FLAT WASHER 3/4” x ø19 x 1.5T CURVED WASHER 3/8” x 23 x 2.0T SPRING WASHER ø10 x 2T”...
- Page 13 CS800 STEP TWO HARDWARE FOR STEP 2 PART TYPE DESCRIPTION HEX HEAD BOLT 3/8” x 3/4” BUTTON HEAD SOCKET BOLT 3/8” x 16 x 2” 3/8 x 2-14” HEX HEAD BOLT NYLOC NUT 3/8” x 7T FLAT WASHER 3/8” x 19”1.5T 3/8”...
- Page 14 CS800 STEP TWO - Continued 2. Repeat process for Upper Right Handlebar (No.16) and the other Handlebar Connecting Tube (No.10). 3. Attach Handlebar Connecting Plate (No.13) to Upper Handlebars (No.15 & 16). Secure with two Button Head Socket Bolts (No.76) and two Curved Washers (No.106) by using Wrench (No.116).
- Page 15 CS800 STEP THREE HARDWARE FOR STEP 3 PART TYPE DESCRIPTION SCREW M5 x 10MM SHEET METAL SCREWS 4 x 15 1. Match Left Console Mast Cover (No.57) with Right Console Mast Cover (No.58) on top of left and right Chain Covers and around the Console Mast (No.2) and secure with three Sheet Metal Screws (No.85) by...
- Page 16 CS800 STEP THREE - Continued 4. Secure the Water Bottle Holder (No.113) on the Console Mast (No.2) with two Phillips Head Screws (No.83) by using the Phillips Head Screw Driver (No.118). Spirit Fitness...
-
Page 17: Console Operation
CS800 CONSOLE OPERATION www.spiritfitness.com... - Page 18 Scan Button for LED Windows Dot Matrix LED Data Display Message Center Windows Scan Button for Dot Matrix Up, Down, Program Controls Charger Start, Stop, Level Controls Spirit Fitness...
- Page 19 POWER When the AC power cord is connected to the Stepper, the console will automatically power up. When initially powered on the console will perform an internal self-test. During this time all the lights will turn on. When the lights go off, the Dot Matrix Message Center will show the software version (i.e.: VER 1.0). The LED Data Display Window shows the total hours of use and total steps.
- Page 20 The Program Key is used to preview each program. When you first turn the console on, you may press program key to preview what the program profile looks like. If you decide that you want to try a program, press the Enter key to select the program and enter into the data set-up mode. Spirit Fitness...
- Page 21 You must use both left and right stainless steel sensors to pick up your pulse. Pulse values are displayed anytime the computer is receiving a Grip Pulse signal. You may use the Grip Pulse feature while in Heart Rate Control. The CS800 will also pick up wireless heart rate transmitters that are Polar compatible, including coded transmissions.
-
Page 22: Programmable Features
If you want to change the personal settings then just follow the instructions in the Dot Matrix Message Center. If you start a program without changing the settings the default – or pre- saved – settings will be used. Spirit Fitness... - Page 23 MANUAL The Manual program works as the name implies, manually. This means that you control the workload yourself and not the computer. To start the Manual program follow the instructions below. 1. Using the Program button select Manual then press the Enter button. 2.
- Page 24 This program follows a quick progression up to the maximum resistance level (default or user input level) that is Fat Bur sustained for 2/3 of the workout. This program will challenge your ability to sustain your energy output for an extended period of time. Fat Bur Cardio Spirit Fitness...
- Page 25 Hill CARDIO This program presents a quick progression up to near maximum resistance level (default or user input level). It has slight fluctuations up and down to allow your heart rate to elevate, and then recover repeatedly, before beginning a quick cool down. This will build up your heart muscle and increase blood flow and Fat Burn Fat Burn lung capacity.
- Page 26 HIIT is a fully customizable interval training program. You can enter the number of intervals, time of each interval Sprint and Rest periods and the work intensity of the levels. HIIT HIIT Spirit Fitness...
- Page 27 PROGRAMMING PRESET PROGRAMS 1. Using the Program button select your desired program then press the Enter button. 2. The Dot Matrix Message Center will ask you to enter your Age. You may adjust the age setting, using the Up and Down buttons, then press the Enter button to accept the new number and proceed on to the next screen.
- Page 28 Enter to continue to the next segment. 8. The next segment will show the same level as the previously adjusted segment. Repeat the same process as the last segment then press Enter. Continue this process until all twenty segments have been set. Spirit Fitness...
- Page 29 9. The Dot Matrix Message Center will then tell you to press Enter to save the program. After saving the program the Dot Matrix Message Center says “New program saved” then will give you the option to start or modify the program.
- Page 30 You can manually adjust the resistance levels during the Sprint and Rest segments. 10. At the end of the last Sprint there is a 2-minute cool-down period. You can bypass this by pressing the Stop key and the workout summary will be displayed. Spirit Fitness...
- Page 31 HEART RATE PROGRAMS The old motto, “no pain, no gain”, is a myth that has been overpowered by the benefits of exercising comfortably. A great deal of this success has been promoted by the use of heart rate monitors. With the proper use of a heart rate monitor, many people find that their usual choice of exercise intensity was either too high or too low and exercise is much more enjoyable by maintaining their heart rate in the desired benefit range.
- Page 32 Consult your physician before participating in any exercise program. With all Spirit Fitness machines you may use the heart rate monitor feature without using the Heart Rate program. However, when using the heart rate monitor feature in conjunction with the Heart Rate programs, the machine will automatically adjust speed or incline to maintain the desired heart rate.
-
Page 33: Heart Rate Program
HEART RATE PROGRAM OPERATION To start the HR program follow the instructions below. 1. Using the Program button choose the HR program (65% or 80%) then press the Enter key. 2. The Dot Matrix Message Center will ask you to enter your Age. You may enter your Age, using the Up/Down keys, then press the Enter key to accept the new number and proceed on to the next screen. - Page 34 18 Very hard + 7 Very, very light 11 Fairly light 15 Hard 19 Very, very hard 8 Very, very light + 12 Comfortable 16 Hard + 20 Maximal 9 Very light 13 Somewhat hard 17 Very hard Spirit Fitness...
- Page 35 WEARING THE CHEST STRAP (SOLD SEPARTELY) 1. Attach the transmitter to the elastic strap using the interlocking button. 2. Adjust the strap as tightly as possible while ensuring it is still comfortable. 3. Position the transmitter with the logo centered in the middle of your torso facing away from your chest (some people must position the transmitter slightly left of center).
- Page 36 5. Some people have problems with the transmitter picking up a signal from their skin. If you have problems try wearing the transmitter upside down. Normally the transmitter will be oriented so the Spirit Fitness logo is right side up.
-
Page 37: General Maintenance
GENERAL MAINTENANCE Wipe down all areas in the sweat path with a damp cloth after each workout. If a squeak, thump, clicking or rough feeling develops the main cause is most likely one of two reasons: 1. The hardware was not sufficiently tightened during assembly. All bolts that were installed during assembly need to be tightened as much as possible. - Page 38 - Pause mode (have five minutes) - Odometer Reset (Resets the odometer) - Sleep mode - Beep sound (Control Beep) - CAB Protocol or CSAFE Protocol Service - Motor test - Csafe test - Sensor test (Test the speed sensor function) Exit Spirit Fitness...
- Page 39 EFFECTIVE APRIL 1, 2020 Spirit Fitness warrants all its stepper parts for a period of time listed below from the date of retail sale, as determined by sale receipt, or in the absence of a sales receipt eighteen (18) months from the original factory shipping date.
- Page 40 5. Products that have been: sold, transferred, bartered, or given to a third party. 6. Products that do not have a warranty registration card on file at Spirit Fitness. Spirit Fitness reserves the right to request proof of purchase if no warranty record exists for the product.
- Page 41 Jonesboro, AR 72402-2037 Product features or specifications as described or illustrated are subject to change without notice. All warranties are made by Spirit Manufacturing, Inc. This warranty applies only in the 48 contiguous United States. NOTE: This does not apply to Alaska or Hawaii.
- Page 42 Spirit Fitness...
- Page 43 30~10 Console Display Board CS800-XS200B-SS005-01 Part List_SPIRIT(SAP) 30~11 Main Key Board Main Frame 30~12 Interface Board Console Mast 30~13 Bluetooth Crank Arm 30~14 USB charging module Crank Axle 30~15 W/Receiver, HR Linked Assembly(L) 30~16 CASFE Board Linked Assembly(R) 1200m/m_Computer Cable...
- Page 44 3/8" × UNF26 × 4T_Luck Nut 200304 3/8" × UNF26 × 11T_Nut 3/8" × 7T_Luck Nut M8 × 6.3T_Luck Nut M8 × 170m/m_J Bolt Ø3/8" × Ø19 × 1.5T_Flat Washer Ø8.5 × Ø26 × 2.0T_Flat Washer Ø5/16" × Ø23 × 1.5T_Flat Washer Spirit Fitness...
- Page 45 www.spiritfitness.com...
- Page 46 Spirit Fitness...
- Page 47 www.spiritfitness.com...
- Page 48 800.258.4555 Spirit Fitness spiritservice@spiritfitness.com 3000 Nestle Road www.spiritfitness.com Jonesboro, AR 72401 CS800 Owners Manual © 2021 All Rights Reserved Revision 2: 02.04.2021...