
Related Manuals for Audiovox ACD-22


Summary of Contents for Audiovox ACD-22
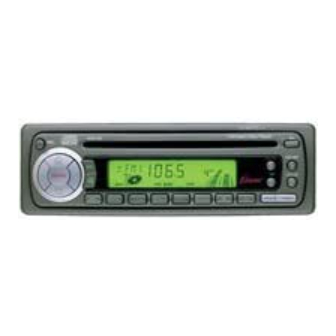
- Page 1 ACD-22 ACD-22 ACD-22 ACD-22 ACD-22 DETACHABLE FRONT PANEL AM/FM/MPX RADIO WITH COMPACT DISC PLAYER AND QUARTZ CLOCK ROCK DISC LOUD TRACK CLAS DISC SCAN...
-
Page 2: Installation Instructions
INSTALLATION INSTRUCTIONS INSTALLATION INSTRUCTIONS INSTALLATION INSTRUCTIONS INSTALLATION INSTRUCTIONS INSTALLATION INSTRUCTIONS This unit is designed for installation in cars, trucks, and vans with an existing radio opening. In many cases, a special installation kit will be required to mount the radio to the dashboard. These kits are available at electronics supply stores and car stereo specialist shops. -
Page 3: Iso Installation
T T T T T OLL-FREE INST OLL-FREE INST OLL-FREE INSTALL OLL-FREE INST OLL-FREE INST The installation and wiring connections for this unit are so simple, we doubt you'll need our help, but, if you do, we're here to help you. Just call our toll-free telephone assistance line at 1-800-645-4994 during the days and hours shown (U.S.A. -
Page 4: Radio Wiring
RADIO WIRING RADIO WIRING RADIO WIRING RADIO WIRING RADIO WIRING REFER TO PAGE 4 FOR SPEAKER WIRING AUTOMATIC ANTENNA ANTENNA EXISTING ANTENNA CABLE ANTENNA LEAD ON REAR OF RADIO 3 3 3 3 3 BLUE IMPORTANT THE BLUE WIRE CAN BE USED TO REMOTELY ACTIVATE AN AUTOMATIC ANTENNA OR AN EXTERNAL AMPLIFIER (SEE ANTENNA OR AMPLIFIER MANUAL) -
Page 5: Speaker Wiring
SPEAKER WIRING SPEAKER WIRING SPEAKER WIRING SPEAKER WIRING SPEAKER WIRING REFER TO PAGE 3 l THE AMPLIFIERS IN THIS RADIO ARE ONLY DESIGNED FOR USE WITH 4 SPEAKERS. FOR RADIO WIRING l NEVER COMBINE (BRIDGE) OUTPUTS FOR USE WITH 2 SPEAKERS. l NEVER GROUND NEGATIVE SPEAKER LEADS TO CHASSIS GROUND. -
Page 6: Power Off Button
POWER OFF BUTTON Press this button to turn the unit on and off. When turned on, the volume level will start at 1 and gradually increase to the level at which it was set when the unit was turned off. VOLUME / LEVEL CONTROLS To increase the volume level, press the button. - Page 7 TREBLE CONTROL To adjust the treble level, first select the Treble mode by pressing the Select button the “TRE” indication appears on the display panel. Within 5 seconds of choosing the Treble mode, press the Level Control to adjust the treble response as desired.
- Page 8 Pressing and holding either button for longer than 0.5 seconds will cause the radio to con- tinue tuning rapidly in the selected direction until the button is released at which point it will seek the next available station. AUTO-STORE TUNING (AS) PRE-SET SCAN TUNING (PS) Press this button momentarily to scan the 6 stations in the pre-set memories of the band in...
-
Page 9: Track Select
DISC SLOT With the label surface facing up, gently insert the disc into the slot until the soft-loading mechanism engages and disc play begins. The and track number will appear on the display panel. CAUTION: This unit is designed for play of stan- dard 5"... -
Page 10: Disc Eject
DISC EJECT ( Disc play is stopped, the disc is ejected and the unit will change to radio operation by pressing this button (“EJT” will briefly appear on the display panel). If the disc is not re- moved from the unit and the button is pressed again, the disc will be re-loaded and begin playing. -
Page 11: Detaching The Front Panel
DETACHING THE FRONT PANEL Release button ATTACHING THE FRONT PANEL Engage right side first 10 10 10 10 10... -
Page 12: Error Codes
1. Switch the vehicle ignition “on” and the radio “on” (radio frequency or disc track number will be shown on the display panel). 2. Press and hold the Time/Frequency Display Selector button 2 seconds until the time display appears with the colon ( : ) flashing. Release the Time/Frequency button. -
Page 13: Specifications
SPECIFICATIONS SPECIFICATIONS SPECIFICATIONS SPECIFICATIONS SPECIFICATIONS Size: Operating Voltage: Output Power: Output Wiring: Output Impedance: Low-Level Output: Tuning Range: Sensitivity: FM Stereo Separation: CD Frequency Response: CD Signal/Noise Ratio: CD Channel Separation: CD Distortion: *Specifications are subject to change without notice. 7"... -
Page 14: Care And Maintenance
The radio section of your new sound system does not require any maintenance. recommend that you keep this manual for reference on the many features found in this unit as well as how to set the clock. The compact disc player section also requires no routine maintenance, but proper understanding of its use and handling will help you obtain maximum enjoyment of its capabilities. - Page 15 This Warranty gives you specific legal rights and you may also have other rights which vary from state to state. U.S.A.: AUDIOVOX CORPORATION, 150 MARCUS BLVD., HAUPPAUGE, NEW YORK 11788 • 1-800-645-4994 CANADA: CALL 1-800-645-4994 FOR LOCATION OF WARRANTY STATION SERVING YOUR AREA...