Advertisement
Quick Links
Advertisement

Related Manuals for Horizon Fitness 7.0AT


Summary of Contents for Horizon Fitness 7.0AT
- Page 1 OWNER’S MANUAL Read the TREADMILL GUIDE before using this OWNER’S MANUAL.
-
Page 2: Important Precautions
IMPORTANT PRECAUTIONS SAVE THESE INSTRUCTIONS When using an electrical product, basic precautions should always be followed, including the following: Read all instructions before using this treadmill. It is the responsibility of the owner to ensure that all users of this treadmill are adequately informed of all warnings and precautions. - Page 3 DANGER Do not operate under blanket or pillow. Excessive heating can occur and cause fire, electric shock, or injury to persons. • • Connect this exercise product to a properly grounded outlet only. If you experience any kind of pain, including but not limited to chest pains, nausea, dizziness, or shortness of breath, stop exercising •...
- Page 4 WARNING Place the treadmill on a level and stable surface. There should be one foot of clearance in front of the • treadmill for the power cord. Please leave a clear zone behind the treadmill that is at least the width of the treadmill and at least 79”...
- Page 5 Connect this exercise product to a properly grounded outlet only. Never operate product with a damaged cord or plug even if it is working properly. HORIZON 7.0AT TREADMILL MODEL NAME: Never operate any product if it appears damaged, or has been immersed in water.
-
Page 6: Pre-Assembly
SPEAKERS TABLET/READING RACK TOOLS INCLUDED: PRE ASSEMBLY CONSOLE JOINT COVER CONSOLE 6 mm T-Wrench UNPACKING 5 mm L-Wrench WATER BOTTLE HOLDER CONTROL PANEL AND DISPLAY WINDOWS Place the treadmill carton on a level flat surface. It is recommended that you place a PARTS INCLUDED: protective covering on your floor. -
Page 7: Assembly Step
ASSEMBLY STEP 1 ASSEMBLY STEP 2 Cut the yellow banding straps and lift the running HARDWARE FOR STEP 1 HARDWARE FOR STEP 2 deck upward from the rear to remove all contents from NOTE: Do not fully tighten bolts until STEP 3. PART TYPE DESCRIPTION... - Page 8 ASSEMBLY STEP 3 ASSEMBLY STEP 4 Open HARDWARE FOR STEP 4. HARDWARE FOR STEP 3 HARDWARE FOR STEP 4 NOTE: Fully tighten all bolts from STEPS 1 & 2. Attach RIGHT SIDE PULSE RATE GRIP (7) PART TYPE DESCRIPTION PART TYPE DESCRIPTION to the underside of the CONSOLE (5) using...
-
Page 9: Treadmill Operation
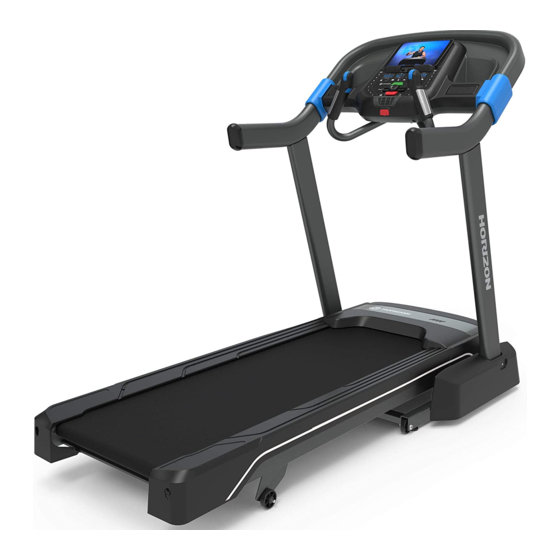
Before the first use, lubricate the treadmill deck by following the instructions in the MAINTENANCE section in the TREADMILL GUIDE. 7.0AT Running Area: 152 × 51 cm / 60” × 20” Product Weight: 115 kg / 254 lbs. User Weight Capacity = 147 kg / 325 lbs. - Page 10 CONSOLE OPERATION Note: There is a thin protective sheet of clear plastic on the overlay of the console that should be removed before use. A) LCD DISPLAY WINDOWS: Watts, Pace, Calories/Hour, Heart Rate, Laps. B) LED DISPLAY: Time, Speed, Distance, Incline, Pace, Heart Rate, and Calories. C) WORKOUT LED INDICATORS: indicate what workout is set for the current program.
- Page 11 GETTING STARTED 1) Check to make sure no objects are placed on the belt that will hinder the movement of the treadmill. 2) Plug in the power cord and turn the treadmill ON. (The ON/OFF switch is next to the power cord.) 3) Stand on the side rails of the treadmill.
- Page 12 3) MY FIRST 5K: This 9-week program is intended for inexperienced runners looking to run their first 5k or simply begin an exercise routine. It is designed specifically to keep you motivated and engaged, gradually building your strength, increasing your stamina and giving you the confidence it takes to complete your first 5k. WORKOUT PROFILES Week Workout #1 Workout #2...
- Page 13 4) FAT BURN: Relatively slow and steady is the name of the game to maximize your weight-loss goals. Promotes weight loss by TARGET PROFILES increasing and decreasing the speed and incline, while keeping you in your fat burning zone. DISTANCE: Push yourself and go further during your workout with 13 distance workouts. Choose from 1K, 3K, 5K, 8K, 10K, Speed and Incline changes, segments repeat every 30 seconds.
- Page 14 You will need to ensure that your wireless heart rate monitoring device is Bluetooth 4.0 compatible and is also “open” to sharing data. Non-“open” or “closed” devices typically only share data with their proprietary apps. The 7.0AT needs an “open” device to This chart gives examples of the heart rate range for a 30 year old exercising at 5 different heart rate zones.
- Page 15 It will automatically pair at this time. Dut: Verwijderingsaanwijzing VISION Fitness / HORIZON Fitness / TEMPO Fitness / TREO Fitness producten zijn recyclebaar. Breng het apparaat aan het einde RE-PAIRING MUSIC DEVICES van de gebruiksduur naar een in recycling gespecialiseerd bedrijf (plaatselijk verzamelpunt).
- Page 16 Horizon 7.0AT Owner’s Manual 042020’ ©2020 Horizon Fitness...