Table of Contents
Advertisement
Available languages
Available languages
Quick Links
Gebruiksaanwijzing
GB
NL
Nederland, 1
Nederland, 1
Nederland, 1
Nederland, 1
Nederland, 1
English, 12
KN3G11S/NL
K3G11/O
K3G11S/O
FR
Français, 23
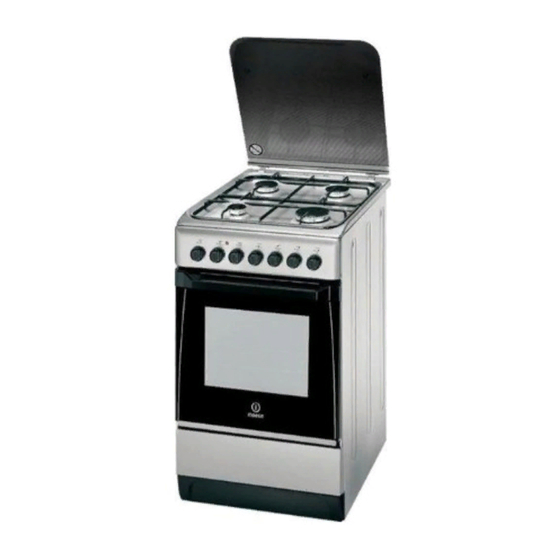
FORNUIS EN OVEN
Inhoud
Installatie, 2-3
Plaatsen en waterpas zetten
Elektrische aansluitingen
Gas aansluitingen
Aanpassen aan de verschillende soorten gas
Technische gegevens
Tabel eigenschappen
Beschrijving van het apparaat, 4
Aanzichttekening
Bedieningspaneel
Starten en gebruik, 5-8
De kookzones
Gebruik van de oven
Kooktabel oven
Voorzorgsmaatregelen en advies, 10
Algemene veiligheid
Afvalverwijdering
Energiebesparing en milieubehoud
Onderhoud en verzorging, 11
De elektrische stroom afsluiten
Reinigen van het apparaat
Vervangen van het ovenlampje
Reinigen van de glaskeramische kookplaat
Servicedienst
NL
Advertisement
Chapters
Table of Contents

Related Manuals for Indesit KN3G11S/NL


Summary of Contents for Indesit KN3G11S/NL
- Page 1 Tabel eigenschappen Beschrijving van het apparaat, 4 Aanzichttekening Bedieningspaneel Starten en gebruik, 5-8 De kookzones Gebruik van de oven Kooktabel oven KN3G11S/NL Voorzorgsmaatregelen en advies, 10 Algemene veiligheid K3G11/O Afvalverwijdering K3G11S/O Energiebesparing en milieubehoud Onderhoud en verzorging, 11 De elektrische stroom afsluiten...
- Page 2 Installatie ! Bewaar dit instructieboekje zorgvuldig voor Afvoer van de verbrandingsgassen eventuele raadpleging in de toekomst. In het geval u De afvoer van de verbrandingsgassen moet het apparaat verkoopt, weggeeft of wanneer u plaatsvinden door middel van een afzuigkap die is verhuist, moet het boekje bij het apparaat bewaard aangesloten op een veilige en goedwerkende worden.
- Page 3 • als het kookvlak hoger is dan de meubels, moeten • de spanning zich bevindt tussen de waarden die zij op minstens 200 mm van het apparaat vandaan staan aangegeven op het typeplaatje; worden geplaatst; • de contactdoos en de stekker overeenkomen. Als •...
- Page 4 • niet in contact komt met scherpe voorwerpen, geschikt zijn voor het nieuwe type gas ( zie Tabel Eigenschappen branders en sproeiers ); scherpe randen, beweegbare onderdelen en niet in de knel raakt; • gedurende de hele lengte makkelijk te 3.
- Page 5 34x39x44 cm HxBxD liter 58 Inhoud breedte 42 cm Afmetingen van de diepte 44 cm verwarmingslade hoogte 18 cm KN3G11S/NL geschikt voor alle soorten gas Branders aangegeven op het typeplaatje K3G11/O Spanning en zie typeplaatje frequentie van de K3G11S/O elektrische voeding Richtlijn 2002/40/EG op etiket van elektrische ovens.
- Page 6 Beschrijving van het apparaat Aanzichttekening Bedieningspaneel Controlelampje Knop THERMOSTAAT TIMER* Knoppen BRANDER THERMOSTAATKNOP OVENKNOP Controlelampje Knop THERMOSTAAT TIMER Knoppen OVENKNOP THERMOSTAATKNOP BRANDER...
- Page 7 Starten en gebruik Gebruik van de kookplaat ! Op modellen die voorzien zijn van een vlamverspreider moet deze alleen worden gebruikt Aansteken van de branders op de extra brander wanneer men pannen gebruikt Naast elke BRANDER knop wordt met een vol rondje die een doorsnede hebben van minder dan 12 cm.
- Page 8 Viene fatto notare che le temperature più elevate Ovenverlichting vengono raggiunte in tempi piuttosto lunghi, De verlichting gaat aan door de pertanto in questi casi è consigliabile utilizzare la PROGRAMMAKNOP in een willekeurige stand funzione "Forno Statico". (behalve “0”) te zetten. Hij zal aanblijven totdat de Oven "boven"...
- Page 9 Het braadspit Ga voor het aktiveren van het braadspit als volgt te werk: a) plaats de lekplaat op de 1° stand; b) plaats de braadspithouder in de 4° stand en steek de vleespen in het hiervoor bedoelde gat van het braadspit dat zich achterin de oven bevindt;...
- Page 10 Voorzorgsmaatregelen en advies ! Dit apparaat is ontworpen en vervaardigd volgens onderhoud uit als de stekker nog in het de geldende internationale veiligheidsvoorschriften. stopcontact zit. Deze aanwijzingen zijn geschreven voor uw veiligheid • Probeer in geval van storingen nooit zelf de en u dient ze derhalve goed door te nemen.
- Page 11 Onderhoud en verzorging De elektrische stroom afsluiten Het controleren van de afdichtingen van de oven Sluit altijd eerst de stroom af voordat u tot enige Controleer regelmatig de staat van de afdichtingen handeling overgaat. rondom de ovendeur. In het geval de afdichting beschadigd is, dient u zich tot de dichtstbijzijnde Reinigen van het apparaat Erkende Servicedienst te wenden.
-
Page 12: Table Of Contents
Control panel Start-up and use, 18-20 Using the hob Using the oven Cooking modes Practical cooking advice Oven cooking advice table KN3G11S/NL Precautions and tips, 21 K3G11/O General safety K3G11S/O Disposal Respecting and conserving the environment Care and maintenance, 22... -
Page 13: Installation
Installation ! Before operating your new appliance please read Disposing of combustion fumes this instruction booklet carefully. It contains important information concerning the safe installation The disposal of combustion fumes should be and operation of the appliance. guaranteed using a hood connected to a safe and efficient natural suction chimney, or using an electric ! Please keep these operating instructions for future fan that begins to operate automatically every time... -
Page 14: Electrical Connection
! Once the appliance has been installed, the power • Do not position supply cable and the electrical socket must be blinds behind the HOOD easily accessible. cooker or less than 200 mm away from its Min. ! The cable must not be bent or compressed. sides. -
Page 15: Adapting To Different Types Of Gas
! If one or more of these conditions is not fulfilled or 3. While the burner is alight, quickly change the position if the cooker must be installed according to the of the knob from minimum to maximum and vice versa conditions listed for class 2 - subclass 1 appliances several times, checking that the flame is not (installed between two cupboards), the flexible steel... -
Page 16: Table Of Burner And Nozzle Specifications
Rapid (Large) 3.00 0.70 Semi-rapid 1.90 0.40 (Medium) (S) Auxiliary 1.00 0.40 (Small) (A) KN3G11S/NL Nominal (mbar) Supply Minimal (mbar) pressure K3G11/O Maximised (mbar) K3G11S/O At 15°C and 1013 mbar - dry gas Natural G25 P.C.S. = 32.49 MJ/m³ TECHNICAL DATA... -
Page 17: Description Of The Appliance
Description of the appliance Overall view Control panel THERMOSTAT TIMER indicator light knob Hob BURNER THERMOSTAT SELECTOR control knobs knob knob TIMER THERMOSTAT knob indicator light SELECTOR THERMOSTAT Hob BURNER knob knob control knobs... -
Page 18: Start-Up And Use
Start-up and use Using the hob Lighting the burners ! For models equipped with a reducer grid, the latter For each BURNER knob there is a complete ring must be used only for the auxiliary burner, when showing the strength of the flame for the relevant burner. pans with a diameter of less than 12 cm are used. -
Page 19: Cooking Modes
Cooking modes Practical cooking advice ! A temperature value can be set for all cooking ! In the GRILL cooking mode, place the dripping modes between 50°C and MAX, except for the pan in position 1 to collect cooking residues (fat GRILL programme, for which only the MAX power and/or grease). -
Page 20: Oven Cooking Advice Table
Oven cooking advice table Selector knob Food to be cooked Weight Cooking rack Preheating time Thermostat Cooking setting (in kg) position from (minutes) knob time bottom setting (minutes) Duck 65-75 1 Static Roast veal or beef 70-75 Pork roast 70-80 Biscuits (short pastry) 15-20 Tarts... -
Page 21: Precautions And Tips
Precautions and tips ! This appliance has been designed and manufactured in • Never perform any cleaning or maintenance work without compliance with international safety standards. having disconnected the appliance from the electricity mains. The following warnings are provided for safety reasons and must •... -
Page 22: Care And Maintenance
Care and maintenance Switching the appliance off The cover If the cooker is fitted with a Disconnect your appliance from the electricity supply glass cover, this cover before carrying out any work on it. should be cleaned using lukewarm water. Do not use Cleaning the appliance abrasive products. - Page 23 Description de l’appareil, 28 Vue d’ensemble Tableau de bord Mise en marche et utilisation, 29-32 Utilisation du plan de cuisson Mise en marche du four KN3G11S/NL Programmes de cuisson K3G11/O Conseils de cuisson Tableau de cuisson au four K3G11S/O Précautions et conseils, 33 Sécurité...
-
Page 24: Installation
Installation ! Conservez ce mode d’emploi pour pouvoir le pièces voisines (voir figure B) – à condition qu’il ne consulter à tout moment. En cas de vente, de cession s’agisse pas de parties communes du bâtiment, de ou de déménagement, veillez à ce qu’il suive chambres à... -
Page 25: Positionnement Et Nivellement
Positionnement et nivellement intercaler entre l’appareil et le réseau un interrupteur à coupure omnipolaire ayant au moins 3 mm ! L’appareil peut être installé à côté de meubles dont d’écartement entre les contacts, dimensionné à la la hauteur ne dépasse pas celle du plan de cuisson. charge et conforme aux normes NFC 15-100 (le fil de terre ne doit pas être interrompu par l’interrupteur). -
Page 26: Adaptation Aux Différents Types De Gaz
Raccordement gaz par tuyau flexible en caoutchouc Adaptation du plan de cuisson Assurez-vous que le tuyau est bien conforme aux Remplacement des injecteurs des brûleurs du plan de normes applicables dans le pays d’installation. Le cuisson: tuyau doit avoir un diamètre intérieur de : 8 mm en cas 1.enlevez les grilles du plan de cuisson et sortez les d’alimentation au gaz liquide;... -
Page 27: Caractéristiques Techniques
à l'intérieur du Brûleurs portillon ou sur la paroi intérieure gauche (visible après avoir sorti le tiroir chauffe-plats). KN3G11S/NL Directive 2002/40/CE sur K3G11/O l’étiquette des fours électriques Norme EN 50304 ETIQUETTE K3G11S/O Consommation énergie déclarée... -
Page 28: Description De L'appareil
Description de l’appareil Vue d’ensemble Le couvercle Brûleur à gaz Plateau du plan de cuisson Grille du plan de cuisson GLISSIERES Tableau de bord de coulissement niveau 5 Support GRILLE niveau 4 niveau 3 Support LECHEFRITE niveau 2 niveau 1 Pied de réglage Pied de réglage Tableau de bord... -
Page 29: Mise En Marche Et Utilisation
Mise en marche et utilisation Utilisation du plan de cuisson Pour distinguer le type de brûleur reportez-vous aux dessins figurant dans le paragraphe "Caractéristiques des brûleurs et des injecteurs" Allumage des brûleurs Un petit cercle plein près de chaque bouton ! Pour les modèles équipés d'une grille de réduction, BRULEUR indique le brûleur associé... -
Page 30: Programmes De Cuisson
En cours de cuisson, on peut à tout moment : permet pas d’atteindre une température maximum à • modifier le programme de cuisson à l’aide du l’intérieur du four (250°C), il est par conséquent bouton PROGRAMMES; déconseillé de cuire en maintenant longuement le •... -
Page 31: Conseils De Cuisson
Conseils de cuisson ! En cas de cuisson en mode GRIL, placer la lèchefrite au gradin 1 pour récupérer les jus de cuisson. GRIL • Placer la grille au gradin 3 ou 4, enfourner les plats au milieu de la grille. •... - Page 32 Tableau de cuisson Position Aliments à cuire Poids Position Temps de Position Temps de sélecteur (Kg) gradins en préchauffage sélecteur de cuisson partant du (minutes) températures (minutes) 1 Statique - Canard 65-75 Traditionnel Rôti de veau ou de bœuf 70-75 Rôti de porc 70-80 Biscuits (pâte brisée)
-
Page 33: Précautions Et Conseils
Précautions et conseils ! Cet appareil a été conçu et fabriqué conformément • Ne posez pas d’objets lourds sur la porte du four aux normes internationales de sécurité. ouverte. Ces conseils sont fournis pour des raisons de sécurité • Cet appareil doit être exclusivement destiné à et doivent être lus attentivement. -
Page 34: Nettoyage Et Entretien
Nettoyage et entretien Mise hors tension complètement et tirez vers le haut ( voir figure ). ! Evitez de refermer le couvercle si les brûleurs sont Avant toute opération de nettoyage ou d’entretien allumés ou encore chauds. coupez l’alimentation électrique de l’appareil. Contrôler les joints du four Nettoyage de l’appareil Contrôlez périodiquement l’état du joint autour de la... - Page 36 03/2011 - 195048029.03 XEROX FABRIANO...