Table of Contents
Advertisement
Advertisement
Table of Contents

Related Manuals for Zeiss Smartzoom 5


Summary of Contents for Zeiss Smartzoom 5
- Page 1 Quick Start Guide Smartzoom 5 Digital Microscope...
-
Page 3: Table Of Contents
Table of Contents 3.8 Performing Examination Tasks Welcome 1.1 Introduction 3.9 Checking and Exporting Job Results 1.2 About Your Smartzoom 5 Microscope 3.10 Saving a Job 1.3 Main Components 3.11 Administrator Workflow 1.4 User Roles and Workflows Running a job Assembling and starting Smartzoom 5 4.1 Job Workflow... -
Page 5: Welcome
WELCOME... -
Page 6: Introduction
1 WELCOME 1.1 Introduction Welcome to the Smartzoom 5 Quick Start Guide. • Creating jobs for routine examinations • Running jobs This Quick Start Guide introduces you to the most important features, functions, and information you need to know to start... -
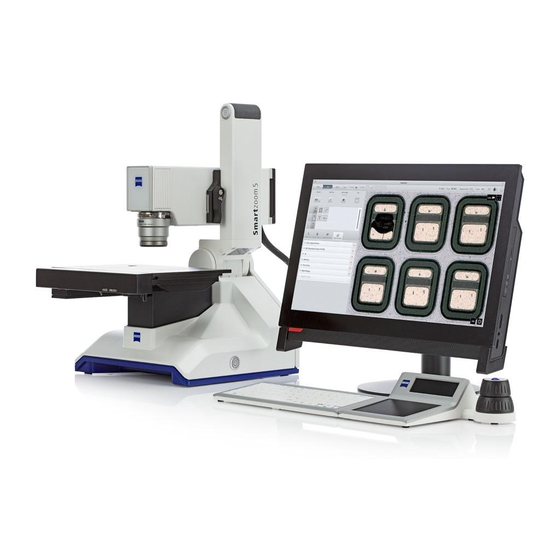
Page 7: About Your Smartzoom 5 Microscope
13 x 10 x 12 cm (width x depth x height). attached computer, which is also used to process and analyze Smartzoom 5 is also designed as a portable device and can be the acquired images. assembled within minutes without needing any tools. -
Page 8: Main Components
The control knobs control the zoom, focus, and Microscope stand microscope image position. The main component of Smartzoom 5: it provides the support for the optical engine and the scanning stage as well as controlling the communication between the attached components and the computer. -
Page 10: User Roles And Workflows
Administrator Operator 1 WELCOME 2 ASSEMBLING AND STARTING SMARTZOOM 5 1.4 User Roles and Workflows How you work with Smartzoom 5 depends on your user role in the system: 3 ACQUIRING A FIRST MICROSCOPE IMAGE • Administrator Administrators are experienced microscopy users. -
Page 11: Assembling And Starting Smartzoom
ASSEMBLING AND STARTING SMARTZOOM 5... -
Page 12: Assembling Smartzoom
2 ASSEMBLING AND STARTING SMARTZOOM 5 2.1 Assembling Smartzoom 5 The following contains a summary of how to assemble Smartzoom 5. For a complete guide, see the Instruction Manual. Slide the scanning stage onto the microscope stand and close the lever. -
Page 14: Starting Smartzoom
Enter the password and tap the icon to log in. • The optical engine and the scanning stage move to their initial positions. • Start the Smartzoom 5 application from the desktop, and the Login screen is displayed. -
Page 15: Positioning The Sample
10 cm 13 cm 2.3 Positioning the Sample Smartzoom 5 can be used to inspect various types of samples, Ensure that the correct side of the scanning stage insert is from circuit boards to tissue samples, from solar panel sections facing up (fl at side or side with angle stops). - Page 16 2 ASSEMBLING AND STARTING SMARTZOOM 5...
-
Page 17: Acquiring A First Microscope Image
ACQUIRING A FIRST MICROSCOPE IMAGE (This chapter only applies to administrators) -
Page 18: Workflow Selection
3 ACQUIRING A FIRST MICROSCOPE IMAGE 3.1 Workfl ow Selection After logging in you can choose which type of workfl ow you Note: A crossed red USB sign may be displayed that indicates wish to perform. a missing USB connection: •... -
Page 19: Acquiring An Overview Image
3.2 Acquiring an Overview Image Tap the icon to acquire a new overview image. The fi rst step is to acquire an overview image. This shows the entire stage and enables you to orientate yourself on the To fi nish the setup, tap the icon. -
Page 20: Acquiring A Microscope Image
3 ACQUIRING A FIRST MICROSCOPE IMAGE 3.3 Acquiring a Microscope Image After acquiring the overview image, you can now create the actual microscope image: Tap the icon to open the overview image. Tap the icon to perform an initial autofocus. The camera symbol indicates the live-position of the The microscope image gets focused. -
Page 21: Finding Areas On The Sample
3.4 Finding Areas on the Sample Navigate to the desired area of the sample: You can also perform all these actions using the controller. • Pan and scroll the sample • Zoom in and out • Adjust the focus until the sample is sharp... -
Page 22: Adjusting The Image Zoom, Focus, And Position
3 ACQUIRING A FIRST MICROSCOPE IMAGE Toggle Zoom / button focus mode Pan mode Upper Zoom Move image control in / out along y axis knob Lower Adjust Move image control focus along x axis knob 3.5 Adjusting the Image Zoom, Focus, and Position You can adjust the zoom and position of the image using the You can adjust the zoom, focus, and position of the image... -
Page 23: Optimizing Microscope Images
3.6 Optimizing Microscope Images Smartzoom 5 contains various possibilities to enhance the If the sample appears pixelated, incorrectly exposed, or un- appearance of a sample, from adjusting the brightness and sharp, adjust the settings in the Image Enhancement tab. aperture to reducing noise or altering the color temperature. -
Page 24: Acquiring Microscope Images
When you are satisfi ed with the appearance of the sample, Move to any existing microscope image by tapping its acquire a microscope image. number. Smartzoom 5 also supports advanced types of microscope Tap the icon. The microscope image is added to the Image images, for example 3D images and images with an extended depth of fi eld (EDF). -
Page 25: Performing Examination Tasks
Measure distances, angles, or perimeters tool to the object you wish to measure. • Measure areas enclosed by shapes Smartzoom 5 also contains Smart Tools to automatically • Add notes and other annotations recognize and/or measure objects in the microscope image. -
Page 26: Checking And Exporting Job Results
3 ACQUIRING A FIRST MICROSCOPE IMAGE 3.9 Checking and Exporting Job Results If you wish to alter a measurement or acquire an Once you have acquired all desired microscope images and alternative microscope image, switch back to the Edit have performed all relevant examination tasks, you can workfl ow step. -
Page 27: Saving A Job
3.10 Saving a Job The microscope records any workfl ow that you perform. This A job can be performed by an operator. All saved jobs are allows you to save your workfl ow as a job: automatically displayed for the operator after logging in. Tap the Save button. -
Page 28: Administrator Workflow
3 ACQUIRING A FIRST MICROSCOPE IMAGE 3.11 Administrator Workflow Administrators have the following typical workflow: Acquire an overview image As an administrator you have three possible workflows: Define the coordinate system • Creating a job (routine examination) Name the sample and the job This “template”... - Page 29 Routine Free...
- Page 30 3 ACQUIRING A FIRST MICROSCOPE IMAGE...
-
Page 31: Running A Job
RUNNING A JOB... -
Page 32: Job Workflow
4 RUNNING A JOB 4.1 Job Workfl ow Acquire a microscope image As an operator you have the following workfl ow: Perform the specifi ed measurements From the archive, select the appropriate job You are automatically presented with the appropriate Enter the sample ID tool. -
Page 33: Selecting A Job
4.2 Selecting a Job When you log in as an operator, you are immediately directed If you cannot see the job you wish to run in the list, you can reduce the number of jobs using the filters. to the job archive. Tap the Show menu and select Jobs. -
Page 34: Entering The Sample Id
4 RUNNING A JOB 4.3 Entering the Sample ID After selecting the job to run, a dialog is displayed to enter the If you are unsure about the sample ID, contact your sample ID. This is the unique ID of the sample you wish to administrator. -
Page 35: Acquiring An Overview Image
4.4 Acquiring an Overview Image After entering the sample ID, the live overview image of the Place the sample on the scanning stage in the identical sample is displayed. Acquire an overview image so that you position and orientation to that shown in the reference can orientate yourself on the sample when viewing microscope image. -
Page 36: Placing The Coordinate System
4 RUNNING A JOB 4.5 Placing the Coordinate System Look at the position of the coordinate system in the Note: If the administrator chose the default position, this step is skipped. reference image. The coordinate system is placed in a similar location in Coordinate systems help to locate measurements exactly on the microscope image. -
Page 37: Acquiring A Microscope Image
You have to acquire an identical microscope image to that in If the areas do not match, use the controller to move the the reference image. Smartzoom 5 automatically moves to the microscope image until the areas are identical and the correct area of the sample and automatically adjusts the image sample is in focus. -
Page 38: Performing Measurements
4 RUNNING A JOB 4.7 Performing Measurements Once you have acquired a microscope image, the The measurement value is displayed as well as the measurement to be performed is displayed in the reference difference between your value and the expected value. image. -
Page 39: Saving The Job Results
4.8 Saving the Job Results When you have completed the last examination task, the Choose what you want to do next: icon is displayed. • Return to the start screen To return to a previous measurement, tap the icon. • View the report of the measurement results When you are satisfi ed with all the measurements, tap •... - Page 40 4 RUNNING A JOB...
-
Page 41: Advanced Features
ADVANCED FEATURES... -
Page 42: Defining The Coordinate System
Stage coordinate system Origin coordinate system Perpendicular coordinate system 5.1 Defi ning the Coordinate System Smartzoom 5 allows you to specify a reference point and • Relative – Origin Reference point: user-defi ned coordinate system that is the basis for all measurements, e.g. -
Page 43: Naming The Sample And Job
5.2 Naming the Sample and Job Adding a sample ID and job description helps users identify • The unique serial number of the current sample. the correct job to run. The user can filter the list of jobs Example: 000ABC123 according to any of the following criteria: Fill out the fields according to your company or institution •... -
Page 44: Measurement Tools
5 ADVANCED FEATURES Icon Description Description Angle between two connected lines 5.3 Measurement Tools Angle between two lines that do not join The table lists the most important measurement tools. For more information about Smart Tools see the Online Help. Distance between the centers of two circles Diameter of a circle... - Page 45 Icon Description Description Icon Description Description Total length of a multi-point line Arrow with text label Perpendicular distance between two Circle with text label parallel lines Perpendicular distance between a Rectangle with text label line and a point Reference point, that is used as an endpoint for different measurement Measurement scale tools...
- Page 46 Carl Zeiss Microscopy GmbH Carl-Zeiss-Promenade 10 07745 Jena Germany microscopy@zeiss.com www.zeiss.com/microscopy © Jena 2016 by Carl Zeiss Microscopy GmbH - all rights reserved Document 000000-2064-411; June 2016...