
Related Manuals for AMX NXB-KNX


Summary of Contents for AMX NXB-KNX
- Page 1 Operation/Reference Guide NXB-KNX NetLinx KNX Interface C o n t r o l S y s t e m A c c e s s o r i e s I n i t i a l R e l e a s e : 5 / 1 5 / 2 0 0 8...
- Page 2 AMX is not responsible for products returned without a valid RMA number. AMX is not liable for any damages caused by its products or for the failure of its products to perform. This includes any lost profits, lost savings, incidental damages, or consequential damages.
-
Page 3: Table Of Contents
PoE (Power Over Ethernet) ... 4 KNX Connector... 4 Configuration ...5 Overview ... 5 Determining the IP Address of the NXB-KNX... 5 Bonjour (Zero-Configuration) Client ... 5 Accessing the WebConsole ... 6 Admin Menu ... 6 Security Settings ... 7 Enable / Disable Security Settings ... - Page 4 Table of Contents NXB-KNX NetLinx KNX Interface...
-
Page 5: Overview
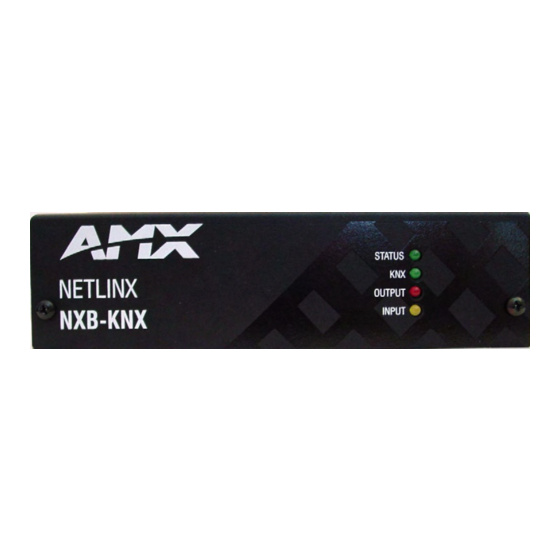
• KNX LED (green): Solid on indicates power is on and the unit is connected to KNX bus. • Output LED (red): Lights to indicate traffic from the NXB-KNX to the KNX bus. • Input LED (yellow): Lights to indicate traffic from the KNX bus to the NXB-KNX. - Page 6 • Intended for indoor use only • Green 2-Pin 5mm Phoenix connector with captive screws • AC-DIN-CS3 DIN Rail Mounting Bracket (FG532-01) • PS-POE-AF PoE Injector (FG423-80) • FCC Class B • CE • IEC60950 • RoHS NXB-KNX NetLinx KNX Interface...
-
Page 7: Installation
Do not connect power to the NXB-KNX until the wiring is complete. The NXB-KNX is installed between the NetLinx Master and the KNX control bus, and passes NetLinx control commands to the KNX control bus via 2-wire twisted pair cabling, as indicated in FIG. 1:... -
Page 8: Poe (Power Over Ethernet)
If used with a non PoE-capable Ethernet switch (such as the NXA-ENET24), then an optional PS- POE-AF Power-over-Ethernet (PoE) power supply is required to provide power to the NXB-KNX. If the NXB-KNX is used with a PoE-capable Ethernet switch (such as the NXA-ENET24PoE), then no PoE Injectors are required. -
Page 9: Configuration
NXB-KNX units have a built-in WebConsole that allows you to make various configuration settings via a web browser on any PC that has access to the NXB-KNX device. The web console consists of a series of web pages that are collectively called the "NXB-KNX Configuration Manager" (FIG. 1). -
Page 10: Accessing The Webconsole
From any PC that has access to the LAN that the NXB-KNX resides on: Open a web browser and type the IP Address of the target NXB-KNX unit in the Address Bar. Press Enter to access the WebConsole for the specified NXB-KNX unit. The initial view is the IP Settings page (FIG. -
Page 11: Security Settings
Security Settings Select Security Settings from the Admin drop-down menu to open the Security Settings page (FIG. 4). Use the options on the page to specify security options and login information for this NXB-KNX unit. FIG. 4 Security Settings page... -
Page 12: Logging Into The Configuration Manager (With Security Enabled)
IP Settings Select IP Settings from the Admin drop-down menu to open the IP Settings page (FIG. 6). Use the options on the page to specify network/IP settings for this NXB-KNX unit. FIG. 6 IP Settings page... -
Page 13: Port Settings
Reboot: Port Settings Select Port Settings from the Admin drop-down menu to open the Port Settings page (FIG. 7). Use the options on the page to specify various Port settings for this NXB-KNX unit. FIG. 7 Port Settings page The options on this page provide inputs for enabling and disabling of HTTP, HTTPS, Telnet, SSH and FTP ports, and allow you to change each port number from it’s standard default assignment. -
Page 14: Clock Manager
Once the unit is rebooted, the time will be lost, and will have to be reset. Note that the Daylight Savings and NIST Servers tabs are enabled only if Net- work Time is selected as the mode. NXB-KNX NetLinx KNX Interface... -
Page 15: Clock Manager - Daylight Savings
Daylight Savings: Use these radio buttons to turn daylight savings time on and off Offset: Starts: NXB-KNX NetLinx KNX Interface synch period options include 5 minutes, 15 minutes, 1, 2 and 4 hours (default = 1 hour). Select the appropriate Time Zone from the drop-down menu. -
Page 16: Clock Manager - Nist Servers
Day is provided when this radio button is selected). • Select Occurrence to end daylight savings at a specified occurrence (additional fields for Week of the Month, and Day of the Week are provided). NXB-KNX NetLinx KNX Interface... -
Page 17: Application Upgrade
If the download is successful, a message is displayed and the new application file information is displayed. Click the Reboot button to initiate a system reboot. Application file changes only take effect after a reboot. NXB-KNX NetLinx KNX Interface Configuration... -
Page 18: Firmware Upgrade
Configuration Firmware Upgrade Select Firmware Upgrade from the Admin drop-down menu to open the Firmware Upgrade Manager page (FIG. 14). Use the options on the page to upgrade the firmware on this NXB-KNX unit. FIG. 14 Firmware Upgrade Manager page This page allows you view information on the firmware version currently loaded on this unit, and to upload a firmware .JAR file to the unit. -
Page 19: Programming - Telnet Commands
2. Type cmd in the Open field and click OK to open an instance of the Windows command interpreter (Cmd.exe). 3. In the CMD (command), type "telnet" followed by a space and the NXB-KNX’s IP Address info. Example: >telnet XXX.XXX.XXX.XXX 4. -
Page 20: Terminal Commands
Programming - Telnet Commands Terminal Commands The Terminal commands listed in the following table can be sent directly to the NXB-KNX via Telnet terminal session. In your terminal program, type "Help" or a question mark ("?") and <Enter> to access the Help Menu,... - Page 21 Example: >REBOOT Rebooting... Releases the current DHCP lease for the NXB-KNX. Note: The NXB-KNX must be rebooted to acquire a new DHCP lease. Example: >RELEASE DHCP Modify system security settings. Prompts you to enter the new date for the NXB-KNX.
- Page 22 This command prompts you to enter a Domain Name, DNS IP #1, DNS IP #2, and DNS IP #3. Then, enter Y (yes) to approve/store the information in the NXB-KNX. Entering N (no) cancels the operation. Note: The device must be rebooted to enable new settings.
- Page 23 Once you enter a value and press the ENTER key, you get the follow- ing message: Setting HTTPS port number to New HTTPS port number set, reboot the NXB-KNX for the change to take affect. Sets the IP configuration. Enter a Host Name, Type (DHCP or Fixed), IP Address, Subnet Mask, and Gateway IP Address.
- Page 24 Displays the log of messages stored in the NXB-KNX's memory. The NXB-KNX logs all internal messages and keeps the most recent messages. The log contains:· • Entries starting with first specified or most recent •...
- Page 25 Terminal Commands (Cont.) Command SHOW HEAP SHOW MEM TIME NXB-KNX NetLinx KNX Interface Programming - Telnet Commands Description Displays heap usage statistics. Displays the memory usage for all memory types. Displays the current time on the NXB-KNX. Example: >TIME 13:42:04...
- Page 26 Programming - Telnet Commands NXB-KNX NetLinx KNX Interface...
- Page 27 Programming - Telnet Commands NXB-KNX NetLinx KNX Interface...
- Page 28 It’s Your World - Take Control™ 3000 RESEARCH DRIVE, RICHARDSON, TX 75082 USA • 800.222.0193 • 469.624.8000 • 469-624-7153 fax • 800.932.6993 technical support • www.amx.com...